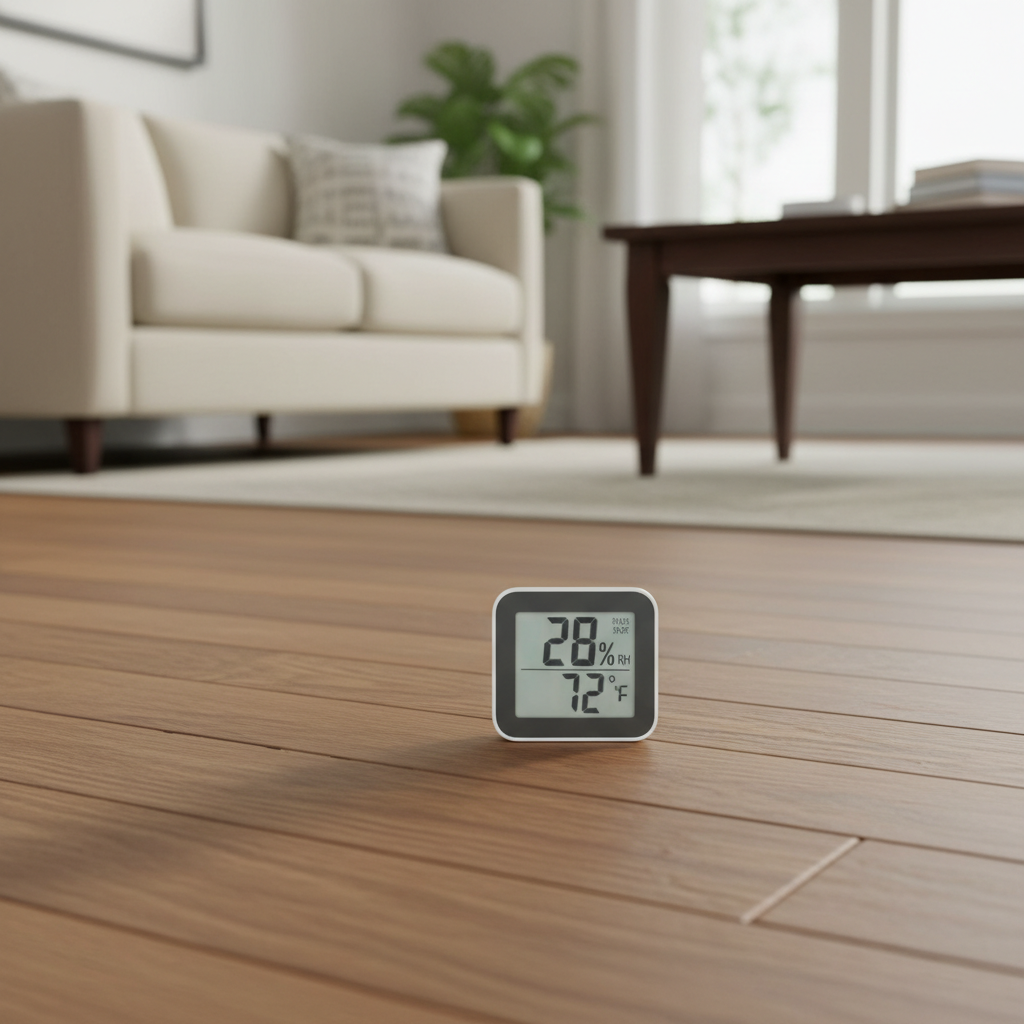
- Humidity Swings: This is the big one. Wood shrinks in dry air and expands in humid air. If your house swings from 20% RH in winter to 80% RH in summer, your floor’s gonna move all over the place.
- Improper Acclimation: New flooring needs time in the house — sometimes days, sometimes weeks — before installation so it can settle into the home’s humidity. Skip that, and you’re asking for trouble.
- Subfloor Moisture: Crawl space leaks, damp basements, or plumbing leaks inside the walls can push moisture up from below and cause localized problems.
- Heating and Cooling Systems: HVAC systems that dry the air out too much in winter, or don’t pull enough humidity out in summer, make the problem worse fast.
- Poor Installation: Boards that weren’t nailed or glued properly can shift easier, which makes gapping worse every time humidity changes.
General remodeling · Renovation planning
| Project category | General remodeling |
|---|---|
| Problem type | Renovation planning |
| Trade required | General contracting |
| Urgency | Planned project |
| Safety risk | Low safety risk |
| DIY suitability | Pro recommended |
| Cost category | Major investment |
| Typical timeline | Design and permitting often 2–4 months before work starts |
| Contractor type | General contractor |
Repair option
Phase the work and fix the building envelope first.
Replacement option
Full renovation with permits, design, and a general contractor.
Common causes
- Space no longer fits how the household lives
- Resale preparation
- Deferred maintenance stacking up
Relevant tools:project cost estimatorcompare quoteshome improvement material prices
Published September 5, 2026Last updated September 5, 2026
Tools & materials you'll need
Affiliate links- AmazonDigital Hygrometer1
- AmazonWhole-house humidifier or portable room humidifierif humidity is too low
- AmazonDehumidifierif humidity is too high
- AmazonPainter's 5-in-1 tool or thin scraping toolfor cleaning gaps
- AmazonShop-vac with crevice toolfor cleaning gaps
- AmazonMoisture meteroptional, for advanced diagnosis
As an Amazon Associate FixlyGuide earns from qualifying purchases — at no extra cost to you. Prices and availability are accurate as of publication and subject to change.
Quick Answer
Those gaps in your hardwood floor? Nine times out of ten, they’re a moisture problem, not just “the floor getting old.” Wood’s a hygroscopic material — fancy way of saying it drinks up and gives off moisture depending on what the air’s doing. When it dries out, it shrinks. That’s where the gaps come from. When it picks up too much moisture, it swells and can start buckling. Best thing you can do is keep your home’s humidity steady, ideally between 35% and 55%, so those boards stay tight and happy.
The Problem
I get calls all the time from folks who are scratching their heads over gaps showing up in their hardwood floors. They’ll say, “It just happened overnight!” or “I thought hardwood was supposed to last forever without big cracks.” And sure, hardwood’s tough, but it’s still wood. It moves. It reacts. It breathes, whether we like it or not.
When you’ve got consistent gapping between boards, especially in spots that used to be snug, you’re almost always looking at a moisture issue — too little, too much, or wild swings between the two. And no, it’s not just a looks problem. Those gaps collect dirt, hold onto moisture, and can shorten the life of the floor pretty quick. I’ve been in homes where the homeowner swore their HVAC was “working fine,” and then I stuck a meter in there and found humidity over 70% in summer and under 25% in winter. That kind of rollercoaster’ll beat up a hardwood floor in a hurry.
How It Works
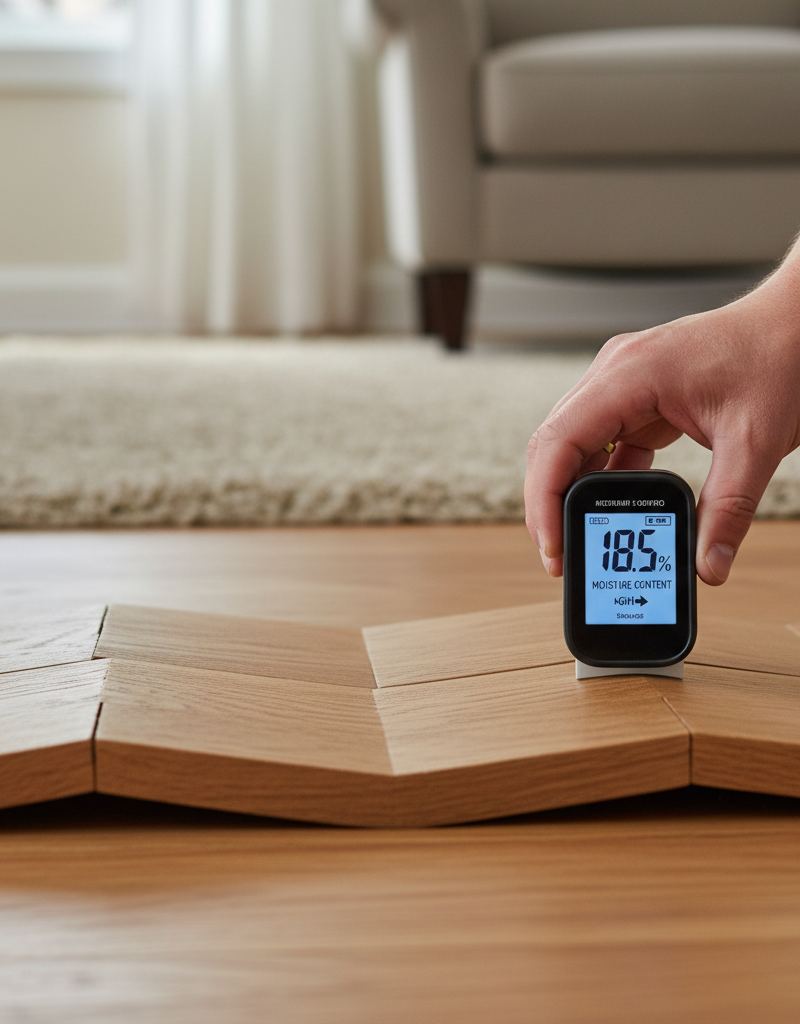
Think of your hardwood floor like a sponge. Not literally, but close enough for the way it handles moisture. Every board has a moisture content, or MC, which is just the percentage of water in the wood by weight. When the flooring gets milled and installed, it ought to be at an MC that matches the average relative humidity, or RH, of the house it’s going into. For most parts of the US, that usually lands in the 6% to 9% MC range, which lines up with about 35% to 55% RH.
Here’s the part folks miss: wood’s always trying to balance itself with the air around it. If the air in your house is dry, the wood gives up moisture to the air. As it loses that moisture, the fibers shrink, and the boards pull apart. That’s your gap right there. If the air gets too humid, the wood takes moisture in and swells. Push it far enough and you’ll see cupping — edges higher than the center — or buckling, where boards actually lift off the subfloor. I pulled a water heater in Frisco last month that had exactly this leak pattern under a dining room floor, and the flooring had been shrinking and swelling so long the boards looked like they’d had a grudge. That back-and-forth movement is the whole game. Get the humidity under control, and you’re halfway home.
Step-by-Step Fix
Before you grab a sledgehammer and start making a mess, let’s slow down and figure out what’s actually happening. Most gaps can be managed, or at least kept from getting worse, if you take it step by step.
-
Assess the Environment – *Check your home's humidity levels.
- First thing I’d do? Grab a decent hygrometer. They run about $15–$30, and they’re worth every penny. Set it in the room where the gapping’s happening. Check it morning and evening for at least a week, and longer if you can swing it, because you want a real picture — not just one lucky day.
- If it's too dry (below 35%), you’ve got to add moisture. If it's too wet (above 55%), you’ve got to pull some out.
-
Adjust Humidity Levels – *Bring your home's air into balance.
- For Dry Conditions: If your readings stay low, run a whole-house humidifier off the HVAC, or use a few portable room humidifiers. Place them where they’ll actually do some good. Don’t go crazy — you’re aiming for steady, not swampy. Nobody wants condensation beading up on the windows.
- For Humid Conditions: If the house is staying too wet, run the AC harder, use a dehumidifier, and make sure the place’s got decent ventilation. Basements and crawl spaces are the usual troublemakers. Crawl space encapsulation can help a lot if that’s where the moisture’s coming from. I worked on a house in Marietta last summer where the crawl space was sitting around 85% humidity like it paid rent there. The upstairs floors were cupping, and yeah, that one wasn’t a mystery.
-
Inspect for Leaks – *Look for hidden water sources.
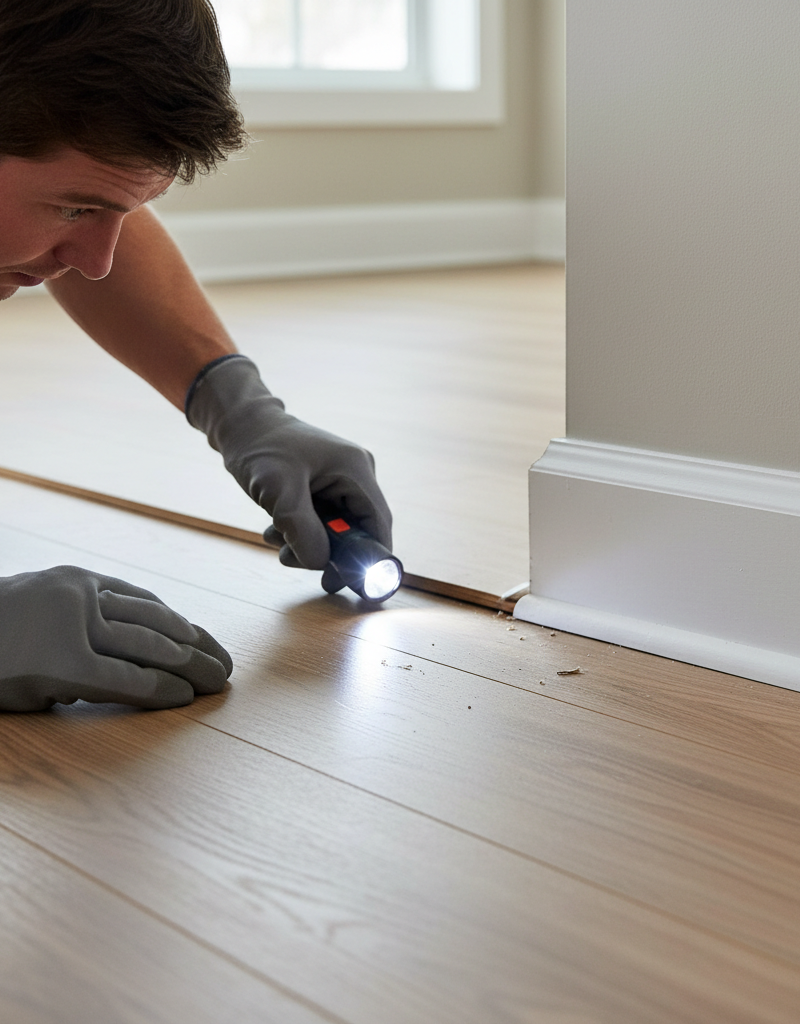
- Sometimes the air isn’t the whole story. Check around dishwashers, refrigerators with ice makers, toilets, sinks — all the usual suspects. Even a tiny drip under a cabinet can make nearby boards swell, then shrink, then gap out later. Run your hand along baseboards. Look for staining. Smell anything musty? That’s a clue.
- Don't forget about the exterior — look at gutters and downspouts too. Are they sending water away from the foundation, or dumping it right where it can cause trouble? Bad drainage will sneak moisture into the subfloor like nobody’s business.
-
Clean the Gaps – *Remove debris that prevents boards from closing.
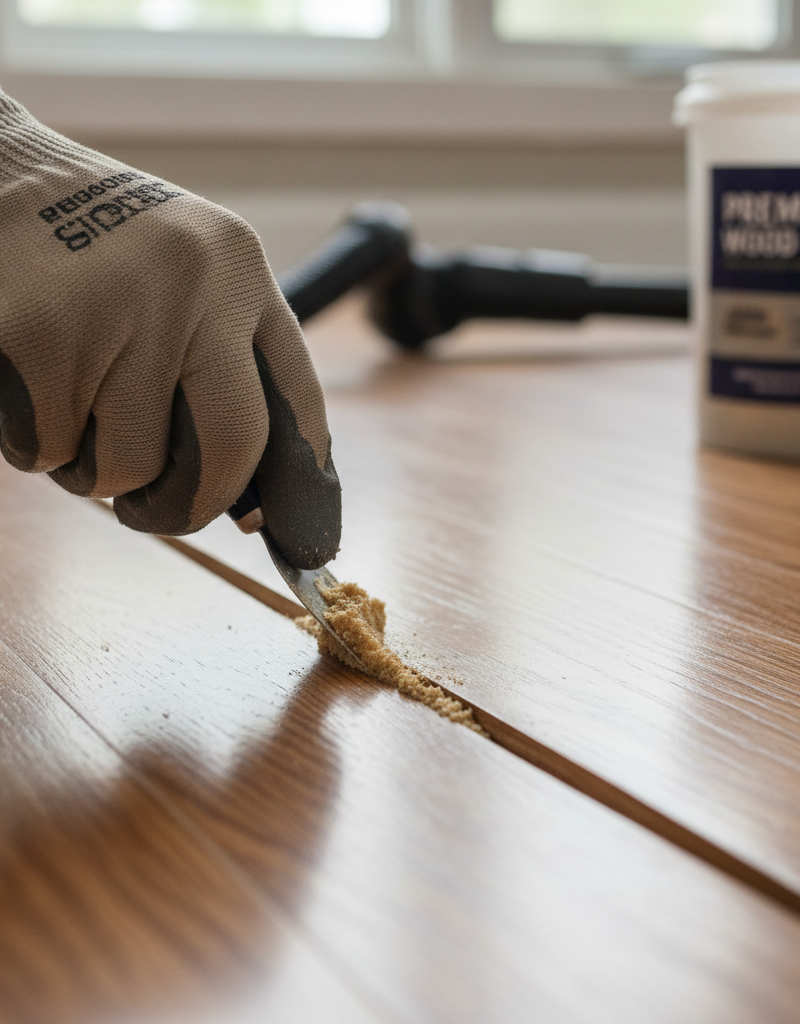
- Use something thin, like a painter’s 5-in-1 tool or even a credit card, and carefully scrape out dirt, pet hair, grit, whatever’s packed in there. If debris stays wedged in the gap, the boards can’t move back together once the humidity levels settle down.
- Be gentle — you’re not trying to chew up the finish. A shop-vac with a crevice tool works great for the loose stuff.
-
Consider Gap Fillers (Temporary/Cosmetic) – *When you can't stand the gaps anymore.
- For stubborn or ugly gaps, especially on older floors, there are fillers made for this. Rope-style fillers, color-matched putty, all that. They’re mostly cosmetic, though, so don’t kid yourself — they won’t fix a moisture problem. I usually tell people to hold off until the humidity’s under control.
- Choose wisely — flexible filler’s the better bet if the floor’s still moving. Rigid putty cracks out fast if the boards keep expanding and shrinking.
-
Assess for Subfloor Issues – *When all else fails, look underneath.
- If you’ve checked humidity, ruled out leaks, and the gaps are still nasty — or the floor feels like it’s moving underfoot — then the subfloor may be part of the problem. Could be poor installation, could be water damage, could be something structural.
- This is usually a pro job — getting to the subfloor often means pulling flooring, and that’s no small afternoon project. Look for soft spots. Too much bounce. Mold or rot down below? That’s past DIY territory, plain and simple.
-
Re-acclimation and Installation (If starting fresh) – *Essential for new floors.
- If you’re installing new flooring, acclimation isn’t optional. Bring the boards into the house and lay them flat in the rooms where they’ll be installed for at least 7-14 days. That gives the wood time to adjust to your home’s humidity before it gets nailed or glued down. Skipping it is how you buy yourself problems later.
- Check manufacturer guidelines — they’ll often spell out minimum acclimation times and acceptable MC ranges. Don’t shave off a few days just to get the job done faster.
Common Causes
- Humidity Swings: This is the big one. Wood shrinks in dry air and expands in humid air. If your house swings from 20% RH in winter to 80% RH in summer, your floor’s gonna move all over the place.
- Improper Acclimation: New flooring needs time in the house — sometimes days, sometimes weeks — before installation so it can settle into the home’s humidity. Skip that, and you’re asking for trouble.
- Subfloor Moisture: Crawl space leaks, damp basements, or plumbing leaks inside the walls can push moisture up from below and cause localized problems.
- Heating and Cooling Systems: HVAC systems that dry the air out too much in winter, or don’t pull enough humidity out in summer, make the problem worse fast.
- Lack of Expansion Gap: If the installer ran the flooring too tight against walls, cabinets, or other fixed points without the recommended 1/2 to 3/4-inch expansion gap, the wood’s got nowhere to go when it expands. That can lead to cupping or buckling, and then later you’ll often see permanent gapping when it dries back out.
- Poor Installation: Boards that weren’t nailed or glued properly can shift easier, which makes gapping worse every time humidity changes.
Common Mistakes
- Ignoring Humidity Readings: Guessing is no way to handle hardwood. Get a hygrometer and actually look at the numbers. Your “feels about right” doesn’t mean much to wood.
- Over-Humidifying/Dehumidifying: Jumping from one extreme to the other too fast can shock the floor and create new problems. Small changes. Give it time.
- Filling Gaps Too Soon: If you fill the gaps while the wood’s at its driest point, you’re setting yourself up for trouble when it expands again. The filler’ll pop out or the boards’ll buckle. Let things stabilize first.
- Using Rigid Wood Filler: Non-flexible putty cracks and crumbles as the floor moves. If you absolutely have to fill gaps, use something made to move with wood.
- Not Checking Underneath: A lot of folks stare at the surface and miss the real source. Moisture problems often start in the crawl space, basement, or from hidden leaks.
- Skipping Acclimation for New Floors: You’re spending good money on flooring. Give it the time it needs to adjust before you lock it down. No need to rush and regret it later.
Cost & Time Breakdown
| Task | DIY Cost | Pro Cost | Time |
|---|---|---|---|
| Hygrometer Purchase | $15–$30 | N/A | 5 min |
| Humidifier/Dehumidifier | $50–$300 | N/A | 1–2 hours setup |
| Leak Inspection | $0 | $100–$250 | 30 min – 2 hours |
| Gap Cleaning | $0–$10 | N/A | 30 min – 1 hour |
| Flexible Gap Filler | $20–$50 | N/A | 1–3 hours |
| HVAC/Crawl Space Assessment | $0 | $150–$500 | 1–4 hours |
| Full Floor Repair/Replacement | N/A | $2,000–$10,000+ | Days – Weeks |
Tips & Prevention
- Maintain Stable Humidity: The best thing you can do for hardwood is keep the relative humidity between 35% and 55% all year. If you need a whole-house humidifier or dehumidifier, that money’s usually well spent.
- Acclimate New Flooring: Always, always, always let new flooring acclimate in your house for at least 7-14 days before installation. Don’t rush it.
- Clean Regularly: Sweep or vacuum often so grit and debris don’t settle into the gaps and make them harder to close later.
- Wipe Up Spills Immediately: Don’t let water sit on hardwood. Even small spills can sneak through the finish and swell the wood.
- Check for Leaks: Every so often, look at plumbing connections, window seals, and foundation areas for moisture. Catching a small leak early can save you a flooring headache.
- Use Proper Cleaners: Stick with cleaners made for hardwood. Harsh chemicals or too much water can mess up the finish and throw off the wood’s moisture balance.
When to Call a Professional
Look, I’m all for DIY, but there are times you’ve got to bring in somebody who does this every day. If you’ve already dealt with humidity, checked for leaks, and the gaps are still getting bigger, or you’re seeing cupping, crowning, or buckling, it’s time to call a pro. Same goes if you suspect major subfloor damage, persistent crawl space moisture you can’t get under control, or mold spreading around. Those are structural issues. They can affect the whole house, not just the floor.
A flooring contractor or moisture mitigation specialist can figure out what’s really going on, whether that’s a bad vapor barrier, foundation trouble, or something else hiding underneath. Don’t try to shove boards back together and call it a day. And don’t ignore widespread damage either — that’s how a small repair turns into a big-ticket mess real fast.
Related Articles
Keep troubleshooting with these hand-picked guides from FixlyGuide:
- Why Your Hardwood Floors Have Gaps in Winter (And When to Worry) — Seeing gaps in your hardwood floors this winter? It's likely caused by low indoor humidity making the wood shrink. Learn what's normal, how…
- The Surprising Reason Your Interior Door Sticks (It's Not Always Humidity) — Discover why your interior door sticks, often due to more than just humidity, and learn simple DIY fixes to restore smooth operation.
- The Hidden Cause of Squeaky Hardwood Floors & The Real Fix — That persistent squeak from your hardwood floors isn't just an annoyance; it's a sign of movement. We'll uncover the hidden causes, from hu…
- That Ceiling Stain Isn't a Leak: 5 Hidden Causes — A mysterious ceiling stain can be alarming, especially when there's no active leak. The real culprits are often hidden issues like attic co…
- That Corner Crack Is Back? It's Not the Drywall's Fault — Discover the real reasons that annoying drywall crack in the corner keeps returning. It's often a sign of deeper issues than just bad mud o…
- The Secret Culprit Behind Your Dishwasher's Standing Water (It's Not Always a Clog) — Discover why your dishwasher isn't draining completely and follow our step-by-step guide to identify and fix common issues, often without a…
What should this project cost?
Enter your project details for a realistic cost range before you call anyone.
Cost depends heavily on which system turns out to be the source.
- Regional adjustment
- National average
- Labor share (typical)
- ~$1,620
- Quotes to collect
- 3 written estimates
Educational estimate based on national averages — not a binding quote. Always confirm with written local estimates.
Get the print-ready PDF of this guide
A clean, ad-free, printable version you can keep on your phone or pin to the workshop wall. Free with a FixlyGuide account.
- Print-optimized layout
- Tools, materials & every step included
- Saved to your account
Recommended for DIYers & woodworkers
Sponsored
The Top 20 Tools for Workshops of Any Budget
No stationary machines or power tools required — plus 3 fundamental tools that can't be bought at any price.
Get the free guide
Ted's Woodworking — The #1 Woodworking Resource
Detailed instructions, dimensioned drawings, materials & cutting lists, and 3D schematics for every skill level.
See the plansSponsored: links above are affiliate links. FixlyGuide may earn a commission on qualifying purchases — at no extra cost to you.
Frequently asked questions
Why do my hardwood floors have gaps?+
Hardwood floors develop gaps primarily due to changes in moisture content. When the air in your home becomes dry, the wood releases moisture and shrinks, causing gaps between the boards. High humidity can cause the opposite effect, making boards expand.
Can I fix hardwood floor gaps myself?+
Minor gaps caused by seasonal humidity changes can often be managed by controlling your home's indoor humidity with humidifiers or dehumidifiers. Cleaning debris out of gaps can also help boards close naturally. For severe or structural issues, a professional is recommended.
What is the ideal humidity for hardwood floors?+
For most hardwood floors, maintaining a relative humidity level between 35% and 55% is ideal. Consistent humidity helps prevent the wood from expanding or contracting excessively, minimizing gaps and other moisture-related problems.
How do I measure my home's humidity?+
You can measure your home's relative humidity using a hygrometer. These devices are inexpensive and readily available at hardware stores. Place it in the room with your floors and monitor readings over several days.
Will filling the gaps solve the problem?+
Filling gaps is often a cosmetic, temporary solution. If the underlying moisture issue isn't addressed, the wood will continue to move, potentially cracking rigid fillers or pushing out flexible ones. It's best to stabilize humidity first.
What happens if I ignore floor gaps?+
Ignoring gaps can lead to several issues. Dirt and debris can accumulate, making cleaning harder. Inconsistent moisture can lead to further damage like cupping or buckling, and even compromise the finish or structural integrity of the boards over time.
How long does new hardwood flooring need to acclimate?+
New hardwood flooring typically needs to acclimate in your home for at least 7 to 14 days before installation. This allows the wood to adjust to the specific temperature and humidity conditions of its new environment, preventing future gapping or movement.
Can excessive sunlight cause floor gaps?+
Direct, prolonged sunlight can contribute to floor gaps by drying out specific areas of the wood, causing localized shrinkage. While not the primary cause, it's good practice to use curtains or blinds to protect your floors from intense, direct sun exposure.
Discussion
Loading comments…