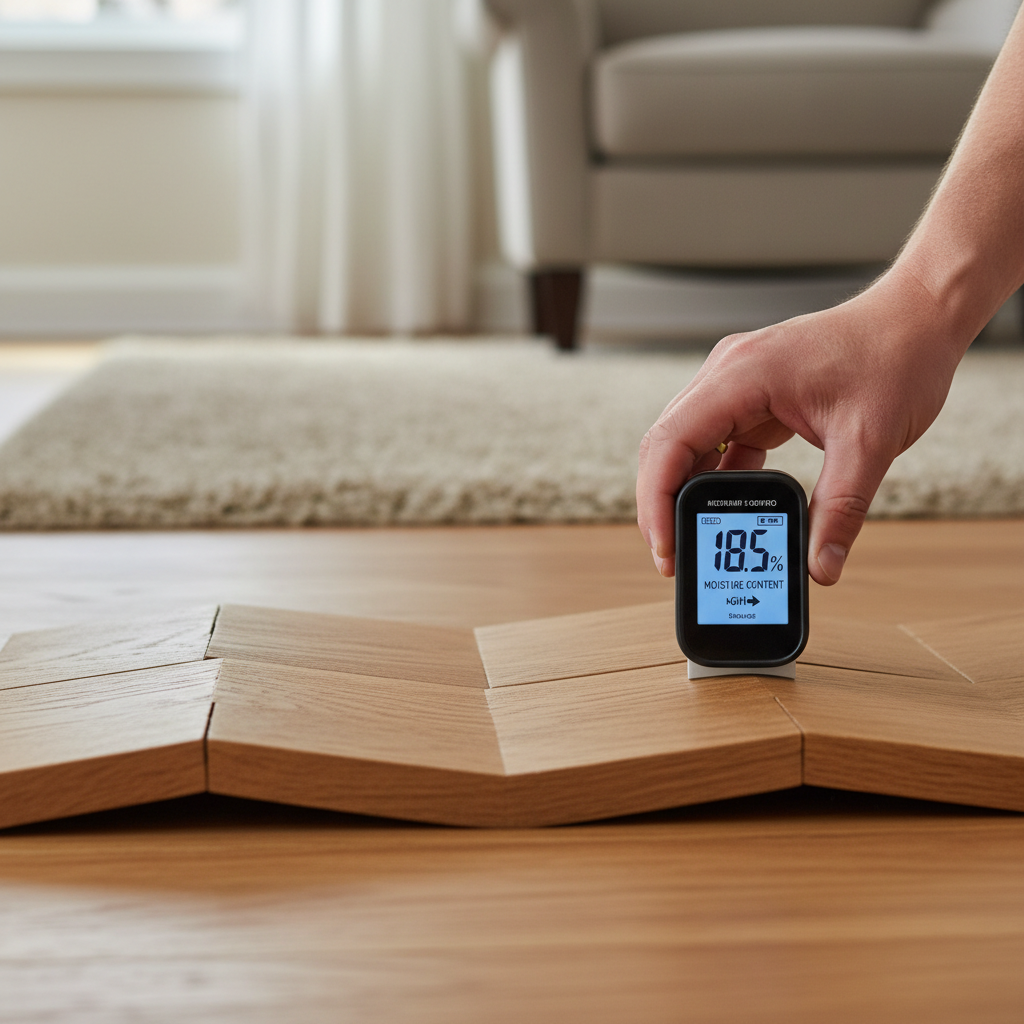
- Identify the Moisture Source — This is the big one.
- Tools: Moisture meter (pinless is best), flashlight, maybe a screwdriver if you need to pop off a vent cover.
- If this doesn't work: If you can't find an obvious source and the moisture readings are still high, call a home inspector or water damage specialist. They've got thermal cameras and better gear for finding hidden leaks.
General remodeling · Renovation planning
| Project category | General remodeling |
|---|---|
| Problem type | Renovation planning |
| Trade required | General contracting |
| Urgency | Planned project |
| Safety risk | Low safety risk |
| DIY suitability | Pro recommended |
| Cost category | Major investment |
| Typical timeline | Design and permitting often 2–4 months before work starts |
| Contractor type | General contractor |
Repair option
Phase the work and fix the building envelope first.
Replacement option
Full renovation with permits, design, and a general contractor.
Common causes
- Space no longer fits how the household lives
- Resale preparation
- Deferred maintenance stacking up
Relevant tools:project cost estimatorcompare quoteshome improvement material prices
Published September 14, 2026Last updated September 14, 2026
Tools & materials you'll need
Affiliate linksAs an Amazon Associate FixlyGuide earns from qualifying purchases — at no extra cost to you. Prices and availability are accurate as of publication and subject to change.
Quick Answer
Alright, so you've got floorboards doing the wave, huh? Lifting up, uneven, maybe gaps opening up too? Most folks hear that and immediately think "water damage," and sure, sometimes that's exactly it. But nine times out of ten, what you're really seeing is a moisture imbalance — the wood's reacting to too much humidity, or not enough, in the space around it. That's fixable. It just takes a little detective work to find where the moisture's coming from, then giving the wood time to settle back down before you start tearing into anything. I've seen plenty of these, and patience is your best tool here. No magic wand. Just good eyes and a moisture meter.
The Problem
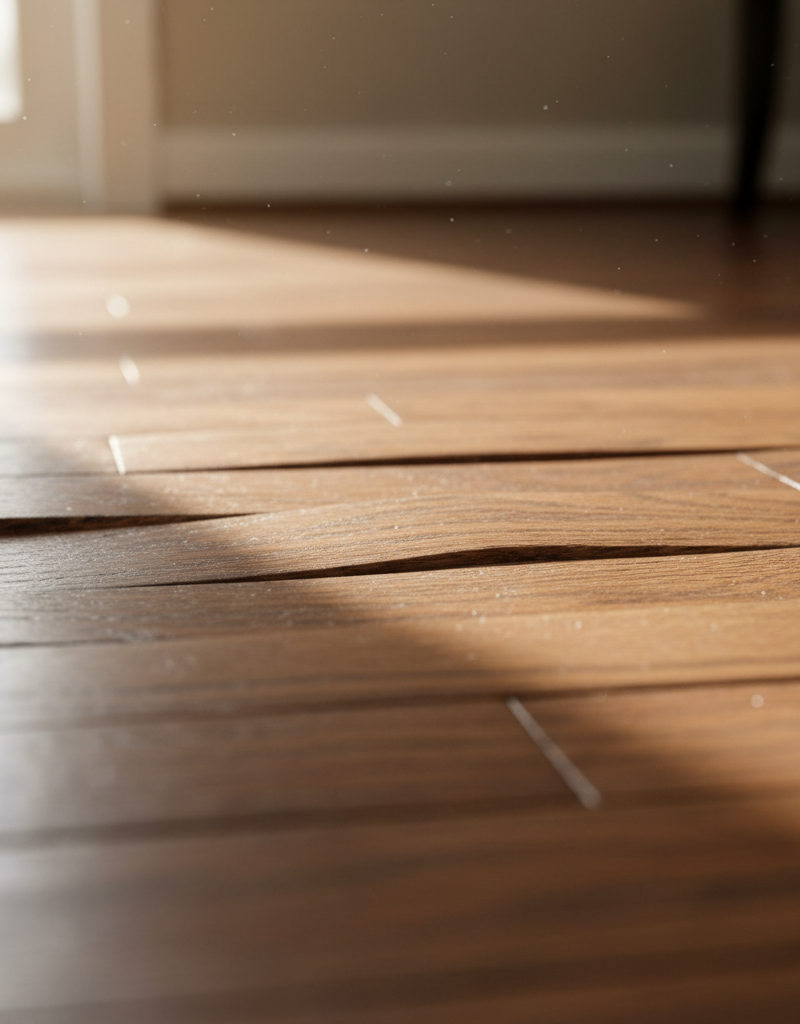
You walk into a room and spot it right away: those nice hardwood planks aren't flat anymore. They're starting to look like little speed bumps, rising in the middle or along the edges. We call that "cupping" when the edges are higher than the center, or "crowning" if the center's higher. If it gets bad enough, you'll see "buckling" — that's when the boards actually lift off the subfloor, sometimes popping free altogether. That ain't just ugly. It can trip somebody up, and if you let it ride, it can wreck the floorboards and even the subfloor underneath. This isn't some small cosmetic gripe; it's your floor waving a red flag because the moisture levels are out of whack.
How It Works
Think of wood like a sponge with a memory. It takes on moisture and gives it off depending on the humidity around it. When your hardwood floor went in, it had a certain moisture content — ideally, one that matched your home's normal conditions. The subfloor underneath has its own moisture content too. Trouble starts when there's a big difference in moisture between the top and bottom of a plank, or between the floor and the subfloor.
If the underside of the plank soaks up more moisture than the top, the bottom fibers expand more than the top ones. That pushes the edges upward and gives you that classic cupped look. Usually, that's moisture coming up from a crawl space, basement, or a slab. On the other hand, if the top of the plank gets soaked and the bottom stays dry, you can end up with crowning — not as common, and it usually means somebody had a spill or leak and didn't get on it fast enough.
Buckling is the ugly cousin of both of those. If the wood expands too much and doesn't have anywhere to go — maybe the installers didn't leave enough expansion gap around the room, or cabinets and furniture are jammed too tight — the boards push against each other until they pop up. Sometimes you hear a sharp crack. I pulled a water-damaged oak floor in Frisco last month that had exactly this kind of mess; the homeowner swore the slab was cursed, but the culprit was a slow HVAC condensate leak under the house. Looked minor. Wrecked half the room.
Moisture meters are the deal here. I use a pinless moisture meter that reads through the wood with electromagnetic waves, so I'm not punching little holes in good flooring. You want to check the surface, the underside if you can get to it, and the subfloor itself. A healthy hardwood floor should typically be between 6% and 9% moisture content. If you're seeing readings consistently above 12% on the planks, and especially if the subfloor's running higher, you've found the problem. Sometimes it's as simple as running a dehumidifier. Other times, you're hunting a hidden leak or fixing lousy crawl space ventilation.
Step-by-Step Fix
Before you do anything drastic, you've gotta figure out why your floor's acting up. It's almost always moisture. Grab a good moisture meter — I like a pinless one so you don't leave holes everywhere — and start poking around.
-
Identify the Moisture Source — This is the big one.
- Tools: Moisture meter (pinless is best), flashlight, maybe a screwdriver if you need to pop off a vent cover.
- Action: Check the moisture content of the affected boards. Get readings from the surface and from the underside if you can access it (like from a basement or crawl space). Then check the subfloor right under the trouble spot. Compare the numbers. A gap of more than 2-3% between the top of the plank and the bottom, or between the planks and the subfloor, points straight at a moisture issue. Look for water signs: damp spots, staining, mold. Check your basement or crawl space for standing water, leaky pipes, poor drainage, or even condensation. Head outside too — are your gutters dumping water near the house, or is the yard sloping back toward the foundation?
- If this doesn't work: If you can't find an obvious source and the moisture readings are still high, call a home inspector or water damage specialist. They've got thermal cameras and better gear for finding hidden leaks.
-
Correct the Moisture Problem — Stop the water before it gets worse.
- Action: Once you've found the source, fix it. That might mean repairing a leaky pipe, cleaning gutters, rerouting downspouts, installing a vapor barrier in a crawl space, or running a dehumidifier in a damp basement. If the house's indoor humidity is the real issue, an HVAC pro might recommend a whole-home dehumidifier.
- Safety: Always kill the power at the breaker if you're working near electrical components or you think a pipe is close to wiring.
-
Allow the Floor to Acclimate — Patience, my friend.
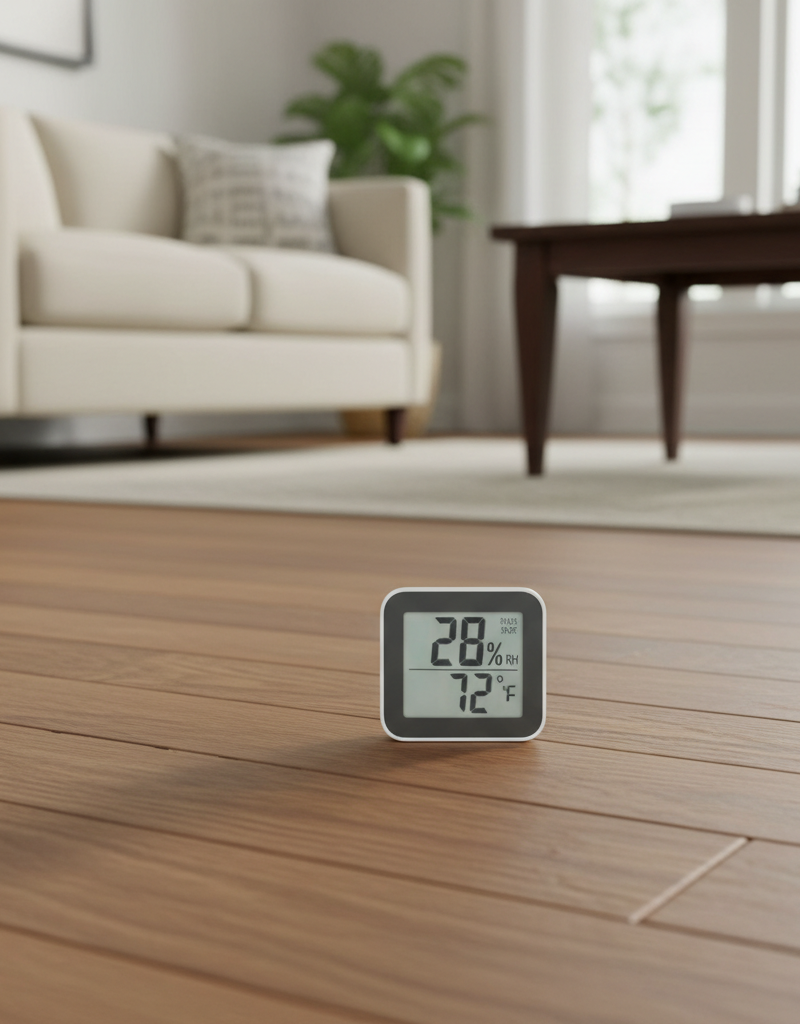
- Action: This part matters. After you fix the moisture source, give the wood time to dry out and settle back to its natural moisture content. This isn't a same-day fix; it can take weeks, sometimes months, for the wood to fully acclimate. Keep checking with your meter. You're aiming for readings that stabilize in that 6-9% range for hardwood. Keep indoor humidity steady — ideally 35-55% relative humidity — with humidifiers or dehumidifiers as needed.
-
Consider Weighted Pressure (For Minor Cupping) — Sometimes a little gentle persuasion helps.
- Tools: Plywood, heavy objects (books, weights, buckets of sand).
- Action: If the cupping is minor and the floor hasn't buckled, you can sometimes help the boards flatten out once the moisture's stable. Lay a piece of plywood over the affected area to spread the weight out evenly, then pile on your weights. Leave it alone for several weeks, and check moisture levels now and then.
-
Re-Fasten Boards (If Buckling has Stopped) — When they just won't sit down.
- Tools: Flooring nails (cleats or staples), flooring nailer/stapler, mallet, wood glue (optional).
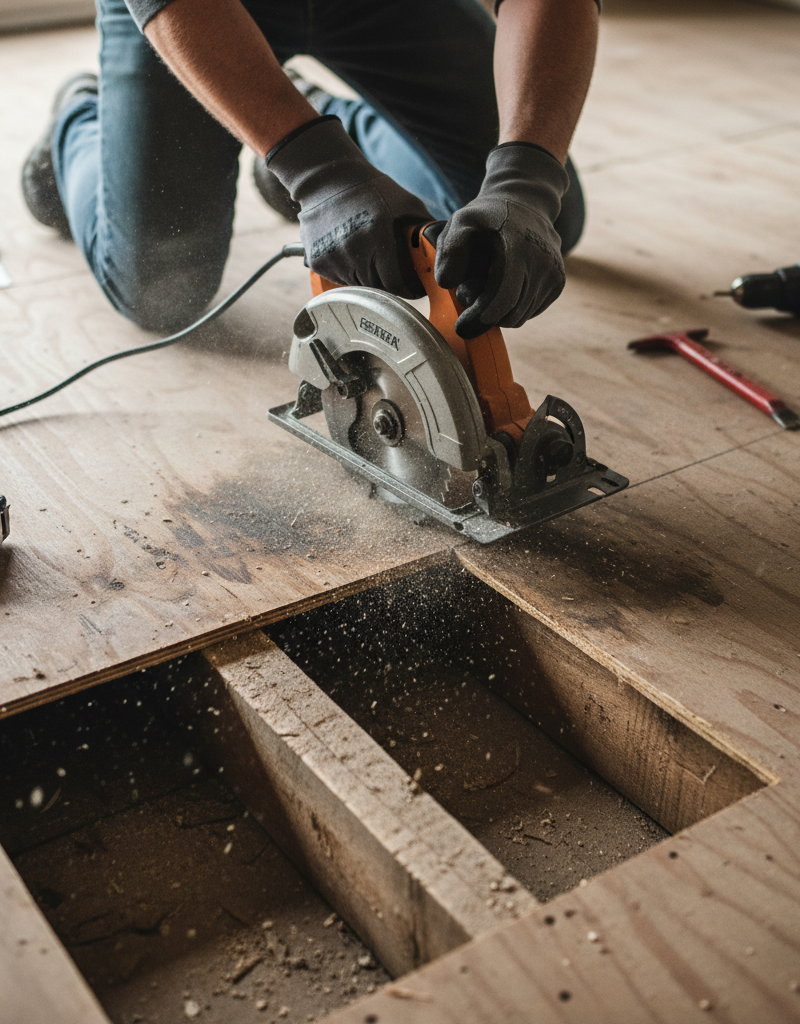
- Action: If the boards buckled and then settled back down but still feel loose, you might be able to re-fastened them. This one's tricky. You'll probably need to pull a few planks carefully, starting from an edge if you can, to take the pressure off. Then reinstall them, making sure you've got proper expansion gaps (about 1/2 inch) around the perimeter. If it's tongue-and-groove, you may need a specialized flooring nailer. For bad buckling, you might be replacing the worst planks instead.
-
Sanding and Refinishing (Last Resort for Cupping) — If they're flat but ugly.
- Tools: Floor sander (drum or orbital), various grit sandpaper, wood filler, finish.
- Action: ONLY do this if the boards have fully dried out and flattened as much as they're going to. If they're still cupped, sanding just creates a new headache — "dish-out," where the edges end up lower than the center. This is for when the boards have mostly flattened but still look rough or uneven on the surface from all the movement. It's a big job and usually better left to a pro unless you've done this before. You'll sand the high spots, then refinish the floor.
Common Causes
- High Humidity in Basements/Crawl Spaces: This is the big one, plain and simple. Moisture moves up through the subfloor into the underside of your hardwood, and that causes cupping. Bad ventilation, leaky foundations, or just wet soil can all feed it. I saw a house in Sandy Springs once where the homeowner had closed up the crawl space vents to "save energy" — all that did was trap ground moisture right under a set of gorgeous oak floors. Absolute disaster.
- Plumbing Leaks: Slow leaks from supply lines, drain pipes, dishwashers, refrigerators, or toilets can soak the subfloor and the underside of your hardwood planks. Even a tiny drip can turn into a big repair if nobody catches it.
- Improper Acclimation: If the hardwood didn't sit in the house for 5-7 days before installation so it could adjust to the home's humidity, you're asking for trouble. The wood moves after it's installed. That's just how it goes.
- Lack of Expansion Gaps: Wood moves. If the installers didn't leave a 1/2-inch gap around the room — especially at walls, cabinets, and doorframes — the floor's got nowhere to go when it expands, and buckling starts.
- Slab Moisture: If your hardwood sits directly over a concrete slab and there's no good vapor barrier, moisture can wick up out of the concrete and into the floor.
- Excessive Cleaning Water: Less common for buckling, sure, but if you're constantly overwetting the floor while cleaning, you can cause surface cupping or finish damage. Use a damp mop, not a wet one.
Common Mistakes
- Panicking and Ripping Up Boards Immediately: Seriously, don't do it. Most moisture problems are fixable, and pulling boards too soon can make things worse or leave you replacing stuff you didn't need to. Diagnose first.
- Ignoring the Source of Moisture: You can swap out every plank in the room, but if that leaky pipe's still dripping or the crawl space stays damp, the new floor'll do the same dance.
- Sanding a Cupped Floor Too Soon: If the wood hasn't fully acclimated and flattened, sanding takes too much off the higher edges. Then when the wood finally dries and flattens, you're stuck with a permanently dish-shaped floor.
- Not Using a Moisture Meter: Guessing is for amateurs. A moisture meter is your diagnostic superpower. Without it, you're basically blindfolding yourself and swinging at the problem.
- Failing to Maintain Consistent Humidity: Wood's a living material. Big swings in humidity — below 30% in winter, above 60% in summer — stress the floor and lead to expansion, contraction, cupping, or gapping over time. A decent humidifier/dehumidifier setup is money well spent.
- Overlooking Exterior Drainage: Sometimes the problem isn't inside the house at all. Clogged gutters, downspouts dumping water right beside the foundation, or bad yard grading can send water straight into the crawl space or basement walls, and then the floor starts talking back.
Cost & Time Breakdown
Here's a rough idea of what you're looking at if you've got raised floorboards. These are ballpark numbers — every house tells its own story.
| Task | DIY Cost ($) | Pro Cost ($) | Time |
|---|---|---|---|
| Moisture Meter & Diagnosis | 20-150 | 150-300 | 1-2 hours initial |
| Minor Leak Repair (DIY) | 10-50 | 100-300 | 1-4 hours |
| Dehumidifier (Purchase) | 150-350 | N/A | N/A |
| Crawl Space Vapor Barrier | 100-500 | 1,500-5,000+ | 1-2 days |
| Re-fastening a Few Boards | 50-150 | 300-800 | 4-8 hours |
| Sanding & Refinishing (Pro) | N/A | 3-5 per sq ft | 2-5 days |
| Replacing Buckled Boards (Pro) | N/A | 500-2,000+ (per area) | 1-3 days |
Tips & Prevention
- Monitor Humidity: Keep indoor relative humidity between 35% and 55% year-round. A simple hygrometer'll help you stay on top of it. That may be the single biggest thing you can do for hardwood.
- Check for Leaks Regularly: Every few months, do a quick walk-through around appliances — dishwasher, fridge, washing machine — plus toilets and sinks. Catching a tiny drip early saves a pile of grief.
- Ensure Proper Exterior Drainage: Make sure gutters are clean and downspouts run at least 5-10 feet away from the foundation. The ground should slope away from the house, not toward it.
- Install Vapor Barriers: If you've got a crawl space, a 6-mil or thicker poly vapor barrier across the ground can cut moisture migration way down. Solid weekend DIY work, or a pro install if you want to call it a day and be done.
- Leave Expansion Gaps: If you're installing new floors or having them installed, double-check that those 1/2-inch expansion gaps stay open around all fixed objects. Wood needs room to move.
- Clean Appropriately: Use a barely damp mop, and wipe up spills right away. Don't let standing water sit there. I've seen folks ruin perfectly good floors just by getting too aggressive with a wet mop.
When to Call a Professional
Look, some jobs are just past the average homeowner's toolkit, and that's fine. If you've got major buckling where the boards are actively popping up, or you hear loud cracking sounds, you're probably beyond a simple DIY repair. Any time you suspect a hidden plumbing leak, especially in walls or under slabs, call a licensed plumber with leak detection gear; those guys can save you a fortune in damage. If your moisture meter keeps showing high readings (over 12-15%) and you can't find or fix the source, a water damage restoration specialist or foundation expert may need to step in and deal with the moisture in your basement or crawl space. And if the floors have serious cupping or buckling and still won't settle after the moisture issue's fixed, a professional floor refinisher or installer can tell you whether sanding or board replacement is the safest way forward without creating another mess. Don't try to resand deeply cupped floors yourself — you'll regret it.
Related Articles
Keep troubleshooting with these hand-picked guides from FixlyGuide:
- The Secret Reason Your Interior Door Sticks (It's Not Always Humidity) — Before you blame humidity, learn the true culprits behind a sticky interior door and how to fix them with simple DIY steps.
- The Surprising Reason Your Interior Door Sticks (It's Not Always Humidity) — Before you blame humidity, learn the common culprits behind a sticking interior door and how to fix them with simple DIY steps.
- The Surprising Reason Your Interior Door Sticks (It's Not Always Humidity) — Discover why your interior door sticks, often due to more than just humidity, and learn simple DIY fixes to restore smooth operation.
- Why Your Hardwood Floors Have Gaps in Winter (And When to Worry) — Seeing gaps in your hardwood floors this winter? It's likely caused by low indoor humidity making the wood shrink. Learn what's normal, how…
- The Unseen Culprit Behind Hardwood Floor Gaps (It’s Not Always Age) — Discover why your hardwood floors are gapping and what to do about it, often due to hidden moisture issues, not just normal wear and tear.
- The Hidden Reason Your GFCI Won't Reset (And It's Not Always a Faulty Outlet) — A GFCI outlet that refuses to reset often points to a persistent electrical fault, not necessarily a broken outlet. Learn to diagnose and f…
Should you do this yourself?
Answer five quick questions before you start. Safety outranks savings every time.
Your experience with work like this
How high do you have to work?
Does the job involve any of these?
Will it need a permit?
Specialty tools
Free and instant. Educational guidance only — not a quote, inspection, or professional diagnosis.
Questions to ask before you sign
Ask every contractor the same questions and the cheapest bid stops looking cheapest. Check them off as you go — your progress is saved on this device.
Free, no signup. Bring this to every walkthrough so you compare bids on the same terms.
What should this project cost?
Enter your project details for a realistic cost range before you call anyone.
Cost depends heavily on which system turns out to be the source.
- Regional adjustment
- National average
- Labor share (typical)
- ~$1,620
- Quotes to collect
- 3 written estimates
Educational estimate based on national averages — not a binding quote. Always confirm with written local estimates.
Fixly Project Decision Box
- DIY difficulty
- Professional Recommended
- Estimated time
- Monitoring over 60–90 days · engineer visit 1–2 hours
- Cost level
- Major Project
Main tools / materials
- Crack monitor or pencil marks with dates
- Tape measure
- Marble or level for floor slope
When to stop and call a pro
- A crack wider than 1/4 inch or growing month over month
- Doors and windows that suddenly stick or will not latch
- Stair-step cracks in brick or block
- Separation between walls and ceilings or floors
Need professional help?
Get a Foundation EvaluationHandle this before it gets worse
First steps that limit damage, then a way to reach a qualified pro.
- Emergency repair checklistThe first steps that limit damage before a pro arrives.Open
- Get local estimatesSend one request and compare written estimates from vetted pros.Open
- Estimate this projectGet a cost range for your scope and ZIP before you call anyone.Open
Free, no signup required. Estimates are educational guidance, not a quote or an inspection.
Get the print-ready PDF of this guide
A clean, ad-free, printable version you can keep on your phone or pin to the workshop wall. Free with a FixlyGuide account.
- Print-optimized layout
- Tools, materials & every step included
- Saved to your account
Recommended for DIYers & woodworkers
Sponsored
The Top 20 Tools for Workshops of Any Budget
No stationary machines or power tools required — plus 3 fundamental tools that can't be bought at any price.
Get the free guide
Ted's Woodworking — The #1 Woodworking Resource
Detailed instructions, dimensioned drawings, materials & cutting lists, and 3D schematics for every skill level.
See the plansSponsored: links above are affiliate links. FixlyGuide may earn a commission on qualifying purchases — at no extra cost to you.
Frequently asked questions
What does it mean if my floorboards are cupping?+
Cupping means the edges of your hardwood floorboards are higher than their center. This happens when the underside of the plank absorbs more moisture than the top, causing the wood fibers on the bottom to expand more and push the edges upwards. It's a clear sign of a moisture imbalance.
How do I know if my buckled floor is still wet?+
The best way to tell if your buckled floor is still wet is by using a moisture meter. Take readings from several spots on the affected boards and the subfloor. If the moisture content is consistently above 9%, it's still too wet and needs more time to dry out before considering repairs.
Can a cupped floor flatten out on its own?+
Yes, a cupped floor can often flatten out on its own once the underlying moisture problem is identified and corrected. It takes time for the wood to release excess moisture and acclimate to normal indoor humidity levels, sometimes several weeks or even months.
What is the ideal humidity level for hardwood floors?+
The ideal indoor relative humidity for hardwood floors is generally between 35% and 55% year-round. Maintaining stable humidity prevents the wood from excessively expanding or contracting, which can lead to cupping, crowning, or gapping.
Is it okay to sand a cupped floor?+
You should absolutely NOT sand a cupped floor until it has fully dried and flattened as much as possible. Sanding a still-cupped floor will remove more material from the higher edges, leading to a 'dish-out' effect and permanent damage once the wood eventually flattens.
How much expansion gap should a hardwood floor have?+
A hardwood floor should typically have an expansion gap of about 1/2 inch around its entire perimeter, including against walls, cabinets, and doorframes. This gap allows the wood to expand and contract naturally with changes in humidity without buckling.
Can high humidity cause hardwood floors to buckle?+
Yes, high humidity is a primary cause of hardwood floors buckling. When wood absorbs too much moisture, it expands. If there isn't enough expansion space, or if the moisture difference between the top and bottom of the planks is severe, the boards will push against each other and buckle upwards.
What's the difference between cupping and crowning?+
Cupping is when the edges of a floorboard are higher than its center, usually from moisture absorbing into the underside. Crowning is the opposite, where the center of the board is higher than the edges, which can happen if the top surface gets excessively wet and expands, or from sanding a cupped floor prematurely.
Discussion
Loading comments…