- Add felt pads to all heavy furniture legs: Spread the load out across bigger contact points. Don't screw or bolt bookcases, transitions, or cabinetry directly through a floating floor into the wooden subfloor.
- Use UV-blocking window treatments: Put blinds or UV-filtering window film on west- and south-facing patio doors. Direct midday sun can heat a dark vinyl surface past 120°F, which can trigger buckling and gap migration.
- Inspect door casing clearance: Make sure your door jambs and casing trims sit at least 1/16-inch above the vinyl planks. If jambs pinch the floor downward, the floor binds and separates somewhere else in the room.
- Check room transitions for pinch points: Make sure T-molding tracks in doorways are anchored to the subfloor between the planks, not pinching down through the top of the vinyl.
General remodeling · Renovation planning
| Project category | General remodeling |
|---|---|
| Problem type | Renovation planning |
| Trade required | General contracting |
| Urgency | Planned project |
| Safety risk | Low safety risk |
| DIY suitability | Pro recommended |
| Cost category | Major investment |
| Typical timeline | Design and permitting often 2–4 months before work starts |
| Contractor type | General contractor |
Repair option
Phase the work and fix the building envelope first.
Replacement option
Full renovation with permits, design, and a general contractor.
Common causes
- Space no longer fits how the household lives
- Resale preparation
- Deferred maintenance stacking up
Relevant tools:project cost estimatorcompare quoteshome improvement material prices
Published October 27, 2026Last updated October 27, 2026
Tools & materials you'll need
Affiliate linksAs an Amazon Associate FixlyGuide earns from qualifying purchases — at no extra cost to you. Prices and availability are accurate as of publication and subject to change.
Quick Answer
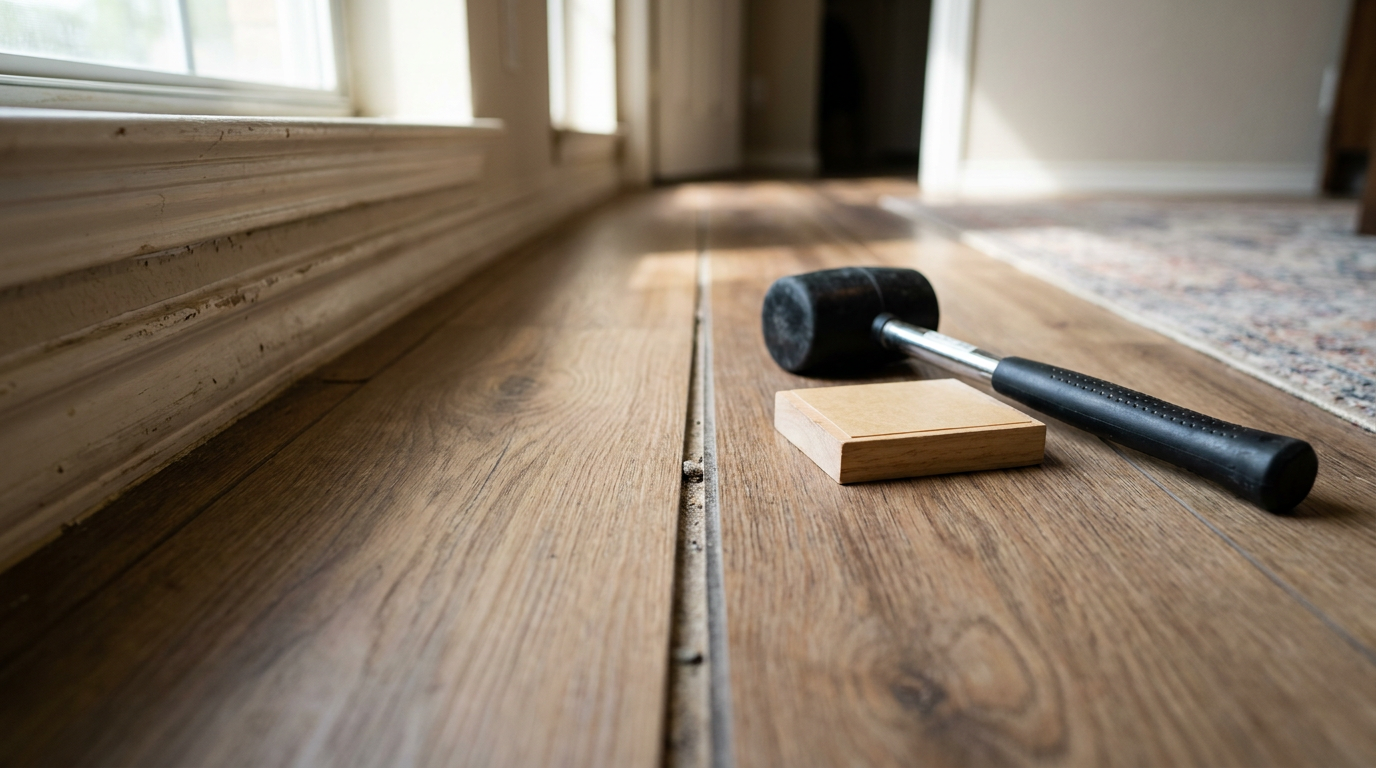
To fix vinyl plank flooring that separates at the seams, I start by vacuuming dirt out of the gap, then I stick heavy-duty double-sided carpet tape to the bottom of a 2x4 wood block. Press that block tight onto the loose plank and smack the side of the block with a rubber mallet toward the gap until the locking mechanism clicks back together. If the gap keeps coming back, or the locking tongues are damaged, I’ll put a pea-sized drop of PVA wood glue or vinyl floor seam adhesive into the female groove before I tap the joint tight.
The Problem
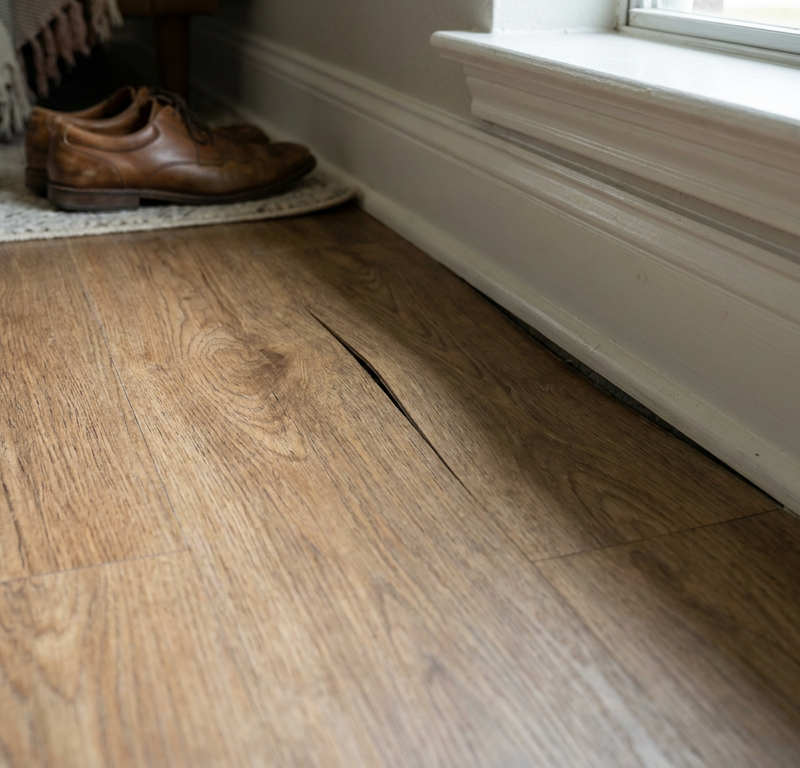
Luxury vinyl plank (LVP) and click-lock laminate floors look great until one afternoon you glance across the hallway and see a distinct 1/8-inch dark void staring back at you. You walk over, look closer, and notice the end joints—or sometimes long edge joints—have parted ways.
That gap doesn’t stay innocent for long. It grabs pet hair, cracker crumbs, mop water. And if somebody catches a heel on that exposed tongue, the thing’s toast. Once that tongue snaps off, the board loses its mechanical lock for good.
So why does this happen on a floor that was supposed to be rock solid? Floating floors expand and contract with seasonal temperature swings and shifts in relative humidity. If the floor went in without enough perimeter expansion gap, or heavy furniture pins the planks in opposite corners of the room, normal movement pulls the boards apart at their weakest mechanical joints.
The good news? You almost never need to tear out the room or pop off baseboards to fix separated seams. Most times, I can pull those planks right back into locking alignment from the surface in ten minutes flat.
How It Works
A floating vinyl plank floor isn't glued or nailed down to the subfloor. Instead, the individual planks lock edge-to-edge with a tongue-and-groove or click-lock profile—stuff like Uniclic, Valinge 2G, or 5G drop-lock joints. The whole floor sits on underlayment like one big connected sheet, shifting just a bit as indoor temps swing between 65°F in winter and 78°F in summer.
Rigid core (SPC) and wood-plastic composite (WPC) planks still have vinyl tops, so they move. Period. Furniture gets slid around, people pace the hallways, the AC kicks on, and tension builds at those seams. If the lock’s holding power is weaker than the pull from shrinkage or foot traffic, the male tongue slips out of the female pocket.
To reset the joint without tearing the floor back to the wall, you need force traveling horizontally along the floor. If you whack a vinyl edge directly with a rubber mallet, you’ll crush the bevel and damage the core. That’s no dice. But if you attach a scrap block of wood to the wear layer with high-shear tape, the blow transfers sideways instead of downward. That pulls the plank across the underlayment and snaps the tongue back into its seat without chewing up the finished surface.
I pulled a water heater in Frisco last month and found a hallway gap just like this near the laundry room—same deal, same fix, and the floor clicked shut clean as can be.
Step-by-Step Fix
Follow these 9 steps to reset your separated planks, clear debris from the grooves, and lock the seams permanently so they don't slide apart next month.
-
Clean out the gap thoroughly — You’ve got to get the grit out first. No skipping it. Grab an old soft toothbrush and a utility vacuum, then scrape the debris out of the pocket between the two boards. If dirt or tiny drywall granules stay packed in the female groove, the male tongue can’t seat all the way, and you’ll be left with a permanent 1/32-inch gap that ruins the joint.
- Tools: Shop vac with narrow crevice tool, stiff nylon brush.
- Safety: Don't use a metal screwdriver to scrape the groove; you will gouge the core profile.
-
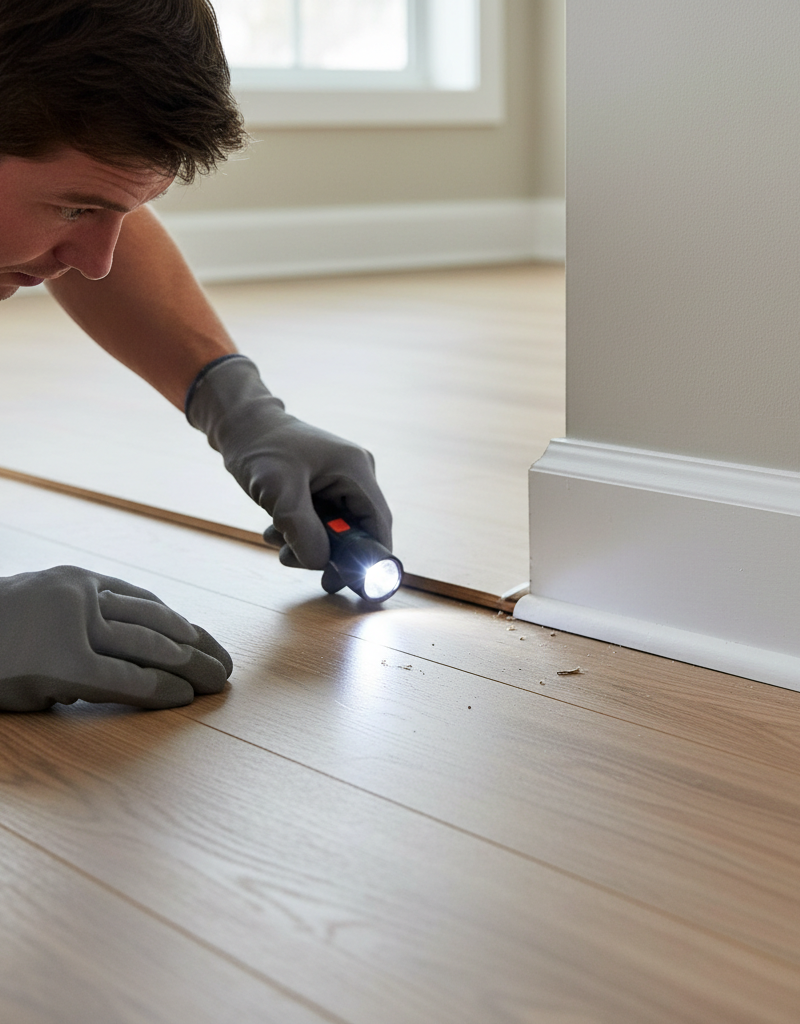
Inspect the joint profile — Shine a flashlight right into the opening and check the locking tongue. If it’s intact, it’ll click back in. If the locking ridge snapped off cleanly—usually on thin 4mm or 5mm planks—you’ll need adhesive in step 5 to lock the joint for real.
- If this doesn't work: If the plank edge is rolled upward or mushroomed from someone kicking it, slice the rolled vinyl flush with a brand-new utility blade before proceeding.
-
Prep the traction block — Cut a scrap piece of 2x4 lumber to roughly 10 to 12 inches in length. Clean the wider face of the block and wipe the separated floor plank with isopropyl alcohol to remove surface wax, grease, or cleaner residue.
- Tools: 2x4 scrap wood, 70% or 91% isopropyl alcohol, microfiber rag.
-
Apply heavy-duty adhesive tape to the block — Lay two parallel strips of heavy-duty double-sided carpet tape across the flat face of the 2x4. Peel the backing film off the tape, exposing the tacky adhesive.
- Alternative tool: A glass suction cup lifter (the dual-pad 100-lb rated kind used for windshields) works brilliantly if your vinyl planks have a flat, smooth ceramic-bead texture rather than deep wire-brushed grain.
-
Apply seam adhesive (for recurring gaps or broken tongues) — If this gap opened up more than once, squeeze a single tiny bead of clear PVA wood glue or specialized vinyl seam sealer directly into the exposed female pocket. Keep the bead to the thickness of a toothpick.
- Caution: Never use standard silicone caulk or cyanoacrylate (super glue). Super glue sets in seconds and will lock the board misaligned, while silicone lacks structural grip.
-
Affix the block to the loose plank — Press the taped 2x4 firmly onto the top face of the separated plank, positioning it about 1 inch back from the gap. Step directly onto the block with your full body weight for 10 seconds to bond the carpet tape to the floor's polyurethane wear layer.
- Alignment: Make sure the block sits fully on the loose board and doesn't overlap onto adjacent planks, or you'll hit both boards at once.
-
Drive the plank into the joint — Hold your 16-to-32-ounce rubber mallet with a firm grip and strike the side of the 2x4 block, swinging parallel to the floor toward the gap. Start with moderate taps to see how it moves, then give it two or three solid, brisk hits.
- Visual check: Watch the gap close. You should hear and feel an audible click as the drop-lock or angle-tap tongue drops into the receiver.
-
Pry off the traction block — Do not yank the block straight upward, which can delaminate the top wear layer of cheap vinyl. Instead, twist the block sideways or slip a 5-in-1 painter's tool under the edge of the wood block to gently slice through the carpet tape foam.
- Clean up: Wipe any leftover tape adhesive from the vinyl surface with a dab of mineral spirits or rubbing alcohol.
-
Wipe squeeze-out and apply weight — If you used PVA glue, damp-wipe any excess adhesive that squeezes out onto the surface using a damp rag. Place a 25-to-50-pound weight (such as a stack of heavy hardback books or a bucket of joint compound) directly over the newly closed seam for at least 2 hours so the glue cures flat.
Common Causes
- Temperature swings and direct sunlight — Unshaded south-facing windows can bake luxury vinyl planks up to 110°F during the day, then they cool down to 68°F overnight. That daily cycle makes the floor expand and contract over and over, and sooner or later it shakes the click joints loose.
- Pitched or unlevel subfloors — Vinyl planks require a subfloor flatness tolerance of no more than 3/16-inch variance across a 10-foot radius. If the subfloor dips, foot pressure pushes the plank downward, torquing the joint vertically until the tongue dislodges horizontally.
- Heavy furniture pinning the floating floor — Kitchen islands, pool tables, or massive oak armoires sitting on floating vinyl clamp the floor to the subfloor. As the rest of the floor tries to contract during cooler months, it can’t slide under the furniture leg, so the joints in the nearest open walkway rip apart.
- Insufficient expansion gaps around walls — If the installer failed to leave a minimum 1/4-inch to 3/8-inch perimeter gap under the baseboards, the floor buckles upward against the baseboard when expanding, popping the end seams apart.
- Walking friction and directional traffic — Heavy foot traffic in narrow hallways, especially from runners or pivot turns near doorways, pushes planks apart with sideways force on smooth underlayments.
Common Mistakes
- Hitting the vinyl edge directly with a hammer: Strike the exposed edge of a vinyl plank with an unprotected hammer or mallet and you’ll crush the decorative film and shatter the tongue. Always use a sacrificial wooden tapping block, a suction cup puller, or an adhesive traction block.
- Filling gaps with colored silicone or wood putty: Homeowners try this all the time. They smear colored acrylic caulk or wood filler into the gap to hide it. Looks bad. Attracts dirt. And it fills the groove with hard junk that keeps the planks from ever locking together again.
- Ignoring the dirt inside the open pocket: Tap a board closed while dirt, dog hair, or small stones are still packed in the groove and you’ll break the locking profile, leaving the joint raised above the surrounding floor. Vacuum it first. Every time.
- Using construction adhesive or liquid nails under floating planks: Gluing floating vinyl directly to the subfloor in isolated spots creates an anchor point. When the rest of the floor shifts seasonally, it tears the seams open right around that glued board. Only glue plank tongue-to-groove, never plank-to-subfloor.
- Yanking off carpet tape straight up: Aggressive carpet tape can grip a cheap wear layer so hard that ripping the block upward peels the vinyl film right off the core. Twist the block or slide a thin putty knife under it to break the bond.
Cost & Time Breakdown
| Task | DIY Cost | Pro Cost | Time |
|---|---|---|---|
| Reset single gap (Traction Block Method) | $5–$15 | $120–$180 | 15–20 minutes |
| Suction Cup Floor Puller Kit | $25–$45 | $120–$180 | 10 minutes |
| PVA Glue Seam Reinforcement | $7–$12 | $150–$200 | 30 minutes |
| Perimeter Baseboard Trimming (Fixing Pinch Points) | $10–$25 | $250–$400 | 1–2 hours |
| Full Plank Replacement (Damaged Locking Tongue) | $20–$40 | $200–$350 | 1–2 hours |
Tips & Prevention
- Maintain indoor humidity between 35% and 55%: Vinyl expands and contracts mostly from heat, but composite cores react to big swings in ambient conditions too. Run your HVAC year-round and consider a whole-house humidifier during dry winter months.
- Add felt pads to all heavy furniture legs: Spread the load out across bigger contact points. Don't screw or bolt bookcases, transitions, or cabinetry directly through a floating floor into the wooden subfloor.
- Use UV-blocking window treatments: Put blinds or UV-filtering window film on west- and south-facing patio doors. Direct midday sun can heat a dark vinyl surface past 120°F, which can trigger buckling and gap migration.
- Inspect door casing clearance: Make sure your door jambs and casing trims sit at least 1/16-inch above the vinyl planks. If jambs pinch the floor downward, the floor binds and separates somewhere else in the room.
- Check room transitions for pinch points: Make sure T-molding tracks in doorways are anchored to the subfloor between the planks, not pinching down through the top of the vinyl.
When to Call a Professional
If you keep resetting the same joints every three weeks, or you walk across the floor and feel real dips under your feet like you’re stepping into an invisible ditch, you’re not dealing with simple plank migration. You’ve got an out-of-spec subfloor.
Fixing serious subfloor deflection means unclicking the entire room back to the origin wall, leveling the low spots with a cementitious self-leveling underlayment to within 3/16-inch over 10 feet, and reinstalling the flooring. That’s not a quick Saturday fix.
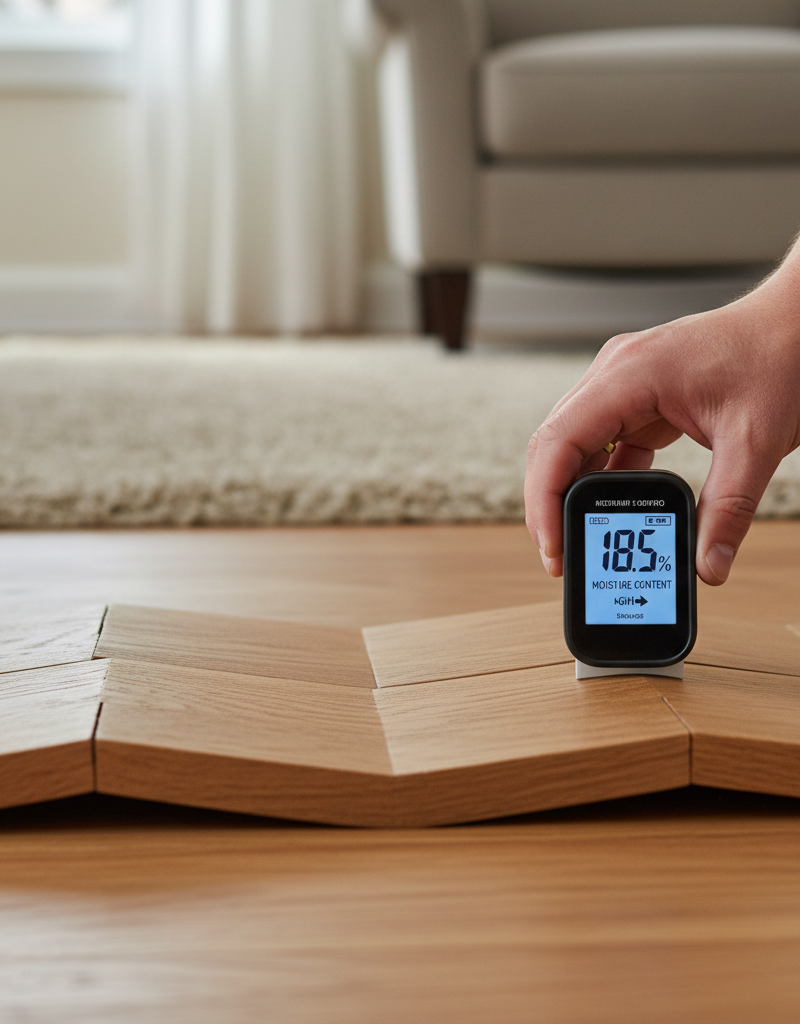
Same story if the gaps are bigger than 1/2-inch across several rows and the tongue systems are shredded through a big room over 800 continuous square feet. In that case, the layout probably missed key expansion transition strips. Call an experienced flooring contractor who’s got moisture meters, laser levels, and specialty undercut tools to sort out the real problem.
Frequently Asked Questions
Can I just use caulk or wood putty to fill gaps in vinyl plank flooring?
No. Acrylic, silicone, and wood filler don't hold up to foot traffic on floating floors. Since the planks move underfoot and cycle through seasonal expansion, that filler will crack, crumble, and turn into a sticky mess that collects dirt. And once you pack the groove, you can forget about sliding the planks back together correctly.
Will tapping the planks back together void my floor's warranty?
Using a non-destructive method like the traction block with carpet tape or a vacuum suction cup puller keeps you in the clear because it doesn’t modify the floor or damage the core. But if you hammer directly on the plank edges or glue floating boards down to the subfloor, you’ll void standard manufacturer warranties in a hurry.
Why do my vinyl floor gaps only appear during winter?
Materials shrink as temperatures fall. In winter, indoor heating dries the air and lowers indoor temps compared to summer highs. That thermal contraction shortens each plank by fractions of a millimeter. Stack enough of those tiny changes across a room and the weakest seam pulls apart into a visible gap.
Can heavy furniture cause vinyl plank gaps to open up?
Yes, and it’s one of the big ones. Floating floors have to move as one uniform sheet. If an 800-pound sofa or a heavy kitchen island pins one section of the floor to the subfloor while the rest of the floor tries to contract away from it, the joints in front of that furniture will separate.
What should I do if the locking tongue on the plank is completely broken off?
If the male tongue snapped inside the pocket, the mechanical lock is done. You’ve got two choices: replace the damaged plank by cutting it out with an oscillating multi-tool, or clean out the broken fragments and use high-strength vinyl plank seam adhesive directly in the joint channel, then weight the board down for 24 hours while it sets.
How much expansion space should vinyl plank flooring have at the walls?
Most manufacturers specify a perimeter expansion gap between 1/4-inch and 3/8-inch along every vertical obstruction, including walls, door jambs, pipes, and cabinetry. If the installer shoved the planks tight against drywall or baseboards, the floor will bind as it moves, which causes edge lift and seam separation somewhere else in the room.
Does double-sided carpet tape damage the vinyl floor wear layer?
Quality heavy-duty carpet tape uses an acrylic or rubber adhesive that won't damage a standard polyurethane or ceramic-bead wear layer if you remove it carefully. Twist the wooden block sideways to peel the tape free instead of pulling straight up, and wipe off any leftover adhesive residue with a clean rag dipped in isopropyl alcohol.
Can I fix a gap in a middle row without removing baseboards?
Yes. The traction block method in this guide is built for middle-row gaps without removing baseboards or disturbing the rest of the room. By walking the plank toward the gap using shear force from the mallet block, you close the opening entirely from above the floor.
Related Articles
Keep troubleshooting with these hand-picked guides from FixlyGuide:
- Bouncy Floating Floors? 5 Causes and How to Fix Hollow Spots — Eliminate hollow sounds and bounce in floating vinyl or laminate floors by relieving pinched wall gaps or injecting subfloor voids with spe…
- The 3 Hidden Reasons Your Floor Squeaks (And 3 Ways to Silence It) — Silence a squeaky floor without tearing up your home using targeted lubrication, shims, or specialized screws.
- The 3 Hidden Reasons Your Window Won't Stay Up (And the Easy Fixes) — Before you call a repairman, learn the three most common reasons your double-hung window won't stay open and how to fix them yourself.
- The 4 Hidden Reasons Your Doorbell Dies (And the 20-Minute Fix) — A non-working doorbell is often caused by simple, hidden issues like a tripped transformer or a corroded button, which homeowners can fix i…
- Why Your Hardwood Floors Have Gaps in Winter (And When to Worry) — Seeing gaps in your hardwood floors this winter? It's likely caused by low indoor humidity making the wood shrink. Learn what's normal, how…
- Driveway Expansion Joint Cracking? 11 Steps to Reseal It for Good — Stop weeds, water erosion, and winter frost heave by replacing failed concrete expansion joints with commercial-grade polyurethane and clos…
Should you do this yourself?
Answer five quick questions before you start. Safety outranks savings every time.
Your experience with work like this
How high do you have to work?
Does the job involve any of these?
Will it need a permit?
Specialty tools
Free and instant. Educational guidance only — not a quote, inspection, or professional diagnosis.
Estimate your own project cost
National averages are a starting point. Enter your details for a range that fits your house.
Flooring cost estimator
- Material$498 – $1,095
- Installation labor$360 – $720
Tile installs and stairs increase labor cost. Get 2–3 quotes for jobs over 200 sq ft.
Educational estimate only — always confirm with written local bids.
What should this project cost?
Enter your project details for a realistic cost range before you call anyone.
Most rooms run $3–$14 per square foot installed depending on material.
- Regional adjustment
- National average
- Labor share (typical)
- ~$2,036
- Quotes to collect
- 3 written estimates
Educational estimate based on national averages — not a binding quote. Always confirm with written local estimates.
Before you start
Check the difficulty, permits, and safety risk — then decide whether to call a pro.
Free, no signup required. Estimates are educational guidance, not a quote or an inspection.
Get the print-ready PDF of this guide
A clean, ad-free, printable version you can keep on your phone or pin to the workshop wall. Free with a FixlyGuide account.
- Print-optimized layout
- Tools, materials & every step included
- Saved to your account
Recommended for DIYers & woodworkers
Sponsored
The Top 20 Tools for Workshops of Any Budget
No stationary machines or power tools required — plus 3 fundamental tools that can't be bought at any price.
Get the free guide
Ted's Woodworking — The #1 Woodworking Resource
Detailed instructions, dimensioned drawings, materials & cutting lists, and 3D schematics for every skill level.
See the plansSponsored: links above are affiliate links. FixlyGuide may earn a commission on qualifying purchases — at no extra cost to you.
Frequently asked questions
Can I just use caulk or wood putty to fill gaps in vinyl plank flooring?+
No. Acrylic, silicone, and wood filler do not hold up to foot traffic on floating floors. Because the planks shift underfoot and cycle through seasonal expansion, the filler will crack, crumble, and turn into a sticky mess that collects dirt. Furthermore, filling the groove prevents you from ever sliding the planks back together correctly.
Will tapping the planks back together void my floor's warranty?+
Using a non-destructive method like the traction block with carpet tape or a vacuum suction cup puller preserves your warranty because it does not modify the floor or damage the core. However, hammering directly on the plank edges or gluing floating boards down to the subfloor will instantly void standard manufacturer warranties.
Why do my vinyl floor gaps only appear during winter?+
Materials shrink as temperatures fall. In winter, your home's indoor heating dries the air and drops indoor temperatures compared to summer highs. This thermal contraction shortens each plank by fractions of a millimeter. Accumulated across an entire room, those micro-shrinkages concentrate at the weakest seam, pulling the boards apart into a visible gap.
Can heavy furniture cause vinyl plank gaps to open up?+
Yes, this is one of the leading causes of separating seams. Floating floors must be free to expand and contract as a uniform sheet. If an 800-pound sofa or a heavy kitchen island pins one section of the floor to the subfloor while the rest of the floor tries to contract away from it, the joints in front of that heavy furniture will pull apart.
What should I do if the locking tongue on the plank is completely broken off?+
If the male tongue snapped inside the pocket, mechanical interlocking is no longer possible. You have two options: replace the damaged plank by cutting it out with an oscillating multi-tool, or clean out the broken fragments and use high-strength vinyl plank seam adhesive directly in the joint channel, weighting the board down for 24 hours while it sets.
How much expansion space should vinyl plank flooring have at the walls?+
Most manufacturers specify a perimeter expansion gap between 1/4-inch and 3/8-inch along every vertical obstruction, including walls, door jambs, pipes, and cabinetry. If the installer shoved the planks tight against drywall or baseboards, the floor will bind as it moves, causing edge lift and seam separation elsewhere in the room.
Does double-sided carpet tape damage the vinyl floor wear layer?+
Quality heavy-duty carpet tape uses an acrylic or rubber adhesive that will not damage a standard polyurethane or ceramic-bead wear layer if removed carefully. Always twist the wooden block sideways to peel the tape free rather than pulling straight upward, and remove any leftover adhesive residue using a clean rag dipped in isopropyl alcohol.
Can I fix a gap in a middle row without removing baseboards?+
Yes, the traction block method described in this guide is designed specifically to fix middle-row gaps without removing baseboards or disturbing the rest of the room. By walking the plank toward the gap using shear force from the mallet block, you close the opening entirely from above the floor.
Discussion
Loading comments…