- Assess the Damage Safely – Before you touch anything
- Tools: Sturdy ladder, safety harness (if you have one and know how to use it), work gloves, rubber-soled shoes.
- Safety: Always have someone spotting you on the ladder. Don’t climb if the roof’s wet, icy, or crazy steep. Stay off damaged sections. Keep your phone with you in case things go sideways.
- Take clear photos from a few angles. That helps with insurance, and it gives you a record of what you’re actually fixing.
Roofing · Flashing failure
| Project category | Roofing |
|---|---|
| Problem type | Flashing failure |
| Trade required | Roofing |
| Urgency | Soon — within weeks |
| Safety risk | Moderate safety risk |
| DIY suitability | Pro recommended |
| Cost category | Low cost |
| Typical timeline | Usually a half-day repair |
| Contractor type | Licensed roofing contractor |
Repair option
Replace the boot or step flashing and re-weave shingles around it.
Replacement option
Address during a full replacement when several details have failed at once.
Common causes
- Cracked pipe boots — the single most common roof leak source
- Rusted step flashing at walls and chimneys
- Sealant used as a substitute for proper metal
Relevant tools:project cost estimatordiy or hire a pro
Published September 25, 2026Last updated September 25, 2026
Tools & materials you'll need
Affiliate linksAs an Amazon Associate FixlyGuide earns from qualifying purchases — at no extra cost to you. Prices and availability are accurate as of publication and subject to change.
Quick Answer
After a big blow, most folks look for missing shingles or a hole you can see from the driveway. Fair enough. But I’ll tell you, after hundreds of storm calls, the sneaky problem is usually hidden flashing damage. It ain’t always a gaping tear; sometimes it’s just a tiny bend, a lifted edge, or a seam that popped loose around a chimney, skylight, or valley. That little flaw is all water needs. It’ll sneak under the shingles, start rotting the decking, and before you know it, you’ve got stains on the ceiling and a mess in the attic. You’ve got to know what to look for, and sometimes that means getting on a ladder or hiring somebody who does this every day.
The Problem
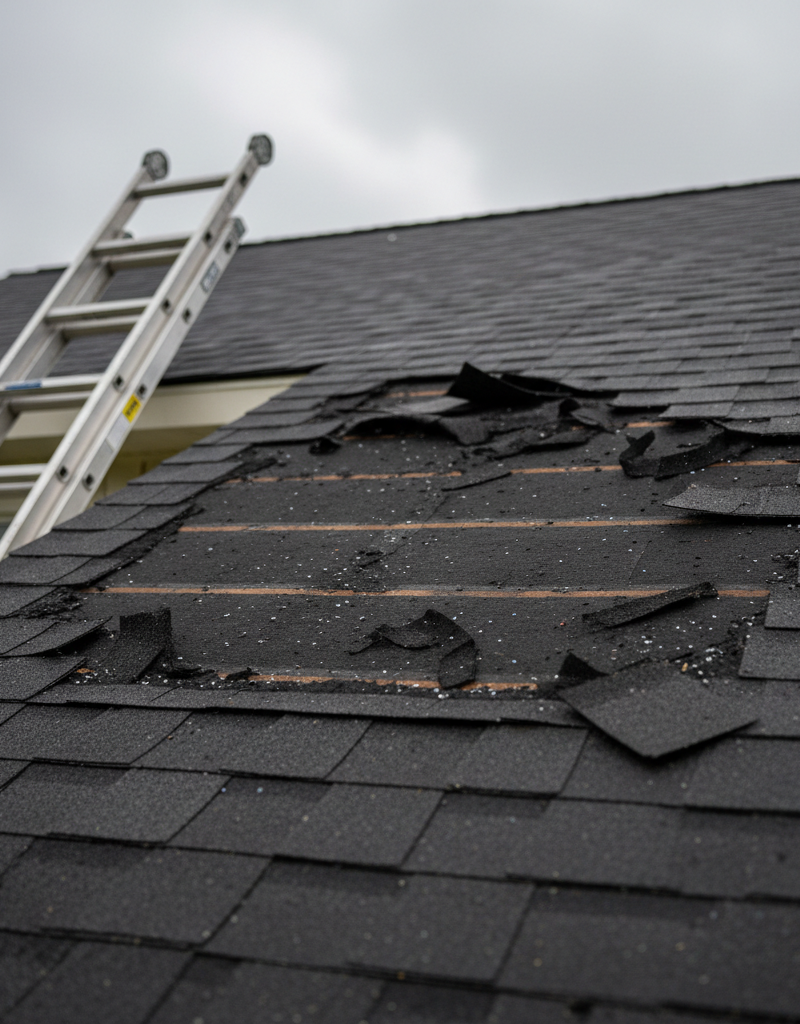
Picture this: a gale-force wind tears through your neighborhood. You do the sensible thing. Walk the yard, check for debris, maybe squint up at the roof from the ground. You spot a few missing shingles, sure, but nothing that looks like a catastrophe. “Lucky break,” you think.
That’s where a lot of homeowners get fooled. The worst roof damage after a storm isn’t always the stuff you can see from the street. It’s the hidden stuff, especially compromised flashing.
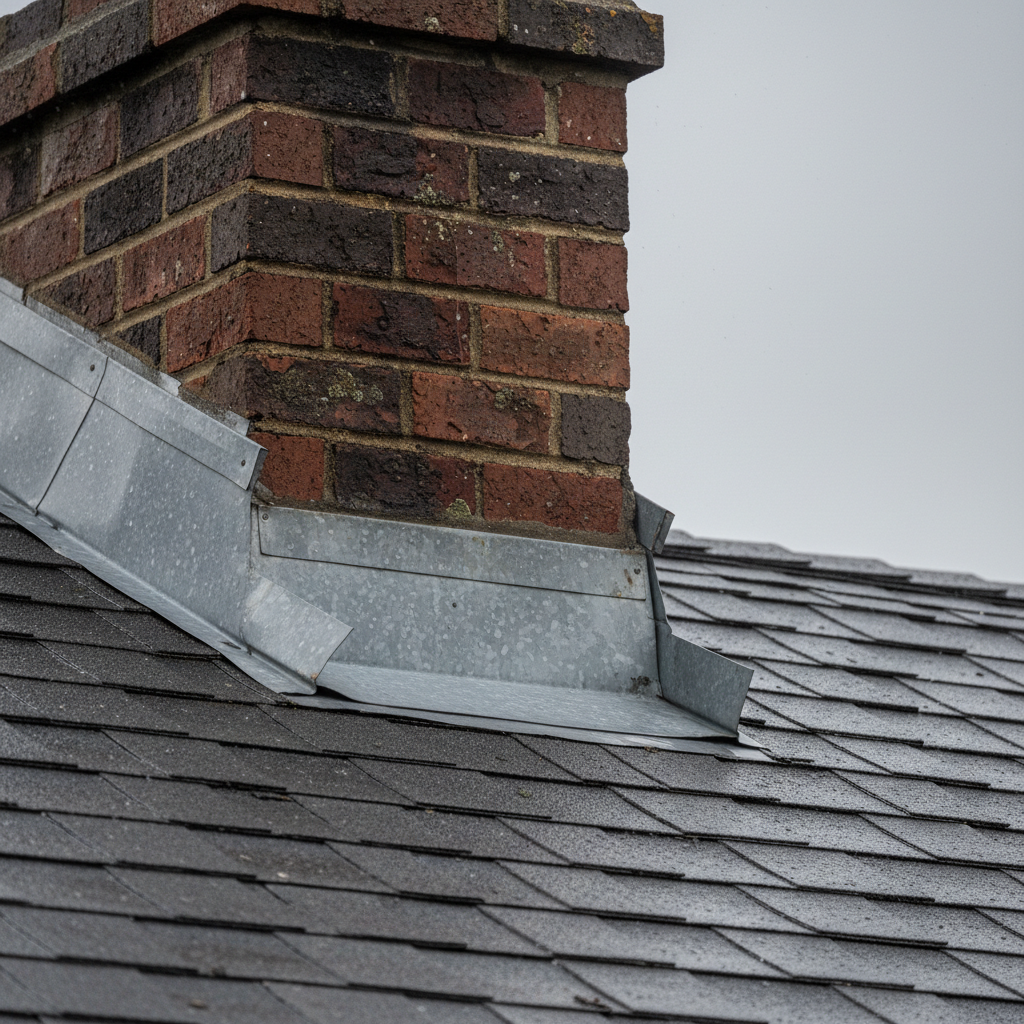
Flashing is that thin metal—aluminum, copper, galvanized steel—that roofers and plumbers use to seal the weak spots where the roof meets something vertical, like a chimney, a dormer wall, or a vent pipe. It’s there to kick water away from those seams and send it down into the gutters. But once high winds, flying debris, or heavy rain get after it, that flashing can bend, lift, or even get knocked loose. From a distance it may look just fine. Up close, though, you’ll often find little gaps, creases, or separations just waiting to let water in. I’ve seen this more times than I can count in my 25 years in the trade; folks think they’re safe, then a couple months later they’re calling about a mystery leak staining the ceiling and soaking attic insulation. Quiet problem. Expensive problem. If you don’t catch it early, it only gets worse.
How It Works
Alright, let’s talk about how a roof normally sheds water and where flashing fits in. Your roof is like a big umbrella, plain and simple. The shingles do the heavy lifting, sending water down the slope. But a roof isn’t one solid sheet. You’ve got chimneys sticking up, vent pipes for plumbing or exhaust, skylights bringing in daylight, and valleys where two roof planes meet. Every one of those spots is a weak point—an opening where water can find trouble.
That’s where flashing steps in. Think of it like a custom raincoat for the vulnerable spots. It gets installed in layers, often woven into the shingles, so water has to keep moving down and away. Around a chimney, for example, you’ll usually see base flashing running along the roof, then step flashing bent at a 90-degree angle and tucked in with each shingle course up the side. On top of that, there’s counter-flashing, usually mortared into the chimney masonry and bent down over the step flashing. It’s a shingle-over-shingle setup. Nice and simple. Gravity does the rest.
Valleys are another big one. These are the inside angles where two roof planes meet, and they move a lot of water fast. They usually have metal valley flashing—sometimes open, sometimes hidden under cut shingles—that funnels all that runoff downhill. When a storm hits, that metal can buckle, crease, or lift. Debris can scrape it. Hail can dent it. Even the coating can get cracked or chipped. Once that seal gets broken, even by a hairline crack, wind-driven rain can get pushed up and under the flashing. Doesn’t take much—a 1/16-inch gap can let in more water than you’d expect over time. That’s how a minor storm turns into a major headache weeks or months later.
Step-by-Step Fix
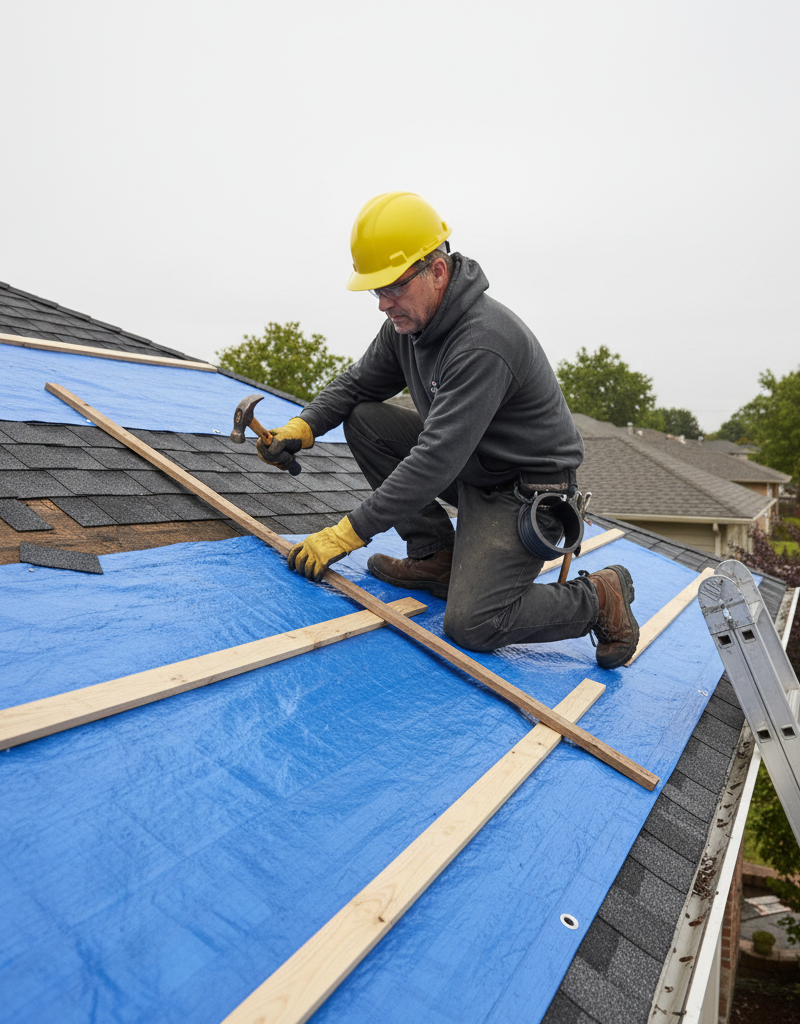
Okay, so you’ve checked things out and found some questionable flashing. Maybe it’s bent, maybe it’s lifted, maybe it’s corroded. Here’s how you can handle minor repairs yourself. And yeah, safety first—a ladder fall will ruin your whole week. If you’re not comfortable on a roof, call a pro. No shame in that.
-
Assess the Damage Safely – Before you touch anything
- Tools: Sturdy ladder, safety harness (if you have one and know how to use it), work gloves, rubber-soled shoes.
- Safety: Always have someone spotting you on the ladder. Don’t climb if the roof’s wet, icy, or crazy steep. Stay off damaged sections. Keep your phone with you in case things go sideways.
- Take clear photos from a few angles. That helps with insurance, and it gives you a record of what you’re actually fixing.
-
Clean the Area Thoroughly – Clear the way for a good seal
- Tools: Stiff-bristle brush, small pry bar (use it gentle), leaf blower (optional).
- Brush away leaves, debris, old sealant, and loose granules around the damaged flashing. You need a clean, dry surface if you want anything to stick right. I once burned an hour on a job in Plano trying to figure out why a patch wouldn’t hold—turned out there was a stubborn mat of pine needles tucked under the old sealant. No dice. Don’t repeat that one.
-
Gently Reshape Bent Flashing – Straighten it out, but don't break it
- Tools: Rubber mallet, wood block, locking pliers (with padding).
- If the flashing is just bent or creased, tap it back into shape with a rubber mallet and a wood block. Go slow. Keep it even. Harder metal may need padded locking pliers, but don’t go cranking down so hard you make new kinks or cracks. You’re restoring the water path, not trying to make it pretty. If it fights you too much, stop—forcing it can weaken the metal.
-
Re-Secure Lifted Flashing Edges – Get it tight against the roof deck
- Tools: Roofing nails (1.25-inch galvanized), roofing cement/sealant, caulk gun, small trowel, hammer.
- If the flashing’s lifted but not badly bent, re-secure it. For step flashing, lift the shingle above it carefully, run a bead of roofing cement under the lifted edge, press it down, then fasten it with a few roofing nails. Nail through the top edge of the flashing where the next shingle course will cover it. If any part stays exposed, seal those nail heads with roofing cement. For bigger spots like valley flashing, put a generous layer of roofing cement underneath and press it down snug. You may need a few nails along the outer edges—where shingles will cover them—to hold it while the cement sets.
-
Seal Small Cracks or Holes – Your last line of defense
- Tools: High-quality asphalt-based roofing cement (apply with a caulk gun or trowel), utility knife.
- For small cracks, pinholes, or exposed nail heads, put a thick dab of roofing cement over the whole damaged area. Spread it a little past the damage with a trowel so you’ve got a waterproof patch. Aim for at least 1/8-inch thick. If the crack is bigger than a quarter-inch, you might need a small patch of flashing embedded in the cement, but now you’re edging out of easy DIY territory.
-
Replace Severely Damaged Flashing Sections – When patching just won't cut it
- Tools: Pry bar, utility knife, tin snips, roofing nails, roofing cement, replacement flashing material (matched to existing).
- If this doesn't work: If the flashing is badly torn, corroded, or has large holes, patching won’t last. You’ll need to cut out the damaged section and install new material. That’s a more advanced DIY job. You’ve got to remove some surrounding shingles, pry up the old flashing, cut the new piece to size, then weave it back in with new shingles and roofing cement. This is where most homeowners ought to throw in the towel and call a pro. Getting those overlaps right matters if you want it to stay dry.
-
Reapply Sealant (if applicable) – A final layer of protection
- Tools: Exterior-grade sealant (silicone or urethane-based, compatible with your flashing), caulk gun.
- Around plumbing vents, where a rubber boot may have a sealant bead, inspect that area. If it’s cracked or peeling, cut out the old sealant carefully with a utility knife and lay down a fresh, continuous bead. Don’t slob it on—clean and even beats a gloppy mess every time.
-
Post-Repair Inspection – Double-check your work
- From a safe distance, ideally with binoculars, look over every repair area. Make sure it’s secure and there aren’t any new gaps. Then wait for a rain shower and check the attic or inside ceilings for fresh leaks. Catching a little drip now is a whole lot better than staring at a big stain later.
Common Causes
When we’re talking flashing, age isn’t the only thing beating it up. Storms are a big culprit, sure, but there are plenty of other reasons that little strip of metal gives up the ghost. Here’s what I run into most out in the field:
- High Wind Damage: This is probably the number one storm-related cause. Strong winds can lift and peel back flashing, especially at the edges or where it meets a chimney. Once it’s bent, it usually won’t go back to watertight without a fight. Picture a 70 mph gust—it’s like an invisible hand trying to rip your roof apart.
- Falling Debris: Tree limbs, loose patio furniture, or even hail the size of golf balls can smack flashing hard enough to dent, puncture, or tear it. I remember one job in Cedar Park where a trampoline blew into a roof valley; it didn’t take out many shingles, but it mangled the valley flashing and caused a nasty leak.
- Improper Installation: Not every contractor knows their stuff. If flashing wasn’t installed right to begin with—maybe not enough fasteners, wrong sealant, bad overlaps—it’s just waiting for a storm to expose the weak spots. It might hang on a few years, but it won’t make it to the roof’s full lifespan.
- Corrosion and Age: Flashing breaks down over time, especially galvanized steel after the zinc coating wears off. Rust starts eating through it, and you get pinholes. Slow burn, sure, but a storm can make an existing problem a whole lot worse.
- Thermal Expansion and Contraction: Metal expands when it’s hot and shrinks when it’s cold. Over years of seasonal swings, that movement stresses the flashing, loosens fasteners, and can fatigue the metal until it cracks. Sometimes the storm’s just the last shove.
Common Mistakes
I’ve seen homeowners make some real doozies trying to fix flashing, and more than once they’ve turned a small issue into a full-blown repair. Learn from the mess, not from the mistake:
- Ignoring the problem: “It’s just a small bend, no big deal.” Famous last words. A small bend is still a path for water. Leave it alone, and you may be buying rot, mold, and ceiling damage later on. Fix it, even if it looks minor.
- Using the wrong sealant: Not every caulk belongs on a roof. Regular silicone caulk or interior-grade sealant is a bad bet out there. It’ll crack, peel, and fail fast under sun and rain. You need asphalt-based roofing cement or a good exterior-grade, UV-resistant sealant made for roofing.
- Over-nailing or improper nailing: Driving a pile of nails through the exposed face of flashing just gives water more places to get in. Flashing should go in so the fasteners are covered by shingles or sealed carefully. If you have to nail an exposed spot, every nail head needs roofing cement.
- Attempting to "patch" large holes: If you’ve got a foot-long tear or a huge dent, smearing roofing cement on it isn’t a real fix. That cement’s going to crack, shrink, and fail. Big damage means cutting out and replacing the flashing section. That’s pro work.
- Walking directly on damaged flashing: You’re up there to fix the problem, not make it worse. Stepping on bent or separated flashing can open it up more and create new leaks. Watch your footing.
- Not checking the attic: After any roof repair, always check the attic. Look for water stains on the decking, insulation, or rafters. A solid repair means no water gets in, and the attic won’t lie to you.
Cost & Time Breakdown
Here’s a rough idea of what you can expect when dealing with flashing damage, whether you handle it yourself or bring in the cavalry.
| Task | DIY Cost ($) | Pro Cost ($) | Time (DIY) |
|---|---|---|---|
| Minor bend/lift (seal & secure) | $10–$50 | $150–$350 | 30–60 minutes |
| Small crack/hole (seal only) | $10–$30 | $100–$250 | 20–40 minutes |
| Replacing a single step piece | $20–$75 | $250–$500 | 1–2 hours |
| Valley section repair | $50–$150 | $400–$800 | 2–4 hours |
| Chimney re-flashing (partial) | $100–$300 | $600–$1200 | 4–8 hours |
| Full chimney re-flashing | N/A | $1000–$2500+ | 1–3 days |
Keep in mind, those pro costs are for the flashing repair alone. If water’s already gotten inside the house, that’s a whole different bill. DIY costs are mostly materials—you’re paying yourself in sweat equity.
Tips & Prevention
Look, an ounce of prevention beats a pound of repair, especially on a roof. Here’s what I tell my customers:
- Annual Roof Inspection: Don’t wait for a leak. Get up there safely, or hire a pro, for a yearly checkup—especially after a rough storm season. Look for bent edges, missing sealant, or any signs of corrosion. Catching a small issue early can save you thousands.
- Keep Gutters Clean: Clogged gutters make water back up and sit against your fascia and roof edge. That standing water can work on flashing and lead to rot. Clean them at least twice a year, more if you’ve got a bunch of trees.
- Trim Overhanging Branches: This one’s huge. Branches rubbing your roof or falling during a storm are prime troublemakers for flashing damage. Keep them trimmed back at least 6-8 feet from your roofline.
- Check Sealants Regularly: Around vent pipes and skylights, sealants dry out and crack over time. Give them a quick look every couple of years. If they’re brittle, scrape the old stuff off and lay down a fresh bead.
- Proper Attic Ventilation: Good attic ventilation helps control temperature and moisture, which helps your roof parts last longer, flashing included. It keeps extreme temperature swings from beating up the materials.
- Consider Upgraded Flashing: If you’re getting a new roof or doing a major repair, ask about upgrading to tougher flashing materials like copper or lead. They’re more durable than standard aluminum or galvanized steel and can last a lifetime.
When to Call a Professional
I’m all for homeowners handling what they can, but there are lines you don’t want to cross. With flashing, here’s when you should put down the tools and pick up the phone:
If you’re dealing with big sections of torn or missing flashing, especially around valleys or chimneys, that’s a job for a licensed, insured roofing contractor. Same goes if you suspect serious water damage in the attic or walls; a pro can check the scope and keep you from getting into structural trouble. Any repair that means matching existing flashing materials or removing a lot of shingles is usually beyond the average DIY skill set and carries a real risk of creating new leaks if it’s done wrong. Don’t mess with your roof’s main defense system unless you’re 100% sure you can do it right. An improper fix will cost you a lot more later than calling somebody in the first place.
Related Articles
Keep troubleshooting with these hand-picked guides from FixlyGuide:
- Missing Shingles? The Real Trouble Is Under Your Roof — After a storm, missing shingles seem like a simple fix. But the high winds that tore them off likely broke the seals on surrounding shingle…
- Wind Tore Off Your Shingles? The 7 Critical Steps Most Homeowners Miss — Discover the essential steps to take when roof shingles go missing after a storm, from immediate safety checks to temporary repairs and ins…
- The Unseen Danger After a Storm: What to Do About a Sagging Roof Deck — A sagging roof deck after a storm isn't just an eyesore; it's a serious structural problem that demands immediate attention to prevent coll…
- The Urgent Truth About Missing Roof Shingles (And Your 3-Step Fix) — High winds can rip shingles off your roof, exposing your home to immediate water damage – here’s how to assess, temporary patch, and plan p…
- The $50 Storm Damage Secret Your Insurance Adjuster Won't Tell You — High winds snatched your shingles? Don't panic. I'll show you how to quickly and safely assess the damage and make a temporary repair to pr…
- The Mystery of the Spongy Floor: Is Your Subfloor Failing? — A spongy or bouncy floor can be more than just annoying; it often signals a hidden problem with your subfloor or joists that needs immediat…
Should you do this yourself?
Answer five quick questions before you start. Safety outranks savings every time.
Your experience with work like this
How high do you have to work?
Does the job involve any of these?
Will it need a permit?
Specialty tools
Free and instant. Educational guidance only — not a quote, inspection, or professional diagnosis.
Questions to ask before you sign
Ask every contractor the same questions and the cheapest bid stops looking cheapest. Check them off as you go — your progress is saved on this device.
Free, no signup. Bring this to every walkthrough so you compare bids on the same terms.
What should this project cost?
Enter your project details for a realistic cost range before you call anyone.
Spot repairs commonly run $400–$1,800; full replacement typically $9,000–$18,000 for an average home.
- Regional adjustment
- National average
- Labor share (typical)
- ~$2,948
- Quotes to collect
- 3 written estimates
Educational estimate based on national averages — not a binding quote. Always confirm with written local estimates.
Fixly Project Decision Box
- DIY difficulty
- Professional Recommended
- Estimated time
- Inspection 1–2 hours · repairs 1–3 days
- Cost level
- High
Main tools / materials
- Binoculars for a ground-level look
- Flashlight for attic checks
- Moisture meter
- Roofing cement (temporary patch only)
When to stop and call a pro
- Active leak near lights, fans, or any wiring
- Sagging, bulging, or water-filled ceiling
- Steep, wet, or two-story roof — do not climb it
- Storm or hail damage you plan to claim on insurance
Need professional help?
Free roof assessment first — no phone calls until you ask for them.
Get Local Roofing HelpGet help with your roof now
Stay off the roof. These free tools help you protect the house and reach the right professional fast.
- Emergency repair checklistThe first steps that limit damage before a pro arrives.Open
- Repair or replace your roof?Answer 10 questions about age, leaks, and damage to get a clear next step.Open
- Get local estimatesSend one request and compare written estimates from vetted pros.Open
Free, no signup required. Estimates are educational guidance, not a quote or an inspection.
Get the print-ready PDF of this guide
A clean, ad-free, printable version you can keep on your phone or pin to the workshop wall. Free with a FixlyGuide account.
- Print-optimized layout
- Tools, materials & every step included
- Saved to your account
Frequently asked questions
What does roof flashing do?+
Roof flashing is thin material, usually metal, installed at vulnerable points on your roof like chimneys, vents, and valleys. Its main job is to create a watertight seal, directing water away from these penetrations and off your roof, preventing leaks into your home.
How can I tell if my flashing is damaged after a storm?+
Look for visible bends, creases, lifted edges, or separations where the flashing meets other roof components. Even small gaps or corrosion can indicate damage. It often requires a close-up inspection from a ladder or binoculars, as it might not be obvious from the ground.
Is it safe to inspect my own roof after a storm?+
Only if you have a sturdy ladder, good footing, and are comfortable working at heights. Always have a spotter and avoid inspecting a wet or icy roof. If you're unsure or the roof is steep, it's safer to hire a professional for an inspection.
Can I temporarily fix damaged flashing myself?+
For minor issues like small lifted edges or pinholes, you can often use high-quality roofing cement or sealant as a temporary fix. However, severely bent, torn, or widely separated flashing usually requires professional repair or replacement for a lasting solution.
What happens if I ignore damaged flashing?+
Ignoring damaged flashing can lead to serious consequences, including water leaks into your attic and home, rotting roof decking and structural elements, mold growth, and damaged interior ceilings and walls. These issues can become very costly to repair if left unaddressed.
How much does it cost to repair flashing?+
The cost varies greatly depending on the extent and location of the damage. Minor repairs might cost $100-$350 for a pro, while a full chimney re-flashing could run $1,000-$2,500+. DIY costs are typically just for materials, ranging from $10 to $150.
Does homeowner's insurance cover flashing damage?+
Generally, if the flashing damage is a direct result of a covered peril, like a storm (wind, hail, falling debris), your homeowner's insurance should cover the repair or replacement costs, minus your deductible. Always document the damage with photos and contact your insurer promptly.
What is the best material for roof flashing?+
The 'best' depends on budget and specific application. Galvanized steel is common, but copper and lead are highly durable and long-lasting, often used in higher-end or historical applications. Aluminum is also used but can be prone to bending.
How often should flashing be inspected?+
It's a good practice to have your roof, including all flashing, inspected annually, especially after any severe weather event. Regular visual checks from the ground can also help spot obvious issues before they escalate.

Discussion
Loading comments…