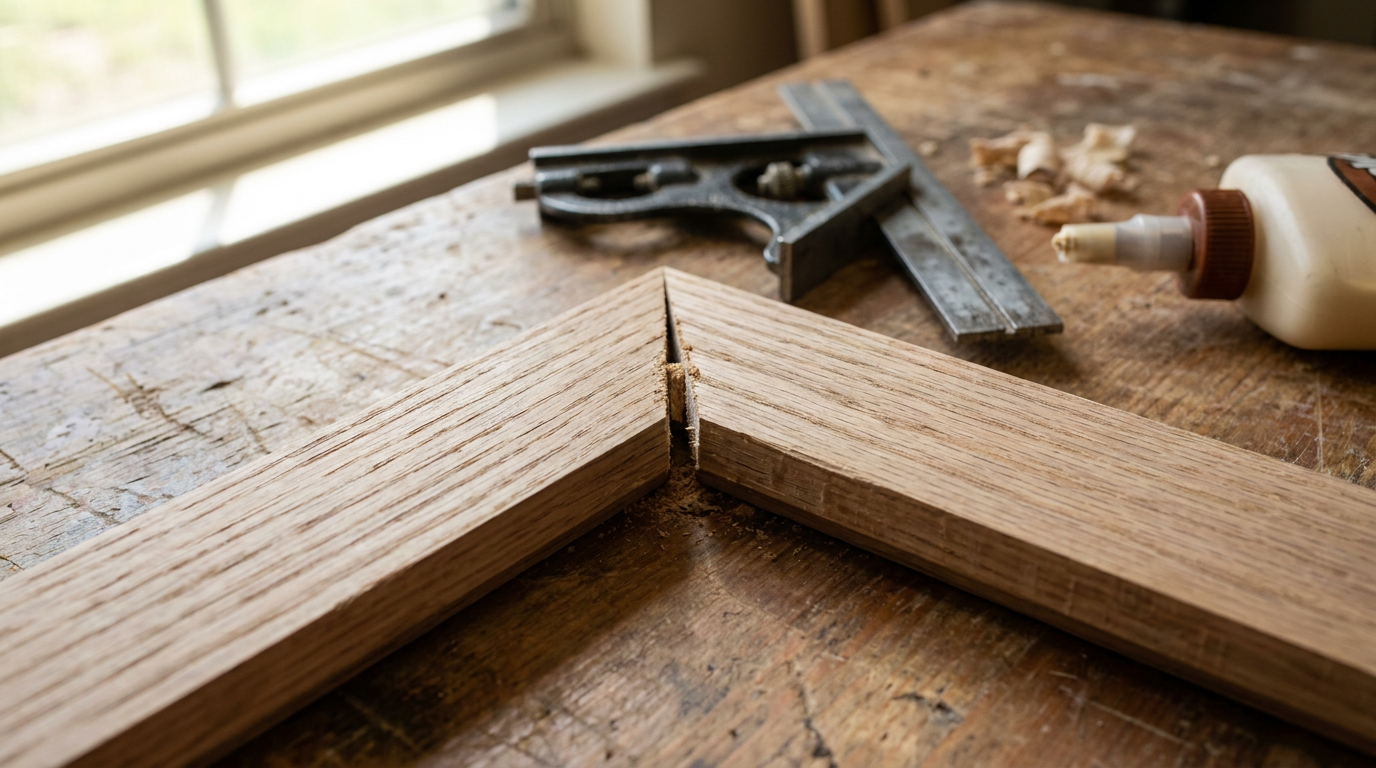
- Internal Wood Tension Relieving: Kiln-dried dimensional lumber carries stress inside the growth rings. Once you slice through those fibers at an angle, that stress dumps out fast and the wood cups, twists, or curves right at the cut.
- Sawdust Trapped in Fence Corners: One speck of hard sawdust between the board and the vertical fence pushes the work outward. What looked like a flat 45-degree slice ends up as a sneaky compound angle.
- Over-Tightening Linear Clamps: If you squeeze opposite sides of a mitered box with regular bar clamps, you crush the heels together and lever the outer tips open.
- Unequal Material Thickness or Width: If Board A is 2-1/2 inches wide and Board B is 2-9/16 inches wide, the geometry just won’t let both the inner corner and outer tip meet flush at the same time.
General remodeling · Renovation planning
| Project category | General remodeling |
|---|---|
| Problem type | Renovation planning |
| Trade required | General contracting |
| Urgency | Planned project |
| Safety risk | Low safety risk |
| DIY suitability | Pro recommended |
| Cost category | Major investment |
| Typical timeline | Design and permitting often 2–4 months before work starts |
| Contractor type | General contractor |
Repair option
Phase the work and fix the building envelope first.
Replacement option
Full renovation with permits, design, and a general contractor.
Common causes
- Space no longer fits how the household lives
- Resale preparation
- Deferred maintenance stacking up
Relevant tools:project cost estimatorcompare quoteshome improvement material prices
Published October 28, 2026Last updated October 28, 2026
The shop list for this build
Hand-picked tools & materials — shop on Amazon, ships fast.
Power tools
· The heavy hitters — buy once, use for decades.- Shop on Amazon80-tooth to 100-tooth full-kerf miter saw blade
Why it's here: minimizes blade deflection
Hand tools & jigs
· Layout, joinery, and the everyday workbench essentials.- Shop on AmazonMachinist combination square
Why it's here: for checking 45° and 90° angles
- Shop on AmazonRatcheting band clamp or spring miter clamps
Why it's here: evenly pulls all 4 corners
- Shop on AmazonLow-angle block plane
Why it's here: for micro-shaving miter faces
- Shop on AmazonClean screwdriver with round steel shank
Why it's here: for burnishing joint edges
- Shop on AmazonFeeler gauges
Why it's here: for measuring precise gap angles
Materials & hardware
· Lumber, fasteners, glue, abrasives — the consumables.- Shop on AmazonPVA wood glue
Why it's here: standard interior wood adhesive
- Shop on AmazonHardwood biscuits or dowels
Why it's here: for joint shear reinforcement
Quick Answer
Miter joints open up at the tips or heels because wood moves across the grain, saw blades can wander during 45-degree angle cuts, or the frame corners aren’t locked square while you’re clamping. If you want to fix an open miter, check your saw with a machinist square, score along the joint seams, shave micro-adjustments with a low-angle block plane or shooting board, and clamp it with corner band clamps or spring miter clamps using PVA glue. Simple in theory. Fussy in practice.
The Problem
You cut what you were sure were four clean 45-degree angles. You lay them on the bench, cinch the clamps down, and there it is — the corner betrays you. Maybe the inside heel’s touching while a 1/16-inch wedge gap sits wide open at the outside tip. Or the outside tip closes up and the inside corner leaves an ugly gap staring back at you.
I’ve seen it on custom picture frames, casing around new interior doors, baseboard returns, and flat-panel cabinet trim. If you just pack wood filler into that seam, the first seasonal humidity change will crack the dried putty and leave a little fracture line right through your stain or paint. Miter joints don’t give you much grace. An error of only 0.2 degrees on each cut stacks up across four corners into nearly a full two-degree gap on the final closure. That’s enough to ruin the look.
How It Works
Wood’s basically a bundle of tiny straws — tracheids and vessel elements — running along the length of the board. Moisture goes in and out through those cellular walls, so wood expands and shrinks a lot across its width and thickness, but almost not at all lengthwise. When you join two boards at a 45-degree angle to make a 90-degree corner, you’re putting end grain against end grain on a diagonal shear plane.
End grain soaks up adhesive like a sponge. It pulls moisture out of standard polyvinyl acetate (PVA) glue before the polymer chains can really bridge the joint. Then you’ve got the tool side of it. A standard 10-inch or 12-inch circular miter saw blade plunges into wood at an angle, and side-loading forces shove against the spinning plate. A thin-kerf blade (typically 3/32-inch thick) can flex 0.015 to 0.030 inches off-axis if you force it down too fast. And if you wrap a regular bar clamp around the outside without balancing the corners, that pressure slides the wet glue faces sideways and opens the tips right back up.
Step-by-Step Fix
1. Calibrate Your Miter Saw's Positive Stops
Unplug the saw and clear out any sawdust packed into the detent teeth under the miter table. Swing the table arm to the 0-degree detent, lock it, and loosen the bevel lock so you can check your vertical 90 degrees with an accurate machinist square set flat against the cast-iron table and the saw plate — not the carbide teeth. Then swing over to the 45-degree detent. Drop an engineer's combination square or a dedicated 45-degree drafting triangle between the blade body and the fence. If you can see light at the top or bottom of the contact edge, loosen the detent plate adjustment screws, tap the plate into dead alignment, and torque the screws back down to 15–18 in-lbs.
- Tools: 6-inch machinist square, Philips or Torx driver, shop vacuum.
- If your saw lacks adjustable detents: You’ll have to override the detent stop and lock the miter arm manually just a hair off the notch.
2. Run the "Four-Cut" Test on Scrap Stock
Don’t jump straight into expensive finish molding or hardwood until you’ve checked the cumulative error. Grab a flat piece of scrap plywood or hardwood that matches the exact width of your project material (like 2-1/2-inch poplar). Cut four identical pieces with 45-degree miters on both ends using a stop block clamped to the fence so the lengths match. Dry-fit all four pieces into a frame on the bench.
- What to look for: If the fourth joint won’t close, measure the gap with feeler gauges. Divide that gap by eight — that’s the eight individual 45-degree cuts — and you’ll know the exact fraction your saw angle is drifting.
3. Stabilize the Cut Rate and Blade Choice
Swap out standard framing blades for an 80-tooth or 100-tooth dedicated crosscut or miter blade with an Alternate Top Bevel (ATB) grind. Thick-plate, full-kerf (1/8-inch) blades are a lot stiffer than thin-kerf blades, so they don’t deflect as much when you’re cutting dense grain. When you fire up the saw, let it hit full 4,000+ RPM before the teeth touch wood. Bring the blade down slowly — I’m talking a full 3 to 4 seconds per cut — and let it come to a dead stop in the lower position before you release the trigger and raise the arm.
- Safety Note: Raising a spinning blade back through an angled cut creates back-cutting friction that’ll chew off miter tips and wreck your crisp outer edge.
4. True-Up Mismatched Angles with a Shooting Board
If the machine cut’s off by a hair, set the power tools aside and grab a hand plane. Build or use a shop-made wooden shooting board with an accurate 45-degree stop fence. Rest a sharp low-angle block plane or No. 62 jack plane on its side against the guide track, with the iron sticking out just enough to take a whisper-thin shaving (about 0.001 to 0.002 inches thick).
- Instruction: Push the workpiece tight against the 45-degree cleat, then move it forward just a little past the plane track. Slide the plane across the end grain in one clean stroke. Take one or two passes, then check the dry fit again.
5. Pre-Seal the Thirsty End Grain
Because miter faces expose porous end grain, dry wood will suck the water right out of wet glue and leave you with a starved, weak bond that cracks under tension. Mix a small batch of PVA wood glue with clean water at a 50/50 ratio, or just brush a thin coat of straight wood glue onto both miter faces with your fingertip. Let it soak into the open grain for 3 to 5 minutes until it turns tacky and a little clear. That “sizes” the end grain so your final glue coat stays up on the surface and bonds the wood fibers.
- Tip: Don’t let that first sizing coat cure hard before assembly, or it’ll act like a barrier instead of a help.
6. Reinforce the Joint to Resist Movement
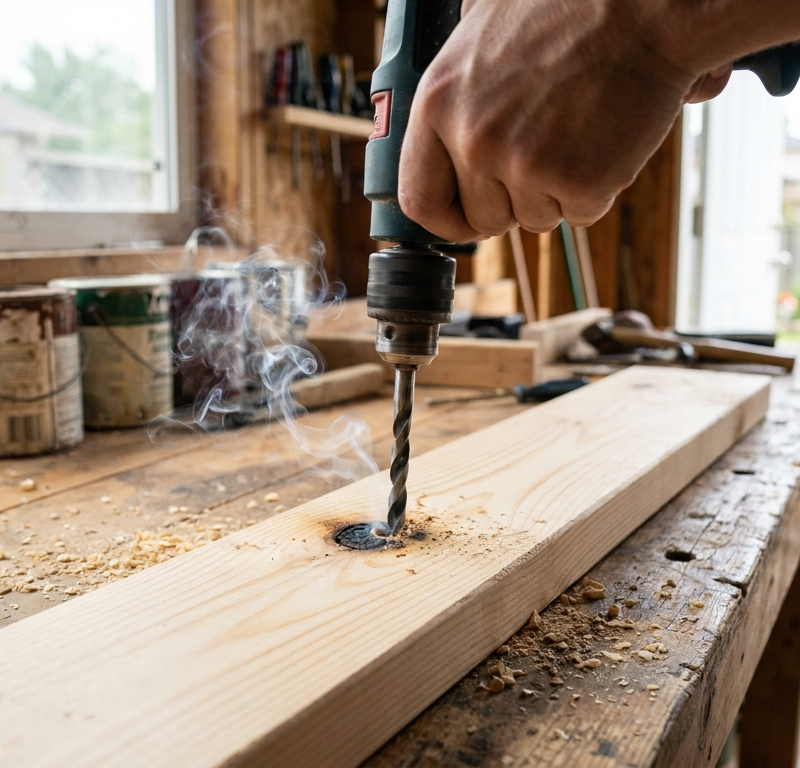
A bare end-grain-to-end-grain miter will fail eventually if humidity swings or vibration get to it. Add some mechanical reinforcement while you’re prepping the stock. Cut a biscuit slot using a #0 or #10 biscuit, drill matching holes for 1/4-inch hardwood dowels, or route a hidden pocket for loose tenons. If you’re building frames, cut a 1/8-inch kerf through the back of the assembled corner on a table saw sled after it dries, then slide in a glued hardwood spline.
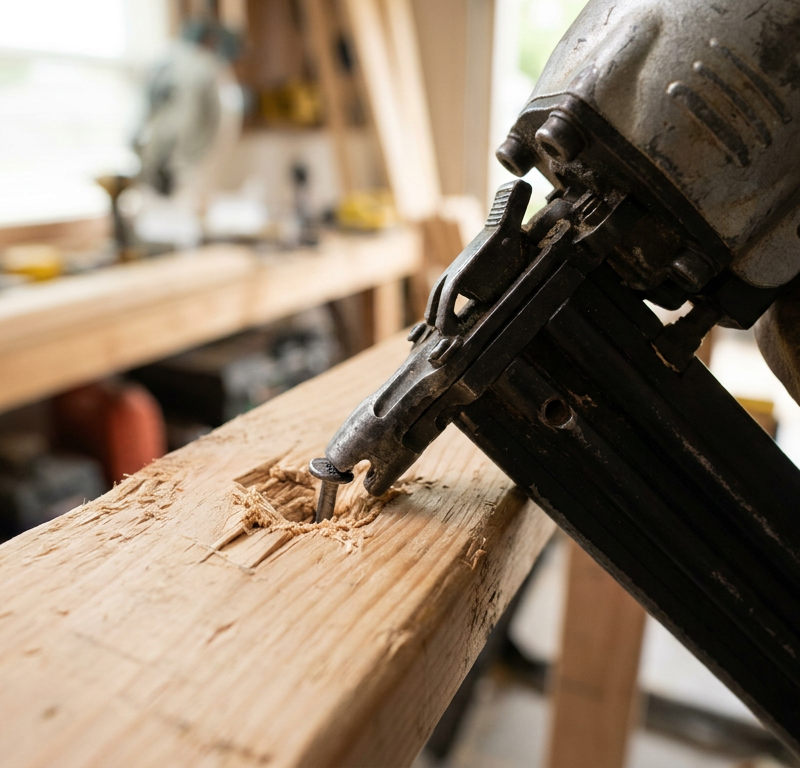
- For thin door casing: Drive 18-gauge 1-1/4-inch brad nails through the outer edges from both directions to lock the heel and toe in place while the glue cures.
7. Choose the Right Clamping Method
Skip flat-jaw bar clamps that push in a single direction; they’ll slide wet 45-degree joints out of line every time. Use a ratcheting nylon band clamp with four corner brackets so you get equal inward pressure at all four corners at once. Or use spring miter clamps with spreader pliers right over the corner apex. The hardened steel points bite into the fibers at the seam and help force both the inner heel and outer tip shut evenly.
- Safety / Surface Warning: Spring clamps leave tiny pin pricks on the outside edges; put them where a little sanding or putty can hide them later.
8. Burnish the Outer Corner Seam
If you tighten the clamps and still see a microscopic gap along the outer corner line — under 1/64 inch — burnish it right then while the glue’s still damp. Grab the smooth round steel shank of a clean screwdriver. Hold it at a 45-degree angle against the sharp outside corner and rub it firmly along the seam three or four times with steady hand pressure.
- How it works: The hardened steel crushes and rolls the tiny fibers of both pieces together across the gap, which closes the hairline seam for good. Wipe off any squeeze-out glue right away with a damp rag.
9. Check Diagonal Squareness Before Cure
Hook a tape measure from the top-left outer corner to the bottom-right outer corner of the assembly. Write that measurement down to the 1/32-inch. Then measure from the top-right corner to the bottom-left corner. If both diagonals match exactly, your frame’s square and the miters are sitting at a true 90-degree relationship. If one diagonal’s 1/8-inch longer than the other, tweak the band clamp tension or apply light diagonal squeeze-clamp pressure across the longer corners to rack the frame square before the glue sets up.
Common Causes
- Blade Deflection During the Cut: Thin-kerf miter saw blades flex under load, especially when you shove them through dense hardwoods like oak or maple too fast. The blade drifts off the stock and you end up with a dish-shaped cut instead of a dead-flat 45-degree plane.
- Internal Wood Tension Relieving: Kiln-dried dimensional lumber carries stress inside the growth rings. Once you slice through those fibers at an angle, that stress dumps out fast and the wood cups, twists, or curves right at the cut.
- Miter Saw Arm Play and Slop: Cheap or worn chop saws usually have loose pivot bearings or slop in the sliding rails. Grab the handle and push a little left or right while pulling down, and the blade can tilt 0.5 to 1.5 degrees off the detent.
- Sawdust Trapped in Fence Corners: One speck of hard sawdust between the board and the vertical fence pushes the work outward. What looked like a flat 45-degree slice ends up as a sneaky compound angle.
- Over-Tightening Linear Clamps: If you squeeze opposite sides of a mitered box with regular bar clamps, you crush the heels together and lever the outer tips open.
- Unequal Material Thickness or Width: If Board A is 2-1/2 inches wide and Board B is 2-9/16 inches wide, the geometry just won’t let both the inner corner and outer tip meet flush at the same time.
Common Mistakes
- Trusting Factory Detents Blindly: Folks pull a saw out of the box and assume the 45-degree notch is dead-on. It usually isn’t. Shipping and rough handling in the truck bed can throw it off, so check it yourself before you cut project stock.
- Dumping Wood Glue Straight on Raw End Grain: If you assemble dry end-grain miters without pre-sizing, the glue disappears into the cellular core in about two minutes. The joint looks fine on day one, but once a door slams or the humidity jumps above 65%, it pops apart.
- Sanding the 45-Degree Faces Freehand: When a miter doesn’t fit, a lot of DIYers reach for an orbital sander or sanding block. That rounds the outer edges and turns a straight diagonal into a subtle curve. No dice. Use a shooting board with a plane instead.
- Ignoring Board Flatness: Trying to cut clean miters on cupped, bowed, or crowned wood is a losing game. If the board rocks on the saw table, the blade cuts an accidental compound bevel across the face and leaves a gap no matter how good the fence alignment is.
- Wiping Wet Glue With a Soaked Sponge: Drenching a fresh miter with water dilutes the glue and drives liquid into the pores. That swells the corner fibers too early, and when they dry days later, they shrink and pull the miter open. Scrape the semi-cured glue off with a chisel after 30 minutes instead.
Cost & Time Breakdown
| Task / Solution | DIY Cost | Pro Cost | Time |
|---|---|---|---|
| Miter Saw Fence & Bevel Calibration | $0 (existing squares) | $75–$125 | 20–30 mins |
| Blade Upgrade (80T–100T Full-Kerf) | $55–$95 | $120–$160 | 10 mins |
| Building a Wooden 45° Shooting Board | $15–$25 (scrap hardwood) | $150–$200 | 1–2 hours |
| Adding Spring Miter Clamps & Pliers | $25–$45 | N/A | 5 mins |
| Corner Spline Reinforcement Routing | $10–$20 (bits & stock) | $100–$180 | 30–45 mins |
| Re-trimming / Re-casing a Room | $60–$150 (lumber) | $350–$650 | 3–6 hours |
Tips & Prevention
- Acclimate lumber before cutting: Stack your trim or hardwood inside the climate-controlled space where it’ll live for at least 72 hours (or up to a week for thick hardwoods). Cutting wood that’s still shedding moisture from the lumberyard pretty much guarantees the joints will warp as the boards dry down to 8–10% equilibrium moisture content.
- Always use a scrap stop block: Don’t eyeball cut lengths using pencil marks on matching frame pieces. Even a 1/64-inch difference in length between opposing sides pulls all four miter joints out of line.
- Cut parts slightly oversized: Leave your pieces 1/16-inch long so you can trim a whisper shaving off the face and dial in the final dry fit without coming up short.
- Keep your fence clean: Sweep the junction between the saw table and the fence with a stiff-bristle bench brush before every single cut. A 0.010-inch wood flake can create noticeable miter gaps.
- Back-bevel field casing: For interior door casing and baseboard corners against drywall, undercut the miters with a slight bevel of 1 to 2 degrees (cut the back of the board slightly shorter than the face). That way the visible front edge makes tight contact even if the drywall corner flares out from joint compound.
When to Call a Professional
Most miter joint problems get solved by tuning the saw, using the right clamp setup, and understanding how end grain drinks glue. But if you’re dealing with high-end architectural millwork — say, running multi-piece, 7-inch crown molding around an out-of-square room where the ceiling-to-wall angles drift between 87 and 94 degrees — a trim carpenter earns his keep. I pulled a water heater in Frisco last month that had exactly this kind of “looks close enough” problem, and the fix only looked simple after the third try. Same story with finish work.
Historic restoration jobs with antique or irreplaceable profiles need specialized shaper setups and scribe-fitting methods that can get expensive in a hurry if you burn through the raw stock learning on the fly. And if the whole addition’s got warped, out-of-plumb studs, an experienced finish carpenter can shim framing and cope joints to hide wall irregularities that plain 45-degree miter cuts will never bridge cleanly.
Should you do this yourself?
Answer five quick questions before you start. Safety outranks savings every time.
Your experience with work like this
How high do you have to work?
Does the job involve any of these?
Will it need a permit?
Specialty tools
Free and instant. Educational guidance only — not a quote, inspection, or professional diagnosis.
What should this project cost?
Enter your project details for a realistic cost range before you call anyone.
Cost depends heavily on which system turns out to be the source.
- Regional adjustment
- National average
- Labor share (typical)
- ~$1,620
- Quotes to collect
- 3 written estimates
Educational estimate based on national averages — not a binding quote. Always confirm with written local estimates.
Recommended for DIYers & woodworkers
Sponsored
The Top 20 Tools for Workshops of Any Budget
No stationary machines or power tools required — plus 3 fundamental tools that can't be bought at any price.
Get the free guide
Ted's Woodworking — The #1 Woodworking Resource
Detailed instructions, dimensioned drawings, materials & cutting lists, and 3D schematics for every skill level.
See the plansSponsored: links above are affiliate links. FixlyGuide may earn a commission on qualifying purchases — at no extra cost to you.
Frequently asked questions
Why can't I just glue two 45-degree pieces together without reinforcement?+
A 45-degree miter exposes end grain, which has minimal structural strength when glued directly to another piece of end grain. Without internal mechanical fasteners—like biscuits, dowels, splines, or brad nails—the joint has very little shear or tensile strength and will fail under light handling or seasonal wood movement.
How do I fix a tiny gap on the tip of an already-glued miter?+
Use the screwdriver burnishing trick: rub the smooth, round steel shank of a clean screwdriver firmly down the outside corner edge at a 45-degree angle. This rolls the outer wood fibers inward toward each other, pinching the seam closed. Wipe away any glue that squeezes out during burnishing.
Why are my door casing miters open even though my saw is set to exactly 45 degrees?+
Drywall corners rarely sit at a true 90-degree angle due to built-up drywall tape and joint compound. If the drywall corner is rounded or flared to 91 or 92 degrees, a standard 45-degree cut leaves an open seam on the front. You need to bevel the back of the trim slightly (back-beveling) or cut the pieces at 45.5 to 46 degrees to match the wall's actual angle.
Does blade thickness really cause miter gaps?+
Yes. Thin-kerf blades have thinner steel cores that flex when pushed down through dense wood grain or when making steep angled cuts. Upgrading to a full-kerf (1/8-inch) blade with 80 to 100 teeth reduces side-flexing, leaving a dead-flat 45-degree cut face that meets squarely.
What is a shooting board and do I need one?+
A shooting board is a simple shop-made wooden jig that holds a workpiece at an exact angle (like 45 or 90 degrees) while a hand plane slides sideways along a guide track. It allows woodworkers to trim ultra-thin shavings off an end-grain miter—just a fraction of a hair thick—to micro-adjust the angle for an airtight fit.
What clamps work best for mitered frame corners?+
Spring miter clamps use sharp, tempered steel prongs applied with specialized spreader pliers. When released across the seam, the prongs bite into both pieces simultaneously, pulling the heel and tip shut with balanced lateral tension. Unlike bar clamps, they do not push the glue-slicked faces out of alignment.
Can I just fill open miter joints with wood putty?+
Wood filler doesn't move with the wood and will crack and fall out after seasonal humidity changes. Instead, mix fine sawdust gathered from cutting the exact same wood species with PVA wood glue to create a matching paste. Force it into the crack, rub it smooth, and sand flush once dried.
Why is my miter joint tight at the inside heel but open at the outer tip?+
The heel is touching first, which means your cut angle is slightly more than 45 degrees, or the frame's diagonal geometry is out of square. Adjust your saw setting a hair under 45 degrees, or check that your opposing frame sides are identical in length. A shooting board can trim the inside heel down to let the tip meet.
Discussion
Loading comments…