The shop list for this build
Hand-picked tools & materials — shop on Amazon, ships fast.
Hand tools & jigs
· Layout, joinery, and the everyday workbench essentials.- Shop on AmazonChisel Honing Guide· 1
Why it's here: The key to the system. A basic side-clamping model is perfect.
- Shop on AmazonSafety Glasses· 1 pair
Why it's here: Always wear eye protection when sharpening.
- Shop on AmazonPermanent Marker· 1
Why it's here: For the 'Sharpie trick' to see where you are grinding.
- Shop on AmazonSmall Ruler· 1
Why it's here: For setting the blade projection in the honing guide.
- Shop on AmazonBench Chisels· 1 set
Why it's here: The tools you intend to sharpen.
Materials & hardware
· Lumber, fasteners, glue, abrasives — the consumables.- Shop on AmazonPlate Glass· 1
Why it's here: Approx 12"x18", 1/4" thick. Must be dead-flat.
- Shop on AmazonWet/Dry Sandpaper· 1-2 sheets each
Why it's here: Assorted grits: 120, 220, 320, 600, 1500, 2000.
- Shop on AmazonSpray Adhesive· 1 can
Why it's here: To fix the sandpaper to the glass.
- Shop on AmazonMineral Spirits· 1 small can
Why it's here: Used as a lubricant for the sandpaper. Water with a drop of soap also works.
''' It’s a story every woodworker knows. You unbox a brand-new, gleaming bench chisel. The factory edge looks sharp, maybe it even bites into your fingernail. You line it up to pare the shoulder of a tenon on a piece of red oak. You give it a confident push. Instead of a whisper-thin shaving, you get a nasty, splintery tear-out. After three or four more cuts, the chisel is crushing the wood fibers, and you need excessive force to make it move. What gives? Has your brand-new tool gone dull already?
Yes, it has. The frustrating truth is that virtually no woodworking hand tools arrive "ready to use" from the factory. Understanding this is the first major step toward high-quality craftsmanship. This article will explain exactly why that factory edge fails and provides a detailed, step-by-step plan for a woodworking tool sharpening system that costs less than a decent pizza, requires no electricity, and produces an edge that will utterly transform your work. The key is consistency, and the heart of that consistency is a simple chisel honing guide.
Quick Answer
Chisels dull quickly because factory-ground edges are not truly sharp; they are rough, microscopically serrated, and weak. These microscopic teeth break off almost immediately. The permanent fix is to re-establish the geometry of the edge by flattening the back of the chisel and then honing a precise, multi-stage bevel using a simple $12 chisel honing guide and progressively finer grits of sandpaper on a dead-flat surface like plate glass. This creates a durable, mirror-polished edge that slices wood fibers cleanly rather than tearing them. This method, often called the "scary sharp" system, is far superior to a bench grinder alone and more foolproof for beginners than freehand water stone sharpening.
Why This Matters
A sharp chisel isn’t a luxury; it is the absolute foundation of safe and accurate woodworking. A dull chisel is a dangerous tool. It requires immense physical force to push through material. This exertion makes your movements jerky and unpredictable, leading to slips that can cause serious injury. A sharp chisel, by contrast, feels like an extension of your hand. It advances with firm, controllable pressure, allowing you to remove shavings as thin as 0.001 inches.
Beyond safety, sharpness directly translates to quality.
- Dull Chisel: Crushes and tears wood fibers. This leaves a bruised, rough surface that looks terrible and creates weak glue joints. When chopping a mortise, a dull chisel compacts the waste wood instead of ejecting it, making the process slow and laborious.
- Sharp Chisel: Shears wood fibers cleanly. The resulting surface has a satisfying sheen and is perfectly flat. It allows for precision joinery that fits together with satisfying perfection. You can pare end grain without blowing out the back of the cut. The difference isn't subtle—it's the difference between fighting the wood and working with it.
How It Works: The Science of the Edge
A cutting edge is simply the intersection of two planes. The sharper the edge, the smaller the radius of that intersection. A truly sharp edge has a radius measured in microns.
The edge on a factory chisel is created quickly on a coarse grinding wheel. Under a microscope, this edge isn’t a clean intersection at all. It’s a jagged, serrated row of microscopic teeth. While these teeth feel "sharp" to the touch and might even cut paper, they are incredibly fragile. The moment they encounter the unyielding fibers of hard maple or oak, these tiny teeth fold over or snap off. This is why your chisel feels dull after just a few cuts—the "edge" you were using has literally disintegrated.
The solution is to reshape those two planes—the back of the chisel and the bevel—so they are perfectly flat, smooth, and meet at a precise, durable angle.
- The Back: The first 1-2 inches of the chisel's back must be lapped perfectly flat. Without a flat back, you can never have a truly sharp edge, no matter how much you polish the bevel.
- The Bevel: This is the angled face. We create this in two stages: a Primary Bevel (usually 25°) and a Micro-Bevel (usually 30°).
- The Primary Bevel is the main workhorse angle. We grind this first using coarse abrasives. Its only job is to remove metal and establish the basic geometry.
- The Micro-Bevel is a tiny, secondary bevel right at the cutting edge, honed at an angle 3-5 degrees steeper than the primary. Because it's so small, it can be polished to a mirror finish in seconds. This is the part that does the actual cutting. When the tool gets dull, you only need to re-hone this tiny micro-bevel, which takes less than a minute.
This two-bevel system is the key to both durability and efficient re-sharpening. The "scary sharp" sandpaper method allows us to achieve this geometry with incredible precision for a minimal investment.
Step-by-Step: The $12 Sharpening System
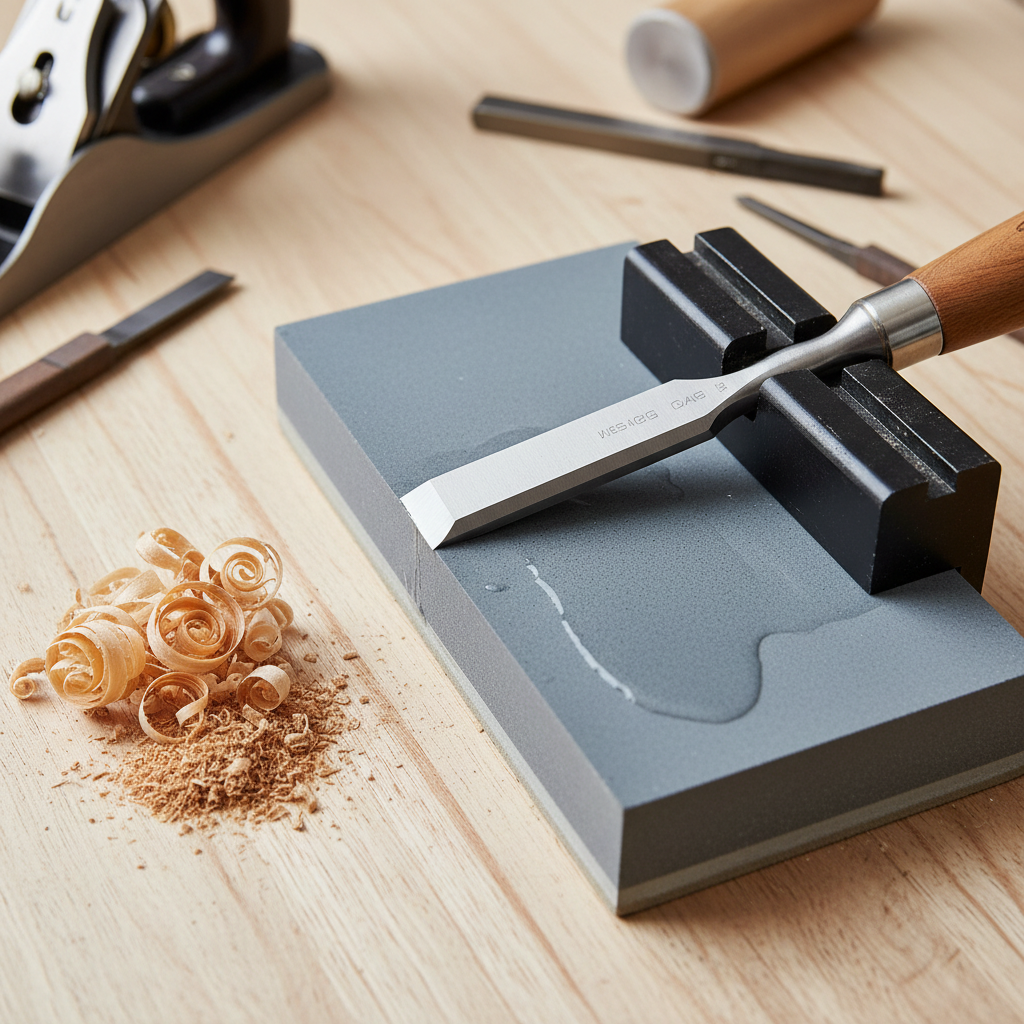
The heart of this system is a basic side-clamping honing guide, which costs about $12-$15. The rest are common supplies. The goal is to create a mirror-polished micro-bevel that can shave the hairs off your arm.
Step 1: Gather Your Tools & Materials
- Honing Guide: A non-negotiable. Get a basic side-clamping guide. This is the ~$12 key.
- Flat Reference Surface: A 1/4" thick piece of plate glass, about 12" x 18". Ask a local glass shop for an offcut; it should cost $5-$10. A dead-flat granite tile or the cast-iron wing of a table saw also works.
- Adhesive: A can of spray adhesive (removable type is a plus).
- Wet/Dry Sandpaper: You need a range of grits. Get sheets of 120, 220, 320, 600, 1500, and 2000 grit. This will cost about $15.
- Permanent Marker: For the "Sharpie trick."
- Lubricant: A small bottle of mineral spirits or even just water with a drop of dish soap.
- Safety Glasses: Essential. You will be creating tiny metal slivers.
Step 2: Prepare the Sharpening Surface Clean your glass plate thoroughly. Spray a light, even coat of adhesive onto the back of the 120-grit sandpaper sheet and press it firmly onto the glass, smoothing out any bubbles. This immobilizes the abrasive, ensuring a flat, consistent surface.
Step 3: Flatten the Chisel Back (Lapping) This is the most important and most-skipped step. Apply a few drops of mineral spirits to the sandpaper. Place the back of the chisel flat on the paper. With firm downward pressure, rub the chisel back and forth across the front 1-2 inches of the blade. After a few strokes, lift it and look. You'll see shiny spots where the metal is high and dull spots where it's low. Your goal is to keep grinding until the entire first 1.5 inches of the back has a uniform, satin-sheen finish with no low spots. This might take 10 minutes on a new chisel, but you only do it once in the tool's life.
Step 4: Set the Honing Guide for the Primary Bevel (25°) Insert the chisel into the guide, bevel-side down. You need to set the blade projection to achieve a 25° angle. For most common honing guides, projecting the blade tip 1-1/2 inches (38mm) from the front of the guide will produce a 25° angle. Use a small ruler to measure this precisely. Lock the chisel down tightly.
Step 5: Grind the Primary Bevel Color the entire bevel of the chisel with the permanent marker. Now, place the honing guide's wheel on your 120-grit sandpaper and roll it back and forth. Let the abrasive do the work; use only light, even pressure. After a few passes, check the bevel. The disappearing marker tells you where you're removing metal. Keep going until all the marker is gone and you have a new, flat 25° bevel from heel to toe. You should feel a small "burr" (a wire edge) form on the back of the chisel. That's how you know you're done with this grit.
Step 6: Refine the Bevel Move up through your grits. Remove the 120-grit paper and apply the 220-grit. Repeat the honing process. You don't need to remove much metal, just enough to replace the 120-grit scratches with finer 220-grit scratches. This should take less than a minute. Repeat this process for the 320-grit and 600-grit paper.
Step 7: Set the Honing Guide for the Micro-Bevel (30°) Once your primary bevel is refined to 600-grit, it's time for the micro-bevel. Without removing the chisel, simply retract the blade into the guide by about 1/8th of an inch. For our example, change the projection from 1-1/2" to 1-3/8". This slightly increases the angle to about 30°. There's no need to be exact, as long as it's steeper than the primary bevel.
Step 8: Hone the Micro-Bevel Switch to your 1500-grit sandpaper. Color the very tip of the edge with the marker again. Now, take just 5-10 strokes on the 1500-grit paper. Because the angle is steeper, you will only be polishing a tiny sliver of metal right at the edge. You should see the marker disappear from a very thin line at the chisel's tip. Follow this with 5-10 strokes on the 2000-grit paper.
Step 9: Remove the Burr (Stropping) The final step. Take the chisel out of the guide. To remove the fine burr created by the final honing, gently pull the back of the chisel (the face you flattened in Step 3) across a piece of wood or your final high-grit sandpaper, keeping it dead flat. Just one or two light passes. You can also use a leather strop charged with honing compound for an even finer polish.
Step 10: Test the Edge The chisel should now have a mirror polish on its micro-bevel. It should easily and cleanly shave a sliver from the end grain of a piece of scrap pine. It should also be able to painlessly shave hair from your arm. This is the new standard of sharpness.
Common Mistakes to Avoid
- Not Flattening the Back: A rounded or dished back makes a true edge physically impossible. Do not skip this.
- Using a Cheap, Wobbly Honing Guide: The ~$12 guide is good. The $5 stamped-metal ones can wobble, ruining your angle.
- Rocking the Guide: Keep the guide's wheel flat on the surface. Don't lift or press down unevenly.
- Skipping Grits: Going from 120 to 1500 grit directly will take forever and produce a poor edge. Each grit's job is to remove the scratches of the one before it.
- Pressing Too Hard: This can slightly distort the sandpaper and round the edge. Let the abrasive work.
Cost & Time Breakdown
This system is about investing a little time up front to save countless hours of frustration later. Re-sharpening a previously-honed chisel takes only a few minutes.
| Item / Action | Cost (Estimate) | Time (Initial Setup) | Time (Re-Sharpening) |
|---|---|---|---|
| Honing Guide | $12 - $25 | - | - |
| Plate Glass (1/4") | $5 - $15 | 2 min (cleaning) | - |
| Sandpaper Assortment | $15 | 5 min (attaching) | <1 min (changing paper) |
| Lapping the Back | - | 10-15 min | (one-time only) |
| Honing & Polishing | - | 10 min | 2-3 min |
| TOTAL | $32 - $55 | ~30 min / chisel | ~5 min / chisel |
Tips & Pro Notes
- The Sharpie is Your Best Friend: Always re-color the bevel when changing grits or angles. It provides instant, clear feedback on where you are removing material.
- Bevel Angles: A 25°/30° bevel combination is a great all-around choice. For dedicated chopping mortises in hardwood, a tougher 30°/35° combination might be better. For delicate paring in softwood, a finer 20°/25° combo will yield a sharper but less durable edge.
- Re-sharpening is Quick: Once this initial process is done, re-sharpening is a breeze. When the chisel feels dull, simply put it back in the guide at the 30° micro-bevel setting and take 5-10 strokes on your 1500 and 2000-grit papers. You're done in 60 seconds.
- What About Water Stones? Water stone sharpening is a fantastic skill and the traditional method for many woodworkers. They cut faster than sandpaper but have a higher entry cost (~$80 for a decent combination stone) and require regular flattening, as they wear into a dish with use. The sandpaper method on glass is perfectly flat every time, making it more foolproof for getting started.
When to Upgrade Your Tools
Frankly, this sandpaper system is so effective that you may never need to upgrade. It will produce an edge just as sharp as one from a $1,000 system. You should only consider upgrading when the time it takes to sharpen chisels becomes a significant drag on your workflow.
- Upgrade to Water Stones: If you find you're re-grinding primary bevels often (e.g., after hitting a nail or dropping a chisel) and the slow removal rate of sandpaper is costing you time. A 1000/6000 grit combination water stone is the classic next step.
- Upgrade to Diamond Plates: These are steel plates coated in diamond grit. They cut fast, stay flat forever, but are a significant investment ($150-$300 for a set). They are a high-performance alternative to water stones.
- Upgrade to a Powered System: For a professional shop, a slow-speed wet grinder like a Tormek can make sense when you need to sharpen dozens of tools a week. For a hobbyist, it is complete overkill.
Ultimately, mastering this simple, affordable system will do more for your woodworking than buying any new machine. Sharp tools are the true secret to quality work. '''
Recommended for DIYers & woodworkers
Sponsored
The Top 20 Tools for Workshops of Any Budget
No stationary machines or power tools required — plus 3 fundamental tools that can't be bought at any price.
Get the free guide
Ted's Woodworking — The #1 Woodworking Resource
Detailed instructions, dimensioned drawings, materials & cutting lists, and 3D schematics for every skill level.
See the plansSponsored: links above are affiliate links. FixlyGuide may earn a commission on qualifying purchases — at no extra cost to you.
Frequently asked questions
Can I sharpen a chisel without a honing guide?+
Yes, it is possible to sharpen freehand, but it's a difficult skill that takes years of practice to master. For a beginner or intermediate woodworker, a $12 honing guide is a cheap tool that guarantees a perfect, consistent angle every single time, removing all guesswork.
How often should I sharpen my chisels?+
Sharpen as soon as you feel a change in performance. If you have to push significantly harder, or if the chisel is crushing rather than slicing, it's time. A good practice is a quick touch-up on the micro-bevel after an hour of use. Full re-sharpening is only needed when the edge gets significantly damaged.
Is the sandpaper method better than water stone sharpening?+
It's not inherently better, but it has significant advantages for beginners. It's far cheaper to start, and the glass plate guarantees a flat surface, which is critical. Water stones cut faster but require their own maintenance (flattening) and have a higher initial cost. The edge quality from a properly executed sandpaper sharpening is equal to that from a water stone.
What's the difference between a primary bevel and a micro-bevel?+
The primary bevel (e.g., 25 degrees) is the main angle ground onto the tool. Its job is to remove metal and establish the basic shape. The micro-bevel (e.g., 30 degrees) is a very narrow, secondary bevel honed at a slightly steeper angle right at the cutting tip. This is the actual cutting edge, and because it's so small, it can be quickly polished to a mirror finish. This makes re-sharpening extremely fast.


Discussion
Loading comments…