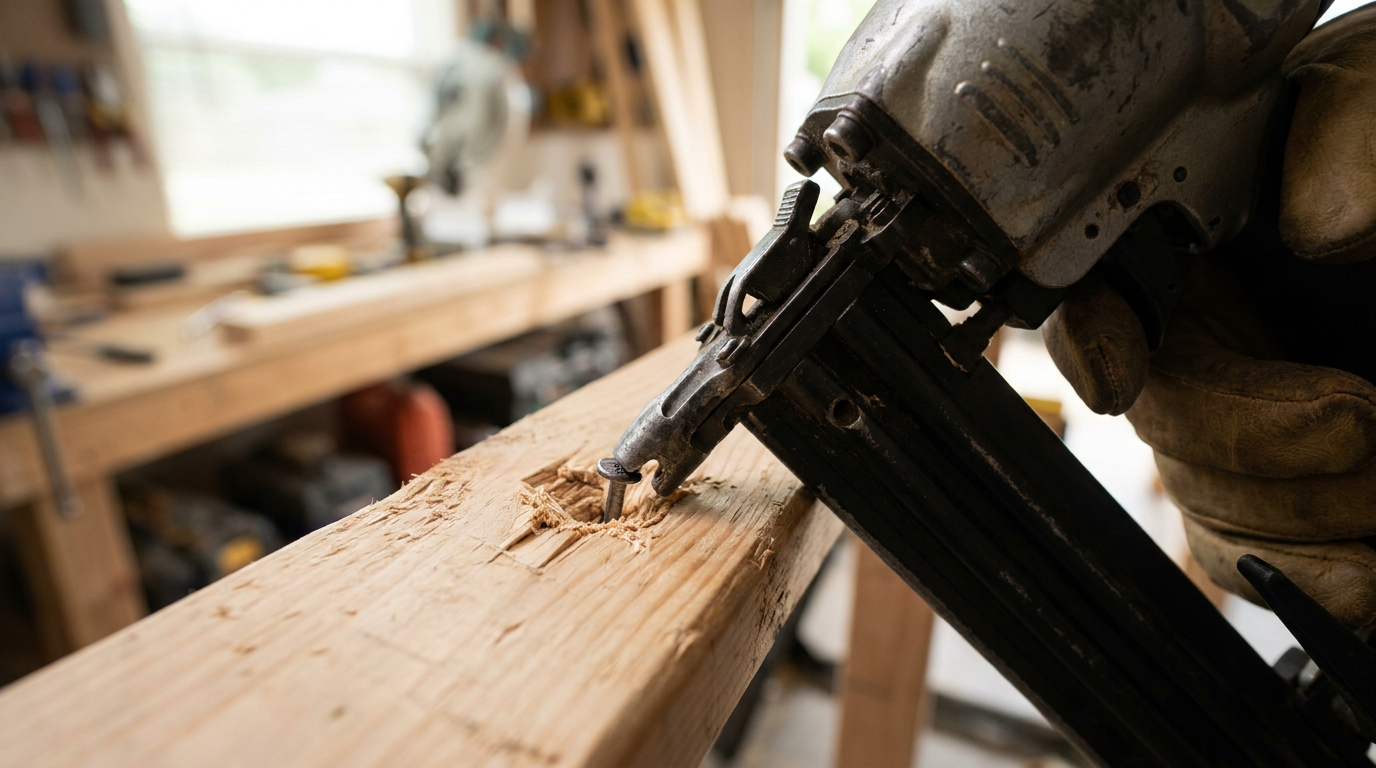
- Air on Deck: Your compressor holds air in the tank at a pretty high pressure, usually 120-150 PSI (pounds per square inch). That air moves through the hose and into your nail gun.
- Trigger Action: When you pull the trigger and press the safety nose into the wood, a valve inside the gun opens up.
- Power Stroke: That blast of compressed air slams into a cylinder and drives a piston downward. Hooked to that piston is a long, hardened steel rod called the "driver blade."
- Nail Impact: The driver blade hits the head of the top nail in the magazine strip and sends it out of the gun and into your workpiece fast.
General remodeling · Renovation planning
| Project category | General remodeling |
|---|---|
| Problem type | Renovation planning |
| Trade required | General contracting |
| Urgency | Planned project |
| Safety risk | Low safety risk |
| DIY suitability | Pro recommended |
| Cost category | Major investment |
| Typical timeline | Design and permitting often 2–4 months before work starts |
| Contractor type | General contractor |
Repair option
Phase the work and fix the building envelope first.
Replacement option
Full renovation with permits, design, and a general contractor.
Common causes
- Space no longer fits how the household lives
- Resale preparation
- Deferred maintenance stacking up
Relevant tools:project cost estimatorcompare quoteshome improvement material prices
Published October 15, 2026Last updated October 15, 2026
The shop list for this build
Hand-picked tools & materials — shop on Amazon, ships fast.
Hand tools & jigs
· Layout, joinery, and the everyday workbench essentials.- Shop on AmazonSafety glasses
- Shop on AmazonAir compressor with hose
- Shop on AmazonStiff brush or rag
- Shop on AmazonWrench set (for rebuild)
Materials & hardware
· Lumber, fasteners, glue, abrasives — the consumables.- Shop on AmazonScrap wood (same as project)
- Shop on AmazonNailer rebuild kit (optional)
Finishes & coatings
· Stains, dyes, top-coats, and prep products.- Shop on AmazonPneumatic tool oil
Quick Answer
If your framing nail gun is sinking nails too deep, nine times out of ten the compressor pressure’s set too high. Start by backing it down in 5-PSI increments. If that doesn’t clear it up, tweak the depth-of-drive setting right on the nailer — usually a little wheel or trigger near the nose. A worn driver blade or bumper inside the tool can do it too, and that’ll make the gun fire all over the place.
The Problem
You’re rolling right along on a project—framing a wall, knocking out a workbench, maybe hanging a fence—and everything feels smooth. The nail gun’s firing clean, you’re making good time, and then you stop to eyeball the work. Well, that’s no good. Every nail’s punched way below the surface, leaving a deep, ugly crater around the head. That’s not just a looks problem; once a nail’s overdriven, it’s lost a chunk of its holding power because it’s crushing the wood fibers instead of fastening them.
When a nail goes too deep, the connection gets weaker. In structural work like framing, that can mess with the integrity of the build. In furniture or finish work, it turns into a pile of extra labor, because now you’ve got to fill every hole with putty and sand it out. I pulled a framing nailer in Frisco last month that was doing exactly this on SPF, and the guy had already burned through half a box of filler before he called me. Frustrating? You bet. And it usually means something in your setup’s off. You’re not looking at a tiny dimple here — the nail head’s buried, sometimes as much as 1/4-inch below the surface. That’s the problem we need to fix.
How It Works
A pneumatic nail gun is a dead-simple, powerful tool. It runs on compressed air. Here’s what happens in the split second after you pull the trigger:
- Air on Deck: Your compressor holds air in the tank at a pretty high pressure, usually 120-150 PSI (pounds per square inch). That air moves through the hose and into your nail gun.
- Trigger Action: When you pull the trigger and press the safety nose into the wood, a valve inside the gun opens up.
- Power Stroke: That blast of compressed air slams into a cylinder and drives a piston downward. Hooked to that piston is a long, hardened steel rod called the "driver blade."
- Nail Impact: The driver blade hits the head of the top nail in the magazine strip and sends it out of the gun and into your workpiece fast.
- Return & Reload: Once you let off the trigger, the air pressure vents, and a spring or a little bit of return air pushes the piston and driver blade back where they started. Then the next nail gets pushed into the firing chamber and you’re set for the next shot.
How deep that nail lands comes down to how much force that driver blade delivers. And that force depends on two main things: the air pressure (PSI) from the compressor and the mechanical depth adjustment on the tool itself. Getting the nail depth just right—so the head’s flush with the wood surface or just a hair below it (a "proud" nail)—is what gives you a strong, clean joint.
Step-by-Step Fix
Let’s work through it from the easiest fix to the one that takes a little more elbow grease. Start with scrap wood every time—the same type and thickness as the material you’re actually using. Don’t test on your finished piece. That’s just asking for grief.
Safety First: Always disconnect the air hose from your nail gun before you make any adjustments or do any maintenance. Wear safety glasses; these tools can fire unexpectedly or kick out debris.
1. Check the Air Pressure First
- The compressor’s the engine. If it’s running too hot, the tool’s gonna hit too hard. Most framing nailers like to run between 90 and 120 PSI. A lot of folks just crank it wide open, and that’s a common mistake.
- Action: Check the regulated pressure gauge on your compressor — the one feeding the hose, not the tank gauge. If it’s over 110 PSI, bring it down to around 100 PSI. Hook the gun back up and shoot a test nail into your scrap. Still too deep? Drop it another 5 PSI and test again. Keep nudging it until you hit the sweet spot.
2. Adjust the Nailer's Depth Control
- Almost every modern nail gun’s got a depth adjustment built in. That changes how far the driver blade can travel, so you can fine-tune the setting. It’s your main depth-control tool.
- Action: Find the adjustment on your gun. Usually it’s a little thumb wheel or a detent-style slider right behind the safety nose. You’ll usually see markings for deeper or shallower. Turn the wheel or slide it toward the "shallow" side. Fire a test nail. This thing’s touchy, so a tiny change can make a big difference.
3. Check Your Firing Technique
- How you handle the gun matters. If you’re pushing down too hard, you can help the nail overdrive, especially in soft woods like pine.
- Action: Let the tool do the work. Hold it firm against the workpiece so the nose is fully depressed, but don’t lean your whole weight into it. Fire a test nail with a steady press. Then compare it to one where you really shoved hard. If there’s a big difference, ease up a bit and call it a day.
4. Inspect the Safety Nose (Contact Trip)
- The spring-loaded safety piece on the nose is what retracts so the gun can fire. If that part’s packed with dirt, sawdust, or resin, it can stick partway in. That shortens the distance between the driver blade’s starting point and the wood, which can drive the nail deeper than it should.
- Action: Disconnect the air. Clean the whole nose assembly well with a stiff brush and a rag. If it’s sticky, a quick shot of tool cleaner or the right lubricant (check your manual for approved types) can help. Push the tip in and out by hand a few times and make sure it moves freely and snaps back like it should.
5. Check for a Worn Bumper
- Inside the nailer, there’s a hard rubber or plastic piece called a "bumper." Its job is to stop the piston/driver assembly at the bottom of its stroke. After thousands of shots, that bumper gets beat up and compressed. Once it thins out, it lets the driver blade travel a little farther, and that’s how you wind up with overdriven nails.
- Action: This is a more advanced repair. If the easy fixes didn’t solve it, this is a likely suspect. You’ll need a rebuild kit for your exact model. Follow the manual, crack it open, and replace the old bumper — usually pretty chewed up by then — with a new one. It’s a 15-minute job that can make an old gun run like new.
6. Inspect the Driver Blade
- While you’ve got the gun open looking at the bumper, check the driver blade too. It ought to be straight, and the tip should be flat and square. It’s rare, sure, but a bent driver can cause trouble, and a worn or "mushroomed" tip won’t transfer energy like it should — sometimes it’ll even hang up.
- Action: If the blade’s bent or the tip’s damaged, replace it. Same deal as the bumper: it’s model-specific and usually comes in a rebuild kit.
Common Causes
Here’s your quick-hit list of why nails sink too deep. Nine times out of ten, it’s one of these six culprits.
- Compressor Pressure Too High: Most common by a mile. Anything over 120 PSI is usually too much for framing.
- Incorrect Depth-of-Drive Setting: The tool’s own adjustment is cranked for maximum depth when you need less.
- Soft Wood, Hard Setting: You’re driving into a soft material (like SPF—spruce, pine, fir) using the settings you had for a dense hardwood (like oak or LVL beams).
- Inconsistent User Pressure: Leaning on the gun too hard drives the nail deeper than you meant to.
- Worn Internal Bumper: A classic wear item. The bumper compresses over time, which lets the driver travel too far.
- Dirty or Sticking Nose Piece: Sawdust and grime can keep the safety contact from extending fully.
Common Mistakes
Don’t fall into these traps while you’re trying to fix it. They can send you in circles or make the problem worse.
- "Feathering" the Trigger: Some folks try to control depth by pulling the trigger fast or halfway. That’s inconsistent, unsafe, and it doesn’t work. It can cause misfires or jammed nails.
- Using the Wrong Lubricant: Don’t just blast WD-40 into your nailer’s air intake. It can ruin O-rings and seals. Use oil made for pneumatic tools — just a few drops in the air fitting each day is plenty.
- Ignoring the Scrap Wood Test: Tweaking your settings and then firing straight into your nice project board is a fast way to get mad. Always test on matching scrap.
- Mixing Nail Brands: Most nailers will run nails from different brands, but sometimes a small difference in collation angle or nail head size throws off feeding and driving consistency. If it’s acting up, try going back to the brand your tool maker recommends.
- Mismatching the Gun and the Job: Using a heavy framing nailer on delicate trim is overkill and it’ll blast right through the material. Use the right tool: a brad nailer or finish nailer for trim, a framing nailer for structure.
Cost & Time Breakdown
Here’s what you’re looking at for time and money to diagnose and fix an over-driving nail gun. For a DIYer, it’s usually cheap.
| Task | DIY Cost | Pro Cost | Time |
|---|---|---|---|
| Adjusting Air Pressure & Depth Setting | $0 | N/A | 2–5 minutes |
| Cleaning the Tool Nose | $0–$10 (for tool cleaner) | $50–$75 (shop minimum) | 5 minutes |
| Replacing Internal Bumper & O-rings | $20–$40 (for a rebuild kit) | $100–$150 | 20–30 minutes |
| Replacing a Worn Driver Blade | $15–$30 (part only) | $120–$160 | 20–30 minutes |
Tips & Prevention
Keep the gun running smooth, and you won’t fight this problem nearly as much.
- Start Low: When you’re setting up on a new job or different wood, start with compressor pressure low (around 90 PSI) and the depth set on the shallow side. Shoot a test nail, then bump pressure and depth up little by little until it’s right.
- Daily Oiling: Before you start for the day, put 2-3 drops of pneumatic tool oil straight into the air inlet fitting on the nailer before you hook up the hose. That keeps the internals happy.
- Blow It Out: At the end of the day, use the compressor blower nozzle to clear sawdust and debris out of the magazine and nose assembly.
- Check Your Bumper Annually: If you use your framing nailer a lot, get in the habit of checking the bumper once a year. If it looks compressed, cracked, or chewed up, replace it. A rebuild kit is cheap insurance against lost time.
- Listen to Your Tool: If the nailer starts sounding different or feels weaker, that’s often the first hint an internal seal (an O-ring) is going south. A rebuild kit’ll take care of it and save you from bigger problems.
When to Call a Professional
On a framing nailer, there aren’t many issues a solid DIYer can’t handle with a rebuild kit and the manual. These tools are built to be serviced in the field. Still, you should stop and bring it to a tool repair shop if you run into these signs:
- A Cracked Main Body or Handle: If the housing’s cracked from a drop, don’t keep using it. Pressurized air could make it fail hard.
- Constant Air Leak You Can't Locate: If you hear air hissing all the time from inside the tool — not the hose connection — and a basic O-ring swap doesn’t fix it, a pro’s got the diagrams and experience to track down the internal leak.
- The Gun Fires When Not Depressed: If the gun ever fires a nail without the safety nose being pressed to a surface, stop using it right then. That’s a major safety failure and it needs a pro to diagnose it.
Related Articles
Keep troubleshooting with these hand-picked guides from FixlyGuide:
- The Hard Water Secret: Why Your Shower Head Sprays Sideways (and the 10-Minute Fix) — Hard water mineral buildup can reduce shower head pressure and cause erratic spray patterns. Learn how to restore flow and direction in und…
- Wood Glue Not Drying? 7 Reasons Your Project Is Still Tacky (And How to Fix It) — Wondering why your wood glue is still wet hours or even days later? It's usually due to temperature, wood type, or clamp pressure—here are…
- Toilet Keeps Running? 7 Causes and the Fix for Each — A running toilet is a common annoyance that wastes water and money. Most causes are easy to fix in under 30 minutes with a few basic parts…
- The Giant Drywall Hole: 3 Hidden Mistakes That Make Fixing It Worse — Don’t just spackle over that huge drywall hole; learn the right way to repair it and avoid common mistakes that lead to an even bigger head…
- The Mystery of the Loose Screws: Why Your Wood Furniture Keeps Coming Apart — Discover why screws in your wood furniture repeatedly loosen, causing instability, and learn the simple, lasting fix that avoids constant r…
- The Weird Reason Your Drain's Gurgling (and It's Not a Clog) — That unsettling gurgling sound from your drain isn't always a full-blown clog; it's often a sign of negative air pressure building in your…
Should you do this yourself?
Answer five quick questions before you start. Safety outranks savings every time.
Your experience with work like this
How high do you have to work?
Does the job involve any of these?
Will it need a permit?
Specialty tools
Free and instant. Educational guidance only — not a quote, inspection, or professional diagnosis.
What should this project cost?
Enter your project details for a realistic cost range before you call anyone.
Cost depends heavily on which system turns out to be the source.
- Regional adjustment
- National average
- Labor share (typical)
- ~$1,620
- Quotes to collect
- 3 written estimates
Educational estimate based on national averages — not a binding quote. Always confirm with written local estimates.
Recommended for DIYers & woodworkers
Sponsored
The Top 20 Tools for Workshops of Any Budget
No stationary machines or power tools required — plus 3 fundamental tools that can't be bought at any price.
Get the free guide
Ted's Woodworking — The #1 Woodworking Resource
Detailed instructions, dimensioned drawings, materials & cutting lists, and 3D schematics for every skill level.
See the plansSponsored: links above are affiliate links. FixlyGuide may earn a commission on qualifying purchases — at no extra cost to you.
Frequently asked questions
Why does my nail gun shoot two nails at once?+
This is often called a 'double fire' and is usually caused by a worn-out bumper or a weak feeder spring in the magazine. When the bumper is worn, the driver blade can recoil too far, allowing a second nail to slip into the chamber. Check your tool's bumper and the spring that pushes the nail strip forward.
Can I use a framing nailer for decking?+
You can, but it's not always the best choice. Framing nails are typically thicker and less corrosion-resistant than proper deck screws. If you do use a nailer, you must use hot-dip galvanized or stainless steel ring-shank nails. Screws generally provide better long-term holding power against the expansion and contraction of deck boards.
What's the difference between a framing nailer and a finish nailer?+
A framing nailer is a heavy-duty tool that drives large-gauge nails (8d to 16d) for structural work like building walls and roof sheathing. A finish nailer is a lighter tool that shoots smaller, thinner-gauge nails (15ga or 16ga) for attaching trim, baseboards, and crown molding, where the smaller nail hole is easier to hide.
How do I know what pressure to set my air compressor to?+
Always check the manual for your specific nail gun model. Most framing nailers operate between 90 and 120 PSI. As a rule of thumb, start at 100 PSI and use the depth adjustment on the tool for fine-tuning. Only increase the PSI if the tool consistently fails to drive the nail flush in dense material.
My nail gun is leaking air from the trigger. What's wrong?+
An air leak from the trigger area almost always points to a failed O-ring inside the trigger valve assembly. This is a common wear item. You can fix this by purchasing a rebuild kit for your nailer model and following the instructions to replace the O-rings in the trigger.
What does 'ring shank' mean on a nail?+
A ring-shank nail has a series of small, sharp rings along its shank. These rings act like barbs, dramatically increasing the nail's withdrawal resistance. They are excellent for use in subflooring, decking, and sheathing where holding power is critical.
Is it better to have the nail head flush or slightly sunken?+
For framing, the ideal depth is perfectly flush with the wood surface. This provides the maximum holding power. For sheathing or subflooring that will be covered, a slightly countersunk nail (about 1/16-inch) is acceptable as it prevents the nail head from interfering with subsequent layers.
Why do my nails keep jamming in the gun?+
Jams can be caused by several things: using the wrong size or collation angle of nails, low air pressure that fails to drive the nail completely, a dirty magazine or nose assembly, or a worn-out driver blade. Start by confirming you have the correct nails and cleaning the tool thoroughly.
Discussion
Loading comments…