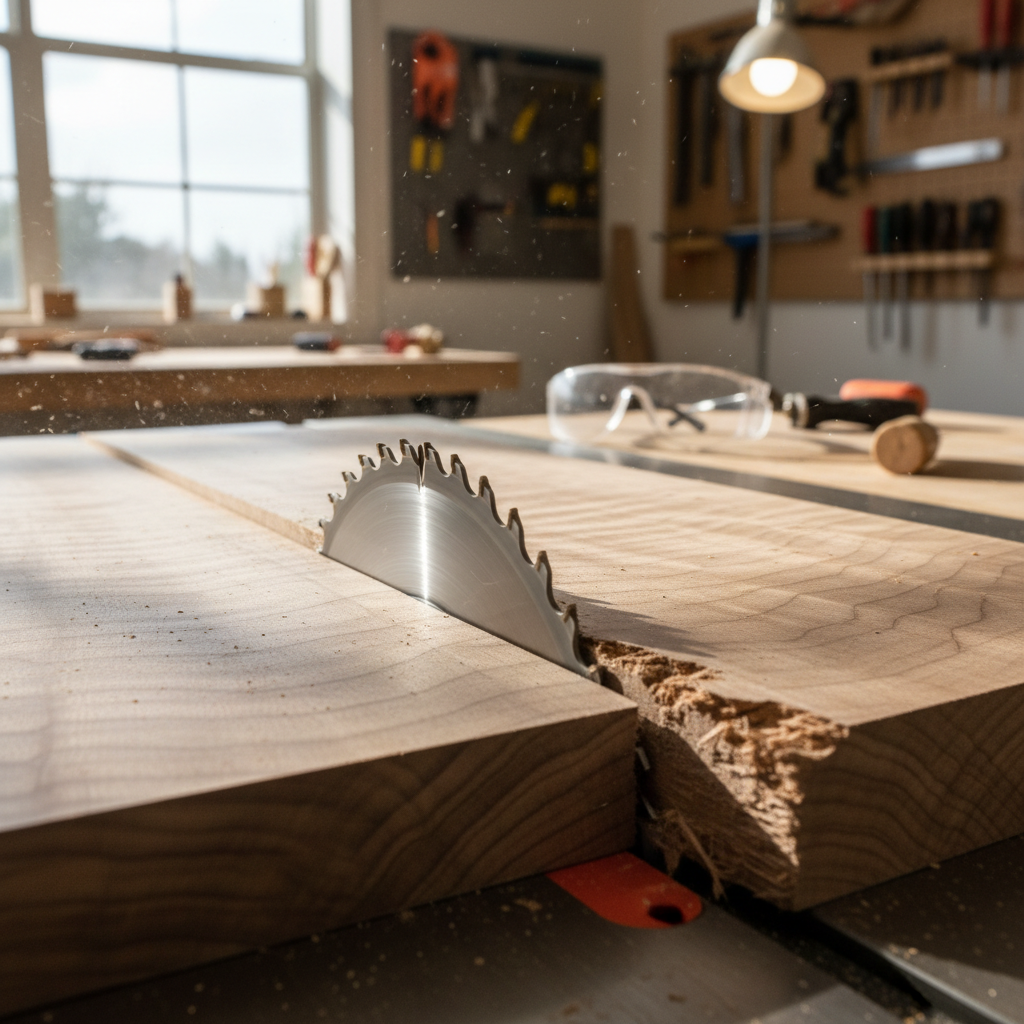
- Dull Blades or Bits: Biggest offender, plain and simple. A dull edge pulls and tears wood fibers instead of slicing clean.
- Cutting Against the Grain: Especially with routing or planing, going the wrong way lifts and splinters the fibers.
- Lack of Support: When a blade exits the wood and there's nothing behind it, those fibers blow out.
- Too Fast Feed Rate: Push too hard, and the cutting edge doesn't get enough time to work.
- Incorrect Blade/Bit Type: A ripping blade for cross-cutting, or the wrong router bit, can make tear-out worse.
General remodeling · Renovation planning
| Project category | General remodeling |
|---|---|
| Problem type | Renovation planning |
| Trade required | General contracting |
| Urgency | Planned project |
| Safety risk | Low safety risk |
| DIY suitability | Pro recommended |
| Cost category | Major investment |
| Typical timeline | Design and permitting often 2–4 months before work starts |
| Contractor type | General contractor |
Repair option
Phase the work and fix the building envelope first.
Replacement option
Full renovation with permits, design, and a general contractor.
Common causes
- Space no longer fits how the household lives
- Resale preparation
- Deferred maintenance stacking up
Relevant tools:project cost estimatorcompare quoteshome improvement material prices
Published September 5, 2026Last updated September 5, 2026
The shop list for this build
Hand-picked tools & materials — shop on Amazon, ships fast.
Power tools
· The heavy hitters — buy once, use for decades.- Shop on AmazonSharp Saw Blades
Why it's here: Match tooth count to cut type (e.g., 60-80T for cross-cut)
- Shop on AmazonSharp Router Bits
Why it's here: Carbide-tipped for longevity
- Shop on AmazonZero-Clearance Insert
Why it's here: For table saw, custom-made or purchased
- Shop on AmazonPush Stick/Block
Why it's here: Essential for table saw safety
Hand tools & jigs
· Layout, joinery, and the everyday workbench essentials.- Shop on AmazonUtility Knife
Why it's here: For scoring cut lines
Materials & hardware
· Lumber, fasteners, glue, abrasives — the consumables.- Shop on AmazonSacrificial Backer Board· scrap plywood/MDF
- Shop on AmazonPainter's Tape
Why it's here: Blue or green low-tack tape
- Shop on AmazonBlade/Bit Cleaner
Why it's here: Removes pitch and resin
Quick Answer
Grain tear-out — that nasty, splintered edge that ruins a perfectly good piece of lumber — happens when your tool's blade or bit rips the wood fibers instead of slicing 'em cleanly. It's usually a sign of a dull edge, cutting against the grain, or not giving the wood enough support. Good news is, it's totally preventable. You just need a few simple tricks I've picked up over the decades to keep those cuts crisp and clean.
The Problem
Alright, let's talk about tear-out. You're humming along, making what you think is a nice, straight cut on your project piece, then you flip it over and bam! — a jagged, splintered mess along the edge. Or maybe you're routing a decorative profile, and chunks of wood start tearing away. It's infuriating, right? You've spent money on good lumber, put in the time, and now your masterpiece looks like it's been gnawed on by a beaver.
I've seen homeowners — and yeah, even some pros — scrap whole panels because of it. It's not just ugly, either. It weakens the joint, makes finishing a headache, and generally screams "amateur hour." I remember one job in Roswell where I was cutting high-end cherry for a built-in cabinet set. I got cocky, fed it too fast, and tore out a big visible edge. Had to recut the whole piece. Cost me a day and a sheet of expensive lumber. I don't make that mistake twice.
This stuff'll eat at you if you let it. Fix the problem now, and your work gets cleaner fast.
How It Works
Wood isn't metal or plastic. It's a bundle of fibers, like millions of tiny straws glued together. When you cut it, you're trying to sever those fibers. A sharp blade, moving the right direction, slices through them cleanly. Think sharp scissors on paper — nice and crisp.
But if the blade's dull, or you're pushing against the natural direction of the fibers, or there's nothing backing them up as the blade exits, those fibers don't cut. They tear. They lift, splinter, and break away, leaving that ragged edge you hate.
It's worse in some woods than others. Softwoods like pine and fir crush easier. Exotic stuff with wild, interlocking grain can fight you every step of the way. Routing makes it even more obvious, because the bit's spinning at thousands of RPMs. If it's dull, or you're feeding too fast, those cutters stop shaving and start grabbing. No dice.
Same story with a saw blade. The teeth enter and exit the material, and on the exit side, unsupported fibers will just blow out. Once you understand that fibrous structure, you can usually spot the cause before you make the cut. That saves a lot of swear words.
Step-by-Step Fix
Here's how I handle tear-out, whether I'm on a job site or in my own shop. There's no magic wand here. It's a combo of little fixes, and you'll often use a few of 'em on the same piece.
-
Sharpen Your Edges — The first and often most overlooked step. You wouldn't shave with a dull razor, would ya? Same deal with wood. Dull blades and bits are the biggest cause of tear-out. Saw blade, router bit, hand plane iron — if the edge ain't sharp, you're asking for ugly cuts. I send my saw blades out for sharpening when they start feeling sluggish or I see even a hint of tear-out, usually after about 40 hours of use on hardwoods or 80 hours on softwoods. For router bits, if it's struggling or leaving burn marks, that thing's toast. Don't get cheap here; it'll save you a pile of headaches and wasted material.
-
Mind the Grain Direction — Always cut with the flow. This is huge, especially with routing or planing. Look at the grain. When you're running a router, feed the wood so the bit's cutting downhill along the grain. Go uphill, and it'll lift those fibers right up and tear 'em. With a hand plane, same idea — go with the grain. If the grain changes direction, and it often does on wider boards, you may have to flip the board or change your cutting direction. Takes a little eyeballing, sure, but it pays off.
-
Use a Sacrificial Backer Board — Support your exit points. This is my go-to for cross-cutting plywood, veneered panels, or anything delicate on the table saw or miter saw. Clamp a scrap piece of plywood or MDF behind your workpiece so the cut goes through both. As the blade exits your good material, those delicate bottom fibers have something to push against instead of thin air. That cuts tear-out way down on the underside. For router work, you can do the same thing by clamping a scrap right where the bit exits.
-
Score Your Cut Line — A little knife work goes a long way. Before a cut with a circular saw or router, especially across the grain on veneered plywood or delicate hardwoods, use a sharp utility knife or marking knife to score a deep line along the cut path. Press hard enough to sever the top fibers. That gives your saw or router a clean break line to follow instead of letting the wood splinter past the cut. An old cabinetmaker showed me that trick years ago, and I've leaned on it plenty since.
-
Use a Zero-Clearance Insert — Tighten up your saw's throat. On your table saw, the gap around the blade in the throat plate is a prime place for fibers to tear out and little pieces to fall through. A zero-clearance insert is a custom throat plate with a slot just wide enough for your blade. It supports the underside of the workpiece right up to the blade teeth, and that helps a lot on the bottom edge. You can buy 'em or make 'em yourself out of plywood or MDF. Cheap fix. Big payoff.
-
Slow and Steady Feed Rate — Don't rush the cut. It's tempting to shove the wood through quick, but that's a recipe for tear-out. A slower, steady feed rate lets the cutting edge do its job, slicing fibers instead of ripping them. With a router, it also helps keep burn marks away. Find that sweet spot where the tool cuts clean without bogging down. Too fast, and you'll know it. Too slow, and you'll smell it.
-
Climb Cutting (Router Only) — A delicate, controlled approach. This one's advanced, and you need to treat it with respect. A regular router cut is called a conventional cut. A climb cut is when you feed the router with the rotation of the bit for a very shallow first pass. It can cut tear-out way down on nasty grain, but it's dangerous because the bit wants to grab the wood and run. Only do this for the first, shallowest pass (like 1/32" deep) on a router table, and always keep a super firm grip and control. If you're not confident, skip it and use the other methods.
-
Masking Tape Method — Simple, but effective for fine cuts. For really fine cuts, especially on thin veneers, use painter's tape. Stick a strip right over the cut line and press it down firm. The tape acts like a temporary sacrificial layer, holding those delicate top fibers in place while the blade passes through. It works better than you'd think for reducing chipping and tear-out on delicate surfaces. Just peel it off slow and at a shallow angle after the cut.
-
Make Multiple Shallow Passes — Don't hog it all at once. When you're routing a deep dado or a wide rabbet, or even cutting thick stock, don't try to remove all the material in one shot. Make several shallow passes instead. That puts less stress on the bit, keeps it cooler, and cuts the tear-out risk way down. For a typical 3/4" dado, I'd usually make two passes: the first around 1/2" deep, then the final pass to full depth. Slower, sure. Cleaner, too.
-
Use the Right Blade/Bit for the Job — Match your tool to your task. Different saw blades are built for different cuts. A high tooth count (like 60-80 teeth for a 10" blade) ATB (Alternate Top Bevel) blade is great for cross-cutting and keeping tear-out low on plywood or fine hardwoods. A low tooth count (24-40 teeth) flat-top grind (FTG) blade is better for ripping solid wood, where tear-out isn't as much of a problem. For routing, use sharp, carbide-tipped bits. There's no one-size-fits-all blade or bit, so match the tool to the material and the cut you're making.
Common Causes
- Dull Blades or Bits: Biggest offender, plain and simple. A dull edge pulls and tears wood fibers instead of slicing clean.
- Cutting Against the Grain: Especially with routing or planing, going the wrong way lifts and splinters the fibers.
- Lack of Support: When a blade exits the wood and there's nothing behind it, those fibers blow out.
- Too Fast Feed Rate: Push too hard, and the cutting edge doesn't get enough time to work.
- Incorrect Blade/Bit Type: A ripping blade for cross-cutting, or the wrong router bit, can make tear-out worse.
- Loose Machine Parts: Wobbly fences, loose arbors, or too much runout in a router can cause vibration and ugly cuts.
Common Mistakes
- Ignoring the Sound: If your saw or router sounds like it's straining or shrieking, something's off — usually a dull edge or too much load. Don't ignore that.
- Assuming New Blades are Always Sharp: Even brand-new blades can have little flaws or just not be as sharp as they should be. Check 'em.
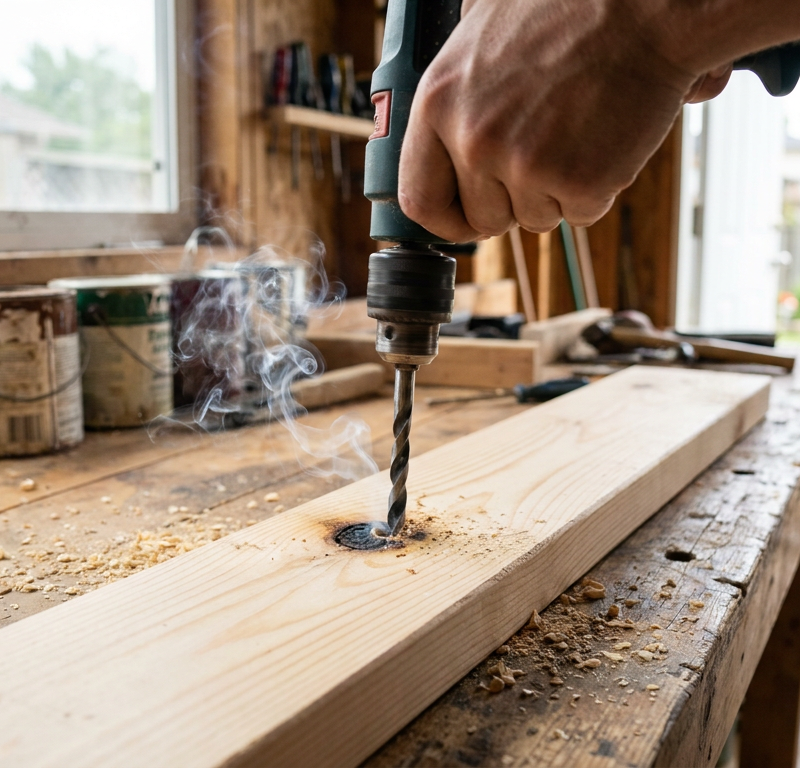
- Pushing Through Burn Marks: Burn marks mean friction, usually from a dull blade or a feed rate that's off. Push through it, and tear-out gets worse.
- Not Testing on Scrap: Never make a critical cut on your project piece without trying it first on a scrap of the same material. Dial it in first.
- One-Size-Fits-All Tooling: Thinking one saw blade or router bit will handle every job is rookie thinking. Different cuts need different tools.
- Forgetting Safety: Don't get so wrapped up in tear-out that you skip eye and ear protection or get sloppy with your hands. Ugly cuts are bad. Injuries are worse.
Cost & Time Breakdown
When you're fighting tear-out, it's good to know what you're getting into, cost and time-wise.
| Task | DIY Cost | Pro Cost | Time |
|---|---|---|---|
| New saw blade (good quality) | $40–$100 | N/A | 5 min to swap |
| New router bit (carbide) | $20–$50 | N/A | 2 min to swap |
| Custom zero-clearance insert | $5–$15 (materials) | N/A | 30–60 min to make |
| Professional blade sharpening | $10–$20 per blade | Included in service | 2–5 days turn-around |
| Sacrificial backer board | $0–$5 (scrap) | N/A | 1 min to set up |
| Masking tape | $3–$10 per roll | N/A | 1 min to apply |
Tips & Prevention
- Keep a dedicated cross-cut blade: Buy a good 60-80 tooth ATB blade for your table saw. It'll make clean cross-cuts a whole lot easier.
- Clean your blades: Saw blades and router bits collect pitch and resin. Use a dedicated blade cleaner — simple oven cleaner works in a pinch, or grab a proper cleaning solution — so they keep cutting freely. Gunk makes 'em act dull.
- Store blades properly: Don't just toss 'em in a drawer. Keep blades and bits protected so you don't ding those cutting edges.
- Listen to your wood: Wood'll tell you if you're pushing too hard or cutting the wrong way. Feel the resistance, listen for burning, and watch the chips. Fine dust means you're rubbing, not cutting.
- Check your fences: Make sure your table saw fence or router fence is dead parallel and square. Even a little misalignment can add friction, burning, and tear-out.
- Upgrade your tools: Technique matters most, but an old underpowered tool can struggle. A stronger saw or router holds RPMs better under load, and that gives you cleaner cuts.
When to Call a Professional
Look, some jobs are just too big, too fussy, or too risky for a typical DIYer, especially when the cut has to be dead-on. If you're working with expensive, rare, or hard-to-replace lumber, and you're not confident you can keep tear-out under control, I'd hire a professional woodworker or cabinetmaker for those critical cuts. They've got industrial-grade equipment, specialized blades, and years of experience with tricky grain. And if you're building a structural piece where the integrity of the cut matters for safety, or the project has to be perfect for a high-value finish, a pro's your best bet.
I've pulled a water heater in Frisco last month that had exactly this kind of "looks small, turns into a mess" problem — once the bad cut starts, it snowballs. Same thing here. Don't be afraid to hand off the cuts you're not sure about. It's a lot cheaper than ruining hundreds of dollars of material.
Related Articles
Keep troubleshooting with these hand-picked guides from FixlyGuide:
- The Hidden Culprit Behind Your Fuzzy Table Saw Cuts (It's Not Just the Blade!) — Fuzzy table saw cuts and tearout are frustrating, but often the problem isn't just your blade; hidden factors like feed rate, blade height,…
- The Mystery of Your Stripped Cabinet Hinge: One Simple Fix — Don't let a stripped screw hole ruin your kitchen cabinets. I'll show you how to fix that loose hinge fast, often with just a few household…
- That Annoying Sawhorse Wobble: The Simple Fix Your Shop Needs — Don't let a wobbly sawhorse ruin your cuts or—worse—cause an accident. I'll walk you through the real reasons your sawhorses are unstable a…
- Why Your Freestanding Shelf Wobbles Like a Drunk Sailor (and the 5-Minute Fix) — Don't let a shaky shelf ruin your organization or your peace of mind. I'll show you how to stabilize that wobbly unit in minutes, no matter…
- The 4-Step Drywall Patch Secret That Makes Large Holes Vanish — Discover how to flawlessly repair a large hole in drywall using a simple, effective method that makes the damage disappear without a trace.
- That White Crust On Your Faucet? It's A Big Problem — That chalky, white buildup on your fixtures isn't just ugly—it's limescale from hard water, and it's actively clogging, corroding, and ruin…
Your seasonal maintenance checklist
The small jobs that prevent the expensive repairs. Tick them off — progress saves on this device.
Free, no signup. Skip anything that requires roof access or working near live electrical.
What should this project cost?
Enter your project details for a realistic cost range before you call anyone.
Cost depends heavily on which system turns out to be the source.
- Regional adjustment
- National average
- Labor share (typical)
- ~$1,620
- Quotes to collect
- 3 written estimates
Educational estimate based on national averages — not a binding quote. Always confirm with written local estimates.
Stay ahead of the next repair
Turn this guide into a schedule you will actually follow.
- Is this a safe DIY job?Check permits, tools, and risk before you start the steps below.Open
- Estimate this projectGet a cost range for your scope and ZIP before you call anyone.Open
Free, no signup required. Estimates are educational guidance, not a quote or an inspection.
Get the print-ready PDF of this guide
A clean, ad-free, printable version you can keep on your phone or pin to the workshop wall. Free with a FixlyGuide account.
- Print-optimized layout
- Tools, materials & every step included
- Saved to your account
Recommended for DIYers & woodworkers
Sponsored
The Top 20 Tools for Workshops of Any Budget
No stationary machines or power tools required — plus 3 fundamental tools that can't be bought at any price.
Get the free guide
Ted's Woodworking — The #1 Woodworking Resource
Detailed instructions, dimensioned drawings, materials & cutting lists, and 3D schematics for every skill level.
See the plansSponsored: links above are affiliate links. FixlyGuide may earn a commission on qualifying purchases — at no extra cost to you.
Frequently asked questions
What is grain tear-out in woodworking?+
Grain tear-out is when wood fibers splinter or rip away from the intended cut line instead of being cleanly severed. It leaves a ragged, uneven edge that's difficult to finish and can weaken the wood.
Why does tear-out happen?+
It commonly occurs due to dull tools, cutting against the grain, lack of support for the wood fibers at the cut's exit point, or pushing the material through the tool too quickly. Certain woods with wild grain patterns are also more prone to it.
How can I prevent tear-out when cross-cutting plywood?+
For cross-cutting plywood, use a sharp, high-tooth-count cross-cut blade, employ a sacrificial backer board behind your workpiece, or apply painter's tape along the cut line. A zero-clearance insert on your table saw also works wonders.
Does blade sharpness really make a big difference?+
Absolutely. A dull blade is the number one cause of tear-out. A sharp blade slices through fibers cleanly, while a dull one tears and rips them, leaving a messy edge. Keep your blades and bits razor-sharp.
What's a sacrificial backer board and how do I use it?+
A sacrificial backer board is a scrap piece of wood (like plywood or MDF) clamped firmly behind your workpiece during a cut. It supports the wood fibers as the blade exits, preventing them from blowing out and creating tear-out.
Is climb cutting safe for preventing tear-out with a router?+
Climb cutting with a router can reduce tear-out but is inherently more dangerous than conventional routing. It should only be attempted for a very shallow first pass with extreme caution and firm control, typically on a router table. If you're not experienced, avoid it.
Can I fix tear-out after it happens?+
Once tear-out occurs, it's tough to truly 'fix' it. You might be able to sand it out on smaller pieces, but often the best solution is to cut off the damaged section or, if it's severe, replace the entire piece of wood.
What kind of saw blade is best for avoiding tear-out?+
For general woodworking and especially for cross-cutting solid wood or plywood, an ATB (Alternate Top Bevel) saw blade with a high tooth count (e.g., 60-80 teeth for a 10-inch blade) is excellent for minimizing tear-out.
Should I feed wood faster or slower to prevent tear-out?+
A slower, consistent feed rate is almost always better for preventing tear-out. It allows the tool's cutting edge to properly sever the wood fibers instead of ripping them, leading to a cleaner cut and less stress on your tools.
How does grain direction affect tear-out?+
Cutting against the grain causes tool edges to lift and splinter wood fibers. Always try to cut or plane with the grain, where the tool's edge is pushing the fibers down, to achieve the cleanest results, especially with router bits and hand planes.
Discussion
Loading comments…