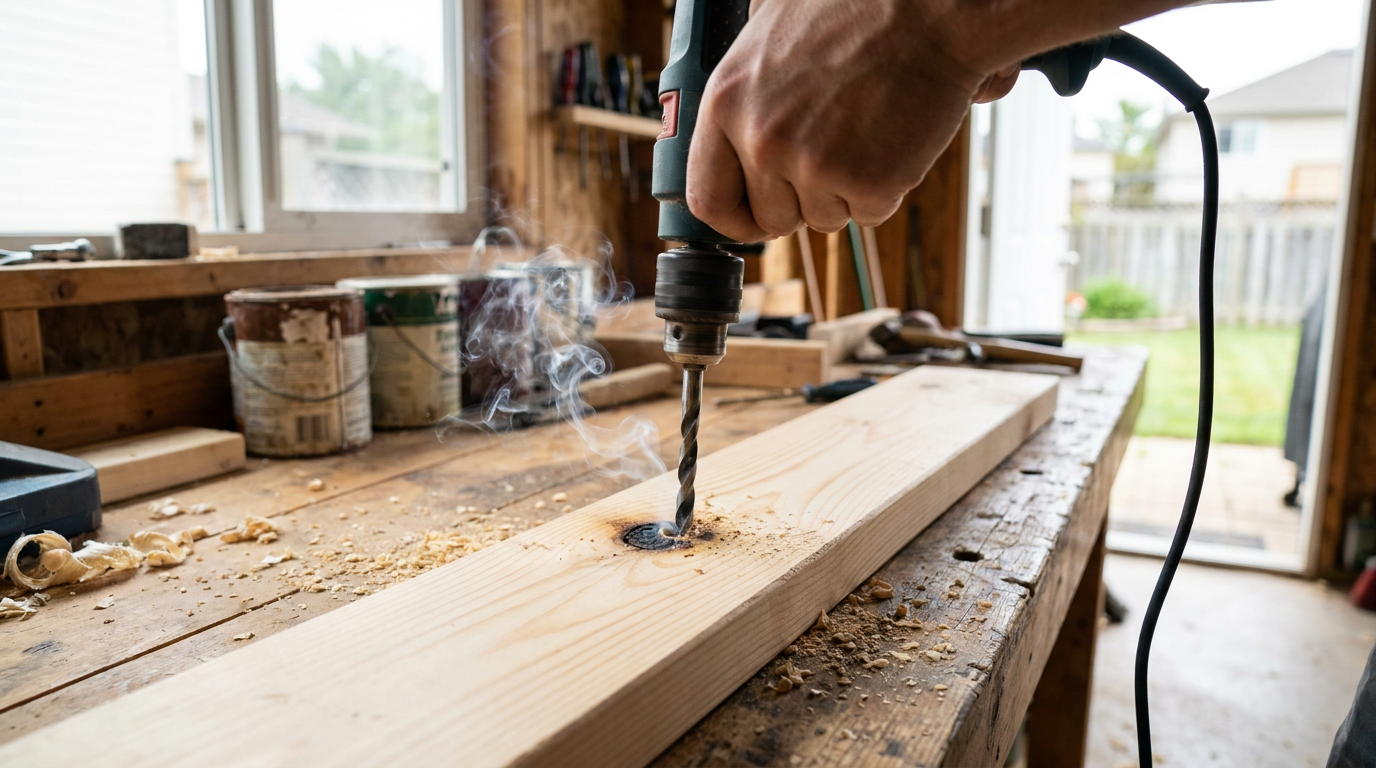
- Dull Bit: This is the big one. A sharp bit cuts; a dull bit burns.
- Wrong Speed: Running the drill too fast, especially with large bits, makes a ton of friction.
- Pitch/Resin Buildup: Sap from pine and similar woods can cook onto the bit and turn into a sticky, heat-making mess.
- Not Clearing Chips: Clogged flutes trap sawdust and keep the bit from cutting like it should.
- Wrong Bit Type: Using a metal-drilling bit in wood, or using a twist bit when a brad-point or Forstner bit is the better pick.
General remodeling · Renovation planning
| Project category | General remodeling |
|---|---|
| Problem type | Renovation planning |
| Trade required | General contracting |
| Urgency | Planned project |
| Safety risk | Low safety risk |
| DIY suitability | Pro recommended |
| Cost category | Major investment |
| Typical timeline | Design and permitting often 2–4 months before work starts |
| Contractor type | General contractor |
Repair option
Phase the work and fix the building envelope first.
Replacement option
Full renovation with permits, design, and a general contractor.
Common causes
- Space no longer fits how the household lives
- Resale preparation
- Deferred maintenance stacking up
Relevant tools:project cost estimatorcompare quoteshome improvement material prices
Published October 6, 2026Last updated October 6, 2026
The shop list for this build
Hand-picked tools & materials — shop on Amazon, ships fast.
Power tools
· The heavy hitters — buy once, use for decades.- Shop on AmazonSharp Drill Bits
Why it's here: Brad-point bits are best for wood
- Shop on AmazonVariable Speed Drill
Hand tools & jigs
· Layout, joinery, and the everyday workbench essentials.- Shop on AmazonBrass Brush
Why it's here: For cleaning resin off bits
- Shop on AmazonSafety Glasses
Materials & hardware
· Lumber, fasteners, glue, abrasives — the consumables.- Shop on AmazonMineral Spirits
Why it's here: For cleaning pitch and sap
Quick Answer
If your drill bit’s smoking, that’s your cue to stop. Plain and simple. You’ve got too much friction and too much heat, and the usual suspects are a dull bit, the wrong bit for the material, or the drill running way too fast. Shut it down, let the bit cool, then look for dull edges, wood sap buildup, or a speed setting that’s just flat-out wrong. Push too hard and you’ll make it worse. Same with not clearing chips out of the hole. A sharp, clean bit spinning at the right speed is what keeps things from turning into a little smoke show.
The Problem
You’re halfway through a project—maybe you’re putting together a bookshelf or hanging a shelf—and then you catch that smell. Burnt wood. Sharp, nasty, impossible to ignore. You look down and there’s smoke curling up out of the hole you’re drilling. The wood around it’s getting dark, maybe black, and the bit can even start to look faintly red if you’ve really cooked it. That’s not just a bad odor. It means something’s off with your technique or your tool, and the job’s heading south fast. A smoking drill bit means you’re building heat, and heat will scar the wood fibers, leave ugly burn marks that won’t take stain right, and can ruin the temper in the steel so the bit’s basically toast.
How It Works
Drilling a hole isn’t about muscling through it. A sharp bit is really a tiny spinning chisel. The point centers the hole, and the cutting lips shave the wood clean. The flutes—the spiral grooves running up the bit—are there to haul the chips out as you drill. That whole setup depends on three things working together: speed, pressure, and chip removal.
When all that’s in sync, the bit cuts clean and the drill’s energy goes into slicing fibers instead of roasting them. The chips carry a lot of the heat away as they leave the hole. But once the system gets out of whack, that energy has nowhere to go except into friction. Then the bit starts rubbing instead of cutting, and that rubbing makes a pile of heat—often over 750°F—which is more than enough to scorch the wood and blue the steel. The smoke you see? That’s the wood burning off. I pulled a water heater in Frisco last month where the homeowner had drilled three holes like this into pine trim—same exact smell, same blackened edge. Once a bit’s been overheated, it loses its temper, the steel softens, and those cutting edges don’t come back.
Step-by-Step Fix
So you see smoke. Don’t start forcing it. Don’t do that. Stop, back out, and figure out what’s causing the mess.
-
Stop and Cool Down - The second you see smoke or smell it, stop drilling. Pull the bit out of the hole and let everything cool off all the way. Don’t grab the bit with bare hands; it’ll be hot enough to make you regret it. Let it sit for a few minutes and air-cool. Don’t dunk a hot bit in water, either—thermal shock can make it brittle and crack it.
-
Examine the Bit for Dullness - Take a close look at the tip. The two cutting lips ought to be sharp and clean, meeting at a crisp point. If the edges are rounded over, chipped, or look shiny and flattened, that bit’s dull. A dull bit rubs instead of cuts, and that’s the biggest reason you get heat and smoke. You can sharpen it with a file or a drill bit sharpener, or you can just replace it. For most folks, new and sharp is the quickest answer.
-
Clean the Bit - Is the bit loaded up with sticky resin, sap, or wood gunk? That happens a lot in pine, fir, or pressure-treated lumber. The buildup acts like insulation and traps heat, which raises friction fast. Use a brass brush and a solvent like mineral spirits or a citrus-based cleaner to scrub the flutes and cutting edges clean. Clean bits run cooler. No mystery there.
-
Check Your Drill Speed - Running it wide open? Yeah, that’ll do it. High speed creates more friction and heat, especially with bigger bits. The speed needs to match the bit size and the material. Simple rule: the bigger the bit, the slower you go. For most hardwoods and for bits over 1/2-inch, use slow to medium. If your drill’s got a speed selector—usually a switch marked 1 and 2—set it to "1" for more torque and less speed.
-
Reduce Your Feed Rate - Pushing harder feels like the fix, but it’s usually the problem. Forcing a dull or wrong bit into the wood just piles on more friction. Let the drill cut at its own pace. Use light, steady pressure. You want two clean ribbons of shavings coming out, not dusty crumbs. If you’re getting dust, the bit’s dull or the speed’s too high.
-
"Peck" the Hole - For any hole deeper than the bit’s diameter, you’ve got to clear the chips. Don’t just sit there drilling nonstop. Use a little “pecking” routine: drill down about half an inch, pull the bit all the way out, clear the chips from the flutes, then go back in another half-inch. Keep repeating that until you’re through. It gets the heat-trapping junk out and lets air move through the hole, which cools the bit and the wood.
-
Select the Right Bit Type - Are you using the right bit for the job? A standard twist bit can work, sure, but it isn’t the best choice for clean wood holes. For clean, fast holes in wood, a brad-point bit is way better. It’s got a sharp center spur that keeps it from wandering and outer spurs that score the wood for a cleaner entry. For large holes (over 1/2-inch), use a spade bit or Forstner bit, and both of those need a slower drill speed. No dice at high speed.
-
Test on Scrap - Before you drill into the real piece, grab a scrap of the same wood and the same thickness. Test your setup. Sharp bit? Correct speed? Chips clearing out like they should? That little test takes maybe five seconds and can save you from ruining the actual workpiece with a burn mark you’ll stare at forever.
Common Causes
- Dull Bit: This is the big one. A sharp bit cuts; a dull bit burns.
- Wrong Speed: Running the drill too fast, especially with large bits, makes a ton of friction.
- Pitch/Resin Buildup: Sap from pine and similar woods can cook onto the bit and turn into a sticky, heat-making mess.
- Not Clearing Chips: Clogged flutes trap sawdust and keep the bit from cutting like it should.
- Wrong Bit Type: Using a metal-drilling bit in wood, or using a twist bit when a brad-point or Forstner bit is the better pick.
- Dense Hardwood: Rock maple, hickory, and ipe all need slower speeds and sharper bits than soft pine does.
Common Mistakes
- Pushing Harder: Thinking brute force will fix it. It won’t. It just makes more heat.
- Ignoring the Smell: That burning smell is the project telling you something’s wrong. Stop.
- Quenching a Hot Bit: Tossing a hot steel bit into water can cause micro-fractures and ruin it.
- Using a Bent Bit: If the bit wobbles, it won’t drill straight and it’ll create extra friction.
- Ignoring the "1" and "2" Speed Setting: Using the high-speed "2" setting for large-diameter holes is asking for smoke.
- Trying to "Power Through": Believing speed and horsepower can make up for a dull bit or bad technique. They can’t.
Cost & Time Breakdown
Fixing a smoking drill bit issue usually comes down to better tooling and better technique. It’s not some big-budget repair.
| Task | DIY Cost | Pro Cost | Time |
|---|---|---|---|
| Replacing a dull twist bit | $2–$5 for a single bit | N/A | 5 minutes |
| Buying a quality bit set | $20–$40 for a good brad-point set | N/A | 5 minutes |
| Cleaning a resinous bit | $0–$10 for solvent and a brush | N/A | 10 minutes |
| Learning to peck drill | $0 | N/A | 2 minutes |
| Replacing burnt workpiece | $5–$50+ depending on the project | N/A | Hours |
Tips & Prevention
- Invest in Good Bits: Cheap bits use softer steel and dull quick. A decent brad-point set from a solid brand is money well spent.
- Start Slow: If you’re unsure, start at a lower speed. You can always speed up if it’s cutting too slow, but you can’t un-burn wood.
- Use a Drill Press: If you want straight holes and better speed control, a drill press is hard to beat. Even a benchtop one can make a big difference.
- Apply Wax: On dense or resinous wood, a little paste wax or beeswax on the bit can help it cut smoother and keep resin from building up.
- Listen to the Drill: A sharp bit at the right speed makes a steady cutting sound. A dull one squeals or scrapes. You’ll hear the difference once you’ve done a few.
- Sharpen or Replace: Don’t try to tough it out. If the bit’s dull, sharpen it right or toss it and get a new one. Your project’s worth more than a $3 drill bit.
When to Call a Professional
Honestly, drilling a hole is about as basic as it gets. You probably won’t ever need to call a pro for this exact problem. The “pro” move here is better tools and better habits. If you keep burning wood and killing bits, that’s your sign to upgrade to a better set of drill bits—especially brad-point or Forstner bits for woodworking—or spend a few minutes learning the right speed and feed rate for the material in front of you. The fix is usually sitting right there on your bench.
Related Articles
Keep troubleshooting with these hand-picked guides from FixlyGuide:
- Wood Glue Not Drying? 7 Reasons Your Project Is Still Tacky (And How to Fix It) — Wondering why your wood glue is still wet hours or even days later? It's usually due to temperature, wood type, or clamp pressure—here are…
- That Annoying Sawhorse Wobble: The Simple Fix Your Shop Needs — Don't let a wobbly sawhorse ruin your cuts or—worse—cause an accident. I'll walk you through the real reasons your sawhorses are unstable a…
- Stain Blotching Your Pine Project? 5 Causes of Splotchy Finishes (And How to Prevent It) — Tired of your pine projects turning out splotchy and uneven? Understand the 5 key reasons pine blotches and learn the pro-level preparation…
- That New Grout Is Already Cracking? Here’s the Hidden Cause — Cracked grout weeks after a renovation is often a sign of a deeper issue with your subfloor or tile installation, not just a problem with t…
- The Nasty Truth About Your Slow Kitchen Drain (And How to Unclog It for Free) — Don't let a sluggish kitchen sink drain ruin your day—most clogs are easy fixes with common household items, saving you a costly plumber's…
- The Drip You Can't Ignore: Why Your Garbage Disposal Leaks (And How to Stop It) — Don't let a leaky garbage disposal ruin your cabinets and create a mold problem; discover the real reasons behind the drips and how to fix…
Should you do this yourself?
Answer five quick questions before you start. Safety outranks savings every time.
Your experience with work like this
How high do you have to work?
Does the job involve any of these?
Will it need a permit?
Specialty tools
Free and instant. Educational guidance only — not a quote, inspection, or professional diagnosis.
What should this project cost?
Enter your project details for a realistic cost range before you call anyone.
Cost depends heavily on which system turns out to be the source.
- Regional adjustment
- National average
- Labor share (typical)
- ~$1,620
- Quotes to collect
- 3 written estimates
Educational estimate based on national averages — not a binding quote. Always confirm with written local estimates.
Before you start
Check the difficulty, permits, and safety risk — then decide whether to call a pro.
- Estimate this projectGet a cost range for your scope and ZIP before you call anyone.Open
- Get local estimatesSend one request and compare written estimates from vetted pros.Open
Free, no signup required. Estimates are educational guidance, not a quote or an inspection.
Get the print-ready PDF of this guide
A clean, ad-free, printable version you can keep on your phone or pin to the workshop wall. Free with a FixlyGuide account.
- Print-optimized layout
- Tools, materials & every step included
- Saved to your account
Recommended for DIYers & woodworkers
Sponsored
The Top 20 Tools for Workshops of Any Budget
No stationary machines or power tools required — plus 3 fundamental tools that can't be bought at any price.
Get the free guide
Ted's Woodworking — The #1 Woodworking Resource
Detailed instructions, dimensioned drawings, materials & cutting lists, and 3D schematics for every skill level.
See the plansSponsored: links above are affiliate links. FixlyGuide may earn a commission on qualifying purchases — at no extra cost to you.
Frequently asked questions
Why is my drill bit black after drilling wood?+
If your drill bit is turning black or bluish, it's a sign it has been severely overheated. This heat destroys the bit's temper, making the steel soft and unable to hold a sharp edge. It's permanently damaged and needs to be replaced.
What's the right speed for drilling in wood?+
It depends on the bit size. As a general rule, the larger the bit, the slower the speed. For small bits (under 1/4"), you can use a medium-high speed. For larger bits (1/2" or more), always use the slowest speed setting on your drill.
Can I use a metal drill bit for wood?+
You can, but it's not ideal. Standard twist bits (for metal) have a wide-angle tip that tends to 'walk' or wander on wood. A brad-point bit has a sharp spur that bites into the wood, providing a much cleaner and more accurate start.
How do I get burn marks out of wood?+
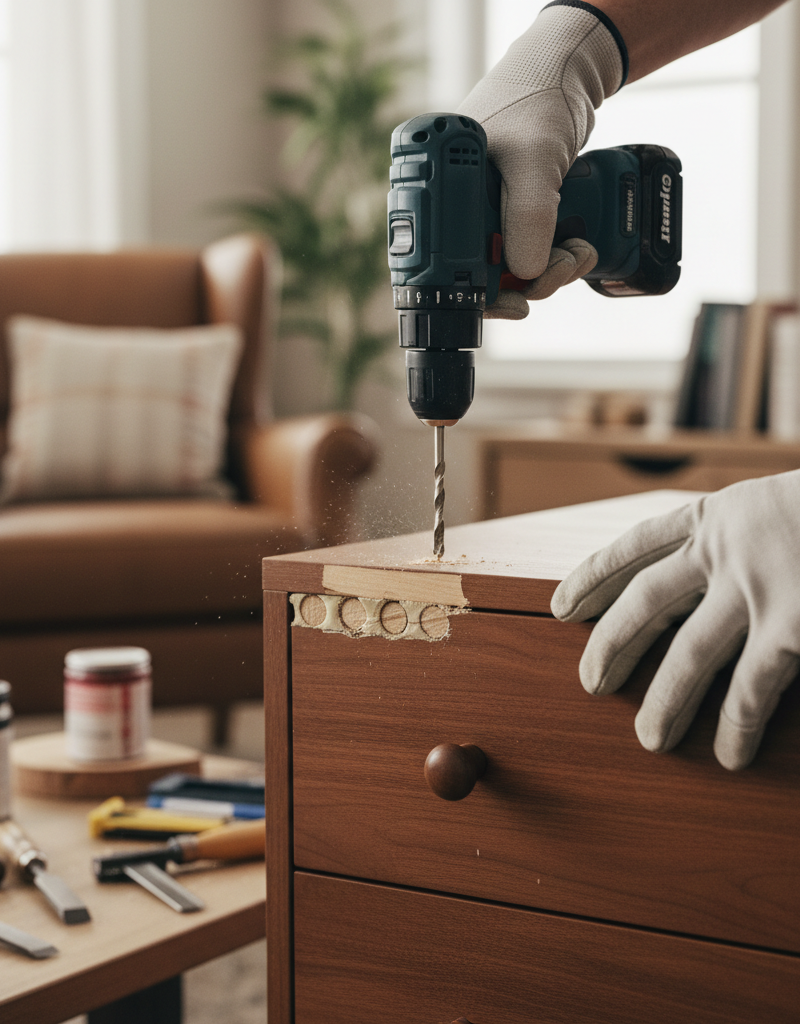
For shallow scorch marks, you can sometimes remove them by sanding, but you'll create a divot. A better solution for a deep burn is to re-drill the hole with a larger bit to remove the charred wood, and then plug the hole with a dowel. Otherwise, the burn is permanent.
What is 'peck drilling' and why should I do it?+
'Peck drilling' is the technique of drilling a short distance, then pulling the bit all the way out of the hole to clear chips, and repeating. This is essential for deep holes because it clears out hot debris and allows the bit to cool, preventing burning.
Is it better to use a spade bit or a Forstner bit for large holes?+
A Forstner bit is generally better as it cuts a much cleaner, flat-bottomed hole with less tear-out, but it requires a slower speed and more force. A spade bit is faster and more aggressive but creates a rougher hole. For fine woodworking, a Forstner bit is always preferred.
How can I tell if my drill bit is dull?+
Look at the cutting edges on the tip. A sharp bit has crisp, well-defined edges. A dull bit will have rounded edges, or you may see shiny, flat spots that reflect light. If you have to apply a lot of pressure to make it cut, it's dull.
My new drill bit is smoking, what's wrong?+
If the bit is new and sharp, the most likely culprits are incorrect drill speed (too fast) or not clearing the chips. Slow the drill down and use the 'peck drilling' method to pull the chips out as you go, especially in deep holes or dense wood.
Discussion
Loading comments…