- Wood Movement: This is the big one. As wood absorbs and releases moisture, it expands and contracts, gradually widening screw holes. It's just the nature of the material.
- Original Pilot Hole Too Large: If the hole was drilled oversized during manufacturing or assembly, the screw never had good purchase to begin with.
- Overtightening: Cranking down on a screw too hard during installation can strip the wood fibers, especially in softer woods like pine, leaving it loose from day one.
- Incorrect Screw Type/Size: Using a screw that's too short, too thin, or has threads inappropriate for the wood type (e.g., fine threads in softwood) won't hold well.
- Constant Stress/Use: Daily use, like sitting in a chair or opening a drawer repeatedly, puts stress on the joint, exacerbating any existing looseness.
General remodeling · Renovation planning
| Project category | General remodeling |
|---|---|
| Problem type | Renovation planning |
| Trade required | General contracting |
| Urgency | Planned project |
| Safety risk | Low safety risk |
| DIY suitability | Pro recommended |
| Cost category | Major investment |
| Typical timeline | Design and permitting often 2–4 months before work starts |
| Contractor type | General contractor |
Repair option
Phase the work and fix the building envelope first.
Replacement option
Full renovation with permits, design, and a general contractor.
Common causes
- Space no longer fits how the household lives
- Resale preparation
- Deferred maintenance stacking up
Relevant tools:project cost estimatorcompare quoteshome improvement material prices
Published September 21, 2026Last updated September 21, 2026
The shop list for this build
Hand-picked tools & materials — shop on Amazon, ships fast.
Power tools
· The heavy hitters — buy once, use for decades.- Shop on AmazonCordless drill/driver· 1
Why it's here: optional, for speed and consistency
- Shop on AmazonAssorted drill bits· set
Why it's here: specifically wood-boring bits
- Shop on AmazonFlush-cut saw· 1
Why it's here: optional, for dowel trimming
Hand tools & jigs
· Layout, joinery, and the everyday workbench essentials.- Shop on AmazonPhillips head screwdriver· 1
- Shop on AmazonFlathead screwdriver· 1
Materials & hardware
· Lumber, fasteners, glue, abrasives — the consumables.- Shop on AmazonWood glue (PVA type)· small bottle
- Shop on AmazonRound toothpicks· box
Why it's here: or small wood splinters
- Shop on AmazonDowel rod assortment· small pack
Why it's here: various diameters, for larger holes
- Shop on AmazonWood filler or 2-part epoxy putty· small tube/can
Why it's here: optional, for very damaged holes
- Shop on Amazon120-grit sandpaper· small sheet
Quick Answer
Ever wonder why that chair leg or drawer pull just won't stay tight? You cinch down the screw, it holds for a bit, then BAM—it's wobbling again. The problem usually isn't the screw itself, but the wood it's biting into. Over time, wood expands and contracts with humidity, slowly widening that screw hole. Or maybe the hole was stripped from the get-go. The good news? You don't need a new piece of furniture. A few common shop supplies and about 30 minutes of your time can give those screws a fresh, permanent grip.
The Problem
I've seen it hundreds of times: a homeowner brings in a wobbly chair, a sagging bookshelf, or a drawer front that's practically falling off, all because of loose screws. They've tightened them countless times, but it's a temporary fix at best. The screw just doesn't have enough "meat" to bite into anymore. It's like trying to get a good grip on wet soap—eventually, it just slips.
What's happening? Well, wood's a living material, even after it's been cut, dried, and turned into a piece of furniture. It breathes, taking on and releasing moisture from the air. When it takes on moisture, it swells; when it releases it, it shrinks. This constant movement, though tiny, slowly wallows out the screw threads in the wood. Add to that the stress of daily use—people sitting, drawers opening and closing, things being moved—and those once-tight connections become sloppy.
Sometimes, the problem starts earlier. Maybe the original pilot hole was drilled too large, or the screw was overtightened during assembly, stripping the wood fibers right then and there. Either way, the result is the same: a screw that spins freely or has minimal grip, leading to instability and frustration. You're not crazy; your furniture really is trying to fall apart, and it's usually due to this lack of proper screw engagement.
How It Works
To really understand how to fix this, you've gotta know how screws work in wood. When you drive a screw, its threads carve out a spiral path in the wood fibers. These threads are what create the friction and mechanical lock that holds the pieces together. The pilot hole, drilled before the screw goes in, is crucial. It's supposed to be just a hair smaller than the screw's shank (the non-threaded part) and slightly larger than the screw's core (the solid part of the threaded section). This lets the threads grab without splitting the wood, while the shank slides through cleanly.
But here's the rub: wood fibers aren't steel. They're relatively soft and pliable. When the wood moves—swelling or shrinking—those fibers around the screw hole get compressed or pull away. Each time you tighten a loose screw, you're essentially re-drilling that hole, often making it slightly bigger and weaker. Eventually, the hole becomes too wide for the screw threads to get a proper bite. The screw just spins, or if it catches at all, it's a shallow, weak engagement. You need at least 6-8 threads of good wood engagement for a strong connection. Once you're below that, you're asking for trouble. Think of it like trying to hold a nail with just your fingertips—it's not going to last.
Different types of screws also play a role. Standard wood screws have tapered shanks and coarser threads that are good for softwoods. Furniture screws, often called "cabinet screws" or "joint connector screws," tend to have a consistent diameter and finer, self-tapping threads designed for hardwoods and engineered wood products. Using the wrong screw for the job, or an undersized screw, contributes to premature loosening.
Step-by-Step Fix
Alright, let's get these loose screws tightened up for good. I've used these methods for years, from fixing antique chairs in Brookline to modern kitchen cabinets in Newton. The trick is to give that screw something new, solid to bite into.
-
Prep the Area & Remove the Loose Screw — Safety first, then clear the deck.
- First, clear any debris around the screw head. If it's a chair leg, maybe flip the chair over. If it's a drawer front, carefully remove the drawer. Grab your screwdriver—manual or a drill with a driver bit—and fully back out the offending screw. Don't try to force it tighter; that'll just make the hole worse. Once it's out, inspect the screw: are the threads damaged? Is it bent? If so, you'll want to replace it. Also, take a close look at the screw hole itself. Is it noticeably egg-shaped or much wider than the screw? That's our target.
-
Clean Out the Hole — Get rid of the gunk.
- You want a clean surface for our fix to adhere. Use a small pick, an awl, or even a straightened paperclip to scrape out any loose wood fibers, old glue residue, or dust from inside the screw hole. A blast of compressed air can also help. You're aiming for a clean, albeit damaged, hole.
-
Choose Your Repair Method — Pick the right tool for the job.
-
This is where you decide how much "meat" you need to put back. You've got a few solid options here, depending on how big the hole is and how much stress the joint takes. This is where experience tells you what's going to hold.
- Toothpick/Wood Splinter Method (Small Holes): For slightly enlarged holes, this is your quickest, easiest fix. Grab a handful of round toothpicks (the flat ones don't pack as well) or small wood splinters from a scrap piece of hardwood. Apply a dollop of wood glue (PVA glue like Titebond) to the tip of each toothpick. Jam them into the screw hole, packing them tightly. Break off the ends flush with the surface. Let the glue dry completely—give it at least 30-60 minutes, preferably an hour. Don't rush this step, or you'll just strip it again.
- Dowel Rod Method (Larger, High-Stress Holes): If the hole is really blown out, or it's a critical joint like a chair leg, a dowel rod is the way to go. You'll need a dowel that matches the diameter of the outermost part of the screw hole. Drill out the existing damaged hole with a drill bit that matches your dowel's diameter. Make sure you drill straight and not too deep. Apply wood glue generously to the dowel and tap it into the freshly drilled hole until it's flush or slightly proud. Let the glue cure for a full 2-4 hours, or even overnight, before trimming it flush with a flush-cut saw or a sharp chisel.
- Wood Filler/Epoxy Method (Irregular Holes): For really mangled, irregular holes where a dowel won't fit neatly, a good quality wood filler (like Bondo Wood Filler or a two-part epoxy putty designed for wood) can work. Mix it according to the manufacturer's instructions and press it firmly into the hole. Overfill slightly, then let it cure completely—this can take anywhere from 15 minutes to several hours depending on the product. Once hard, sand it flush with 120-grit sandpaper.
-
-
Drill a New Pilot Hole — Give the screw a fresh start.
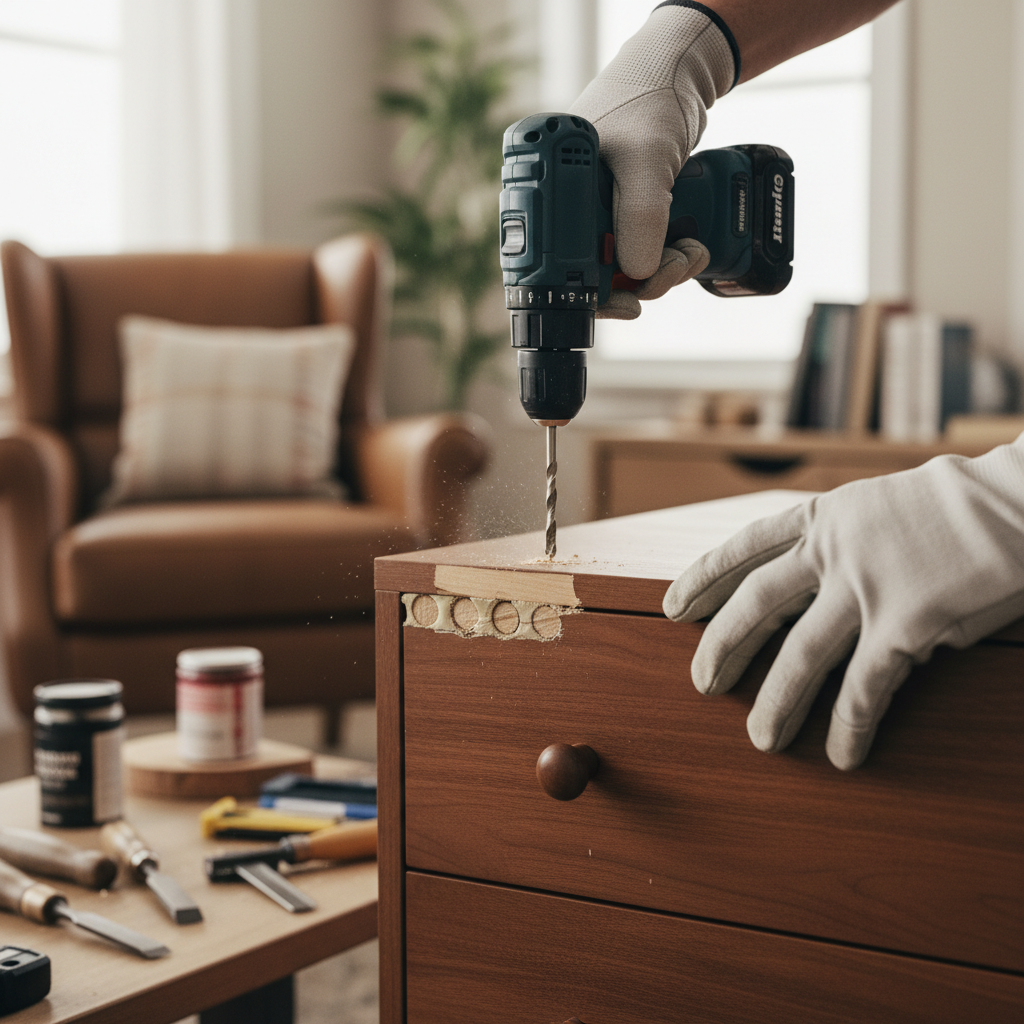
- Once your repair material (toothpicks, dowel, or filler) is completely dry and solid, you need to create a new pilot hole. This is critical. Don't just try to drive the screw in. Select a drill bit that is the correct size for your screw. As a general rule, the pilot hole should be slightly smaller than the screw's shank (the unthreaded part) and larger than its core diameter (the inner part of the threads). A quick way to check is to hold the drill bit up to the screw—the threads of the screw should just be visible outside the drill bit. If you're working with hardwood, you might need a slightly larger pilot hole than for softwood. Drill slowly and straight into the center of your repaired area to the appropriate depth.
-
Drive the Screw — Tighten it up, but don't overdo it.
- Now, apply a small amount of paste wax or soap to the screw threads. This acts as a lubricant, making it easier to drive the screw and reducing the risk of splitting the wood or stripping the new pilot hole. Carefully re-insert the original screw (or a new, slightly larger one if the old one was damaged or too small). Drive it in slowly, either by hand with a screwdriver or with a drill/driver on a low torque setting. Stop as soon as you feel it snug up. Do not overtighten, or you'll strip out your fresh repair! That's the biggest mistake I see folks make right after they've done all this good work.
Common Causes
- Wood Movement: This is the big one. As wood absorbs and releases moisture, it expands and contracts, gradually widening screw holes. It's just the nature of the material.
- Original Pilot Hole Too Large: If the hole was drilled oversized during manufacturing or assembly, the screw never had good purchase to begin with.
- Overtightening: Cranking down on a screw too hard during installation can strip the wood fibers, especially in softer woods like pine, leaving it loose from day one.
- Incorrect Screw Type/Size: Using a screw that's too short, too thin, or has threads inappropriate for the wood type (e.g., fine threads in softwood) won't hold well.
- Constant Stress/Use: Daily use, like sitting in a chair or opening a drawer repeatedly, puts stress on the joint, exacerbating any existing looseness.
- Lack of Glue in Joints: Screws are great clamps, but they're often just holding glued joints together. If the glue joint itself fails, the screw takes on all the load and can loosen quickly.
Common Mistakes
- Overtightening the Repair: You've done all that work to rebuild the hole, don't strip it right away! Snug is enough.
- Not Letting Glue/Filler Cure: Patience is key. Driving a screw into wet glue or uncured filler is an invitation for immediate failure.
- Using Too Much Glue: While glue is good, excessive amounts can make a mess and isn't necessary for the toothpick method if you're just coating the toothpicks.
- Skipping the Pilot Hole: Never, ever try to drive a screw into a filled or dowelled hole without drilling a fresh pilot. You'll split the wood or ruin your repair.
- Ignoring the Problem: A loose screw means a weak joint. Ignoring it just puts more stress on other parts, potentially leading to bigger, more expensive failures. Catch it early!
- Using the Wrong Repair Material: Toothpicks are for smaller holes. A big, load-bearing joint needs a dowel or proper wood filler, not a few toothpicks that won't hold under stress.
Cost & Time Breakdown
| Task | DIY Cost | Pro Cost | Time |
|---|---|---|---|
| Remove & Inspect Screw | $0 | $0 | 5-10 minutes |
| Prepare Hole (Clean/Drill) | $0–$5 | $0–$10 | 5-15 minutes |
| Toothpick/Splinter Fill | $1–$5 | $10–$20 | 10 min active, 1 hr cure |
| Dowel Rod Fill | $5–$10 | $20–$40 | 15 min active, 4-24 hr cure |
| Wood Filler/Epoxy Fill | $5–$20 | $20–$50 | 10 min active, 1-4 hr cure |
| Re-drill Pilot & Reinstall | $0 | $0 | 5-10 minutes |
| Total (per screw/joint) | $1–$20 | $10–$50 | 30 min–24 hr |
Note: Pro costs reflect minimum service charges or hourly rates for small repairs, as a single loose screw repair often isn't a standalone job.
Tips & Prevention
- Regular Inspections: Periodically check your furniture, especially chairs, tables, and cabinets, for any signs of wobbling or loose screws. Catching them early makes for an easier fix.
- Humidity Control: Maintaining stable humidity levels in your home (ideally between 40-50% relative humidity) minimizes wood movement and can prevent loosening.
- Proper Assembly: When assembling new furniture, always pre-drill pilot holes to the correct size. Use wood glue on dowels and tenons for a stronger joint that resists screw loosening.
- Don't Over-Torque: Resist the urge to crank down screws as hard as you can. As soon as you feel it snug up, stop. Over-tightening strips threads and damages wood.
- Use Washers: For certain applications, like attaching legs to tabletops, adding a flat washer under the screw head can increase the bearing surface and help prevent the screw from sinking into soft wood, maintaining tightness longer.
- Thread Lockers (Carefully!): For metal-to-wood applications or screws that absolutely must not come loose (and aren't structural), a dab of non-permanent thread locker (like blue Loctite) on the metal screw threads can help. Be very careful though, as some can make future removal difficult and aren't ideal for wood-to-wood directly.
When to Call a Professional
Look, some jobs are just too big or too complex for a DIY fix, or frankly, you just don't have the time or tools. If you've got a valuable antique, a high-end custom piece, or structural furniture that's falling apart (like a dining table that wobbles precariously when you lean on it), it's time to call in a pro. Similarly, if the wood itself is cracked, split, or rotten around the screw hole, or if multiple joints are failing at once—we're talking major structural repair. A furniture restorer or a skilled cabinetmaker can often disassemble, re-glue, and reinforce those joints properly, ensuring the piece is safe and sound for decades to come. Don't risk injury or further damage by trying to cobble together a fix on something that requires professional expertise and specialized clamping or joinery work. It's an investment in your furniture's longevity.
Related Articles
Keep troubleshooting with these hand-picked guides from FixlyGuide:
- The Mystery of Your Stripped Cabinet Hinge: One Simple Fix — Don't let a stripped screw hole ruin your kitchen cabinets. I'll show you how to fix that loose hinge fast, often with just a few household…
- The #1 Mistake Homeowners Make Installing Floating Shelves (and How to Fix It) — Discover the crucial mistake most homeowners make when installing floating shelves into drywall, leading to sagging and damage, and learn t…
- The 7 Critical Wall Prep Mistakes Most DIY Painters Make (And How to Fix Them) — Prepping your walls correctly before painting is crucial for a smooth, lasting finish. Learn to avoid common DIY mistakes and achieve profe…
- The 4-Inch Drywall Hole Fix: Why Most DIY Patches Fail (And How to Do It Right) — Don't let a small drywall hole become a recurring nightmare – discover the secret to a seamless, lasting repair that disappears into your w…
- That Annoying Sawhorse Wobble: The Simple Fix Your Shop Needs — Don't let a wobbly sawhorse ruin your cuts or—worse—cause an accident. I'll walk you through the real reasons your sawhorses are unstable a…
- The #1 Summer Lawn Mistake Turning Your Grass Yellow (and How to Fix It) — Discover the most common summer lawn mistake that causes yellowing grass and learn the simple steps to revive your lawn.
Should you do this yourself?
Answer five quick questions before you start. Safety outranks savings every time.
Your experience with work like this
How high do you have to work?
Does the job involve any of these?
Will it need a permit?
Specialty tools
Free and instant. Educational guidance only — not a quote, inspection, or professional diagnosis.
What should this project cost?
Enter your project details for a realistic cost range before you call anyone.
Cost depends heavily on which system turns out to be the source.
- Regional adjustment
- National average
- Labor share (typical)
- ~$1,620
- Quotes to collect
- 3 written estimates
Educational estimate based on national averages — not a binding quote. Always confirm with written local estimates.
Get the print-ready PDF of this guide
A clean, ad-free, printable version you can keep on your phone or pin to the workshop wall. Free with a FixlyGuide account.
- Print-optimized layout
- Tools, materials & every step included
- Saved to your account
Recommended for DIYers & woodworkers
Sponsored
The Top 20 Tools for Workshops of Any Budget
No stationary machines or power tools required — plus 3 fundamental tools that can't be bought at any price.
Get the free guide
Ted's Woodworking — The #1 Woodworking Resource
Detailed instructions, dimensioned drawings, materials & cutting lists, and 3D schematics for every skill level.
See the plansSponsored: links above are affiliate links. FixlyGuide may earn a commission on qualifying purchases — at no extra cost to you.
Frequently asked questions
Why do screws keep coming loose in my wood furniture?+
Screws often loosen due to wood movement (expansion and contraction from humidity changes) or because the original pilot hole was drilled too large or got stripped from overtightening. Daily use also stresses the joint, exacerbating any existing looseness.
Can I just use a bigger screw to fix a loose hole?+
Sometimes, but it's not always the best long-term solution. A slightly larger diameter screw might bite into fresh wood, but it can also split the wood or still not get enough purchase if the hole is significantly damaged. It's usually better to rebuild the hole first.
What kind of glue should I use for the toothpick method?+
A standard PVA wood glue, like Titebond I or II, works perfectly for the toothpick or wood splinter method. It dries hard and provides excellent adhesion to the wood fibers, creating a solid base for the screw.
How long does wood glue need to dry before I can put the screw back in?+
For the toothpick method, allow at least 30-60 minutes for the wood glue to set, preferably an hour or two to be safe. If using a dowel, give it a full 2-4 hours, or even overnight, especially for critical joints. Rushing this step will lead to a failed repair.
My screw hole is completely blown out; what's the best fix?+
For completely blown-out or heavily damaged holes, the dowel rod method is usually the most robust fix. You drill out the damaged area to a consistent size and then glue in a matching dowel, creating a brand new, solid wood surface to redrill into.
Do I need to drill a new pilot hole after filling the old one?+
Absolutely! It's crucial to drill a new pilot hole into your repaired area (whether it's toothpicks, a dowel, or wood filler). This guides the screw, prevents splitting, and ensures the threads get a proper bite into the new material, just like with fresh wood.
Can wood filler really hold a screw securely?+
Good quality wood fillers or two-part epoxy putties designed for wood can indeed hold screws securely, especially if the hole is irregularly shaped. They dry extremely hard and can be drilled and screwed into just like wood. Make sure to choose a strong, reputable brand and let it cure fully.
How can I prevent screws from loosening in new furniture?+
Preventative measures include ensuring pilot holes are correctly sized during assembly, not overtightening screws, using wood glue in structural joints, and maintaining stable humidity levels in your home. Regular checks and early intervention for any signs of looseness also help a lot.
Is it okay to use super glue for a loose screw?+
While super glue (cyanoacrylate) can temporarily hold a screw, it's generally not recommended for a permanent, structural fix in wood furniture. It can become brittle over time and doesn't provide the same type of bond or flexibility as wood glue, which cures more slowly and allows for better penetration into wood fibers.
What's the right pilot hole size for a wood screw?+
The pilot hole should be slightly smaller than the screw's shank (the unthreaded shaft) and slightly larger than its core diameter (the inner part of the threads). You can check by holding the screw in front of the drill bit; the screw's threads should just barely protrude past the bit's sides. For hardwoods, you might need a slightly larger pilot hole than for softwoods to prevent splitting.
Discussion
Loading comments…