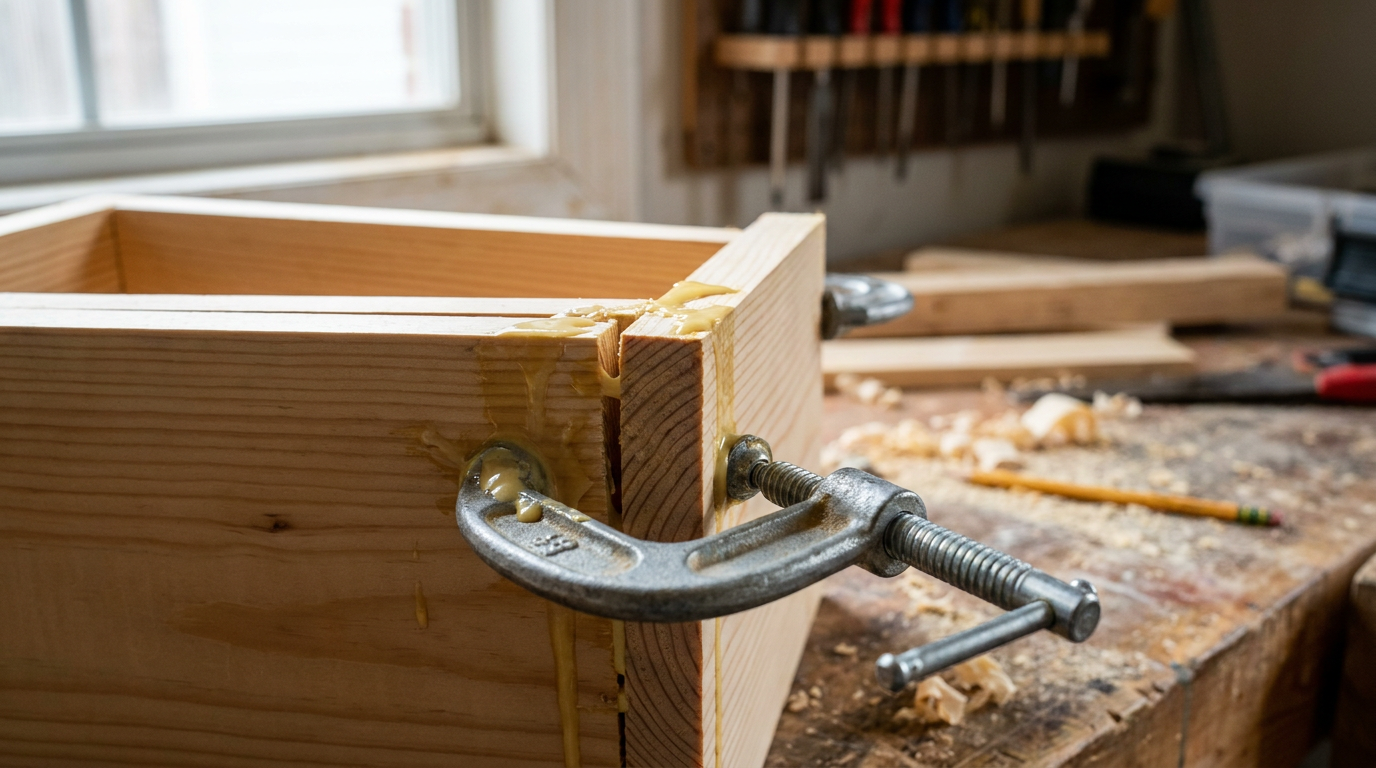
- Cold Shop: Gluing in a garage or basement below 65°F is the 1 reason for slow curing. The chemistry just bogs down.
- Too Much Glue: People think more glue means a stronger joint. Usually, it just traps moisture. You want enough to get a small bead of squeeze-out when clamped.
- Oily or Exotic Woods: Woods like teak, rosewood, and cocobolo have natural oils that repel water and keep the glue from soaking in. Wiping with acetone right before gluing is the move.
- Low Clamping Pressure: If you’re just pushing boards together by hand, the gap stays too thick for the glue to cure well. You need real mechanical pressure.
- Gluing End Grain: End grain acts like a bundle of straws — it drinks up glue and leaves not enough on the surface to bond. Always “size” end grain by brushing on a thin coat, letting it soak for 10 minutes, then adding the main coat.
General remodeling · Renovation planning
| Project category | General remodeling |
|---|---|
| Problem type | Renovation planning |
| Trade required | General contracting |
| Urgency | Planned project |
| Safety risk | Low safety risk |
| DIY suitability | Pro recommended |
| Cost category | Major investment |
| Typical timeline | Design and permitting often 2–4 months before work starts |
| Contractor type | General contractor |
Repair option
Phase the work and fix the building envelope first.
Replacement option
Full renovation with permits, design, and a general contractor.
Common causes
- Space no longer fits how the household lives
- Resale preparation
- Deferred maintenance stacking up
Relevant tools:project cost estimatorcompare quoteshome improvement material prices
Published October 1, 2026Last updated October 1, 2026
The shop list for this build
Hand-picked tools & materials — shop on Amazon, ships fast.
Hand tools & jigs
· Layout, joinery, and the everyday workbench essentials.- Shop on AmazonBar clamps or C-clamps
- Shop on AmazonPlastic putty knife
- Shop on AmazonShop fan
Materials & hardware
· Lumber, fasteners, glue, abrasives — the consumables.- Shop on AmazonPVA wood glue
- Shop on AmazonAcetone
Why it's here: for oily woods
- Shop on AmazonSandpaper (150-grit)
Quick Answer
If your wood glue isn't drying, the problem's almost always in the shop or in the way you put it on. Most of the time, I’m looking at temps below 65°F, the wrong glue for the wood, or way too much glue, which chokes off the bond line and keeps it from curing right. You also need enough clamping pressure—but not a gorilla grip—so the joint seats tight and leaves a thin, even glue line that can actually harden.
The Problem
You spent the afternoon putting together a new bookshelf or fixing a loose chair leg. You followed the directions, spread the glue, clamped it up, and figured you’d have a solid joint in a few hours. Then you come back and it’s still gummy, tacky, or flat-out wet. The joint shifts around, and the whole thing feels sketchy. That’ll test your patience, no doubt. Makes you wonder if the glue’s junk, if the wood’s bad, or if you missed something obvious. Don’t panic—the glue itself has probably not “gone bad.” The issue is usually the process, and I’ve fixed a pile of ’em over the years.
How It Works
Modern wood glues, especially the common yellow PVA (polyvinyl acetate) glues most homeowners use, don’t dry like a puddle evaporating on the driveway. They cure in two stages: coalescence and evaporation. First, the water gets pulled into the wood fibers, and the tiny polymer spheres suspended in the emulsion get pushed closer and closer together. That’s the “grab” stage, where the parts start feeling tacky and stuck. Second, the rest of the water leaves the glue line into the air, and the polymer chains cross-link into a hard, permanent bond. Temperature, humidity, airflow, and the wood itself all have a hand in this. If one of those is off, the whole thing slows to a crawl, and you’re left with a gummy mess. With standard PVA glue, the wood has to absorb the moisture. If the surface is oily, painted, or non-porous, the water’s got nowhere to go, and the glue just sits there. That’s why clamping matters so much: it forces a thin, even glue line—ideally around 0.002–0.006 inches thick—so the wood can pull the moisture out and the bond can lock up.
Step-by-Step Fix
If you’ve got a joint that refuses to dry, here’s how I’d go after it. Take your time. Rushing this usually makes a bigger mess.
1. Check the Temperature & Humidity
- Move the whole clamped project to a warmer, drier spot first thing. Most PVA glues need at least 65°F to cure the way they’re supposed to. A cold garage slab or a damp basement can stop the whole process dead. You want something like 70°F–80°F with low humidity. A small space heater or a dehumidifier can help a lot. Don’t blast it with a heat gun, though — that’ll skin over the outside and trap moisture inside.
- I pulled a water heater in Frisco last month and the homeowner had the same kind of problem on a cabinet repair sitting in a chilly utility room. Warm room, problem eased up fast. Funny how often that’s the whole story.
2. Evaluate Your Clamping Pressure
- Are the clamps cranked down too hard, or not hard enough? Too little pressure means the wood faces aren’t really touching, so you’re left with a thick, weak layer of glue that can’t cure right. Too much pressure can squeeze all the glue out and leave you with a “starved” joint — no bond left to do the work. You want snug contact and a small, even bead of squeeze-out along the seam. For most hardwoods, that’s around 175–250 psi.
3. Scrape and Re-Glue (If Possible)
- If the parts come apart without tearing up the wood, go ahead and separate them. Use a plastic scraper or putty knife to clean off as much wet glue as you can from both faces. Then let the wood sit for at least an hour so any surface moisture can breathe off. After that, put on a thin coat of glue and clamp it back together in a warm spot.
4. Introduce Airflow
- If the joint’s mostly enclosed or the glue line doesn’t have much open exposure, airflow may be the missing piece. Set a small fan a few feet away from the project. Just a gentle breeze, nothing wild. That steady air helps carry off the moisture as it evaporates.
5. Wait Longer
- Sounds simple, right? But this is the one people blow off all the time. The “30-minute clamp time” on the bottle is a best-case minimum. For oily woods like teak, dense woods like hard maple, or in humid North Texas summers, you might need 2-4 hours, or even overnight. Full strength for PVA glue doesn’t hit until about 24 hours anyway, so leaving it clamped isn’t hurting a thing.
6. Assess the Wood Type
- Were you trying to glue something that isn’t plain porous wood? Painted wood, sealed wood, or non-porous material won’t let the water soak in, so the glue never really cures. In that case, you’ve got to take it apart, sand everything back to bare wood, and start over. For oily woods like cocobolo or teak, I’d wipe the surfaces with acetone right before gluing to clear off surface oils that fight absorption.
7. Drill and Inject for Trapped Glue
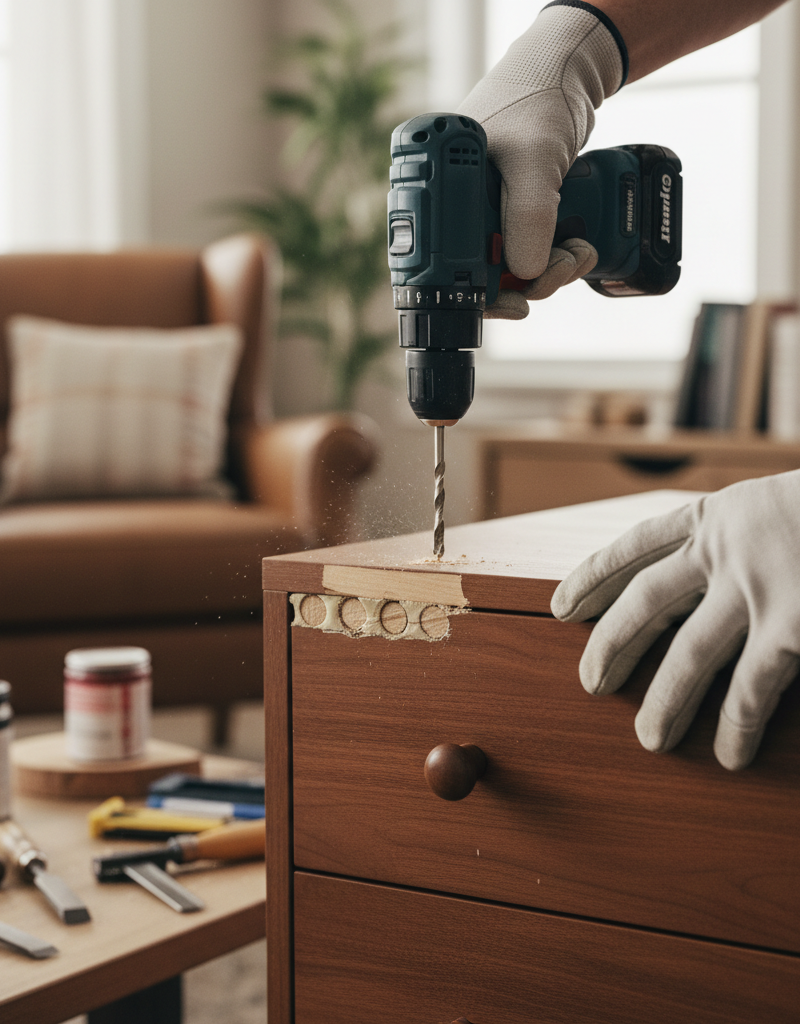
- If the joint is structural and you can’t tear it apart, you’ve got one last card to play. If you can spot a pocket of wet glue — say, in a mortise and tenon — drill a very small hole (1/16 inch) into the void. That gives the trapped moisture somewhere to go. It’s a more advanced move, and no dice sometimes, but it can save a tricky glue-up.
8. Clean Up Squeeze-Out Promptly
- While the glue is still wet or gummy, clean up that squeeze-out. Sure, a damp rag works, but it can thin the glue and smear it into the grain, which’ll come back and bite you when you finish the piece. Better move? Wait about 30-60 minutes until the squeeze-out turns rubbery and gelatinous, then peel it off with a putty knife or chisel. Cleaner surface. Better finish.
Common Causes
Why did this happen in the first place? Here are the usual suspects.
- Cold Shop: Gluing in a garage or basement below 65°F is the #1 reason for slow curing. The chemistry just bogs down.
- Too Much Glue: People think more glue means a stronger joint. Usually, it just traps moisture. You want enough to get a small bead of squeeze-out when clamped.
- Oily or Exotic Woods: Woods like teak, rosewood, and cocobolo have natural oils that repel water and keep the glue from soaking in. Wiping with acetone right before gluing is the move.
- Low Clamping Pressure: If you’re just pushing boards together by hand, the gap stays too thick for the glue to cure well. You need real mechanical pressure.
- Gluing End Grain: End grain acts like a bundle of straws — it drinks up glue and leaves not enough on the surface to bond. Always “size” end grain by brushing on a thin coat, letting it soak for 10 minutes, then adding the main coat.
- Using the Wrong Glue: Standard PVA wood glue on painted surfaces, melamine, or metal? That’s not going to work. You need epoxy or polyurethane glue for non-porous materials.
Common Mistakes
Avoid these pitfalls that DIYers fall into all the time.
- Rushing the Clamp Time: The bottle may say 30 minutes, but that’s under perfect, low-stress conditions in a climate-controlled lab. For a tabletop or cabinet door, leave it clamped for several hours. Don’t load the joint for at least 24 hours.
- Not Preparing the Surface: If the wood’s dusty, oily, or has machine “burnishing” from a dull jointer blade, the glue can’t get a proper bite. A quick scuff with 150-grit sandpaper is cheap insurance.
- Freezing the Glue: If your wood glue ever froze — maybe it sat in the truck or an unheated garage all winter — the chemistry’s probably shot. It may look fine, but the polymers won’t coalesce right. If it’s lumpy or separated after thawing and shaking, toss it. A new bottle costs $8; a failed project costs a whole lot more.
- Using a Heat Gun: Trying to force-dry glue with high heat only skins over the top and traps wet glue underneath. Gentle air movement and warmth are the ticket.
- Wiping Squeeze-out with a Wet Rag: It feels like the right move, but all it really does is smear a thin, diluted film of glue into the pores around the joint. When you stain or finish it, that area goes blotchy and light. Let it skin over and scrape it off.
Cost & Time Breakdown
Fixing a bad glue-up is more about time than money, assuming you’ve already got the basics.
| Task | DIY Cost | Pro Cost | Time |
|---|---|---|---|
| Moving to a warm room | $0 | N/A | 5 minutes |
| Scraping & Re-gluing | $8 (new glue) | $75–$150 | 1-2 hours |
| Acetone Wipe (Oily Wood) | $10 (can of acetone) | Included in labor | 15 minutes |
| Waiting Patiently | $0 | N/A | 4-24 hours |
| Basic Clamps (2-pack) | $20–$40 | Included in tools | N/A |
Tips & Prevention
- Acclimate Your Wood: Let lumber sit in your shop for a few days to a week so it matches the temperature and humidity before you start. That cuts down on wood movement after the glue-up.
- Check the Date: Wood glue has decent shelf life, usually 1-2 years, but an old bottle can lose some of its bite. I’d mark the purchase date with a marker.
- Spread it Evenly: Use a small silicone brush or a notched spreader for a thin, consistent coat. Full coverage, sure — but not a thick, dripping mess.
- Close the Tip: Shut the cap right away every time. If the tip clogs, the rest of the glue’s getting exposed to air and drying out faster.
- Store Glue Indoors: Don’t leave wood glue in an unheated garage or shed where it can freeze. A climate-controlled basement or utility closet is a lot safer.
When to Call a Professional
For most small projects and repairs, this is a DIY job. But if the failed joint is on an antique piece, a load-bearing structural member like a laminated beam, or a complex assembly you can’t safely take apart, stop there. A professional furniture restorer or seasoned carpenter’s got the tools and tricks for injecting adhesive or breaking down irreplaceable pieces without causing more damage. If the stakes are high, don’t gamble on it.
Related Articles
Keep troubleshooting with these hand-picked guides from FixlyGuide:
- That Falling Cabinet Door? It's the 15-Minute Hinge Adjustment You're Missing — Don't let a sagging cabinet door drive you nuts—most issues stem from a simple hinge adjustment that you can fix in minutes with just a scr…
- Why Your Paint Just Won't Cover (and How to Stop the Struggle) — Struggling with paint that just won't cover the old color, even after multiple coats? I'll show you why it happens and how to fix it for go…
- That Annoying Sawhorse Wobble: The Simple Fix Your Shop Needs — Don't let a wobbly sawhorse ruin your cuts or—worse—cause an accident. I'll walk you through the real reasons your sawhorses are unstable a…
- The Hidden Culprit Behind Your Fuzzy Table Saw Cuts (It's Not Just the Blade!) — Fuzzy table saw cuts and tearout are frustrating, but often the problem isn't just your blade; hidden factors like feed rate, blade height,…
- The Mystery of the Loose Screws: Why Your Wood Furniture Keeps Coming Apart — Discover why screws in your wood furniture repeatedly loosen, causing instability, and learn the simple, lasting fix that avoids constant r…
- The Grimy Secret: Why Your Toilet Bowl Stains Keep Coming Back — Fed up with scrubbing stubborn toilet bowl stains only for them to reappear days later? The real culprit is likely hiding in your tank, not…
Should you do this yourself?
Answer five quick questions before you start. Safety outranks savings every time.
Your experience with work like this
How high do you have to work?
Does the job involve any of these?
Will it need a permit?
Specialty tools
Free and instant. Educational guidance only — not a quote, inspection, or professional diagnosis.
What should this project cost?
Enter your project details for a realistic cost range before you call anyone.
Cost depends heavily on which system turns out to be the source.
- Regional adjustment
- National average
- Labor share (typical)
- ~$1,620
- Quotes to collect
- 3 written estimates
Educational estimate based on national averages — not a binding quote. Always confirm with written local estimates.
Before you start
Check the difficulty, permits, and safety risk — then decide whether to call a pro.
- Estimate this projectGet a cost range for your scope and ZIP before you call anyone.Open
- Get local estimatesSend one request and compare written estimates from vetted pros.Open
Free, no signup required. Estimates are educational guidance, not a quote or an inspection.
Recommended for DIYers & woodworkers
Sponsored
The Top 20 Tools for Workshops of Any Budget
No stationary machines or power tools required — plus 3 fundamental tools that can't be bought at any price.
Get the free guide
Ted's Woodworking — The #1 Woodworking Resource
Detailed instructions, dimensioned drawings, materials & cutting lists, and 3D schematics for every skill level.
See the plansSponsored: links above are affiliate links. FixlyGuide may earn a commission on qualifying purchases — at no extra cost to you.
Frequently asked questions
How can you tell if wood glue has gone bad?+
Bad wood glue will often appear lumpy, thick like cottage cheese, or separated with a watery layer on top, even after shaking. It might also have a sour or different smell. If your glue has ever frozen, it's best to discard it, as the freezing process ruins the polymer emulsion needed for a strong bond.
Can I use a hairdryer to speed up wood glue drying?+
It's not a good idea. A hairdryer, much like a heat gun, can dry the surface of the glue too quickly, creating a skin that traps moisture underneath. This prevents the joint from curing properly and results in a weak bond. Gentle, room-temperature air circulation from a fan is a much safer bet.
What if my wood glue joint is weak after drying?+
A weak joint usually means you had a 'starved' joint (too much clamping pressure squeezed all the glue out) or a 'thick' joint (not enough pressure). It can also be caused by gluing dirty or oily surfaces. Unfortunately, the only reliable fix is to break the joint apart, thoroughly sand both surfaces down to fresh wood, and re-glue it correctly.
How long should I really leave clamps on for?+
The 30-60 minute time on the bottle is the bare minimum under ideal conditions. For most projects, a safer bet is to leave clamps on for at least 2-4 hours. For large panels or joints under stress, leaving them clamped overnight (8-12 hours) is best practice to ensure the bond is strong before you handle it.
Does humidity affect wood glue drying time?+
Yes, absolutely. High humidity slows down the evaporation stage of the curing process because the surrounding air is already saturated with moisture. In a humid environment like a Texas summer, you should double your expected clamp time and allow the full 24 hours for the glue to reach maximum strength.
Why did my glue squeeze-out stain the wood?+
This happens when you wipe wet squeeze-out with a damp rag. The water thins the glue and carries it into the wood pores. This seals the wood, and when you apply a stain, it can't penetrate that area. It's better to let the squeeze-out become rubbery (about 30-60 minutes) and then scrape it off with a chisel or putty knife.
Can I glue painted or sealed wood?+
You cannot get a strong bond by applying standard PVA wood glue to painted or sealed surfaces. The glue works by being absorbed into the wood fibers, which is impossible if they're sealed. You must sand the finish completely off down to bare wood for a proper wood-to-wood bond.
Is there a wood glue that works in cold weather?+
Yes, some manufacturers offer special formulas that can cure at lower temperatures, sometimes as low as 40°F. For example, Titebond III is water-resistant and has a lower application temperature than Titebond I. However, for the strongest possible bond, it's always best to work in a space that's at least 65°F.
Discussion
Loading comments…