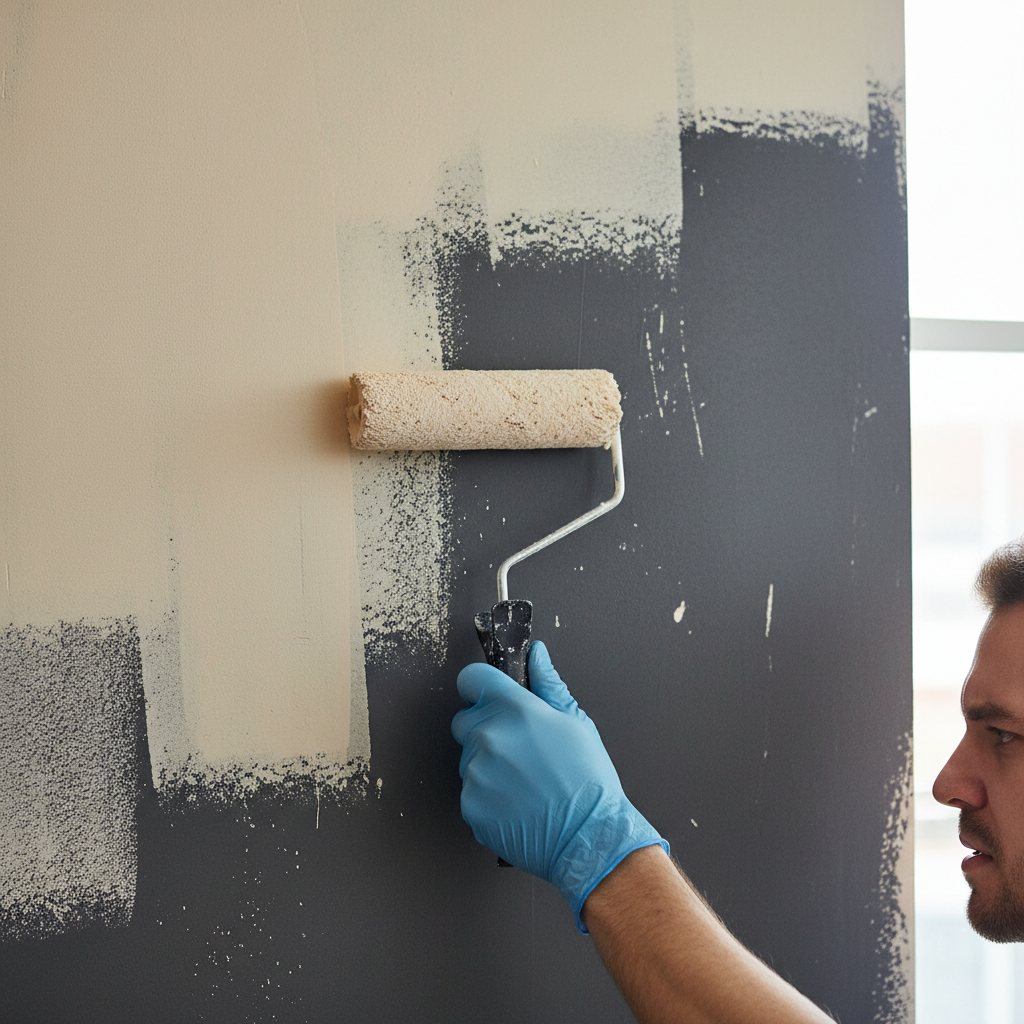
- Choose the Right Primer – Your secret weapon for coverage
- Tool: Tintable acrylic latex primer
- Safety: Keep the room ventilated, and wear gloves and eye protection.
General remodeling · Renovation planning
| Project category | General remodeling |
|---|---|
| Problem type | Renovation planning |
| Trade required | General contracting |
| Urgency | Planned project |
| Safety risk | Low safety risk |
| DIY suitability | Pro recommended |
| Cost category | Major investment |
| Typical timeline | Design and permitting often 2–4 months before work starts |
| Contractor type | General contractor |
Repair option
Phase the work and fix the building envelope first.
Replacement option
Full renovation with permits, design, and a general contractor.
Common causes
- Space no longer fits how the household lives
- Resale preparation
- Deferred maintenance stacking up
Relevant tools:project cost estimatorcompare quoteshome improvement material prices
Published September 16, 2026Last updated September 16, 2026
Tools & materials you'll need
Affiliate linksAs an Amazon Associate FixlyGuide earns from qualifying purchases — at no extra cost to you. Prices and availability are accurate as of publication and subject to change.
Quick Answer
Listen, I’ve heard this one a thousand times: “My paint just isn’t covering!” And yeah, it’ll make you want to throw the roller. You’re going over that old dark red with a nice light gray, thinking two coats ought to handle it, and next thing you know you’re on coat number five and it still looks blotchy. Nine times out of ten, it’s one of three things: you skipped a key primer step, you grabbed bargain-bin paint, or you’re moving too fast and not letting the stuff do its job. Usually the fix is pretty simple — pick the right primer, buy better paint, and slow down long enough for each coat to dry right.
The Problem
You know the drill. You pick out that perfect “Greige” — clean, modern, all that — to cover up the “Harvest Gold” from 1982. You roll on the first coat and, sure, it looks rough, but hey, it’s just the first coat. Then the second one goes on, and you’re still seeing light spots. Third coat. Fourth coat. Maybe a fifth. Now you’re standing there wondering if you’re doing something wrong or if the paint store sold you tinted milk. And it’s not just about looks; every extra coat burns time, money, and patience. That’s the mess we’re dealing with here: paint that won’t hide the sins underneath, leaving you with a patchy finish and a bad mood.
How It Works
Alright, let’s crack open the can and talk about what paint actually does — because if you know that, troubleshooting gets a whole lot easier. Paint isn’t just colored water. It’s a pretty slick chemical mix. You’ve got pigments for color and hiding power, binders that hold everything together and help it stick, solvents that make it brushable, usually water or mineral spirits, and additives for stuff like mildew resistance or smoother flow.
The trick happens when the solvent evaporates and the pigments and binders dry into a solid film. The hiding power — how well it covers — comes mostly from the type and amount of pigment in there. Titanium dioxide, for example, is a beast when it comes to covering old color. Cheap paint usually cuts corners on those good pigments, and that’s why you end up chasing coverage coat after coat.
Then there’s the surface. Think of your wall like a sponge. If it’s porous, it drinks up that first coat and leaves less pigment sitting on top. If it’s glossy, paint can struggle to grab hold. That’s where primer earns its keep. Primer isn’t just fancy white paint. It’s made to give you a uniform, slightly porous surface the topcoat can bite into. It also blocks stains and helps bridge huge color changes. A good primer, especially a tinted one, gives your finish coat a fighting chance. Without it, or with the wrong type, you’re asking the paint to do too many jobs at once — adhesion, stain blocking, color change — and that thing’s toast before it starts.
Step-by-Step Fix
Before you pitch the brush and call it a day, let’s walk through how to deal with paint that won’t cover. It’s not rocket science, but it does take some patience and the right materials.
-
Assess the Situation – Stop and look before you leap
- Take a real hard look at the wall. Is the paint actually failing, or is it just looking translucent because it’s not fully dry yet? Latex paint can look streaky and patchy until it cures. Give it at least 24 hours, even if it feels dry in an hour or two. A light held at an angle across the wall will show you the weak spots fast. That tells you whether you’ve got a coverage issue or just got ahead of yourself. I ran into exactly that on a house out in Smyrna once — homeowner was convinced the paint was junk. Turned out she was working in a damp basement and not giving it enough time between coats. We got the dehumidifier going and waited it out, and the finish settled down just fine.
-
Clean and Prep the Surface (Again, if needed) – A clean slate is a happy slate
- If you’ve already got a few patchy coats on there and it’s dry, don’t just paint over dust, grease, or junk. Lightly sand rough spots, runs, or drips with 150-grit sandpaper. Wipe the whole surface with a damp cloth to get rid of sanding dust and grime. Let it dry completely. You’re basically giving yourself a fresh start for the next step.
-
Choose the Right Primer – Your secret weapon for coverage
- This is where a lot of folks miss the mark. If you’re going from a dark color — deep red, navy, forest green — to a light one like off-white, light gray, or pale yellow, a standard white primer might not cut it. You need a tintable primer. Ask the paint store to tint it close to your new topcoat. Say you’re painting light gray? Have the primer tinted to a slightly darker gray. That gives the finish coat something solid to build on and cuts way down on the number of topcoats you’ll need. A good acrylic latex primer works fine for most interior walls.
- Tool: Tintable acrylic latex primer
- Safety: Keep the room ventilated, and wear gloves and eye protection.
- This is where a lot of folks miss the mark. If you’re going from a dark color — deep red, navy, forest green — to a light one like off-white, light gray, or pale yellow, a standard white primer might not cut it. You need a tintable primer. Ask the paint store to tint it close to your new topcoat. Say you’re painting light gray? Have the primer tinted to a slightly darker gray. That gives the finish coat something solid to build on and cuts way down on the number of topcoats you’ll need. A good acrylic latex primer works fine for most interior walls.
-
Apply Primer Evenly – Don't skimp, don't overdo it
- Roll the primer on in thin, even coats. Don’t try to force full coverage with one heavy pass; that just gives you drips and a nasty surface to deal with later. I’d rather see two thin coats of primer, especially if you’re making a big color jump. Let the first coat dry all the way — usually 1-2 hours for latex primers, but check the can — before you go back with the second. That layered setup gives the primer the best chance to do its job.
-
Use Quality Paint – You get what you pay for, plain and simple
- I know, I know, budgets matter. But if you’re fighting coverage, that $20/gallon paint from the big box store is probably part of the problem. Better paints have more pigment solids, which means better hiding power and better durability. You’ll use fewer coats and wind up with a nicer finish. Look for paint labeled “paint & primer in one” — those usually have a stronger pigment load, but don’t expect miracles if you’re going from black to white. They’re best for small color changes or similar tones.
- Material: High-quality interior latex paint (satin or eggshell finish recommended for most walls)
- I know, I know, budgets matter. But if you’re fighting coverage, that $20/gallon paint from the big box store is probably part of the problem. Better paints have more pigment solids, which means better hiding power and better durability. You’ll use fewer coats and wind up with a nicer finish. Look for paint labeled “paint & primer in one” — those usually have a stronger pigment load, but don’t expect miracles if you’re going from black to white. They’re best for small color changes or similar tones.
-
Avoid Over-Dilution – Keep it thick, but not too thick
- Some DIYers try to thin paint so it goes further or flows better. A tiny bit of water — no more than about 5% by volume — might be fine for some spraying jobs, but too much water knocks down the pigment concentration and weakens the binder’s film. If the paint feels too thick, you may have picked the wrong product or it’s just too cold. Paint flows best at room temperature, around 70°F (21°C). Keep it there for at least 24 hours before you use it.
-
Apply Paint in Thin, Even Coats – Patience is a virtue (and saves you paint)
- This part matters a lot. Don’t try to hide everything with one heavy coat. That leads to drips, slow drying, and a sloppy texture. Load your roller or brush with a moderate amount of paint, put it on in a “W” or “M” pattern, then fill it in. Overlap your strokes a little. Two thin coats of good paint will almost always beat one thick, gloppy coat. For the best coverage, put on a coat, let it dry completely (4-6 hours for most latex paints, or whatever the manufacturer says), then apply the second.
-
Allow Adequate Drying Time Between Coats – Don't rush the chemistry
- Even if the surface feels dry, the paint is still curing. Put the second coat on too soon and you can reactivate the first one, pull it up, or wind up with adhesion trouble and lousy coverage. Stick with the drying times on the can. If it’s humid or cool, give it an extra hour or two. Seriously, don’t skip this one. You’ll just make more work for yourself.
Common Causes
- Skipping Primer (or using the wrong type): This is probably the biggest offender. Primer gives you that uniform, grippy surface. Without it, or with just a skim coat of white primer over something dark, your paint’s fighting uphill.
- Low-Quality Paint: Cheap paint has fewer pigments. Fewer pigments mean less hiding power. Simple as that. You’ll end up buying more gallons and spending way more time just to get halfway decent coverage.
- Drastic Color Change: Going from a dark, bold color to a pale one is tough. The old pigment can bleed through, especially with a sheer light color. That’s where tinted primer stops being optional.
- Applying Too Thinly or Too Thickly: Too thin, and you’re not laying down enough pigment. Too thick, and you get drips, uneven drying, and often still lousy coverage because the paint isn’t spread right.
- Improper Drying Conditions: Painting in cold, humid conditions slows drying and curing, and that affects how the paint film forms. Paint needs to dry evenly, plain and simple.
- Porous or Uneven Surfaces: New drywall, patch spots, or really absorbent surfaces will suck up paint like crazy, which leaves you with patchy coverage. Primer helps seal that stuff down.
Common Mistakes
- Not Tinting the Primer: A lot of homeowners just grab standard white primer. If you’re going from crimson to cream, a tinted primer is the move. It gives your light topcoat a real chance.
- Judging Coverage When Wet: Latex paint especially can look streaky and see-through when it’s wet. It darkens and firms up as it dries. You’ve got to wait until it’s fully dry before you make the call.
- Buying Cheap Paint: It’s tempting to save a few bucks, but a $5 difference per gallon can mean 2 coats versus 4 coats. Once you add labor and extra material, the “savings” disappear fast.
- Painting in Poor Conditions: Trying to paint when it’s 50°F (10°C) and raining outside — or you’re in a drafty, unheated room — is a recipe for trouble. The paint won’t cure right, and you’ll end up with coverage problems, runs, and bad adhesion.
- Not Stirring Paint Thoroughly: Pigments settle in the can. If you don’t stir the paint (and primer!) all the way through, you’re putting on paint with uneven pigment, and that gives you patchy results.
- Applying Too Many Thick Coats Instead of Thin Ones: It feels faster, but it isn’t. Thick coats take forever to dry, don’t always bond as well, and they’re more likely to sag or crack. Keep it thin and even.
Cost & Time Breakdown
| Task | DIY Cost ($) | Pro Cost ($) | Time (DIY) |
|---|---|---|---|
| Prep & Clean Surface | 5-15 | 0-50 | 30-60 min |
| Primer (per gallon) | 25-50 | 0-100 | 1-2 hours/coat |
| Quality Paint (per gallon) | 40-80 | 0-150 | 2-4 hours/coat |
| Tools (roller, brushes, tray) | 20-50 | 0 | N/A |
| Total (for one room) | 90-200+ | 400-800+ | 8-16+ hours |
Note: Pro costs include labor and materials. DIY costs assume you already have basic tools for preparation.
Tips & Prevention
- Always Use Primer for Color Changes: Seriously, don’t skip this. Especially going from dark to light. A tinted primer makes a huge difference.
- Buy the Best Paint You Can Afford: It pays you back in fewer coats, better durability, and a finish that looks like somebody who knows what they’re doing did it. Premium brands are worth a look for bigger jobs.
- Test a Swatch: Before you commit to the whole room, paint a small section (2ft x 2ft) of an out-of-the-way wall with your primer and two coats of the paint you picked. See how it looks when dry. Saves a pile of headaches.
- Maintain Optimal Conditions: Aim for painting in temperatures between 65-80°F (18-27°C) with moderate humidity (around 50%). Good airflow helps things dry out right.
- Stir, Stir, Stir: Don’t just shake the can. Use a stir stick and really scrape the bottom so all the pigments get mixed in before you start, and keep stirring now and then while you work.
- Check Flash Time: Some paints have a “flash time,” which is a quick recoat window. Miss it and you may have to wait a lot longer for the full cure. Read the can.
When to Call a Professional
Look, some paint problems are bigger than a simple DIY fix, or maybe you just don’t have the time or patience to keep fooling with it. If you’ve already tried the steps above — especially using a quality, tinted primer and putting on good paint in thin, even coats — and you’re still getting terrible coverage, especially with an expensive specialty paint, it might be time to bring in a pro. If you’re dealing with large areas of mystery stains that keep bleeding through, or the surface itself is badly damaged, like crumbling plaster or major water damage, and it needs real repair before painting, that’s a job for somebody who does this every day. A professional painter’s got access to industrial-grade primers and tricks for tough surfaces, and they can usually figure out stubborn coverage problems pretty quick, which saves you a whole lot of frustration and wasted material.
Related Articles
Keep troubleshooting with these hand-picked guides from FixlyGuide:
- The Grain Tear-Out That Makes Your Wood Look Like Trash — Grain tear-out isn't just ugly; it ruins projects. I'll show you why it happens and the simple tricks I use to get clean, crisp cuts every…
- Your New Faucet Leaks at the Base? The 50-Cent O-Ring Fix — That brand new kitchen faucet shouldn't be dripping at the base; here's the surprisingly common reason why it's happening and the specific…
- The $10 Shower Fix Plumbers Don't Want You to Know — Stop that annoying drip! I'll show you how to fix a leaky shower faucet yourself, saving you money and preventing water waste.
- Why Your Cabinet Doors Aren't Square (And How to Fix That Gap) — Frustrated by cabinet doors that won't close flush or hang crooked? I'll show you how to diagnose and fix those annoying gaps, hinges, and…
- The Mystery of Your Stripped Cabinet Hinge: One Simple Fix — Don't let a stripped screw hole ruin your kitchen cabinets. I'll show you how to fix that loose hinge fast, often with just a few household…
- The Mystery Smell: Why Your Fridge Stinks (Even After Cleaning It) — That persistent, foul odor in your refrigerator isn't just gross; it's often a sign of hidden issues. Learn the real culprits behind linger…
Should you do this yourself?
Answer five quick questions before you start. Safety outranks savings every time.
Your experience with work like this
How high do you have to work?
Does the job involve any of these?
Will it need a permit?
Specialty tools
Free and instant. Educational guidance only — not a quote, inspection, or professional diagnosis.
Estimate your own project cost
National averages are a starting point. Enter your details for a range that fits your house.
Interior paint estimator
- Paint$96
- Supplies (tape, rollers, drop cloth)$35
- Estimated total (DIY)$131
Hiring a pro? Add roughly $1.50–$4.00/sq ft for labor depending on prep work and trim detail.
Educational estimate only — always confirm with written local bids.
What should this project cost?
Enter your project details for a realistic cost range before you call anyone.
Interior rooms run $400–$1,200; whole-home exterior painting commonly $4,000–$12,000.
- Regional adjustment
- National average
- Labor share (typical)
- ~$2,003
- Quotes to collect
- 3 written estimates
Educational estimate based on national averages — not a binding quote. Always confirm with written local estimates.
Before you start
Check the difficulty, permits, and safety risk — then decide whether to call a pro.
Free, no signup required. Estimates are educational guidance, not a quote or an inspection.
Get the print-ready PDF of this guide
A clean, ad-free, printable version you can keep on your phone or pin to the workshop wall. Free with a FixlyGuide account.
- Print-optimized layout
- Tools, materials & every step included
- Saved to your account
Recommended for DIYers & woodworkers
Sponsored
The Top 20 Tools for Workshops of Any Budget
No stationary machines or power tools required — plus 3 fundamental tools that can't be bought at any price.
Get the free guide
Ted's Woodworking — The #1 Woodworking Resource
Detailed instructions, dimensioned drawings, materials & cutting lists, and 3D schematics for every skill level.
See the plansSponsored: links above are affiliate links. FixlyGuide may earn a commission on qualifying purchases — at no extra cost to you.
Frequently asked questions
Why does my paint look translucent even after two coats?+
Often, this is due to insufficient primer, especially when going from a dark color to a light one. Low-quality paint with fewer pigments or insufficient drying time between coats can also be culprits. Make sure you're using a good, tinted primer and allowing full cure time.
Should I use a primer if my paint says 'paint and primer in one'?+
For drastic color changes (dark to light) or covering stains, I always recommend a dedicated, quality primer. 'Paint and primer in one' products are best for minor color shifts or covering similar tones, not for heavy-duty hiding. Think of them as high-build paints, not true primers.
How long should I wait between paint coats?+
Always check the paint can for the manufacturer's recommended drying time, but typically, for latex paints, it's 2-4 hours. In humid or cool conditions, I'd give it an extra hour or two. Don't rush it; proper drying prevents adhesion issues and improves coverage.
Can I add more water to my paint for better coverage?+
Absolutely not for better coverage! Adding too much water thins the paint, reducing its pigment concentration and hiding power. It's usually a recipe for worse coverage and a weaker paint film. Only thin if explicitly recommended for a specific application, and only by a tiny amount.
My paint looks patchy; is it my roller technique?+
Poor roller technique can definitely contribute to patchy coverage. Not loading enough paint, applying too much pressure, or not overlapping your strokes can leave thin areas. Ensure you're applying paint evenly in thin coats and maintaining a wet edge.
What's the best primer for covering a dark wall color?+
For dark-to-light color changes, your best bet is a high-quality, **tintable** acrylic latex primer. Ask the paint store to tint it to a shade that closely matches your final topcoat color. This gives your new paint a much better base to cover.
How do I know if my paint is good quality?+
Generally, higher-priced paints from reputable brands will offer better quality and hiding power. Look for paints with a higher percentage of solids (pigments and binders) listed on the technical data sheet. Ask the folks at a dedicated paint store – not just the big box guys – they usually know their stuff.
Will adding a third or fourth coat eventually fix poor coverage?+
While more coats *can* eventually provide better coverage, it's often a sign that you're fighting an uphill battle due to inadequate priming or low-quality paint. You'll spend more time and money than if you'd addressed the root cause. It's usually better to fix the foundation (primer) first.
What temperature is best for painting to ensure good coverage?+
Aim for a room temperature between 65-80°F (18-27°C) with moderate humidity, around 50%. Painting in these conditions allows the paint to dry and cure properly, leading to the best coverage and finish. Too cold or too humid, and the paint won't perform as intended.
Discussion
Loading comments…