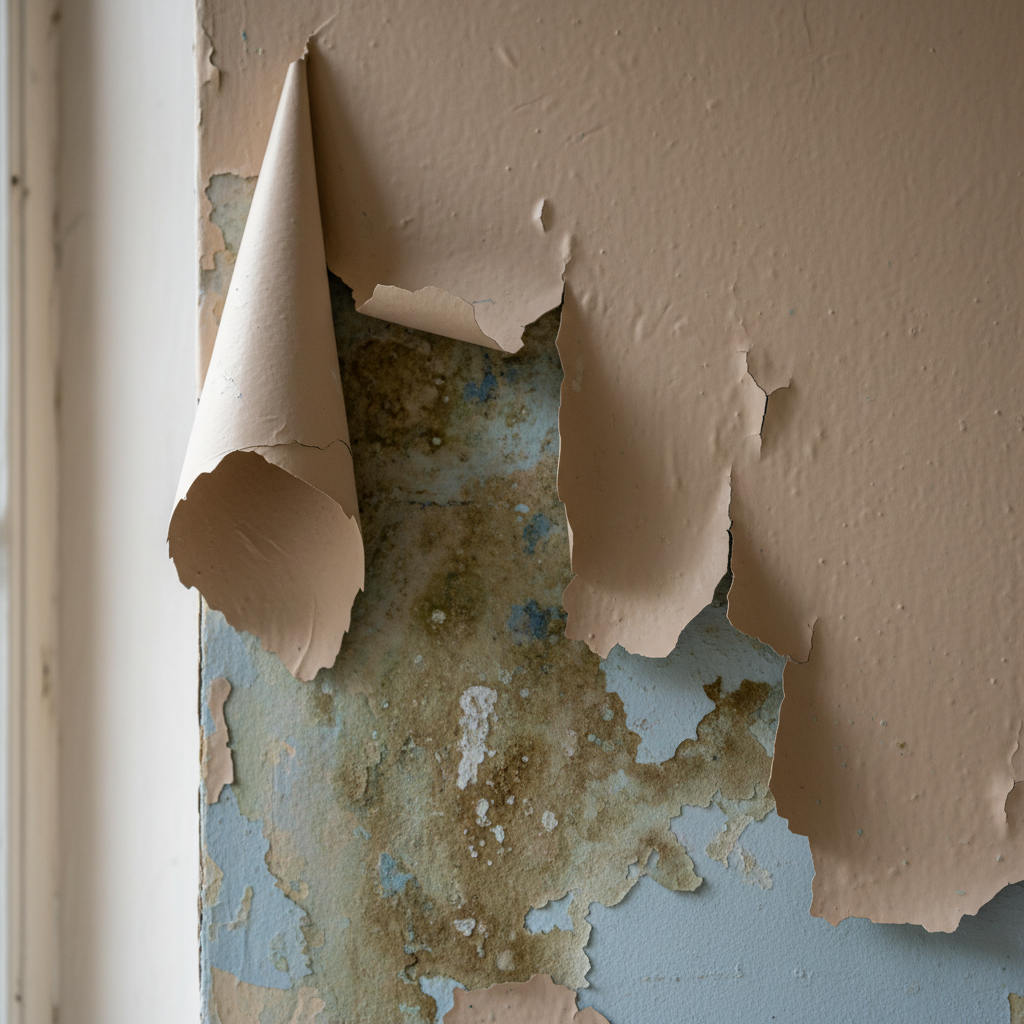
- Leaky Pipes or Roofs: This is the big one. Even a small, slow leak can saturate drywall or plaster over time and lead to widespread peeling.
- High Humidity/Poor Ventilation: Bathrooms, kitchens, and basements without proper exhaust fans or dehumidifiers trap moisture, causing condensation on cool surfaces, which then attacks the paint bond.
- Improper Surface Prep: Painting over dirt, grease, efflorescence, or loose old paint without proper cleaning and scraping means the new paint has nothing solid to stick to.
- No Primer or Wrong Primer: Trying to paint directly onto a bare, porous, or stained surface without a good bonding primer is a recipe for failure. Latex paint on an oil-based primer without sanding and proper prep will also cause issues.
- Paint Applied Too Thickly or Too Quickly: Applying paint too thick or not allowing proper drying time between coats can lead to a weaker film that’s more prone to delamination.
General remodeling · Renovation planning
| Project category | General remodeling |
|---|---|
| Problem type | Renovation planning |
| Trade required | General contracting |
| Urgency | Planned project |
| Safety risk | Low safety risk |
| DIY suitability | Pro recommended |
| Cost category | Major investment |
| Typical timeline | Design and permitting often 2–4 months before work starts |
| Contractor type | General contractor |
Repair option
Phase the work and fix the building envelope first.
Replacement option
Full renovation with permits, design, and a general contractor.
Common causes
- Space no longer fits how the household lives
- Resale preparation
- Deferred maintenance stacking up
Relevant tools:project cost estimatorcompare quoteshome improvement material prices
Published September 23, 2026Last updated September 23, 2026
Tools & materials you'll need
Affiliate linksAs an Amazon Associate FixlyGuide earns from qualifying purchases — at no extra cost to you. Prices and availability are accurate as of publication and subject to change.
Quick Answer
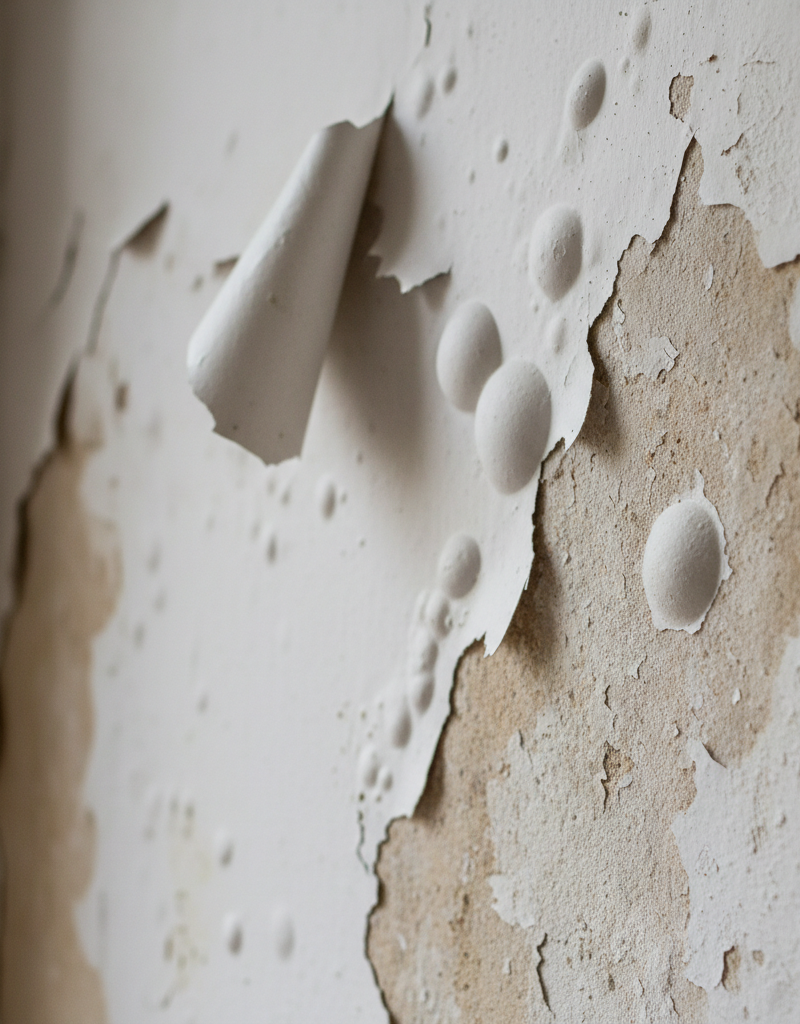
When you see paint peeling off your walls or ceilings in big, curling sheets, it usually isn’t just a bad paint job — it’s a flashing red light for moisture. This kind of delamination, where entire layers separate from the substrate or previous coats, points straight to water getting behind or under the paint film. The fix isn’t hard in theory, but it does take some discipline: find that moisture source, dry things out, and prep it right before you even think about cracking open a can again.
The Problem
I’ve seen this scene a thousand times. A homeowner calls me up, frustrated, saying their freshly painted wall or ceiling looks like it’s shedding skin. They’ve painted over it, sometimes more than once, and the new coat just joins the peeling parade. No dice.
This isn’t just an ugly cosmetic issue; it’s a symptom of a deeper problem: moisture intrusion. Water, whether it’s from a leak, high humidity, or condensation, gets behind the paint film. It weakens the adhesion, lifts the paint off the surface, and before you know it, you’ve got flakes and sheets everywhere. I pulled a water heater in Frisco last month that had exactly this kind of mess on the ceiling below it. Ugly? You bet. But it won’t stop until you cut off the water supply.
How It Works
Think about paint like a thin, flexible skin over your wall. It needs to bond tightly to that surface to stay put. When moisture, usually water vapor, gets trapped behind that skin, it starts messing with the adhesive bond. Water molecules are tiny, and they’ll work their way through porous surfaces like drywall, plaster, or even wood.
Once they’re behind the paint, they push on it and start making blisters or bubbles. Over time, those bubbles grow, and gravity, plus swings in temperature and humidity, makes the paint film lose its grip entirely. It starts to crack, then curl, and eventually whole sections let go. That’s not usually the paint being “bad” — it’s the surface telling you something’s wrong.
Humidity is a big player here, especially in bathrooms, kitchens, or basements. If you’re taking hot showers and not venting the room, that warm, moist air condenses on cooler wall surfaces. If the paint isn’t made for high humidity or there’s no vapor barrier, that moisture gets into the wall. Then, as it dries, it pulls the paint away. Same story with leaky roofs, plumbing leaks, or exterior siding problems letting rain into the wall cavity. The paint might look fine for a while, but eventually the constant push and pull of moisture wins.
Step-by-Step Fix
This isn’t a quick slap-on-some-paint job. You’ve got to be a detective first, then a surgeon, before you can call yourself a painter. Skip steps here, and you’re just buying yourself the same headache later.
-
Diagnose the Moisture Source — The crucial first step Start by figuring out why you’ve got moisture. Is it a leaky pipe in the wall? A roof leak? Poor ventilation in a bathroom? High humidity in a basement? Check the attic for water stains, look for drips under sinks, and feel walls for dampness. If you’ve got a hunch, trust it and verify it — that gut feeling usually didn’t come from nowhere.
- Tools: Flashlight, moisture meter (if you have one), your eyes and hands.
- If you suspect a leak: Look for water stains on ceilings, walls, or floors. Check plumbing fixtures, roof shingles, and exterior siding.
-
Stop the Moisture — No fix without this Once you’ve found the source, you must stop it. Fix that leaky pipe, seal the roof, install a proper bathroom fan (vented outside, not just into the attic!), or run a dehumidifier in damp areas. If you paint over moisture, you’re just covering up a ticking time bomb.
- Safety: For significant leaks or structural water damage, consider calling a plumber or roofer.
- Tip: If it’s high humidity, aim for indoor humidity levels between 30% and 50%.
-
Scrape Away All Loose Paint — Don’t be shy Get a wide putty knife and go to town. Scrape off every bit of paint that’s loose, blistering, or even slightly lifting. Don’t stop when it “looks good” — keep scraping until you reach firmly adhered paint or the bare substrate. Feather the edges where the old paint meets the scraped area so you don’t end up with a hard ridge.
- Tools: 3-inch or 4-inch stiff putty knife, paint scraper, wire brush (for stubborn areas).
- Safety: Wear safety glasses and a dust mask. Old paint can contain lead.
-
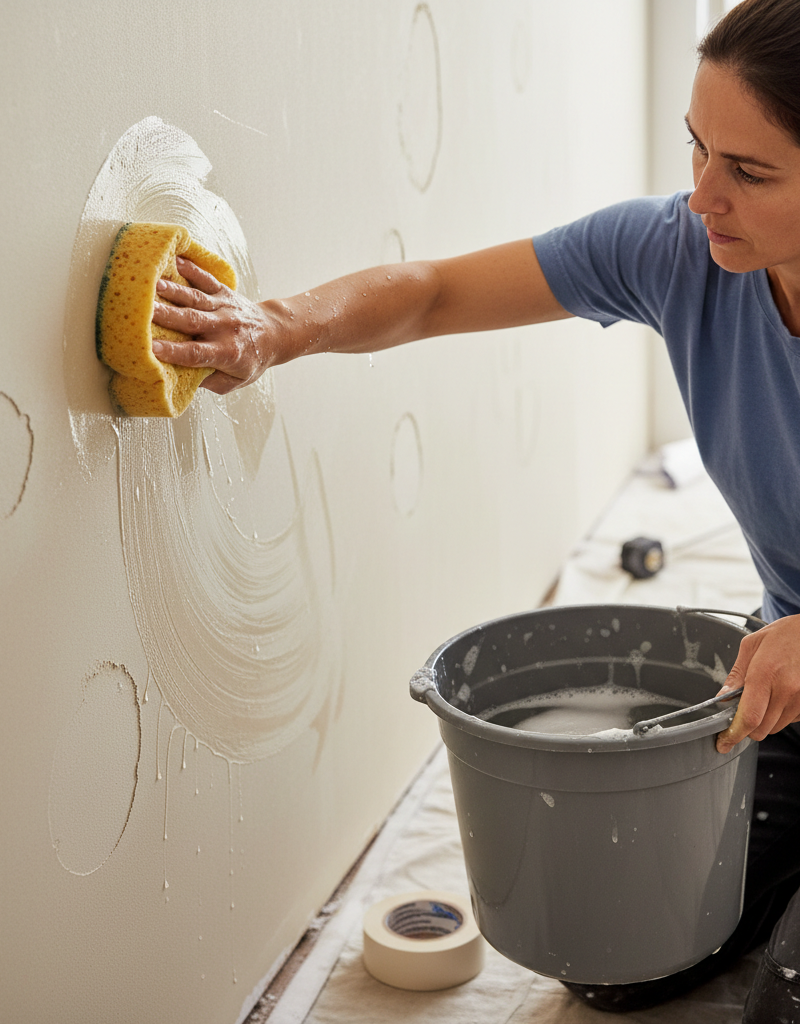
Clean the Surface Thoroughly — Get it spotless After scraping, wipe down the entire area with a damp cloth to get rid of dust, debris, and any mold or mildew. For mold, use a solution of 1 part bleach to 3 parts water, or a specialized mildewcide cleaner. Make sure the surface is completely dry before moving on. I mean bone-dry — sometimes for days if it was really soaked.
- Materials: Mildewcide cleaner or bleach solution, clean rags, bucket.
- Drying: Use fans or a dehumidifier to speed up drying, especially in damp environments.
-
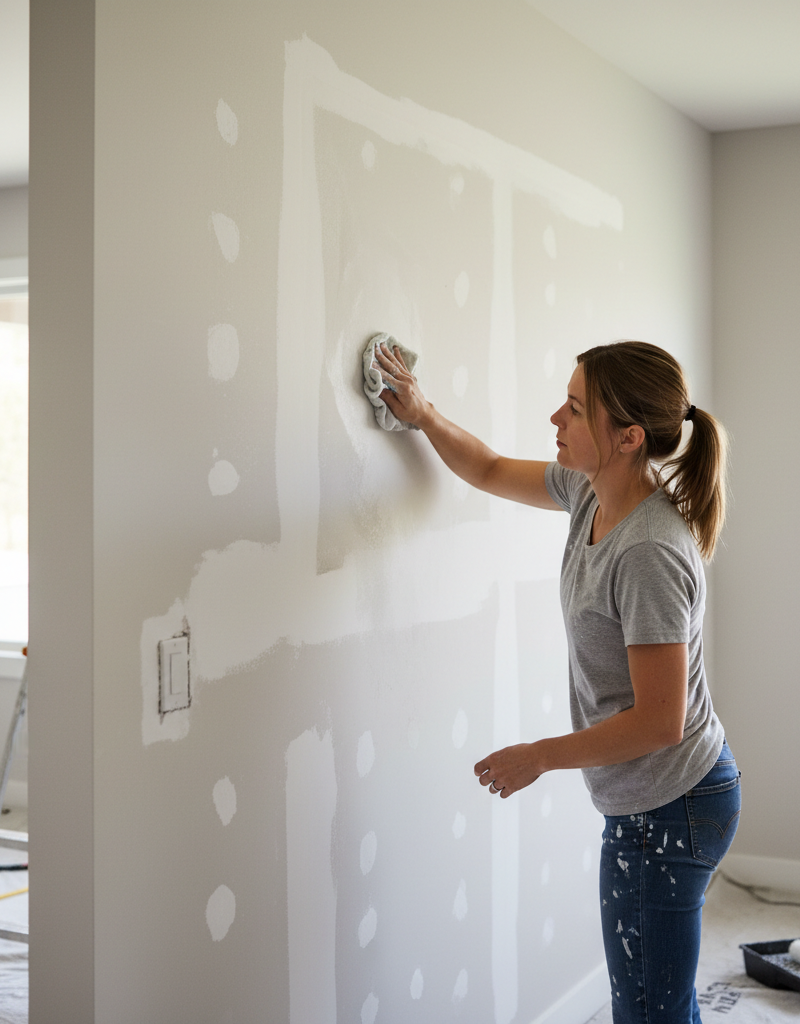
Repair Damaged Substrate — Smooth it out Fill any holes, cracks, or gouges with the right patching compound. Spackle for small holes, joint compound for larger drywall repairs, epoxy filler for wood. Let it dry completely, then sand it smooth with fine-grit sandpaper (around 120-150 grit). You want that surface flush and clean — no humps, no divots.
- Materials: Spackle or joint compound, 120-150 grit sandpaper, sanding block.
- Tip: For very large areas of damage, you might need to cut out and replace sections of drywall.
-
Apply a Stain-Blocking, Bonding Primer — Your secret weapon This one’s non-negotiable. You need a high-quality, oil-based or shellac-based primer. These primers give you better adhesion, seal off any leftover stains, and help stop future moisture wicking. Don’t cheap out here; a bargain primer’ll let you down every time. Roll on one even coat.
- Materials: High-quality oil-based or shellac-based primer (e.g., Zinsser B-I-N, Kilz Original), brush or roller.
- Curing: Let the primer cure fully according to the manufacturer's instructions, usually 1-2 hours for shellac, longer for oil-based.
-
Inspect and Re-prime (if necessary) — Check your work Once the primer’s dry, take a close look. Any stains bleeding through? Any spots that still look questionable? Hit those areas again with a second coat of primer. Better to catch it now than stare at the same stain after the topcoat’s on.
-
Apply Finish Coats of Paint — The home stretch Finally, you can put on your topcoat. Use a high-quality, breathable paint, especially in moisture-prone areas. For bathrooms and kitchens, I always recommend a "kitchen and bath" specific paint with mildewcide. Apply two thin, even coats, and give it proper drying time between coats. Don’t rush it. That’s how you end up doing the job twice.
- Materials: Interior latex paint (or specific kitchen/bath formula), roller, brush.
- Coats: Two coats are almost always better than one thick one for durability and coverage.
Common Causes
- Leaky Pipes or Roofs: This is the big one. Even a small, slow leak can saturate drywall or plaster over time and lead to widespread peeling.
- High Humidity/Poor Ventilation: Bathrooms, kitchens, and basements without proper exhaust fans or dehumidifiers trap moisture, causing condensation on cool surfaces, which then attacks the paint bond.
- Improper Surface Prep: Painting over dirt, grease, efflorescence, or loose old paint without proper cleaning and scraping means the new paint has nothing solid to stick to.
- No Primer or Wrong Primer: Trying to paint directly onto a bare, porous, or stained surface without a good bonding primer is a recipe for failure. Latex paint on an oil-based primer without sanding and proper prep will also cause issues.
- Paint Applied Too Thickly or Too Quickly: Applying paint too thick or not allowing proper drying time between coats can lead to a weaker film that’s more prone to delamination.
- Exterior Moisture Intrusion: Cracks in stucco, worn-out caulk around windows, or damaged siding can let rain into the wall cavity, causing interior paint to peel.
Common Mistakes
- Painting Over the Peeling Paint: This is the most common mistake I see. You’re just putting new paint on old, failed paint, and it’s all going to come off together. You’ve got to remove the loose stuff first.
- Ignoring the Moisture Source: If you don’t find and fix the leak or humidity problem, you’ll be doing this same repair again next year. Guaranteed.
- Not Scraping Enough: Homeowners often stop scraping when the paint “looks” good. You need to scrape until you hit firmly adhered material, even if it means exposing bare drywall.
- Skipping Primer: Thinking you can save a few bucks by not priming, especially after extensive scraping and repair, is a false economy. A good primer is your bond insurance.
- Using the Wrong Type of Primer: If you’re dealing with water damage or stubborn stains, a cheap all-purpose latex primer won’t cut it. You need a dedicated stain-blocking, bonding primer.
- Not Letting Things Dry: Patching compound, primer, and even paint need specific drying and curing times. Rushing the process traps moisture and leads to adhesion issues.
Cost & Time Breakdown
Here’s a rough idea of what you’re looking at for a typical 10x12 room with moderate peeling.
| Task | DIY Cost | Pro Cost | Time |
|---|---|---|---|
| Diagnose Moisture Source | $0 (your time) | $75–$250 (inspection fee) | 1–4 hours |
| Fix Minor Leak/Ventilation | $20–$150 (parts) | $150–$500+ (plumber/HVAC) | 1–8 hours |
| Scrape & Prep Surface | $10–$30 (tools) | Included in painting bid | 2–6 hours |
| Patch & Sand | $15–$40 (materials) | Included in painting bid | 1–3 hours |
| Primer (2 coats) | $30–$70 (gallon) | Included in painting bid | 2–4 hours |
| Paint (2 coats) | $40–$80 (gallon) | Included in painting bid | 3–6 hours |
| Total (DIY) | $115–$370 | $700–$1500+ | 1–3 days |
Tips & Prevention
- Ventilate, Ventilate, Ventilate: Always use your bathroom fan during and after showers for at least 15-20 minutes. Open windows in kitchens while cooking. This one’s huge for stopping condensation before it starts.
- Regular Inspections: Check your roof, plumbing (under sinks, behind toilets), and exterior caulk for leaks now and then. Catching them early is way cheaper than dealing with peeling paint.
- Use Quality Paint & Primer: Don’t buy the cheapest stuff. Good quality paints, especially "kitchen and bath" formulations, hold up better against mildew and stick better too.
- Proper Curing Times: Always read the label and follow the manufacturer's recommended drying and re-coat times for all products — primer, paint, and patching compounds.
- Exterior Maintenance: Keep your home’s exterior in decent shape. Seal cracks in siding or stucco, maintain gutters, and make sure downspouts direct water away from the foundation. That keeps water from sneaking into your walls from the outside.
- Dehumidifiers for Basements: If you’ve got a damp basement, a dehumidifier is a must-have. Keep humidity below 50% to prevent moisture issues.
When to Call a Professional
You’ve taken a swing at it, but sometimes the problem’s just bigger than a homeowner wants to tackle. If you can’t pinpoint the moisture source, or if it’s a major leak involving plumbing, roofing, or structural issues, that’s when you absolutely need to call in a pro. Dealing with extensive mold growth also warrants a specialist. If the peeling paint covers large areas (say, more than 20-30 square feet), or if you’re uncomfortable with the amount of scraping and repair needed, a professional painter’ll have the tools and experience to get the surface properly prepped and painted. Don’t mess around with water damage or mold — it can lead to much bigger headaches down the road than just ugly paint.
Related Articles
Keep troubleshooting with these hand-picked guides from FixlyGuide:
- The 7 Critical Wall Prep Mistakes Most DIY Painters Make (And How to Fix Them) — Prepping your walls correctly before painting is crucial for a smooth, lasting finish. Learn to avoid common DIY mistakes and achieve profe…
- Why Your Cabinet Doors Aren't Square (And How to Fix That Gap) — Frustrated by cabinet doors that won't close flush or hang crooked? I'll show you how to diagnose and fix those annoying gaps, hinges, and…
- The 7 Critical Wall Prep Mistakes Most DIY Painters Make (And How to Fix Them) — Discover the common wall preparation mistakes DIY painters make and how to avoid them for a flawless finish that lasts.
- The Mystery of the Loose Screws: Why Your Wood Furniture Keeps Coming Apart — Discover why screws in your wood furniture repeatedly loosen, causing instability, and learn the simple, lasting fix that avoids constant r…
- Your Painted Cabinets Are Peeling? The $50 Primer Is Why. — Discover the #1 reason DIY painted cabinets chip and peel—it's not the paint, but the overlooked, non-negotiable prep step pros use for a r…
- Why Your Paint is Peeling (And It’s Not Always Bad Prep) — Peeling paint isn't just an eyesore; it often signals deeper issues than just a shoddy paint job. I'll walk you through the real culprits a…
What should this project cost?
Enter your project details for a realistic cost range before you call anyone.
Mid-range remodels commonly $12,000–$22,000; small repairs often under $600.
- Regional adjustment
- National average
- Labor share (typical)
- ~$5,603
- Quotes to collect
- 3 written estimates
Educational estimate based on national averages — not a binding quote. Always confirm with written local estimates.
Get the print-ready PDF of this guide
A clean, ad-free, printable version you can keep on your phone or pin to the workshop wall. Free with a FixlyGuide account.
- Print-optimized layout
- Tools, materials & every step included
- Saved to your account
Recommended for DIYers & woodworkers
Sponsored
The Top 20 Tools for Workshops of Any Budget
No stationary machines or power tools required — plus 3 fundamental tools that can't be bought at any price.
Get the free guide
Ted's Woodworking — The #1 Woodworking Resource
Detailed instructions, dimensioned drawings, materials & cutting lists, and 3D schematics for every skill level.
See the plansSponsored: links above are affiliate links. FixlyGuide may earn a commission on qualifying purchases — at no extra cost to you.
Frequently asked questions
Why does my paint peel off in large sheets instead of small flakes?+
Peeling in large sheets, sometimes called delamination, is a strong indicator of moisture getting trapped behind the paint film. This moisture weakens the bond between the paint and the surface, causing entire layers to lose adhesion and lift away.
What are common sources of moisture that cause paint to peel?+
Common sources include leaky pipes, roof leaks, excessive humidity from unvented bathrooms or kitchens, condensation on cold surfaces, and even exterior water intrusion through damaged siding or caulk. You've got to find the source first.
Can I just paint over the peeling areas?+
No, absolutely not. Painting over peeling paint is the biggest mistake you can make. The new paint will only adhere to the loose, old paint, and it will quickly start peeling itself, making the problem worse.
What kind of primer should I use for peeling paint problems?+
You need a high-quality, stain-blocking, bonding primer. Oil-based or shellac-based primers are excellent for sealing surfaces, blocking stains, and providing superior adhesion, especially in moisture-prone areas. Don't cheap out on this step.
How long does the surface need to dry after a moisture issue is fixed?+
The drying time depends entirely on the severity of the moisture. For minor issues, a few days with good ventilation might suffice. For significant water damage, it could take weeks for the substrate to dry out completely. Use fans and dehumidifiers.
Is paint peeling a sign of mold?+
It can be, yes. Moisture that causes paint to peel also creates an ideal environment for mold and mildew to grow. Always inspect for mold and treat it properly before repainting to ensure a healthy and lasting finish.
What are some preventative measures to avoid future paint peeling?+
Ensure proper ventilation in bathrooms and kitchens, maintain healthy indoor humidity levels (30-50%), fix leaks promptly, and keep your home's exterior well-maintained to prevent water intrusion. Using quality paints in wet areas also helps.
When should I call a professional for peeling paint?+
If you can't identify or fix the moisture source, if there's extensive water damage, major mold growth, or if the peeling covers a very large area (say, a whole ceiling), it's time to call in a professional plumber, roofer, or painting contractor.
Discussion
Loading comments…