- Patch and Skim If Needed.
- Tools: Spackling compound, 6-inch drywall knife.
- If the scraping leaves gouges or the surface feels uneven, put on a thin skim coat of spackling compound. Use a 6-inch knife and pull it tight to the wall so you get a thin, smooth patch. You're filling low spots, not building a hump.
General remodeling · Renovation planning
| Project category | General remodeling |
|---|---|
| Problem type | Renovation planning |
| Trade required | General contracting |
| Urgency | Planned project |
| Safety risk | Low safety risk |
| DIY suitability | Pro recommended |
| Cost category | Major investment |
| Typical timeline | Design and permitting often 2–4 months before work starts |
| Contractor type | General contractor |
Repair option
Phase the work and fix the building envelope first.
Replacement option
Full renovation with permits, design, and a general contractor.
Common causes
- Space no longer fits how the household lives
- Resale preparation
- Deferred maintenance stacking up
Relevant tools:project cost estimatorcompare quoteshome improvement material prices
Published October 5, 2026Last updated October 5, 2026
Tools & materials you'll need
Affiliate linksAs an Amazon Associate FixlyGuide earns from qualifying purchases — at no extra cost to you. Prices and availability are accurate as of publication and subject to change.
Quick Answer
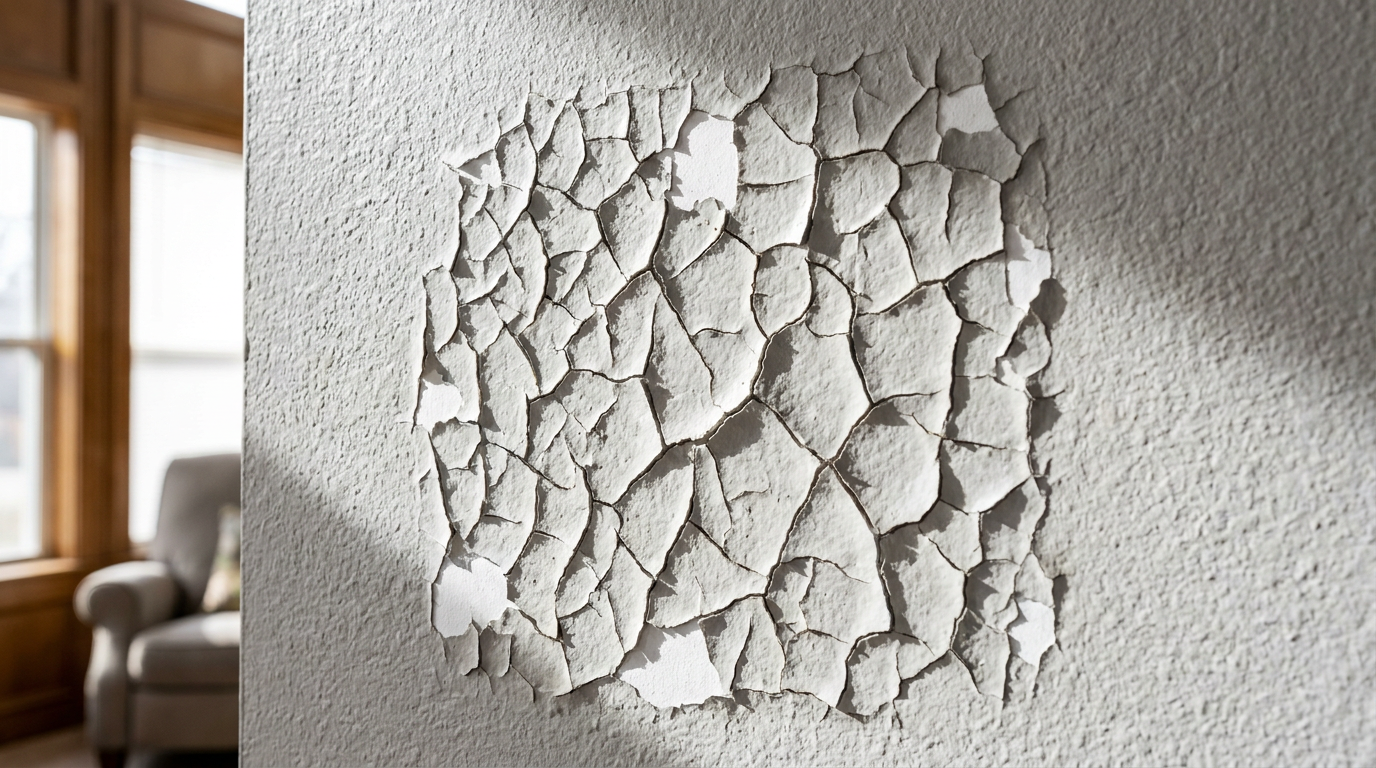
Paint cracks, also known as 'alligatoring' or 'crazing,' happen when the top coat of paint can't stick properly to the surface underneath. Usually, that means the first coat of paint or primer wasn't fully dry before the second coat went on. I've also seen it from painting in direct sun, using cheap paint, or laying a hard, rigid paint — like an oil-based enamel — over something more flexible, like a latex primer. No mystery there. Just bad layering.
The Problem
You spent the weekend painting, and it looked great. Then a few days or weeks later, you spot a web of fine, shallow cracks crawling across the surface. Looks like dried mud. Or alligator skin, if you want the proper term. This isn't just a cosmetic nuisance; it's paint failure. The top layer has lost its grip and is pulling apart, which means it's not protecting the wall underneath anymore. If you don't deal with it, those little cracks turn into flaking and peeling, and then you're right back at square one.
How It Works
Paint's got to do two jobs: stick to the surface below it and hold together as a film. Alligatoring happens when the top coat shrinks at a different rate than the layer underneath. That pulls the paint in different directions, and once the stress beats the paint's own strength, it fractures.
Think of it like a brownie that's crispy on top but still gooey in the middle. The top cools and contracts, but the soft layer under it can't keep it together, so the surface cracks. Same thing with paint. If you put a fast-drying top coat over an undercoat that's still curing, the top layer tightens up and basically tears itself apart because the base under it is too soft and flexible. That's the usual culprit, but temperature, dirt, and mixing the wrong products can create the same stress and give you the same ugly cracked finish. I pulled a water heater in Frisco last month that had exactly this kind of layered failure on the chase wall — looked fine from ten feet away, then bam, whole section was alligatored like a reptile hide.
Step-by-Step Fix
The only real fix for alligatoring is to strip off the failed paint and start over. Don't try to paint over it — those cracks will show right through.
-
Scrape It All Off.
- Tools: 2-inch putty knife, 5-in-1 painter's tool.
- Start with a stiff putty knife or a 5-in-1 tool and scrape off every bit of cracked, loose paint. You want solid, stable material underneath. If the layer below the cracked paint is soft or peeling too, you've got to take that off as well. Keep going until the paint stops coming off without a fight.
-
Feather the Edges.
- Tools: 120-grit sandpaper, sanding block.
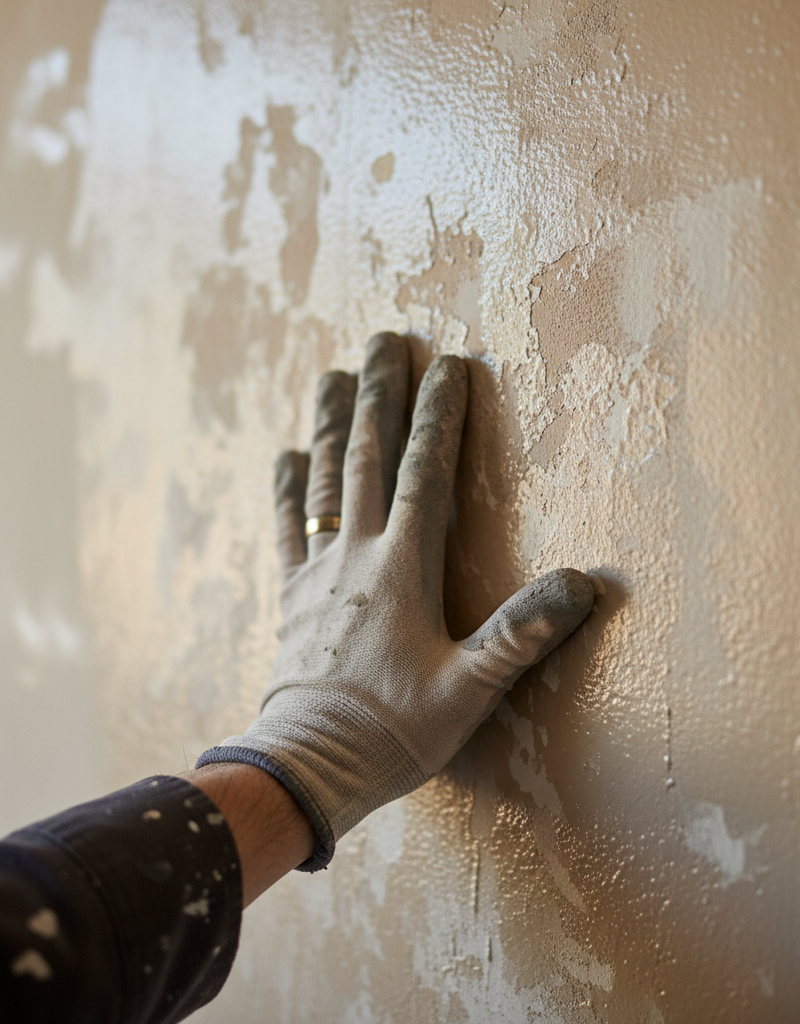
- The scraped spot will leave a hard edge — a little cliff between the remaining paint and the bare area. Smooth that transition out. Use a sanding block with 120-grit sandpaper to feather the edges until they're flush with the wall. Run your hand across it; you shouldn't feel a ridge.
-
Clean the Surface.
- Tools: Trisodium phosphate (TSP) or substitute, bucket, sponge, clean rags.
- Wash the whole area with a TSP solution to get rid of dust, oils, and leftover residue. This step matters. Mix the cleaner per the directions, wash the wall with a sponge, then rinse it with a clean rag dampened with plain water. Let it dry all the way — at least 2-4 hours.
-
Patch and Skim If Needed.
- Tools: Spackling compound, 6-inch drywall knife.
- If the scraping leaves gouges or the surface feels uneven, put on a thin skim coat of spackling compound. Use a 6-inch knife and pull it tight to the wall so you get a thin, smooth patch. You're filling low spots, not building a hump.
-
Sand the Patch Smooth.
- Tools: 150-grit sandpaper or sanding sponge.
- Once the spackle's fully cured — check the label, because it could be a few hours or overnight — sand it smooth. Start with 150-grit and finish with 220-grit if you want it to disappear into the wall. Feel it with your hand. That never lies. Vacuum the dust off and wipe it down with a tack cloth or a barely damp rag.
-
Apply a Quality Primer.
- Tools: Quality latex primer (e.g., Zinsser Bulls Eye 1-2-3), roller or brush.
- This is the step that keeps the mess from coming back. Primer gives the top coat a uniform surface to bite into. Use a high-quality acrylic (latex) primer. Put on one even coat and let it dry for the full time the manufacturer calls for. Don't get cute and rush it.
-
Respect the Recoat Time.
- Safety: Check the primer can for the recoat window. It's usually 2-4 hours, but can be longer in humid conditions. Applying the top coat too soon is the #1 cause of alligatoring.
- If you topcoat before the primer has had time to cure and shed its solvents, you're setting yourself up for another failure. Give it the full recommended time, and if the room's humid or cold, add an extra hour or two. Better to wait than redo it.
-
Apply Your Top Coat.
- Tools: High-quality latex paint, roller or brush.
- Roll or brush on your first coat of quality acrylic latex paint. Skip oil-based paint over latex primer — that's a classic bad combo, and it cracks under stress. Use smooth, even strokes and don't overwork it. Let it dry all the way, and again, follow the recoat time on the can.
-
Apply the Final Coat.
- Put on your second and final coat of paint. If you've done the scraping, sanding, cleaning, priming, and waiting, you've got a stable base now, and that gives you a durable, crack-free finish.
Common Causes
Why did your paint crack in the first place? Here are the usual suspects:
- Recoating Too Soon: This is the big one. The first coat was still wet or curing when the second coat went on. The top dried first, formed a tight skin, and then cracked as the undercoat kept shrinking and giving off solvents.
- Incompatible Paints: Putting a hard, rigid paint — like an oil-based enamel or a vinyl-based paint — over a softer, more flexible paint — like acrylic latex — is asking for trouble. The top coat can't move with the bottom coat, so it splits.
- Painting in Direct Sun or on a Hot Surface: If the surface is hot, above 90°F, the paint flash-dries almost right away. That makes a brittle film before the rest of the paint has a chance to bond and cure properly.
- Low-Quality Paint: Cheap "bargain" paints don't have as many solids and binders, which are the stuff that gives paint flexibility and adhesion. They crack a whole lot easier than a premium product.
- Surface Contamination: Dirt, grease, wax — any of that on the wall keeps paint from gripping the surface. It might look okay at first, but the weak bond fails later and the paint cracks.
- Skipping Primer: If you're going straight over new drywall or thick joint compound without priming, the surface drinks the moisture out of the paint too fast. That throws off the cure and leads to cracking.
- Paint Applied Too Thickly: One heavy coat might look like a shortcut, but it dries unevenly. The surface skins over while the paint underneath is still wet, and that can lead to alligatoring as it cures.
- Aging Oil-Based Paint: Old oil-based coatings get brittle over time. As the house expands and contracts with temperature and humidity swings, that old film can't flex anymore and starts to crack.
- Excessive Temperatures: Paint in a room that's too cold, below 50°F, and the cure gets messed up. The film won't coalesce right, and you end up with a weak, brittle coat that can crack later.
Common Mistakes
- Just painting over it. Biggest mistake on the list. The crack pattern comes right through the new paint. You've got to remove the failed stuff first.
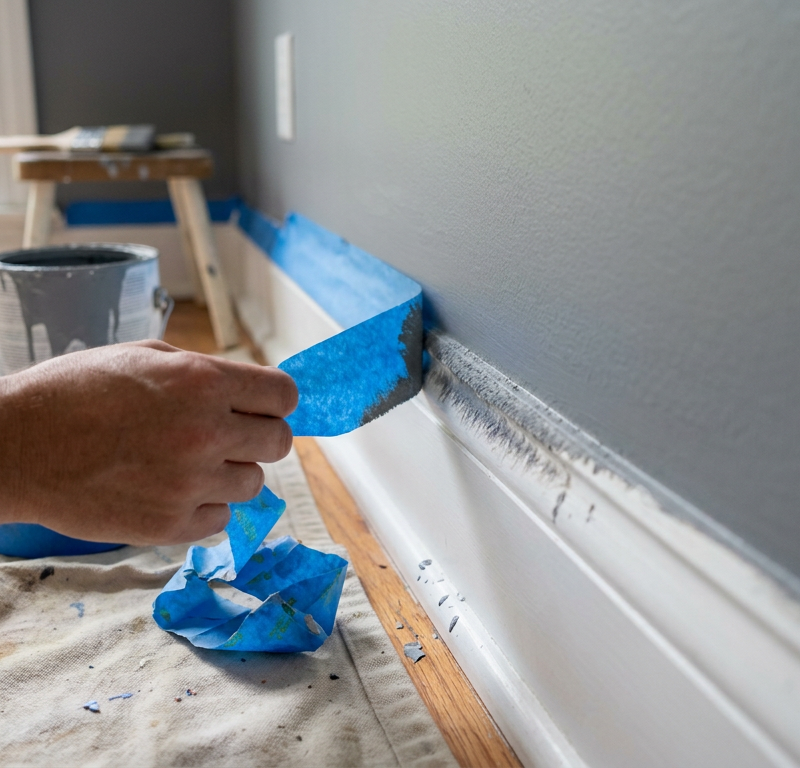
- Rushing the prep. People hate scraping and sanding. I get it. But if the surface isn't smooth, clean, and dull, the new paint won't stick any better than the old paint did. Then the problem's back.
- Using the wrong primer (or none at all). Primer isn't optional here. It gives you a bridge between the old surface and the new finish. A quality acrylic bonding primer is cheap insurance.
- Ignoring the recoat window. Painting takes patience. The time on the can is a minimum, not a suggestion. If it says "recoat in 4 hours," wait 4 hours. Humid? Wait longer.
- Applying a thick "hiding" coat. Trying to bury the problem with one giant coat is a good way to make it happen again. Two thin, even coats beat one thick one every time.
Cost & Time Breakdown
Fixing a 5x5 foot section of alligatored wall.
| Task | DIY Cost | Pro Cost | Time |
|---|---|---|---|
| Scrape & Sand Failed Paint | $15 (blades, sandpaper) | $75–$125 | 1–2 hours |
| Clean & Patch Surface | $20 (TSP, spackle) | $50–$100 | 1 hour + dry time |
| Priming | $15 (quart of primer) | $40–$60 | 30 mins + dry time |
| Painting (2 coats) | $20 (quart of paint) | $75–$150 | 1 hour + dry time |
| Total | $70 | $240–$435 | ~4 hours active, 24 hours total |
Tips & Prevention
- Always read the can. The manufacturer knows their own paint. Follow the temperature, humidity, and recoat instructions.
- Buy good paint. That extra $15-$20 per gallon from a real paint store is money well spent. Better binders, better solids, better flexibility.
- Two thin coats are king. Don't try to force it with one heavy coat. It cures unevenly and causes paint film problems.
- Prime strategically. Always prime new drywall, patched spots, and any time you're going from a dark color to a light one. Use a bonding primer on glossy or tricky surfaces.
- Control your environment. Stay out of direct sun and keep surface temperatures under 90°F. And don't paint if the room's below 50°F, or the paint won't cure right.
- Let it cure. Fresh paint may feel dry in a few hours, but it can take up to 30 days to fully harden. Be gentle with it during that stretch.
When to Call a Professional
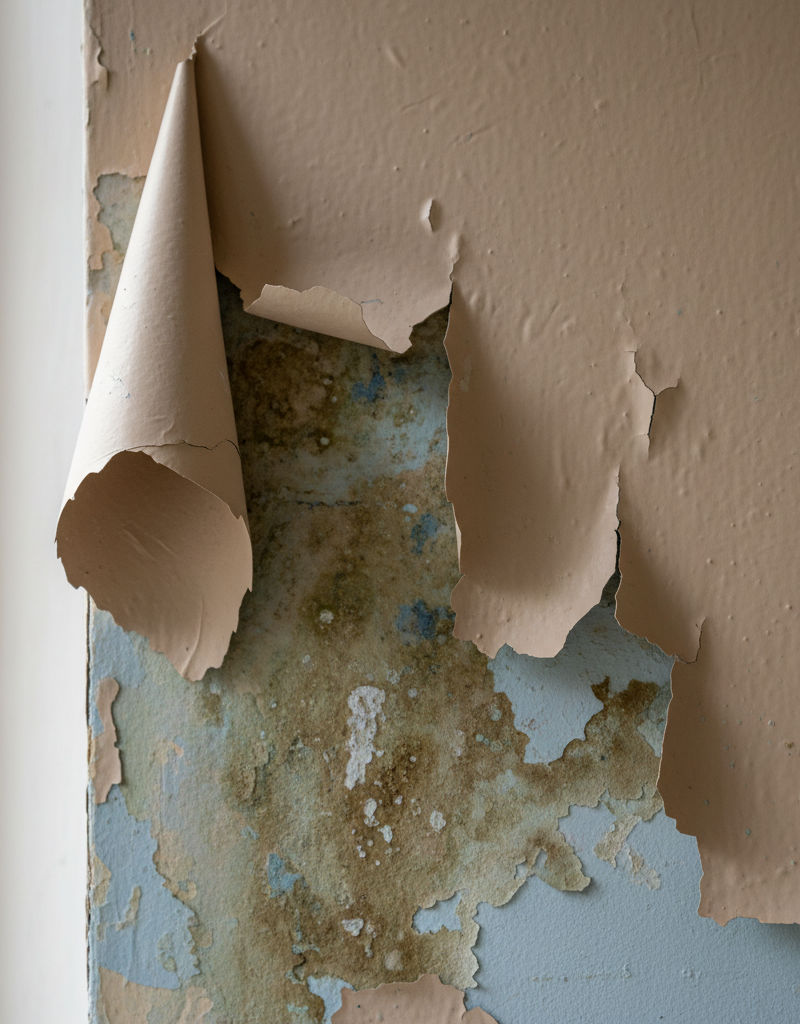
If the cracking is spread across multiple rooms, or if it comes back after you've done the repair work, it's probably time to bring in a pro. That can point to a bigger issue, like moisture coming through the walls from outside, and a paint job won't fix that. And if the paint you're scraping might contain lead — common in homes built before 1978 — you absolutely need a certified lead-safe renovator. Don't scrape lead paint yourself. That dust is nasty stuff.
Related Articles
Keep troubleshooting with these hand-picked guides from FixlyGuide:
- The 7 Critical Wall Prep Mistakes Most DIY Painters Make (And How to Fix Them) — Discover the common wall preparation mistakes DIY painters make and how to avoid them for a flawless finish that lasts.
- Why Your New Inductor Cooktop Won't Turn On (And the Easy Fix) — Don't panic if your new induction cooktop isn't firing up after installation; it's a common issue with a straightforward electrical cause.
- Stain Blotching Your Pine Project? 5 Causes of Splotchy Finishes (And How to Prevent It) — Tired of your pine projects turning out splotchy and uneven? Understand the 5 key reasons pine blotches and learn the pro-level preparation…
- Your New Faucet Leaks at the Base? The 50-Cent O-Ring Fix — That brand new kitchen faucet shouldn't be dripping at the base; here's the surprisingly common reason why it's happening and the specific…
- That New Grout Is Already Cracking? Here’s the Hidden Cause — Cracked grout weeks after a renovation is often a sign of a deeper issue with your subfloor or tile installation, not just a problem with t…
- Why Your New Sod Is Disappearing (The Grub Problem Plumbers Don't Talk About) — If your freshly laid sod is dying in patches or easily pulls up, you're likely dealing with a hidden grub infestation, a common problem oft…
Should you do this yourself?
Answer five quick questions before you start. Safety outranks savings every time.
Your experience with work like this
How high do you have to work?
Does the job involve any of these?
Will it need a permit?
Specialty tools
Free and instant. Educational guidance only — not a quote, inspection, or professional diagnosis.
Estimate your own project cost
National averages are a starting point. Enter your details for a range that fits your house.
Interior paint estimator
- Paint$96
- Supplies (tape, rollers, drop cloth)$35
- Estimated total (DIY)$131
Hiring a pro? Add roughly $1.50–$4.00/sq ft for labor depending on prep work and trim detail.
Educational estimate only — always confirm with written local bids.
What should this project cost?
Enter your project details for a realistic cost range before you call anyone.
Cost depends heavily on which system turns out to be the source.
- Regional adjustment
- National average
- Labor share (typical)
- ~$1,620
- Quotes to collect
- 3 written estimates
Educational estimate based on national averages — not a binding quote. Always confirm with written local estimates.
Fixly Project Decision Box
- DIY difficulty
- Professional Recommended
- Estimated time
- Monitoring over 60–90 days · engineer visit 1–2 hours
- Cost level
- Major Project
Main tools / materials
- Crack monitor or pencil marks with dates
- Tape measure
- Marble or level for floor slope
When to stop and call a pro
- A crack wider than 1/4 inch or growing month over month
- Doors and windows that suddenly stick or will not latch
- Stair-step cracks in brick or block
- Separation between walls and ceilings or floors
Need professional help?
Get a Foundation EvaluationBefore you start
Check the difficulty, permits, and safety risk — then decide whether to call a pro.
Free, no signup required. Estimates are educational guidance, not a quote or an inspection.
Get the print-ready PDF of this guide
A clean, ad-free, printable version you can keep on your phone or pin to the workshop wall. Free with a FixlyGuide account.
- Print-optimized layout
- Tools, materials & every step included
- Saved to your account
Recommended for DIYers & woodworkers
Sponsored
The Top 20 Tools for Workshops of Any Budget
No stationary machines or power tools required — plus 3 fundamental tools that can't be bought at any price.
Get the free guide
Ted's Woodworking — The #1 Woodworking Resource
Detailed instructions, dimensioned drawings, materials & cutting lists, and 3D schematics for every skill level.
See the plansSponsored: links above are affiliate links. FixlyGuide may earn a commission on qualifying purchases — at no extra cost to you.
Frequently asked questions
What's the difference between paint cracking and paint crazing?+
They are closely related. 'Alligatoring' refers to larger, more pronounced cracks that resemble alligator skin. 'Crazing' is a finer, less severe version, often appearing as a network of tiny hairline cracks. Both are caused by the same underlying issues of stress and adhesion failure in the paint film.
Can I just use a thick primer to fill the cracks?+
No, this won't work. While a high-build primer can fill minor imperfections, it can't fix the instability of the cracked layer underneath. The old, failed paint must be completely scraped off before you prime, otherwise the cracks will reappear.
How long should I really wait between coats of paint?+
Always follow the manufacturer's instructions on the can, which is typically 2-4 hours for latex paint. However, this is a minimum. If your room is humid (over 50% humidity) or cool (below 65°F), it's wise to wait at least 6-8 hours to be safe.
Is it okay to paint a second coat the next day?+
Yes, waiting until the next day is perfectly fine and often a good idea. Giving the first coat of paint 12-24 hours to cure more thoroughly before applying the second coat significantly reduces the risk of alligatoring and other paint film problems.
My house is old. Could the cracks be lead paint?+
If your home was built before 1978, there is a strong possibility that older layers of paint contain lead. You can buy a lead-test kit at a hardware store. If the test is positive, do not scrape or sand the paint yourself. Hire a professional certified in lead-safe renovation practices.
Why did my ceiling paint crack but not the walls?+
This often happens when flat ceiling paint is applied too thickly. Ceilings are also prone to temperature changes, especially if there's an attic above. A thick coat of paint can't handle the expansion and contraction, leading to stress cracks.
Will a dehumidifier help prevent paint cracking?+
Yes, it can help significantly. High humidity slows down the curing process, which can lead to problems. Running a dehumidifier in the room while you're painting will help the paint dry and cure at the proper rate, reducing the risk of alligatoring.
Can I use oil-based paint for my top coat?+
It's generally not recommended to put a hard, inflexible paint like oil-based enamel over a more flexible latex primer. This mismatch in flexibility is a classic cause of alligatoring. It's best to use a full acrylic/latex system from primer to top coat.
Discussion
Loading comments…