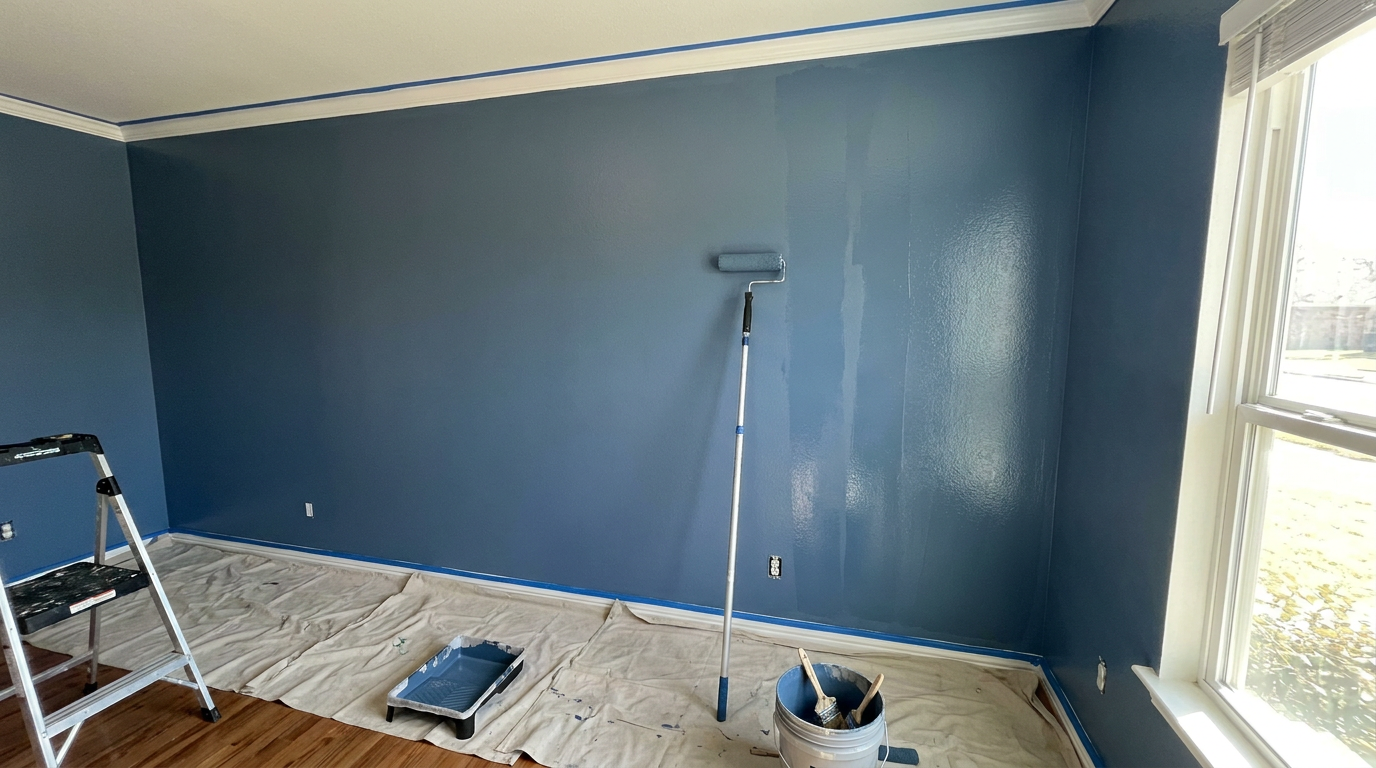
- Clear the workspace and drop protection — Drag all furniture into the center of the room and drape it with 0.7-mil plastic sheeting, then sweep the subfloor clean before laying canvas drop cloths tightly along the perimeter.
- Use 10-oz or 12-oz woven canvas drop cloths instead of cheap plastic on the floor; plastic doesn't soak up drips and turns into an ice rink under your boots.
- Take off every switch plate and outlet cover with a flathead screwdriver, stash the tiny screws so they don't disappear, and tape over the bare receptacles with a strip of blue tape.
General remodeling · Renovation planning
| Project category | General remodeling |
|---|---|
| Problem type | Renovation planning |
| Trade required | General contracting |
| Urgency | Planned project |
| Safety risk | Low safety risk |
| DIY suitability | Pro recommended |
| Cost category | Major investment |
| Typical timeline | Design and permitting often 2–4 months before work starts |
| Contractor type | General contractor |
Repair option
Phase the work and fix the building envelope first.
Replacement option
Full renovation with permits, design, and a general contractor.
Common causes
- Space no longer fits how the household lives
- Resale preparation
- Deferred maintenance stacking up
Relevant tools:project cost estimatorcompare quoteshome improvement material prices
Published November 3, 2026Last updated November 3, 2026
Tools & materials you'll need
Affiliate links- Amazon2-1/2-inch angled sash paint brush1 · synthetic bristle for latex paint
- Amazon9-inch roller frame and 3/8-inch microfiber covers2 covers · lint-free, high-density
- Amazon10-oz canvas drop cloths2 · woven canvas, not plastic
- AmazonSanding sponge (120-grit and 220-grit)2 · aluminum oxide
- Amazon5-gallon plastic bucket with metal bucket grid1 · for boxing paint and rolling
- Amazon3-inch flexible putty knife1 · for spreading spackle and burnishing tape
- Amazon1.41-inch medium-adhesion painter's tape2 rolls · clean-release crepe paper
- AmazonLightweight spackling compound1 pint · for patching nail holes and dents
- AmazonInterior latex acrylic paint2 gallons · eggshell or satin finish
- AmazonAcrylic interior drywall primer1 quart · for spot-priming bare spackle
As an Amazon Associate FixlyGuide earns from qualifying purchases — at no extra cost to you. Prices and availability are accurate as of publication and subject to change.
Quick Answer
To paint a room like a pro, start by clearing the space and washing your walls with mild detergent to get rid of grease and dust. Patch holes with spackle, sand them flat with 120-grit paper, and tape trim using clean-edge painter's tape pressed tight with a putty knife. Cut in the edges one wall at a time with a 2-1/2-inch angled sash brush, then roll that same wall right away with a 3/8-inch nap roller in steady vertical "W" or "N" patterns so you hold a wet edge and don’t get lap marks. Put on two thin, even coats, and give it 2 to 4 hours between coats.
The Problem
Most DIY paint jobs look rough before the first can is even half empty. You spot it fast: heavy lap marks shining in the afternoon light across the main wall, fuzzy edges bleeding past the baseboards, and roller fuzz locked into dry acrylic like it belongs there. Worse, old drywall patches flash through the topcoat like dull chalky ghosts because nobody sealed them first.
Painting sounds easy on paper, so folks rush right past the prep work. They grab whatever cheap roller cover is sitting on the big-box shelf, slap paint straight over dusty walls, and then wonder why the finish peels off in rubbery strips six months later. Painting like a pro isn't about waving your arm faster with a brush. It's about a repeatable sequence — cleaning, repair, edge control, and wet-film management — that gives you a smooth finish every time.
How It Works
Architectural paint has four basic parts: pigment (color and hide), binder (resins that form the solid film), solvent (water in latex/acrylic paints that keeps it liquid), and additives (thickeners, mildewcides, and flow agents). When you spread paint onto drywall, the water starts evaporating. As it dries, the binders coalesce, locking the pigment into a continuous, flexible plastic skin roughly 1.5 to 2.0 mils (thousandths of an inch) thick per dried coat.
If you roll wet paint back into an area that’s already starting to set up — that stage is called "tack" — you tear that coalescing binder skin. The result is a rough, ugly defect called a lap mark or "roping." I pulled a bedroom wall in Frisco last month that had exactly this problem from a homeowner chasing spots with a half-dry roller. No mystery there. Pros stop it by keeping a true "wet edge," moving from one corner to the next without pausing mid-wall.
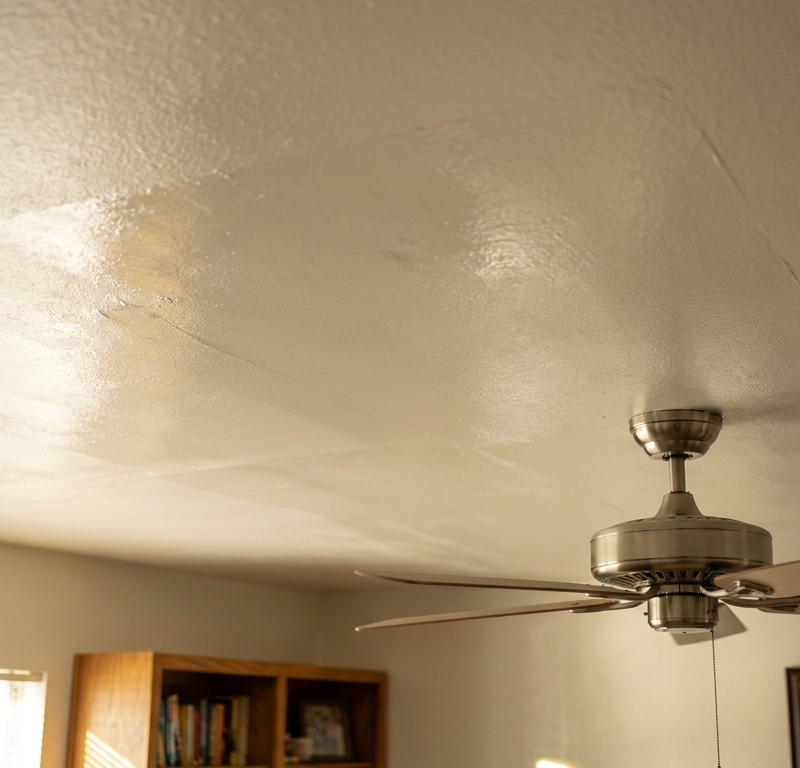
Drywall compound and older painted surfaces also drink paint at different rates. Unsealed spackle sucks solvent out of wet paint fast. That leaves you with an uneven sheen defect called "flashing." Priming evens out that porosity so the final resin film dries at the same rate across the whole wall. Simple idea. Big difference.
Step-by-Step Fix
Follow this exact 10-step sequence to deliver a flawless, high-durability finish across any standard bedroom or living room.
-
Clear the workspace and drop protection — Drag all furniture into the center of the room and drape it with 0.7-mil plastic sheeting, then sweep the subfloor clean before laying canvas drop cloths tightly along the perimeter.
- Use 10-oz or 12-oz woven canvas drop cloths instead of cheap plastic on the floor; plastic doesn't soak up drips and turns into an ice rink under your boots.
- Take off every switch plate and outlet cover with a flathead screwdriver, stash the tiny screws so they don't disappear, and tape over the bare receptacles with a strip of blue tape.
-
Scrub and degrease the walls — Mix 1 gallon of warm water (around 105°F) with two tablespoons of mild dish soap or liquid TSP-substitute in a clean bucket, then wipe down all wall surfaces using a large cellulose sponge.
- Pay extra attention around light switches, door casings, and headboard zones where body oils and skin lipids settle onto the wall.
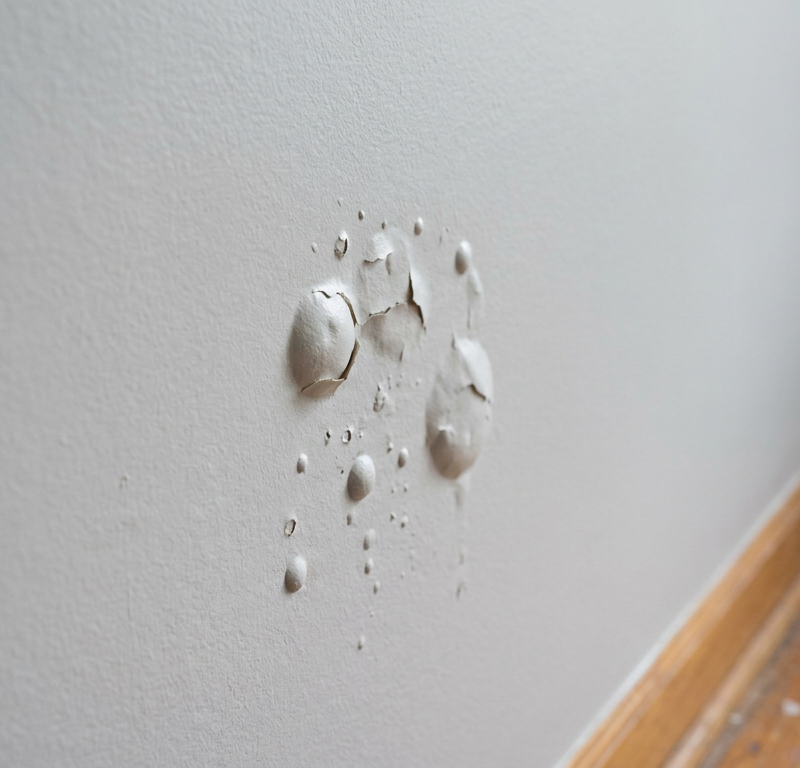
- Skip this step and modern acrylic paints won't bond right to the wall substrate; they'll bubble or peel when somebody bumps them.
-
Gouge, fill, and sand wall imperfections — Run your palm across the wall to find nail pops, drywall tears, and anchor holes, then dig out loose plaster with the corner of a 5-in-1 tool before applying lightweight spackling compound.
- Press the spackle firmly into the hole using a 3-inch flexible putty knife, leaving the patch sitting roughly 1/32-inch proud of the drywall surface to allow for shrinkage as it dries.
- Let it cure for 1 to 2 hours, then sand dead flat using a sanding block loaded with 120-grit aluminum oxide paper, finishing with 220-grit for feathering.
-
Wipe away sanding dust and vacuum trim — Grab a microfiber towel or a slightly damp shop rag and wipe down every square inch of sanded wall space, following up with a brush attachment on your shop vac across the top of all baseboards.
- Dust is the deal-breaker; rolling paint over dry plaster powder leaves gritty pimples all over your finish.
- If your room has heavy plaster damage, run a commercial tack cloth over the patched zones.
-
Tape trim using a mechanical burnish — Apply 1.41-inch-wide medium-adhesion painter's tape along the top edge of baseboards, window casings, and door frames, keeping the edge perfectly straight without stretching the tape.
- Press the tape down, then firmly drag the blade of a clean plastic putty knife along the entire edge to burnish it flat against the wood.
- That pressure helps the adhesive grab and keeps paint from sneaking underneath the tape line.
-
Spot-prime all patches and raw repairs — Dip a 2-inch synthetic brush into a quality acrylic or stain-blocking primer and brush a thin, feathered coat over every spackled patch, water stain, and drywall paper tear.
- Let this spot-primer dry for a full 45 to 60 minutes until it holds a dead-matte finish.
- If you are making a radical color transition—like painting over dark navy with a pale linen cream—skip spot-priming and roll the entire room with a full coat of tinted high-hide primer instead.
-
Box your paint into a single vessel — Pour multiple gallon cans of your topcoat paint together into a clean 5-gallon bucket and stir thoroughly for 3 minutes using a wooden stir stick or drill-mounted mixing paddle.
- Paint manufacturers mix pigments in batches; minor variations between single gallon cans can show up as color shifts right in the middle of one long wall.
- Boxing your paint keeps the color and sheen consistent from start to finish.
-
Cut in the edges one wall at a time — Pour 1 quart of paint into a handheld cut bucket, dip a 2-1/2-inch angled sash brush 1 inch deep, and cut a crisp 2-to-3-inch border along the ceiling line, corners, and trim.
- Hold the brush at an angle so the long bristle tips ride right along the seam, pressing gently until the bristles flex slightly into a flat wedge.
- Only cut in one single wall at a time—don’t cut the whole room first, or the cut line will dry before you roll, which leaves a visible "picture frame" border.
-
Roll the wall while maintaining a wet edge — Load a 3/8-inch nap microfiber roller cover evenly from a 5-gallon bucket grid, then apply paint to an 8-foot-high by 3-foot-wide section using an overlapping "W" or "N" pattern.
- Without reloading the roller, immediately fill in the open pattern with parallel vertical strokes, keeping your roller frame's open arm pointed toward the wet edge to prevent uneven pressure lines.
- Lightly "lay off" the wet section by making one final, continuous top-to-bottom pass with virtually zero pressure on the roller, then move immediately to the next 3-foot section.
-
Apply the second coat and pull tape early — Allow the first coat to dry for 2 to 4 hours (at 70°F and 50% relative humidity), then repeat the exact cutting and rolling process for coat number two.
- Score the tape line lightly with a utility knife if the paint bridged the gap, or pull the painter's tape backward at a sharp 45-degree angle while the second coat is still slightly tacky to the touch (about 30 to 45 minutes after rolling).
- If you wait until the paint is fully cured 24 hours later, the dried latex film will pull away in jagged chunks right off your wall.
Common Causes of Poor Paint Finishes
- Skipping the Wall Wash: Invisible kitchen grease, cooking oils, and skin oils stop paint binders from bonding, which leads to fisheyes, bubbling, or peeling sheets.
- Cheap Roller Sleeves: Inexpensive polyester rollers shed tiny lint fibers straight into wet paint and flatten out fast, leaving uneven, orange-peel texture across the surface.
- Dry-Rolling: Trying to stretch a single roller load across 6 or 8 feet of wall starves the surface of wet film build, which gives you blotchy coverage and obvious roller streaks.
- Overworking Tacky Paint: Going back with a roller to "touch up" a thin spot 10 minutes after application pulls at the setting film and tears the surface texture.
- Incorrect Roller Nap: Using a 3/4-inch rough-surface nap on smooth interior drywall leaves heavy stipple texture, while a 1/4-inch nap can't hold enough paint to lay down an adequate film.
Common Mistakes
- Painting directly over unprimed spackle — You roll color over patches, step back, and see dull spots everywhere. Always spot-prime bare drywall compound; spackle acts like a dry sponge that sucks the sheen out of topcoats.
- Relying on tape instead of brush technique — Taping ceilings takes forever and usually pulls away drywall paper when removed. Pros freehand ceiling lines with a stiff 2-1/2-inch angled sash brush and only use tape on rigid baseboards and casings.
- Stretching tape along baseboards — Pulling tape taut while laying it down deforms the crepe paper backing. Over the next hour, the tape contracts, lifting its edges and letting wet paint bleed underneath. Lay tape down slack, smoothing it in 12-inch sections.
- Leaving painter's tape on for days — Tape left in place over a weekend lets wet acrylic weld the tape directly to the trim. When you yank it off, it shreds or tears the fresh paint off the wall. Pull tape while the final coat is still soft.
- Using plastic drop cloths on hardwood or tile — Plastic bunches up, tears under step ladders, and holds wet paint droplets that you track through the rest of your house on your shoe heels. Buy heavy canvas cloths once; they last for decades.
Cost & Time Breakdown
| Task | DIY Cost | Pro Cost | Time |
|---|---|---|---|
| Surface Prep & Patching | $15–$30 | $150–$250 | 1.5–2.5 hours |
| Masking Trim & Floors | $20–$40 | $100–$175 | 45–60 minutes |
| Cutting In (2 Coats) | $15–$25 (brush) | $150–$225 | 1.5–2 hours |
| Rolling Walls (2 Coats) | $70–$140 (paint + roller) | $200–$400 | 2–3 hours |
| Clean-Up & Reassembly | $0 | $75–$125 | 45 minutes |
| Complete 12x12 Room | $120–$235 | $675–$1,175 | 6–9 hours active |
Tips & Prevention
- Maintain optimal room temperature: Keep indoor temperatures between 65°F and 78°F with humidity around 40% to 50%; high heat or dry HVAC drafts flash-dry paint too quickly, killing your wet edge.
- Inspect with angled work lights: Set an LED work light low to the floor and shine it raking across the wall at a shallow angle before painting to spotlight dents, ridges, and unfeathered patches that standard overhead fixtures hide.
- Wrap tools during breaks: Don't wash brushes and roller sleeves between coats; wrap them airtight in grocery bags or plastic cling wrap and stick them in the refrigerator to keep the paint fresh for up to 24 hours.
- Strain old paint cans: If you're working with paint opened months ago, pour it through a $1 mesh cone strainer into your bucket to catch dried crust bits that will ruin your roller finish.
- Store a labeled touch-up jar: Pour 8 ounces of leftover paint into a small glass mason jar, label it with the room name and date, and store it inside a climate-controlled cabinet—never in a freezing garage or sweltering attic.
When to Call a Professional
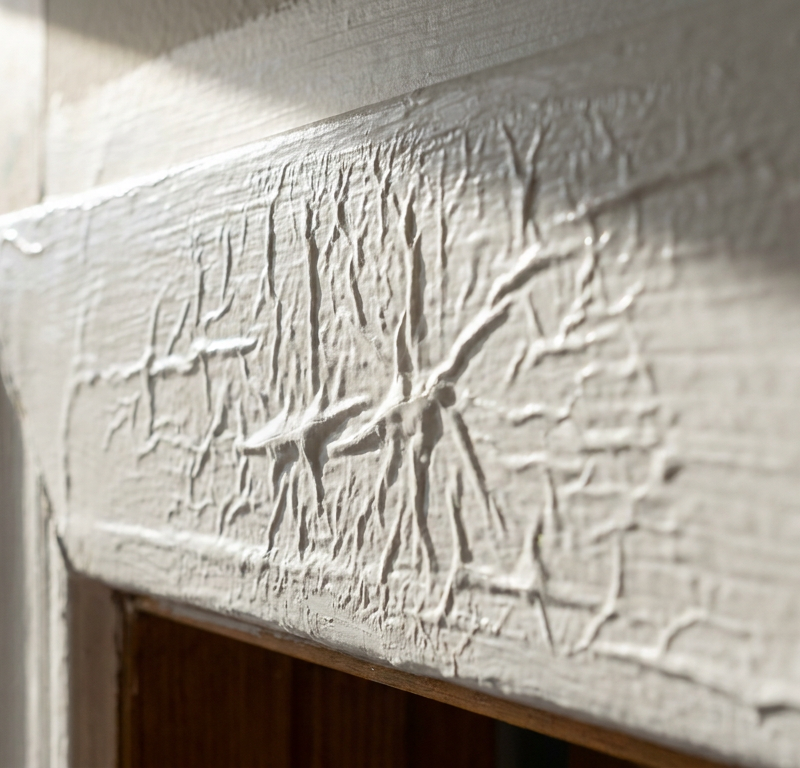
Most interior drywall painting is well within a homeowner's DIY comfort zone, but some situations call for a licensed painting contractor. If your home was built before 1978, peeling or alligatoring paint could mean lead-based coatings; sanding or scraping lead paint without EPA Lead-Safe Certified containment throws hazardous toxic dust all over your living spaces.
Call a pro if your room has vaulted ceilings over 12 feet high that need commercial scaffold towers or articulating ladder jacks, or if you're dealing with widespread water damage, active mildew blooms, or sagging drywall seams where the framing has shifted. Heavy textured plaster walls — like aggressive Spanish lace or thick acoustic knockdown — often need commercial airless spray rigs running at 2,000+ PSI to get even coverage without building up roller marks and sag lines.
Related Articles
Keep troubleshooting with these hand-picked guides from FixlyGuide:
- The 7 Mistakes That Ruin a Perfect Paint Job (and How to Fix Them) — Painting a room like a pro isn't just about technique—it's about avoiding common pitfalls that lead to streaks, drips, and uneven finishes.…
- The $150 Upgrade Hiding 2x More Pantry Space — Stop losing items in the back of your pantry; learn the expert method for installing pull-out shelves to maximize storage and accessibility…
- Paint Wrinkling on Your Walls? 6 Causes and the Exact Fix — Stop peeling and scraping wet paint. Learn why paint wrinkles, how to sand down the ridges, and the exact steps to recoat for a smooth, fla…
- Why Your Fresh Paint Looks Blotchy & Uneven (It’s Not Just Your Technique) — Discover the surprising culprits behind blotchy, uneven paint finishes and learn the contractor-approved steps to achieve a smooth, profess…
- The Secret to a Flawless Drywall Patch Is In the Paper — Frustrated by drywall patches that always show through? That telltale bump or sanding mark can ruin a perfect wall. Discover the 'Californi…
- Lead Paint Safety: 12 Steps to Test, Contain, and Remove It Safely — Renovating an older home? Learn how to identify lead paint, seal off your workspace, wet-scrape safely, and decontaminate properly without…
Should you do this yourself?
Answer five quick questions before you start. Safety outranks savings every time.
Your experience with work like this
How high do you have to work?
Does the job involve any of these?
Will it need a permit?
Specialty tools
Free and instant. Educational guidance only — not a quote, inspection, or professional diagnosis.
Estimate your own project cost
National averages are a starting point. Enter your details for a range that fits your house.
Interior paint estimator
- Paint$96
- Supplies (tape, rollers, drop cloth)$35
- Estimated total (DIY)$131
Hiring a pro? Add roughly $1.50–$4.00/sq ft for labor depending on prep work and trim detail.
Educational estimate only — always confirm with written local bids.
What should this project cost?
Enter your project details for a realistic cost range before you call anyone.
Interior rooms run $400–$1,200; whole-home exterior painting commonly $4,000–$12,000.
- Regional adjustment
- National average
- Labor share (typical)
- ~$2,003
- Quotes to collect
- 3 written estimates
Educational estimate based on national averages — not a binding quote. Always confirm with written local estimates.
Decide what your roof needs
Two minutes of questions turns "something is wrong up there" into a clear next step.
- Repair or replace your roof?Answer 10 questions about age, leaks, and damage to get a clear next step.Open
- Compare contractor quotesScore up to four bids on price, warranty, licensing, and timeline.Open
- Get local estimatesSend one request and compare written estimates from vetted pros.Open
Free, no signup required. Estimates are educational guidance, not a quote or an inspection.
Get the print-ready PDF of this guide
A clean, ad-free, printable version you can keep on your phone or pin to the workshop wall. Free with a FixlyGuide account.
- Print-optimized layout
- Tools, materials & every step included
- Saved to your account
Recommended for DIYers & woodworkers
Sponsored
The Top 20 Tools for Workshops of Any Budget
No stationary machines or power tools required — plus 3 fundamental tools that can't be bought at any price.
Get the free guide
Ted's Woodworking — The #1 Woodworking Resource
Detailed instructions, dimensioned drawings, materials & cutting lists, and 3D schematics for every skill level.
See the plansSponsored: links above are affiliate links. FixlyGuide may earn a commission on qualifying purchases — at no extra cost to you.
Frequently asked questions
What roller nap size should I use for interior walls?+
For smooth interior drywall, a 3/8-inch nap roller cover made of woven microfiber or shed-resistant polyamide delivers the smoothest finish with zero lint. If your walls have light orange-peel texture, step up to a 1/2-inch nap to ensure paint penetrates the valleys without leaving heavy stipple.
Should I cut in or roll the walls first?+
In most cases, you should cut in first. Cutting in creates a 2-to-3-inch wet border around the perimeter, which allows you to roll right up close to the edges and flatten out any brush marks with the roller's stipple before the paint begins to set.
Do I really need two coats of paint if the paint says one-coat coverage?+
Two coats are standard for almost all interior repaints to achieve full color depth, uniform sheen, and proper film build (roughly 3 to 4 mils total wet film thickness). Even self-priming "one-coat guarantee" paints rarely achieve true, professional coverage over patches or color changes with just a single pass.
How long should I wait between the first and second coat of paint?+
Wait 2 to 4 hours between coats when using standard interior latex or acrylic paint at normal room conditions (70°F and 50% relative humidity). Applying a second coat too early re-wets the curing undercoat, causing the roller to drag, tear the fresh film, and leave rough texture defects.
When is the right time to remove painter's tape?+
Pull the tape while the final coat is still slightly wet or tacky to the touch, usually 30 to 45 minutes after rolling. If the paint has fully dried, score the edge gently with a sharp utility knife along the tape line first, then pull the tape backward flat against itself at a 45-degree angle to prevent tearing.
Why does my wall look shiny in some spots and dull in others after painting?+
Flashing happens when porous areas like unprimed spackle suck moisture out of the paint faster than the surrounding wall, altering the dried sheen. Prevent it by applying a dedicated acrylic primer or spot-priming every patched area before rolling your topcoats.
What is the best paint sheen for interior living spaces?+
Eggshell or satin sheens are ideal for living rooms, bedrooms, and hallways because they balance durability with low glare, masking minor drywall imperfections while remaining wipeable. Reserve semi-gloss for trim, doors, and moisture-heavy bathrooms, and use flat or matte paint primarily on ceilings.
How many gallons of paint do I need for an average bedroom?+
A standard 12x12-foot bedroom with 8-foot ceilings has approximately 384 square feet of wall space minus doors and windows (roughly 320 net square feet). Because one gallon of quality latex paint covers 350 to 400 square feet with one coat, you will need two gallons to comfortably apply two full coats.
Discussion
Loading comments…