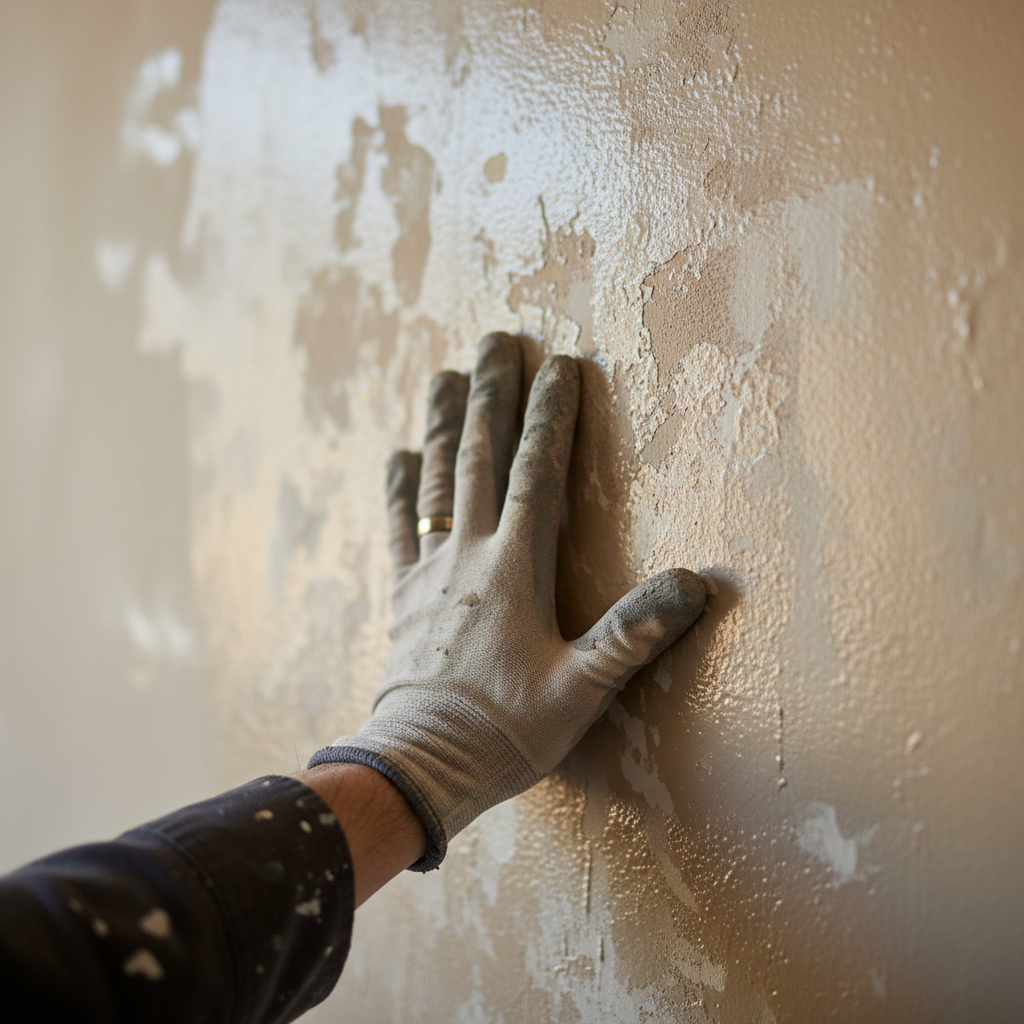
- Assess the Damage – What exactly are you seeing?
- Is it one section or the whole wall? Dark spots? Light spots? Weird sheen changes? Look at it in daylight and under room lights. That’ll tell you a lot.
- Safety First: Make sure the paint’s fully dry before you touch anything. Wet paint’ll throw off your read and make the whole thing messier.
General remodeling · Renovation planning
| Project category | General remodeling |
|---|---|
| Problem type | Renovation planning |
| Trade required | General contracting |
| Urgency | Planned project |
| Safety risk | Low safety risk |
| DIY suitability | Pro recommended |
| Cost category | Major investment |
| Typical timeline | Design and permitting often 2–4 months before work starts |
| Contractor type | General contractor |
Repair option
Phase the work and fix the building envelope first.
Replacement option
Full renovation with permits, design, and a general contractor.
Common causes
- Space no longer fits how the household lives
- Resale preparation
- Deferred maintenance stacking up
Relevant tools:project cost estimatorcompare quoteshome improvement material prices
Published September 24, 2026Last updated September 24, 2026
Tools & materials you'll need
Affiliate linksAs an Amazon Associate FixlyGuide earns from qualifying purchases — at no extra cost to you. Prices and availability are accurate as of publication and subject to change.
Quick Answer
Ever stare at a freshly painted wall, feel pretty good about your work, then catch that blotchy, uneven mess in the light? Yeah, I’ve been there. Plenty of homeowners I’ve worked for have too. Most folks blame their brush strokes first, but a lot of the time the real trouble’s hiding under the paint — in the prep, the product, or even the room conditions. A smooth finish isn’t just about how you roll. It’s about why paint behaves the way it does on different surfaces.
The Problem
So, you spent the weekend painting, right? You cut in, rolled the wall, maybe even put on a second coat, and then you step back expecting a nice, even finish. Instead, you get patches that look darker, lighter, duller, shinier — all of it. Not a little off. Blatantly blotchy.
That isn’t just ugly. It usually means something went sideways in the paint process. And yeah, it screams “DIY” in a way nobody wants. It’s frustrating, and it’s a waste of time, paint, and patience.
How It Works
Look, paint isn’t colored water. It’s a chemical mix built to stick to a surface and dry into one continuous film. When that film cures right, it reflects light evenly, and that’s what gives you the smooth, uniform look everybody wants.
But plenty can throw it off. Think of your wall like a giant sponge. If part of it’s thirsty — patched drywall, new drywall, raw spots — and another part’s already sealed, they’re gonna drink up primer and paint at different rates. That’s how you get changes in sheen and color depth. Blotch city.
Then there’s the way you put it on. If you’re laying down too much paint in one area and too little in another, or pushing the roller harder in one pass and lighter the next, you’ll end up with uneven film thickness. That means streaks, dark spots, and weird shiny patches.
Weather matters too. Too hot, too cold, too humid — any of that can mess with how paint levels out. I’ve seen a wall go sideways in a room that was just a little too warm from space heaters. The paint skinned over too fast and never had a chance to settle. You need the solvents to evaporate and the binders to cure at a steady pace. Otherwise? No dice.
Step-by-Step Fix
Alright, let’s get it sorted. If your walls are blotchy, don’t panic. Most of the time, you can fix it. Might take more than a quick touch-up, though.
-
Assess the Damage – What exactly are you seeing?
- Is it one section or the whole wall? Dark spots? Light spots? Weird sheen changes? Look at it in daylight and under room lights. That’ll tell you a lot.
- Safety First: Make sure the paint’s fully dry before you touch anything. Wet paint’ll throw off your read and make the whole thing messier.
-
Clean the Surface Thoroughly – Dirt and grime are paint’s worst enemy.
- Mix up TSP (Trisodium Phosphate) or a decent all-purpose cleaner with water. Don’t go nuts; a capful per gallon is usually enough. Wash the whole affected area with a clean sponge or cloth, then rinse it with clean water.
- Tools: Bucket, sponges, clean cloths, rubber gloves.
- Pro Tip: I had a homeowner in Silver Lake, California, swear his paint was cursed. Same blotchy wall every time. Turned out he hadn’t cleaned the kitchen walls in years, and the grease was fighting the new paint like it had a grudge. Clean walls aren’t optional.
-
Lightly Sand the Uneven Areas – Smooth out the rough stuff.
- Grab a fine-grit sanding sponge (180-220 grit) and lightly sand the spots that feel rough or look lumpy and shiny. You’re not stripping the wall down. Just scuff it and knock down the high spots. Feather the edges into the surrounding paint.
- Wipe it down with a damp cloth when you’re done. Dust will wreck adhesion. Guaranteed.
-
Prime the Problem Areas (or the Whole Wall) – This is the equalizer.
- If you’ve got patches or different sheen levels, primer’s the move. Use a stain-blocking, even-absorbing primer like Kilz or Zinsser. Put on one thin, even coat over the blotchy spots, or prime the whole wall if it’s a mess from end to end.
- Key: Let the primer dry completely per the manufacturer’s instructions, usually 1-2 hours. Don’t rush it because you’re getting impatient.
-
Apply Two Thin, Even Coats of Paint – Slow down a little.
- This is where a lot of DIY jobs fall apart. One thick coat is not the same as two thin ones. Load the roller evenly, roll in an 'M' or 'W' pattern, then fill it in with overlapping straight passes. Keep a wet edge.
- Let the first coat dry for at least 2-4 hours, or whatever the can says, before the second coat goes on. That part matters for leveling and color development.
-
Maintain Consistent Temperature and Humidity – Paint likes steady conditions, same as the rest of us.
- Paint does best between 60°F and 85°F (15°C and 30°C) with moderate humidity. Too hot and it flashes too fast, leaving marks and uneven sheen. Too cold and it won’t cure right. A fan can help move air around, but don’t point it right at wet paint.
-
Check Your Paint Quality and Type – Cheap paint can absolutely bite you.
- Are you using a bargain flat paint where you really need something tougher like satin? Better paints usually level out nicer and give you a more consistent sheen. If the paint’s old, it may have separated on you. Check the date. If it’s been sitting in the garage for five years, that thing’s toast.
-
Consider Your Application Tools – Sometimes the tools are the problem.
- A cheap roller cover can shed lint or leave you with a funky texture. Use a quality roller cover that fits the job and the surface — 3/8-inch nap for smooth walls, 1/2-inch for textured. Good brushes matter too, especially when you’re cutting in tight lines.
Common Causes
- Uneven Surface Absorption: Big one. Patched areas, new drywall, or walls with different old paint types soak up primer and paint at different rates, which leaves blotchy spots.
- Insufficient or Improper Priming: Skip primer, or use the wrong kind, and your topcoat won’t have a uniform surface to bond to or absorb into.
- Inconsistent Paint Application: Too much paint here, too little there, uneven roller pressure — it all stacks up and gives you an uneven film thickness.
- Poor Quality Paint or Expired Paint: Cheaper paints usually have less pigment and binder, so they’re harder to get even. Old paint can separate and lose its consistency.
- Painting in Extreme Conditions: Too hot, too cold, or too humid can mess with drying and curing, which keeps the paint from leveling out right.
- Dirty or Improperly Prepared Surface: Grease, grime, and dust all act like a barrier and keep the paint from sticking and curing evenly.
- Not Enough Coats: Sometimes one coat just won’t cover it, especially if you’re going light over dark. Two thin, even coats are usually the better bet.
Common Mistakes
- Skipping Primer on Patched Areas: A lot of homeowners think a quick spackle fix is enough. It isn’t. Patched drywall drinks paint differently than the rest of the wall, and you’ll end up with dull spots.
- Over-spreading the Paint: Trying to stretch one roller load too far leaves a thin, uneven film that won’t cover well and looks translucent and blotchy.
- Not Letting Coats Dry Fully: If you hit it with a second coat before the first one has fully flashed off, you can pull up the wet paint underneath and get streaks. Ugly stuff.
- Using the Wrong Roller Nap: Too short and you won’t hold enough paint for coverage. Too long and you’ll leave a rough, stippled texture.
- Ignoring Environmental Conditions: Painting a south-facing wall in direct sun on a 90°F day? That paint dries too fast to level out. Same mess in a chilly, damp basement.
- Poor Lighting While Painting: If the room’s dim, you’ll miss streaks and coverage problems until everything dries and you flip on the overheads. Use bright, direct light from the start.
Cost & Time Breakdown
| Task | DIY Cost ($) | Pro Cost ($) | Time (hours) |
|---|---|---|---|
| Cleaning & Prep | $5-$15 | $20-$50 | 0.5-1.5 |
| Sanding & Dust Removal | $5-$10 | $15-$30 | 0.25-0.5 |
| Spot Priming (Small Area) | $10-$20 | $30-$60 | 0.25-1 |
| Full Wall Priming | $20-$40 | $60-$120 | 1-2 |
| Repainting (2 Coats) | $30-$70 | $100-$250 | 2-4 |
| Total (Fixing an Area) | $50-$100 | $165-$360 | 3-6 |
| Total (Full Wall Refinish) | $60-$140 | $225-$420 | 4-8 |
Note: DIY costs are for materials only. Pro costs include labor and materials. These are rough estimates for a typical 10x12 ft wall.
Tips & Prevention
- Always Prime New Drywall & Patches: Don’t skip this part. A good primer evens out absorption and gives you a cleaner topcoat. I tell homeowners this all the time. Cheapest insurance in the whole job.
- Buy Quality Paint: You really do get what you pay for most of the time. Premium paints level better, cover better, and hold color longer. They’ve usually got more solids in them — more pigment and binders, less water.
- Use the Right Tools: A good roller cover — microfiber’s often my go-to for smooth walls — and a solid brush can make the finish a lot more even. Swap the roller if it starts matting up or clogging.
- Mix Paint Thoroughly: Shake the can first, then stir it well with a paint stick. If you’ve got multiple cans of the same color, box them by pouring them all into one larger bucket and mixing them together. That keeps the color consistent, especially if the batches vary a little.
- Avoid Extreme Temperatures: Try to paint when the room’s sitting between 65°F and 75°F. That gives the paint time to dry at a good pace and level properly instead of flashing off too quick.
- Apply Two Thin Coats: This isn’t just a suggestion. It’s the rule. Two thin, even coats will almost always look better and last longer than one thick, gloppy one.
- Maintain a Wet Edge: When you’re rolling, overlap the last stroke while the paint’s still wet. That helps you avoid lap marks and keeps the finish looking seamless. Don’t stop halfway across a wall if you can help it — run corner to corner.
When to Call a Professional
Look, I’ve seen plenty, and sometimes a job’s just past DIY territory. If you’ve gone through the steps above and the wall’s still blotchy — especially if you’re dealing with water stains, tricky textures, or sheen that won’t behave even after priming and repainting — it’s time to call a pro painter. A good one’s got the experience, tools, and heavier-duty primers to handle the ugly stuff and leave you with a finish that actually lasts. Don’t keep throwing good money after bad paint. Sometimes the smartest move is to bring in the cavalry.
Related Articles
Keep troubleshooting with these hand-picked guides from FixlyGuide:
- The 7 Mistakes That Ruin a Perfect Paint Job (and How to Fix Them) — Painting a room like a pro isn't just about technique—it's about avoiding common pitfalls that lead to streaks, drips, and uneven finishes.…
- The Chemical Reason Your Peel-and-Stick Tile Is an Epic Fail — Discover the surprising scientific reason—poor surface preparation and adhesive chemistry—why your peel-and-stick backsplash is peeling awa…
- The 7 Critical Wall Prep Mistakes Most DIY Painters Make (And How to Fix Them) — Prepping your walls correctly before painting is crucial for a smooth, lasting finish. Learn to avoid common DIY mistakes and achieve profe…
- Why Your Paint Just Won't Cover (and How to Stop the Struggle) — Struggling with paint that just won't cover the old color, even after multiple coats? I'll show you why it happens and how to fix it for go…
- The Hidden Culprit Behind Your Fuzzy Table Saw Cuts (It's Not Just the Blade!) — Fuzzy table saw cuts and tearout are frustrating, but often the problem isn't just your blade; hidden factors like feed rate, blade height,…
- The Hidden Reason Your GFCI Won't Reset (And It's Not Always a Short) — Discover the surprising culprits behind a GFCI outlet that refuses to reset and learn how to diagnose and fix the issue safely.
What should this project cost?
Enter your project details for a realistic cost range before you call anyone.
Interior rooms run $400–$1,200; whole-home exterior painting commonly $4,000–$12,000.
- Regional adjustment
- National average
- Labor share (typical)
- ~$2,003
- Quotes to collect
- 3 written estimates
Educational estimate based on national averages — not a binding quote. Always confirm with written local estimates.
Get the print-ready PDF of this guide
A clean, ad-free, printable version you can keep on your phone or pin to the workshop wall. Free with a FixlyGuide account.
- Print-optimized layout
- Tools, materials & every step included
- Saved to your account
Recommended for DIYers & woodworkers
Sponsored
The Top 20 Tools for Workshops of Any Budget
No stationary machines or power tools required — plus 3 fundamental tools that can't be bought at any price.
Get the free guide
Ted's Woodworking — The #1 Woodworking Resource
Detailed instructions, dimensioned drawings, materials & cutting lists, and 3D schematics for every skill level.
See the plansSponsored: links above are affiliate links. FixlyGuide may earn a commission on qualifying purchases — at no extra cost to you.
Frequently asked questions
Why do I see light and dark patches after painting?+
Light and dark patches usually come from inconsistent paint absorption, often due to unevenly primed surfaces or areas with different porosities. It can also be caused by inconsistent film thickness during application.
Can I just paint over blotchy walls?+
You can, but it's usually a temporary fix. Without addressing the underlying cause—like uneven surface absorption or poor prep—you'll likely end up with the same blotchy look. Proper prep, including cleaning and priming, is key.
What's the best primer to prevent blotchiness?+
For preventing blotchiness, I always recommend a quality stain-blocking, problem-solving primer. Brands like Kilz or Zinsser are excellent for sealing porous patches and creating a uniform surface for your topcoat.
How many coats of paint do I really need?+
Most of the time, two thin, even coats are the standard for a professional-looking finish. This provides optimal coverage, color depth, and durability, especially when going over a darker color or a patched wall.
Does roller technique affect how even the paint looks?+
Absolutely. Inconsistent roller pressure, not maintaining a wet edge, or over-spreading paint can all lead to an uneven finish. Aim for smooth, overlapping strokes and consistent pressure.
Why does my paint look shiny in some spots and dull in others?+
This is often a sheen inconsistency issue, which can be caused by uneven surface absorption (some areas dry faster than others), insufficient mixing of the paint, or applying paint in varying film thicknesses.
Can old paint cause blotchiness?+
Yep. If paint has been sitting for too long, the pigments and binders can separate, and even with good stirring, it might not fully re-emulsify. This can lead to an inconsistent color and sheen when applied.
Is it better to paint in hot or cold weather?+
Neither extreme is ideal. Paint cures best in moderate temperatures, typically between 60-85°F (15-30°C), with moderate humidity. Extreme heat causes paint to dry too fast, and extreme cold prevents proper curing.
What is 'flashing' in painting, and how does it relate to blotchiness?+
Flashing refers to areas where paint dries at a different rate, causing a noticeable difference in sheen or color. It often happens on porous surfaces that absorb paint unevenly or when different paint batches are used.
Should I use a fan while painting to help it dry?+
A fan can help with air circulation, which is good for drying. However, don't aim it directly at a wet painted wall, as it can cause the paint to dry too quickly and unevenly, leading to brush marks or flashing.
Discussion
Loading comments…