- Improper Surface Prep: If you tape over dust, grease, or grime, you’re asking for trouble. The tape sticks to the dust, not the wall. Wipe everything down with a tack cloth or damp rag and let it dry fully before you even touch the tape.
- Not Pressing Down the Edge: This is the 1 mistake I see. Just slapping the tape on the wall won’t cut it. You’ve got to seal the edge with firm pressure along the whole run using a putty knife or 5-in-1 tool.
- Applying Too Much Paint: If you load up the brush or roller and pile on a thick coat near the tape, the paint can get forced under the edge just from sheer volume. Thin coats win every time. One heavy coat? Usually bad news.
General remodeling · Renovation planning
| Project category | General remodeling |
|---|---|
| Problem type | Renovation planning |
| Trade required | General contracting |
| Urgency | Planned project |
| Safety risk | Low safety risk |
| DIY suitability | Pro recommended |
| Cost category | Major investment |
| Typical timeline | Design and permitting often 2–4 months before work starts |
| Contractor type | General contractor |
Repair option
Phase the work and fix the building envelope first.
Replacement option
Full renovation with permits, design, and a general contractor.
Common causes
- Space no longer fits how the household lives
- Resale preparation
- Deferred maintenance stacking up
Relevant tools:project cost estimatorcompare quoteshome improvement material prices
Published October 2, 2026Last updated October 2, 2026
Tools & materials you'll need
Affiliate linksAs an Amazon Associate FixlyGuide earns from qualifying purchases — at no extra cost to you. Prices and availability are accurate as of publication and subject to change.
The Problem
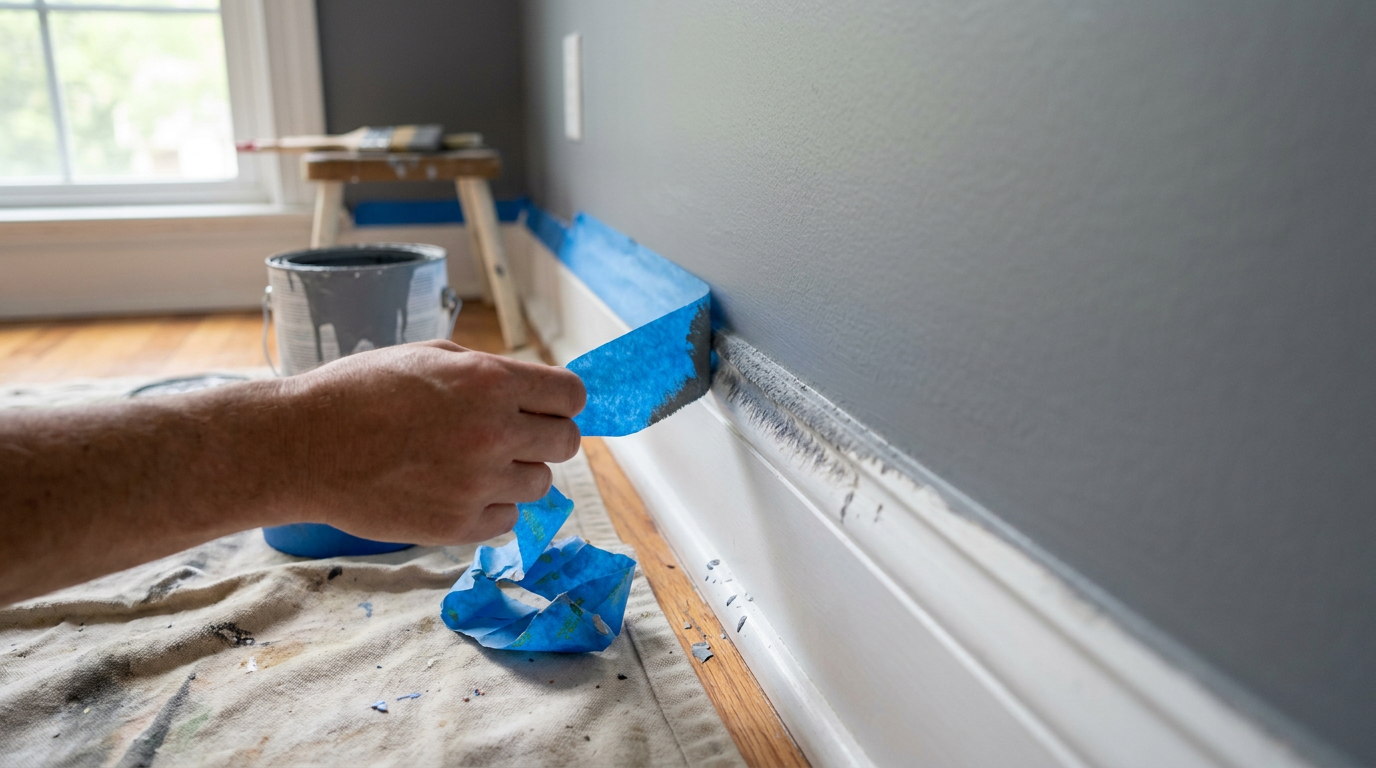
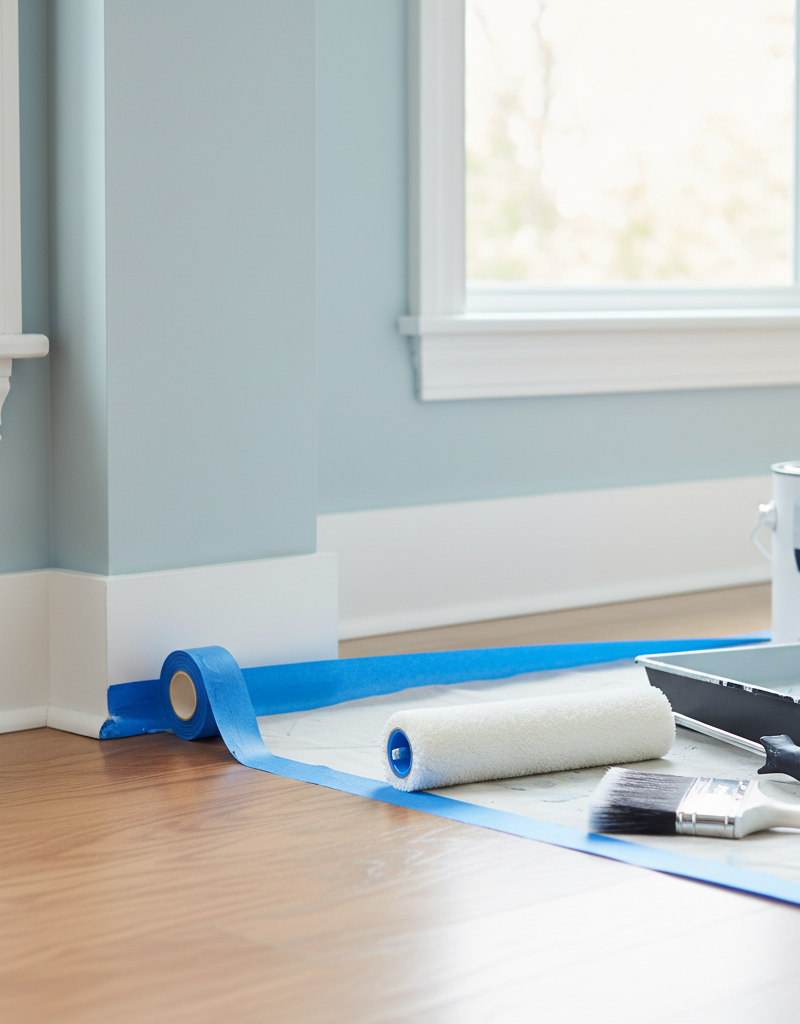
You spent hours taping off the trim, the ceiling, and the window frames just so. You laid down drop cloths, cracked open that can of the perfect new color, and got after it. Then you peel the tape and—man—your stomach drops. Instead of that clean, razor-straight line you were after, you’ve got a fuzzy, bleeding, crooked mess.
Paint slipped under the edge of the tape and left you with a jagged border that looks rough as a cob. Now you’re staring at touch-ups on every edge, and what should’ve been the satisfying final lap turns into a fiddly repair job. I’ve seen that more times than I can count. It’s one of the most common DIY painting headaches, and the good news is it’s usually preventable.
How It Works
Painter's tape looks simple, but it only works if the adhesive and the release are in balance. The tape uses a pressure-sensitive acrylic adhesive that sticks hard enough to block liquid paint, then lets go cleanly without ripping up what’s underneath. Most good painter's tapes—the blue or green stuff—use a thin, tough crepe paper backing. That backing gets soaked with a polymer coating so it won’t soak up paint and turn into a soggy, useless strip.
The real trick, and where things usually go sideways, is the edge. For the tape to do its job, that edge has to make a near-perfect microscopic seal against the wall. If there’s even a hairline gap, capillary action kicks in. That’s just liquid finding its way into tight spaces, and it’s exactly how wet paint sneaks under the tape and into those tiny openings. Wall texture, paint thickness, and how hard you pressed the tape all matter. A good seal acts like a dam. A bad one? That thing's toast.
Step-by-Step Fix
Don’t just rip it off or slop another thick line over the mess. There’s a better way, and it works if you follow the sequence. Here’s how I’d do it on-site.
1. Wait for the Paint to Cure
- Before you fix anything, the new paint has to be fully dry, not just dry to the touch. I mean cured. Give it at least 24 hours. If you jump in too soon, you’ll smear soft paint around and make a bigger headache for yourself.
2. Scrape Away the Major Bumps
- Tools: 1.5-inch flexible putty knife or a plastic razor blade.
- Gently—I mean gently—scrape along the edge to knock down any drips or raised spots from the bleed-through. Keep the blade low and let it shear off the excess. You’re not trying to make it perfect yet, just flatten it out so the next step has something decent to work with.
3. Re-Tape the Line
- Tools: High-quality painter's tape (at least 1.41-inch width is good).
- Put down a fresh strip of painter's tape, but this time place the edge exactly where you want the finished line to land. You’ll be hiding that ugly edge by a tiny bit.
4. Press for a Perfect Seal
- Tools: Flexible putty knife or a 5-in-1 tool.
- This is the big one. Run your putty knife along the edge with firm, even pressure. You want to mash that adhesive edge into every little nook and cranny so it seals like you mean it. On the right surface, you’ll even see the tape shift a touch as it grabs.
5. Seal the Edge with the Base Color
- Tools: Small craft brush.
- Here’s the pro move. Load your small brush with the original wall color—the color you’re taping over—and brush a very thin line right along the tape edge where it meets the wall you’re fixing. Around the shop, we call that caulking the tape. It sounds backwards, but it works. You’re letting a little of the base color sneak under there on purpose. Same color, so who cares? That tiny bleed seals the edge tight. Now the new color can’t worm its way underneath. Let that sealing coat dry for about 30-60 minutes.
6. Paint Your Touch-Up Coat
- Tools: Small paintbrush.
- Now go in with the new color. Brush it over the sealed tape edge. Since you already blocked the gap in the last step, the fresh paint doesn’t have anywhere to creep. Keep it light; don’t cake it on. One thin, even coat is plenty for a touch-up.
7. The Crucial Removal
- Tools: Patience.
- Don’t sit around until it’s rock hard. Pull the tape about 30-60 minutes later, when it’s dry to the touch but still a little flexible. If you wait until it fully cures, the paint film can get brittle and crack or peel off with the tape. I pulled a water heater room repaint in Frisco last month that had exactly this problem—somebody left the tape on overnight, and it peeled like old masking off a toolbox.
8. Pull at a 45-Degree Angle
- Ease the tape back on itself at a 45-degree angle. Don’t yank it straight up. That’ll pull paint right off the wall. This angle helps the tape shear cleanly away from the paint film and leaves you with a crisp line. Keep your pull steady. If you see paint starting to lift, you may need to score the edge lightly with a razor blade, but that’s pretty rare if you time it right.
Common Causes
Why did the tape bleed in the first place? Usually it’s one of these. Figure out the cause, and you’ve got a much better shot at keeping it from happening again.
- Low-Quality Tape: Not all tape is worth buying. Cheap masking tape or old, dried-out painter's tape won’t seal worth a lick. The adhesive’s either too weak or too brittle. Buy a good brand and don’t cheap out; that extra $3-5 per roll is money well spent.
- Improper Surface Prep: If you tape over dust, grease, or grime, you’re asking for trouble. The tape sticks to the dust, not the wall. Wipe everything down with a tack cloth or damp rag and let it dry fully before you even touch the tape.
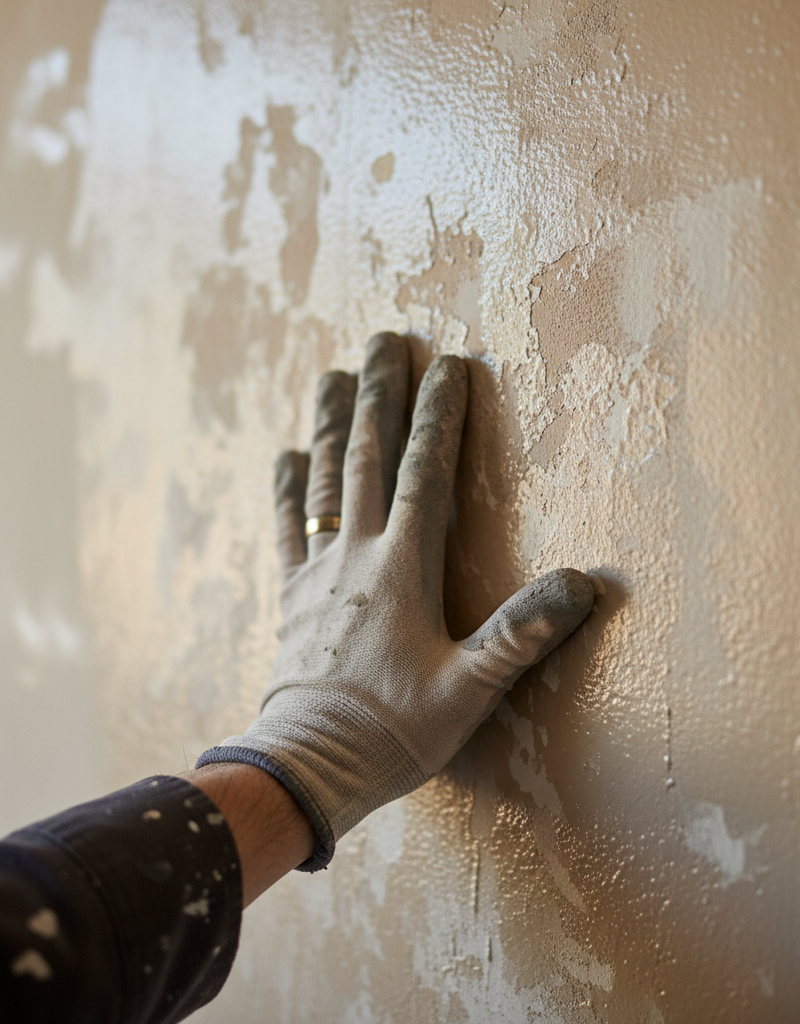
- Textured Walls: It’s tough to get a perfect seal on rough walls like "orange peel" or "knockdown" finishes. All those little peaks and valleys make tiny highways for paint to sneak into. Sealing the edge with your base color, like I laid out above, isn’t optional on textured walls.
- Not Pressing Down the Edge: This is the #1 mistake I see. Just slapping the tape on the wall won’t cut it. You’ve got to seal the edge with firm pressure along the whole run using a putty knife or 5-in-1 tool.
- Applying Too Much Paint: If you load up the brush or roller and pile on a thick coat near the tape, the paint can get forced under the edge just from sheer volume. Thin coats win every time. One heavy coat? Usually bad news.
- Waiting Too Long to Remove the Tape: Once paint fully dries and cures, it forms one hard film over both the wall and the tape. Pull the tape then, and you can tear chunks right off the wall, leaving a ragged edge. You’ve got to get it off while the paint’s still soft.
Common Mistakes
Here are the mistakes I see even decent DIYers make.
- Using a Fingertip to Press the Tape: Your finger’s too soft to give the steady, even pressure needed to seal the edge, especially on slightly textured walls. It just skips over the low spots. Use a flat, firm tool like a putty knife.
- Stretching the Tape as You Apply It: It feels like you’re getting a straighter line when you pull the tape tight, but that’s no good. Once it tries to shrink back, the edges lift and the seal you just made starts to fail.
- Painting Away From the Tape: Always brush from the tape surface out onto the wall. That motion helps keep the tape pressed down and keeps bristles from forcing paint under the edge.
- Leaving the Tape on Between Coats: Some folks leave tape up for days while they do several coats. Bad move. By the time you pull it, the paint’s hard and ready to crack. If coats are more than a few hours apart, you really should remove and re-tape, but the cleanest way is to get your coats done within an hour or two and pull the tape while the last coat is still wet.
- Choosing the Wrong Adhesion Level: Painter's tape comes in different adhesion levels. Use a high-adhesion tape on a delicate, freshly painted wall and you might peel the paint right off. Medium-adhesion tape, which is the standard blue stuff, works for most cured surfaces. Low-adhesion tape, usually yellow or purple, is for delicate surfaces.
| Tape Type | Best For | Adhesion Level | Typical Color |
|---|---|---|---|
| General Purpose | Cured painted walls, wood trim, glass, metal | Medium | Blue |
| Delicate Surfaces | Freshly painted walls (after 24hr cure), wallpaper, faux finishes | Low | Yellow / Purple |
| Rough/Uneven Surfaces | Brick, concrete, stucco, rough wood | High | Green / Red |
Cost & Time Breakdown
Fixing a line that bled under the tape is more about patience than money. Odds are you already own half the stuff.
| Task | DIY Cost | Pro Cost (as part of a larger job) | Time |
|---|---|---|---|
| Gathering Materials | $10–$25 (for good tape and a putty knife) | Included in labor | 15 minutes |
| Scraping & Cleaning | $0 | Included in labor | 10–20 minutes per wall |
| Taping & Sealing Edge | $0 | Included in labor | 15–25 minutes per wall |
| Touching Up & Pulling Tape | $0 | Included in labor | 30-90 minutes (including dry time) |
| Total | $10–$25 | $75–$150+ (as an hourly add-on) | 1.5–3 hours |
Tips & Prevention
- Buy Quality Tape: Seriously, don't go cheap here. The $8 roll of 3M or FrogTape is way better than the $2 roll of generic masking tape. If you want clean lines, that’s the ticket.
- Use a Damp Rag for Sealing: If you don’t have the original base color handy, you can use a lightly damp rag in a pinch. After you press the tape down, wipe a barely-wet cloth along the edge. It can help the tape grab better, but it’s not as dependable as using paint.
- Score Before You Pull: If the paint’s already dry, take a sharp razor blade and lightly score the paint right where the tape meets the wall. That breaks the film and helps keep it from tearing off with the tape.
- Check Your Tape's "Best By" Date: Yep, tape has a shelf life. The adhesive can dry out over time, especially if it’s been sitting in a hot Dallas garage for two years. For best results, use tape that’s less than a year old.
- Work in Sections: On a long wall, don’t paint the whole thing and then race back to the start to yank the tape. Paint a 10-15 foot section, then pull the tape for that section while it’s still wet before moving on.
When to Call a Professional
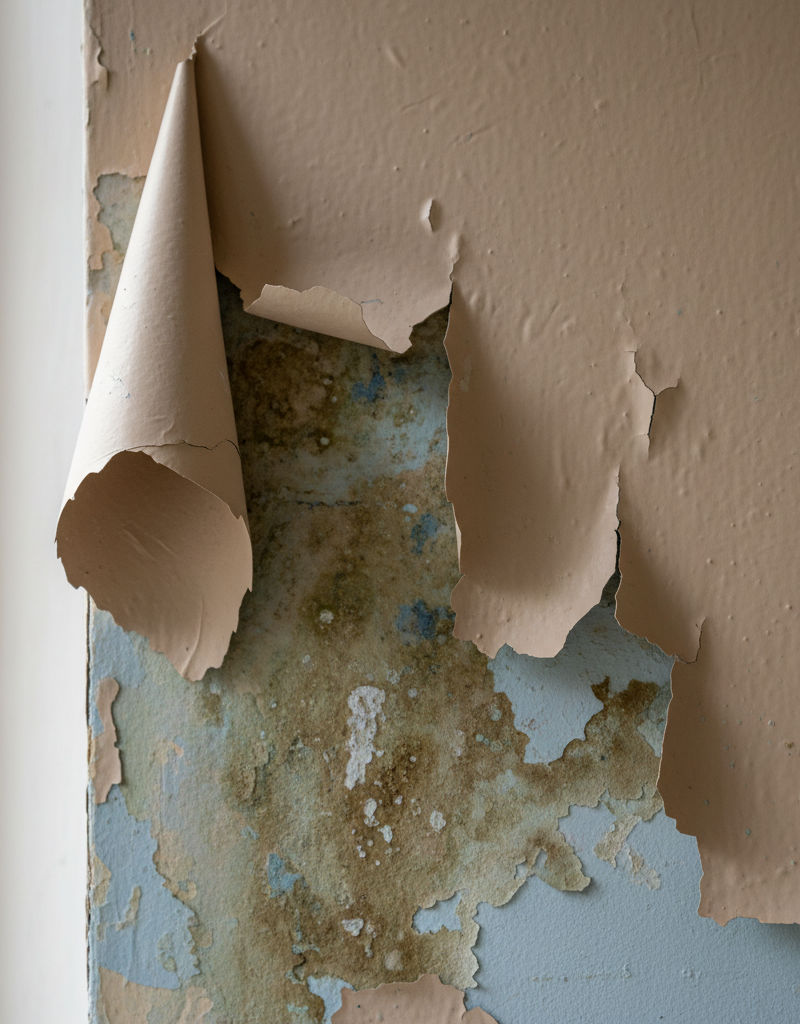
Fixing a little paint bleed is a straightforward DIY job. Truth be told, there’s almost no reason to call a pro just for that. But if the bleed is part of a bigger issue—say the paint’s peeling, cracking, or you’re seeing clear moisture damage—then the tape line is just the symptom, not the problem. That’s where a professional painter can figure out what’s really going on with the wall or the moisture source. And if you’re dealing with tall ceilings or awkward reach, don’t get stubborn—leave the ladder work to an insured pro.
Related Articles
Keep troubleshooting with these hand-picked guides from FixlyGuide:
- The Grain Tear-Out That Makes Your Wood Look Like Trash — Grain tear-out isn't just ugly; it ruins projects. I'll show you why it happens and the simple tricks I use to get clean, crisp cuts every…
- The Shower Door Secret: Stop Leaks Without a Pro — Tired of puddles outside your shower? I'll show you the pro trick to stop leaks cold, without calling in a handyman or ripping out your sho…
- The Secret to a Flawless Drywall Patch Is In the Paper — Frustrated by drywall patches that always show through? That telltale bump or sanding mark can ruin a perfect wall. Discover the 'Californi…
- Why Your Paint Just Won't Cover (and How to Stop the Struggle) — Struggling with paint that just won't cover the old color, even after multiple coats? I'll show you why it happens and how to fix it for go…
- Why Your Cabinet Doors Aren't Square (And How to Fix That Gap) — Frustrated by cabinet doors that won't close flush or hang crooked? I'll show you how to diagnose and fix those annoying gaps, hinges, and…
- The Secret to Sparkling Grout Lines: Why Yours Stay Grimy — Tired of scrubbing your grout only to have it look dirty again? I'll show you the real reason your grout lines stay grimy and how to get th…
Should you do this yourself?
Answer five quick questions before you start. Safety outranks savings every time.
Your experience with work like this
How high do you have to work?
Does the job involve any of these?
Will it need a permit?
Specialty tools
Free and instant. Educational guidance only — not a quote, inspection, or professional diagnosis.
Estimate your own project cost
National averages are a starting point. Enter your details for a range that fits your house.
Interior paint estimator
- Paint$96
- Supplies (tape, rollers, drop cloth)$35
- Estimated total (DIY)$131
Hiring a pro? Add roughly $1.50–$4.00/sq ft for labor depending on prep work and trim detail.
Educational estimate only — always confirm with written local bids.
What should this project cost?
Enter your project details for a realistic cost range before you call anyone.
Cost depends heavily on which system turns out to be the source.
- Regional adjustment
- National average
- Labor share (typical)
- ~$1,620
- Quotes to collect
- 3 written estimates
Educational estimate based on national averages — not a binding quote. Always confirm with written local estimates.
Before you start
Check the difficulty, permits, and safety risk — then decide whether to call a pro.
Free, no signup required. Estimates are educational guidance, not a quote or an inspection.
Recommended for DIYers & woodworkers
Sponsored
The Top 20 Tools for Workshops of Any Budget
No stationary machines or power tools required — plus 3 fundamental tools that can't be bought at any price.
Get the free guide
Ted's Woodworking — The #1 Woodworking Resource
Detailed instructions, dimensioned drawings, materials & cutting lists, and 3D schematics for every skill level.
See the plansSponsored: links above are affiliate links. FixlyGuide may earn a commission on qualifying purchases — at no extra cost to you.
Frequently asked questions
Can I just use masking tape instead of painter's tape?+
You really shouldn't. Masking tape uses a rubber-based adhesive that can dry out, get sticky, and either pull paint off the wall or leave a nasty residue. Painter's tape uses a gentler acrylic adhesive designed for clean removal.
How long should I wait before painting over a freshly painted wall?+
Most latex paints need to cure for at least 24 hours before you should apply painter's tape to them. If you tape too soon, the adhesive can pull the fresh paint right off. For delicate-surface tapes, they sometimes recommend waiting 3 days, so check the tape's label.
Is green painter's tape better than blue painter's tape?+
Not necessarily better, just different. Blue tape is the all-around standard for most surfaces. Green tape, particularly FrogTape, often has special polymers that react with latex paint to form an even stronger barrier against bleeding, making it excellent for trickier situations.
What's the best way to get a straight line on a textured wall?+
The absolute best method is to tape your line, press it firmly with a putty knife, then seal the edge with the original base color before painting your new color. This 'sealing' trick fills all the tiny gaps in the texture with a color that matches, making any bleed-under invisible.
Why did my painter's tape pull the paint off the wall?+
This usually happens for one of three reasons: you used a tape with too-strong adhesion, you taped over uncured paint, or the underlying paint wasn't bonded well to the wall in the first place due to poor prep.
Does the width of the painter's tape matter?+
Wider tape (like 1.88 inches) can be more forgiving as it gives you a bigger buffer zone from your brush or roller, reducing the chance of accidentally getting paint on the trim. However, a standard 1.41-inch tape is perfectly fine if you have a steady hand.
Can I reuse painter's tape?+
No, painter's tape is designed for single-use only. Once you pull it off, the adhesive will have picked up dust and lost its consistent tack, and the paper edge will be full of paint. Using it again is asking for a messy result.
How do I get a perfect paint line on carpet?+
Use a wide, high-adhesion painter's tape. Press it down about a 1/4 inch from the baseboard. Then, use a putty knife to tuck the edge of the tape down into the gap between the carpet and the baseboard. This creates a barrier below the paint line.
Discussion
Loading comments…