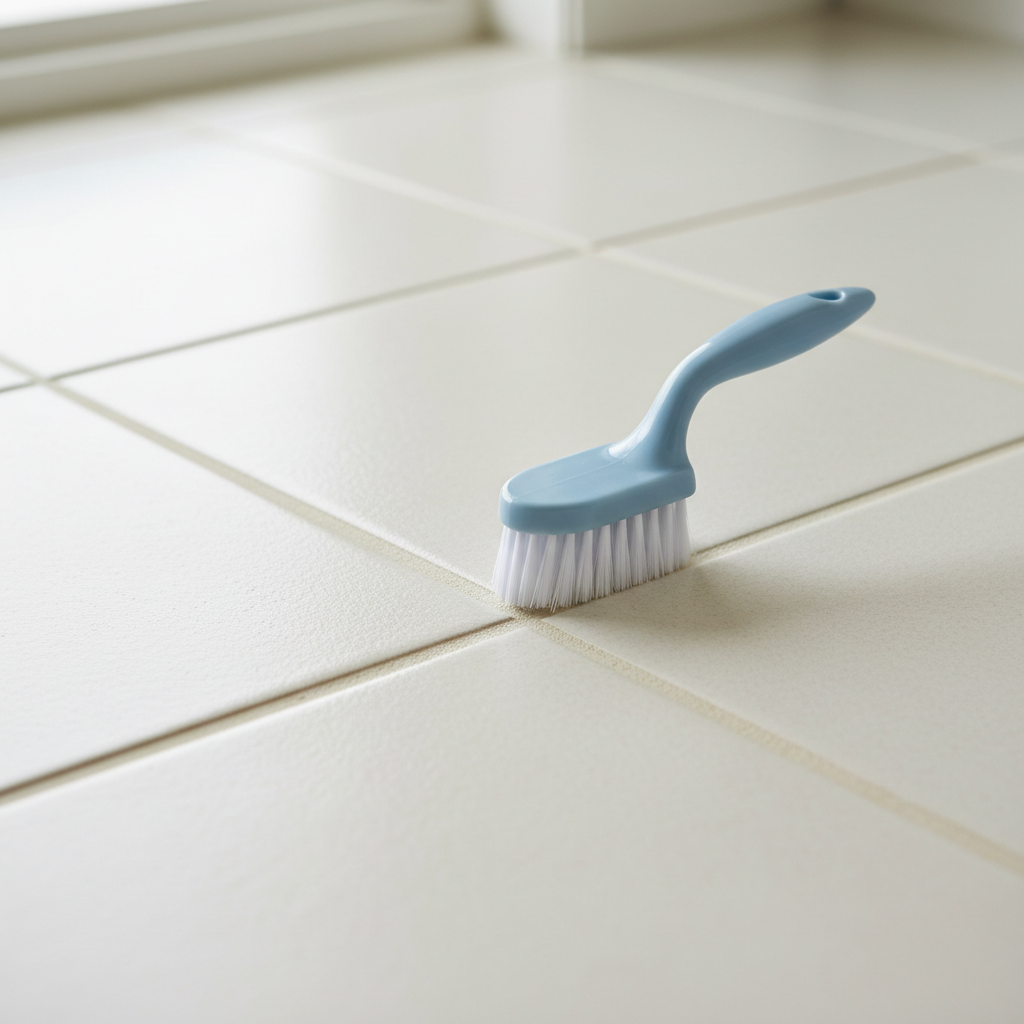
- Porous Grout: Cement-based grout is naturally porous and acts like a sponge, soaking up dirt, oils, and moisture. If it isn’t sealed, grime’s got a straight shot.
- Improper Cleaning Products: Harsh acidic cleaners like vinegar can etch cementitious grout and leave it even more porous. Same story with abrasive powders that wear the surface down.
- Ineffective Cleaning Methods: Mopping or wiping the tile surface doesn’t get into the grout lines. Most of the time, it just pushes dirty water deeper instead of pulling the grime out.
- Hard Water & Soap Scum: In showers, mineral buildup from hard water and that sticky soap scum residue pile up quick and stain the grout.
- Mildew and Mold: In warm, damp spaces like bathrooms, mildew and mold love unsealed or poorly sealed grout. That’s where you get black, pink, or green discoloration.
Published September 26, 2026Last updated September 26, 2026
Tools & materials you'll need
Affiliate linksAs an Amazon Associate FixlyGuide earns from qualifying purchases — at no extra cost to you. Prices and availability are accurate as of publication and subject to change.
Quick Answer
Listen, if you’re sick of scrubbing grout till your shoulder’s barking and it still looks dirty a week later, I hear you. I’ve been there on plenty of jobs. The issue usually isn’t that you didn’t work hard enough; it’s that the grime’s down in the grout, and surface cleaning just won’t touch it. You’ve got to pull that junk out, then lock the grout down so it doesn’t stain again. That’s the part most folks skip, and that’s why they keep spinning their wheels.
The Problem
Walk into any bathroom or kitchen, and if the grout lines are dingy, the whole room just feels off. Doesn’t matter if the tile’s spotless. Those dark, discolored lines drag everything down fast. So what’s going on? You scrub, you spray, you even buy those “miracle” cleaners, and then—boom—the dirt comes right back. It’s enough to make anybody mad.
Most homeowners figure the grout’s permanently stained, but nine times out of ten, it’s just soap scum, grease, mildew, and plain old grime packed into a porous surface. That stuff gets trapped. Regular mopping or a quick wipe just smears it around and pushes more junk into the pores. Then you’re stuck in that same loop, cleaning and re-cleaning with no payoff.
How It Works
Grout isn’t like the tile around it. Most grout is cement-based, so it’s porous—picture a tiny sponge. Those little pores soak up water, dirt, oils, minerals, all of it. Every shower sends soap scum, body oils, and hard-water minerals across the grout. In the kitchen, it’s grease, food spills, and foot traffic doing the damage.
Over time, that absorbed mess darkens the grout. White grout turns gray or black. Light grout looks tired and dingy. And if the area stays damp, mildew loves it. Bathrooms are the worst for that. I pulled a shower in Frisco last month that had exactly this issue—looked like the grout was painted charcoal, but once I got in there with the right cleaner, half of it was just junk trapped in the pores.
Harsh cleaners can make it worse, too. They’ll strip off what sealant you’ve got left and leave the grout even more exposed. So yeah, it can feel like the harder you scrub, the worse it gets. What you need is to lift the embedded dirt out, then put a barrier on it so it doesn’t come right back.
Step-by-Step Fix
This isn’t a quick wipe-down. This is a real deep clean. Give yourself a couple hours for a small bathroom, maybe half a day if you’re dealing with a bigger kitchen floor. You’ll be glad you did.
-
Prep the Area — Clear the decks Before you start scrubbing, get everything out of your way. Pull out bathmats, trash cans, furniture, whatever’s sitting there blocking access. Vacuum or sweep first so you’re not making mud the second water hits the floor. That matters. For showers, get every bottle and scrubby out of there.
-
Pre-Treat with a Cleaner — Let the chemicals do the heavy lifting Don’t just grab any random spray from under the sink. You want a dedicated grout cleaner, preferably oxygen-based (like a hydrogen peroxide solution) or an alkaline cleaner. Skip acid-based cleaners on cement grout unless you really know what you’re doing—they can etch the surface. Spray it on heavy, right onto the grout lines. Let it sit for at least 10-15 minutes, but don’t let it dry. On nasty sections, I’ll let it sit for 20-30 minutes and mist it with water if it starts drying out. That dwell time is the whole trick; it gives the cleaner time to soak in and break up the gunk.
- Tool Tip: A garden sprayer makes it way easier to apply cleaner to big floor areas than a little spray bottle.
-
Scrub, Scrub, Scrub — Elbow grease time Now you’re doing the actual work. Use a stiff-bristled brush—a grout brush with a skinny head is best, but a firm toothbrush or small utility brush can work in a pinch. Work in small sections, around 2x2 feet at a time. Push hard and scrub back and forth along the grout line. You should see the grime loosening up and foaming. Don’t rush it. Hit each line. For floor grout, getting on your hands and knees is usually the only way to get enough leverage.
- Pro Tip: If a spot’s stubborn, sprinkle a little baking soda right on the wet grout and scrub again. It gives you a light abrasive bite that helps knock loose the embedded dirt.
-
Rinse Thoroughly — Wash away the crud Once you’ve scrubbed a section, you’ve got to get all that loosened dirt and cleaner off the surface. Use a bucket of warm water and a sponge or mop. Rinse well and change the water often. You don’t want cleaner residue hanging around, because it’ll just settle right back into the grout. For showers, the showerhead works great. Get after it and make sure the dissolved grime is actually gone.
-
Inspect and Repeat (If Necessary) — Don’t be afraid to go again Let it dry a bit, or wipe it down with a clean dry rag. Once it’s dry, take a look. Did the grout come as clean as you wanted? If it’s still discolored, don’t panic. Some grout is just plain filthy. Go back to step 2 and hit the bad spots again. Sometimes you need a second pass, especially on shower floors and high-traffic areas.
- If it's still not coming clean: You might be looking at permanent staining or deep-set mildew. A colorant/sealer can help—basically it colors and seals the grout at the same time—or you may need to call in a professional.
-
Dry Completely — Crucial for sealing Before you even think about sealing, that grout has to be bone dry. I mean really dry. This can take 24-48 hours, especially if it’s humid or you’re working on a floor. Fans help. A dry grout line is what lets the sealer soak in and cure right. Seal wet grout and you’re trapping moisture. No dice.
-
Apply Grout Sealer — The real secret weapon This is the step most homeowners skip, and it’s why the grout gets dirty again so fast. A good penetrating grout sealer creates an invisible shield inside the grout pores, which makes it water- and stain-resistant. Use a brush, a small applicator bottle, or even a paint pad to put it right on the grout lines. Wipe off any excess on the tile immediately before it dries. Follow the manufacturer’s directions for coats and cure time; some want a second coat after an hour or two. This stuff works. I remember a job out in Springfield where the homeowner swore their 10-year-old shower grout was a lost cause. After a solid scrub and two coats of a quality penetrating sealer, it looked brand new. They were shocked.
- Safety First: Always work in a well-ventilated area when using sealers. Wear gloves and eye protection.
-
Wipe Off Excess Sealer — Don’t leave a haze After the recommended dwell time (usually 5-15 minutes, check your product), wipe off any sealer that didn’t soak into the grout or dried on the tile surface with a clean, dry cloth. If it dries on the tile, you’ll be staring at a cloudy haze that’s a bear to remove. Some sealers will dry tacky if you don’t buff them off in time.
-
Allow Sealer to Cure — Patience, partner Wiped off doesn’t mean ready to use. Most sealers need a full 24-72 hours to cure all the way and give you max protection. Keep water off it during that window. That’s when the barrier really sets up and does its job.
Common Causes
- Porous Grout: Cement-based grout is naturally porous and acts like a sponge, soaking up dirt, oils, and moisture. If it isn’t sealed, grime’s got a straight shot.
- Improper Cleaning Products: Harsh acidic cleaners like vinegar can etch cementitious grout and leave it even more porous. Same story with abrasive powders that wear the surface down.
- Ineffective Cleaning Methods: Mopping or wiping the tile surface doesn’t get into the grout lines. Most of the time, it just pushes dirty water deeper instead of pulling the grime out.
- Hard Water & Soap Scum: In showers, mineral buildup from hard water and that sticky soap scum residue pile up quick and stain the grout.
- Mildew and Mold: In warm, damp spaces like bathrooms, mildew and mold love unsealed or poorly sealed grout. That’s where you get black, pink, or green discoloration.
- Lack of Sealing: This is the big one. If your grout isn’t sealed, or the sealer’s worn off, it’s got no defense against staining.
Common Mistakes
- Using Bleach Too Often or Undiluted: Bleach can knock out mildew, sure, but it doesn’t remove embedded dirt. Use it too much and you’ll wear out the grout over time. Short-term fix. That’s it.
- Ignoring the Dwell Time: Spraying cleaner and scrubbing right away is like trying to lift a fridge without bending your knees—you’re making it harder than it needs to be. Let the cleaner sit and work.
- Not Rinsing Thoroughly: If you leave cleaner residue or dirty water behind, you’re basically putting the mess right back where it started. Rinse until the water runs clear.
- Sealing Wet Grout: Rookie move. Wet grout traps moisture, messes with the bond, and can even let mildew grow underneath the sealant. Don’t do it.
- Using the Wrong Brush: A soft sponge won’t cut it. You need stiff bristles to get down in those grout lines and agitate the grime. A wire brush, though? Too aggressive. It can damage the grout.
- Not Sealing At All, or Not Often Enough: Grout sealer isn’t a one-and-done thing. It wears off, especially in wet or high-traffic areas. Re-seal every 1-3 years and you’ll stay ahead of it.
Cost & Time Breakdown
Here’s what you’re looking at for a typical bathroom (about 50 sq ft of tile) or a small kitchen area.
| Task | DIY Cost | Pro Cost | Time (DIY) |
|---|---|---|---|
| Tools & Cleaner | $20–$50 | Included | 30 min (shopping) |
| Deep Cleaning & Scrubbing | $0 (labor) | $100–$250 | 1–3 hours |
| Sealer | $20–$40 | Included | 30 min |
| Sealer Application | $0 (labor) | Included | 30 min |
| Total | $40–$90 | $100–$250+ | 2–4 hours active |
Tips & Prevention
- Daily Wiping (Showers): After every shower, a quick wipe with a squeegee or microfiber cloth on the walls and grout cuts way down on soap scum and mildew. Yeah, it’s a small chore—but it saves you from a monster cleaning later.
- Regular, Gentle Cleaning (Floors): For floor grout, use a pH-neutral cleaner and a damp mop once a week. Don’t go after it with harsh stuff that leaves residue behind.
- Re-seal Regularly: Depending on traffic and humidity, plan to re-seal every 1-3 years. Want to check it? Drip a few drops of water on the grout. If it soaks in, it’s time.
- Ventilation is Key: In bathrooms, run the exhaust fan during the shower and for at least 20 minutes after. Moisture is what feeds mildew.
- Fix Leaks Promptly: Even a small hidden leak can keep an area damp all the time, and that’ll wreck grout pretty quick.
- Use Mats: In kitchens, mats in high-traffic spots or near sinks help cut down on spills and wear on the grout.
When to Call a Professional
Look, I’m all for DIY, but sometimes you’ve got to know when to tap out. If the grout’s so far gone that scrubbing doesn’t change a thing, or it’s crumbling apart, it might be time for a pro. They can tell you if you need re-grouting, which is a bigger job that means chipping out the old stuff and putting in new grout.
If you’re dealing with deep mold or mildew that won’t respond to treatment, a pro can bring in stronger commercial-grade cleaners or even steam equipment to handle it safely. And if you’re looking at a big stretch of tile—like a whole basement or several rooms—and the thought of being on your knees for hours sounds like pure misery, a professional tile and grout cleaning service can usually knock it out faster and better. They’ve got truck-mounted extraction systems homeowners just don’t have sitting in the garage.
Related Articles
Keep troubleshooting with these hand-picked guides from FixlyGuide:
- The Soap Scum Monster on Your Shower Walls? Here's Its Kryptonite — Tired of scrubbing that stubborn soap scum on your shower walls? I've got the real-world tricks to blast it away, leaving your shower spark…
- The Secret to Cleaning Your Greasy Oven Door (No Harsh Chemicals Needed) — Don't spend hours scrubbing a grimy oven door with harsh chemicals; I'll show you a contractor's trick to get that glass sparkling clean in…
- The Mystery of the Returning Carpet Stain: What Your Cleaner Misses — Ever cleaned a carpet stain only for it to mysteriously reappear days later? You're not alone. This guide reveals the real reason why and h…
- The Caulk Stain That Won't Quit: Why Your Shower Stays Grimy — Is that stubborn, discolored caulk making your clean shower look perpetually dirty? It's not just surface grime; it's often mold or mildew,…
- The Grime That Hides: Why Your Baseboards Always Look Dirty — Even after a thorough cleaning, baseboards can quickly look dingy, often due to overlooked deep-seated dirt, static attraction, and imprope…
- The Grimy Secret: Why Your Toilet Bowl Stains Keep Coming Back — Fed up with scrubbing stubborn toilet bowl stains only for them to reappear days later? The real culprit is likely hiding in your tank, not…
Should you do this yourself?
Answer five quick questions before you start. Safety outranks savings every time.
Your experience with work like this
How high do you have to work?
Does the job involve any of these?
Will it need a permit?
Specialty tools
Free and instant. Educational guidance only — not a quote, inspection, or professional diagnosis.
What should this project cost?
Enter your project details for a realistic cost range before you call anyone.
Cost depends heavily on which system turns out to be the source.
- Regional adjustment
- National average
- Labor share (typical)
- ~$1,620
- Quotes to collect
- 3 written estimates
Educational estimate based on national averages — not a binding quote. Always confirm with written local estimates.
Before you start
Check the difficulty, permits, and safety risk — then decide whether to call a pro.
- Estimate this projectGet a cost range for your scope and ZIP before you call anyone.Open
- Get local estimatesSend one request and compare written estimates from vetted pros.Open
Free, no signup required. Estimates are educational guidance, not a quote or an inspection.
Get the print-ready PDF of this guide
A clean, ad-free, printable version you can keep on your phone or pin to the workshop wall. Free with a FixlyGuide account.
- Print-optimized layout
- Tools, materials & every step included
- Saved to your account
Frequently asked questions
How often should I clean my grout?+
For routine maintenance, I tell folks to clean their grout weekly with a neutral cleaner, especially in high-traffic areas and showers. A deep clean and re-seal should happen every 1-3 years, depending on how much action that area sees.
Can I use vinegar to clean grout?+
Nah, I generally tell homeowners to avoid it. While vinegar can kill some mildew, it's acidic. On cement-based grout, it can actually etch the surface, making it more porous and susceptible to future staining. Stick to pH-neutral or oxygen-based cleaners for most grout.
What's the best type of brush for cleaning grout?+
You need a stiff-bristled brush, specifically designed for grout. It's got a narrow head that fits right into those lines. A firm toothbrush can work in a pinch for small spots, but anything too soft won't get the job done, and anything too hard, like a wire brush, can damage the grout itself.
How long does grout sealer last?+
That depends on the type of sealer and the traffic on the grout. Most penetrating sealers will last 1-3 years in showers or high-traffic floor areas. In less used spots, you might get 5 years. Test it annually by dripping water on the grout; if it soaks in, it's time to re-seal.
My grout is black with mildew, will cleaning fix it?+
If it's just surface mildew, a good oxygen-based cleaner and a stiff scrub should lift it. But if the mildew has really taken hold deep in the grout's pores, it might take a few passes. If it doesn't budge, you might need a stronger commercial cleaner or consider re-grouting if it's truly embedded.
Why does my grout get dirty so fast after cleaning?+
Two main reasons: either you didn't get all the embedded dirt out during cleaning, or more likely, you skipped sealing it. Unsealed grout is like a sponge, it just sucks up dirt and moisture again. Sealing creates a protective barrier.
Can I paint my grout lines?+
Yeah, you can. They make grout colorants or dyes that also act as sealers. It's a good option if your grout is permanently stained or you want to change its color without the hassle of re-grouting. Just make sure the grout is super clean and dry before you apply it.
Is it better to clean grout by hand or with a machine?+
For a homeowner, hand scrubbing with a good brush usually does the trick for most rooms. If you've got a huge area or exceptionally stubborn grime, a professional cleaning service with their truck-mounted steam or rotary machines will get it done faster and often more effectively. For most DIYers, elbow grease is king.
How do I prevent grout from getting dirty in the first place?+
Regular, gentle cleaning with a pH-neutral cleaner is your best friend. Always use an exhaust fan in bathrooms, and most importantly, keep your grout properly sealed. Good ventilation and a working sealer are the top two ways to keep grime at bay.
What's the difference between sanded and unsanded grout when cleaning?+
Sanded grout is more porous and typically used for wider joints (1/8 inch or more). Unsanded is smoother and used for narrower joints. Both need sealing, but sanded grout tends to absorb more and can be a bit tougher to get perfectly clean due to its rougher texture. The cleaning process is generally the same, but sanded might need a bit more scrubbing effort.
Discussion
Loading comments…