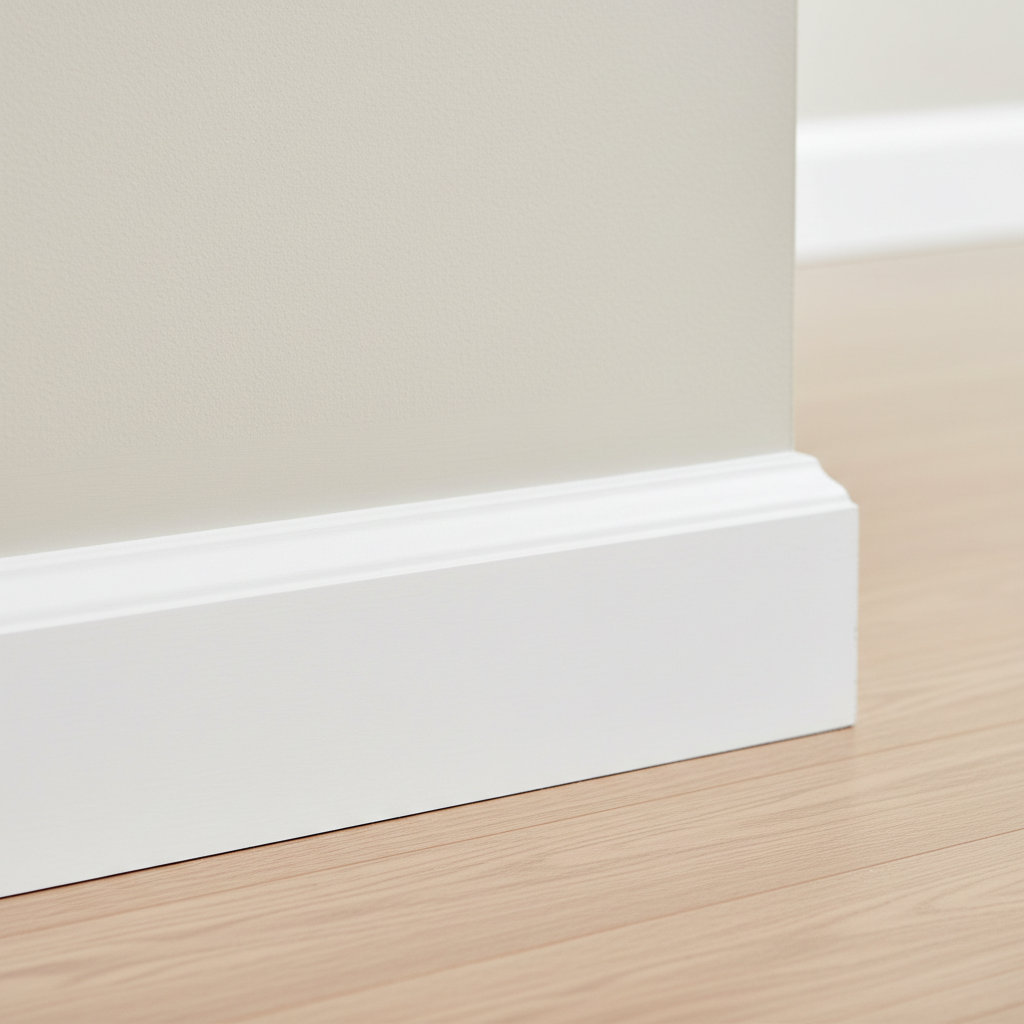
- Static Electricity: Synthetic materials in paint and flooring create static, turning baseboards into dust magnets. It’s basically a little trap for airborne junk.
- Improper Cleaning: Using too much water or the wrong cleaner just pushes dirt around or leaves behind a sticky film that grabs more grime. You think you’re cleaning, but no dice.
- Mopping/Vacuuming Residue: Dirty mop water splashing onto baseboards or vacuum brushes kicking fine dust against them builds up an embedded film over time.
- Pet Dander & Hair: Animals shed all the time, and that fine hair with skin cells loves to cling to anything low and static-charged.
- Foot Traffic & Scuffs: Shoes, furniture, toys — anything bumping or scraping the baseboard leaves marks that are tougher to clean than plain dust.
Published September 13, 2026Last updated September 13, 2026
Tools & materials you'll need
Affiliate linksAs an Amazon Associate FixlyGuide earns from qualifying purchases — at no extra cost to you. Prices and availability are accurate as of publication and subject to change.
Quick Answer
You’ve scrubbed, you’ve wiped, and then a day later those baseboards look like you never touched ’em. Annoying as all get-out, right? The truth is, a surface wipe just don’t get the junk that really hangs on. I’m talking years of dust, dirt, and paint overspray baked right into the finish. You’ve got to hit it with the right cleaner, break up that static cling, and lift the embedded grime if you want the thing to stay clean longer.
The Problem
I’ve seen this a hundred times. Homeowners, bless ’em, will wipe baseboards with a wet rag, maybe splash on some all-purpose cleaner, and figure that’s that. Then a week later, the dirt magnet’s back in business. Why? Because half the time you’re just moving dust around or turning it into a muddy smear that dries and grabs even more dust. What you’re really dealing with isn’t just everyday dirt; it’s layers of pet hair, dead skin, tracked-in soil, and sometimes paint spatter from somebody’s weekend “I got this” job. It all piles up and leaves a sticky, static-charged surface that grabs whatever floats by. And if you’ve got kids or pets? Forget it. They leave scuffs, smudges, and mystery marks that a quick wipe won’t touch. We’re gonna get into how to knock it out for good.
How It Works
Think of your baseboards like a little dust shelf at the bottom of the wall. Every time somebody walks by, kicks up dirt, or the HVAC kicks on, air currents carry tiny particles — dust mites, fabric fibers, pollen, skin cells — right down there. Gravity does the rest. Then you’ve got synthetic paint and flooring materials building static, which acts like a magnet for airborne dust. So even if the house looks clean, particles are constantly settling.
When you mop or vacuum, you can actually shove fine dust or dirty water against the baseboard and press it into the texture of the paint or wood. After a while, you end up with this dull, grimy film that’s a pain to get off. It’s not just sitting there. It’s practically bonded on.
The trick is to break that static bond, dissolve the built-up gunk, and leave a surface that doesn’t invite dust to stick like it owns the place. That’s the whole game — bust up the dust-attraction cycle and get the finish back to smooth.
Step-by-Step Fix
This ain’t a quick swipe and done. We’re doing it the right way so it lasts. Your knees might not love you for it, but the results are worth it.
-
Prep the Area — Clear the decks. Move furniture away from the baseboards. You need clean access to the whole run. Pull down pictures or little wall hangers nearby too, just so you’re not knocking things over or splashing them.
-
Vacuum the Loose Stuff — Get the big guns out. Grab the vacuum with the brush attachment. Don’t skip this part. You’ve gotta get the loose dust bunnies and cobwebs off first, or you’re just making mud in the next step. I’ve watched folks wipe dusty trim and end up with a streaky mess that looked worse than before. Hit the corners and the top edge of the baseboard. A crevice tool helps in the tight spots. That first pass should knock out about 80% of the visible junk.
-
Mix Your Cleaning Solution — The secret sauce. For painted baseboards, I usually go with warm water, a squirt of dish soap (like Dawn), and a splash of white vinegar. Think about a gallon of warm water, a tablespoon of soap, and half a cup of vinegar. The soap cuts grease and grime, and the vinegar helps break down general dirt and leaves things cleaner without streaks. For wood baseboards, use a wood-specific cleaner mixed per the label. Test a hidden spot first so you don’t wreck the finish.
-
Scrub the Grime — Elbow grease time. Dip a microfiber cloth in your solution and wring it out really well — you don’t want drips running down the wall. Start at one end and work across the room. Use firm, even pressure. For stubborn spots, a melamine foam eraser (like a Magic Eraser) can work wonders on painted baseboards, but go easy. Too much scrubbing can take paint with it. Swap out your cloth as it gets dirty; otherwise you’re just spreading the mess around. You’ll be surprised how much comes off even after vacuuming.
-
Tackle Scuff Marks — Banish the black streaks. For shoe scuffs or furniture marks, a little white toothpaste or a pencil eraser can do the trick. Dab it on the scuff, rub gently with a clean cloth or old toothbrush, then wipe it clean. For tougher marks, a bit of rubbing alcohol on a cotton ball often gets it done — but test first. A lot of these marks are rubber or plastic transfer, so you need a mild abrasive or solvent to lift ’em.
-
Wipe Clean and Dry — No streaks allowed. After you scrub a section, follow up right away with a second clean microfiber cloth dampened with plain water. That gets rid of cleaner residue. Then dry the baseboards with a dry microfiber cloth. That keeps water spots away and helps dust slide off instead of sticking. Leftover moisture is a dust magnet, plain and simple.
-
Apply a Dust Repellent — The preventative strike. Here’s a trick I picked up years ago after a job in North Reading where the homeowner swore by it — her baseboards stayed cleaner longer, and I’ve been telling folks about it ever since. After drying, lightly spray a clean cloth with an anti-static spray (like Static Guard) or even a very thin coat of car interior protectant (like Armor All for dashboards, non-silicone based if possible for paint). Wipe it on sparingly. It leaves a slicker surface, cuts static cling, and makes dust work harder to stick.
-
Regular Maintenance — Keep ’em looking good. Once they’re clean, don’t let ’em slide back. Build baseboard dusting into your normal routine. A quick pass with a vacuum brush or dry microfiber cloth once a week or every two weeks makes a big difference and keeps that deep grime from setting up again. An ounce of prevention really does beat a pound of cure — especially when you’re the one kneeling on the floor.
Common Causes
- Static Electricity: Synthetic materials in paint and flooring create static, turning baseboards into dust magnets. It’s basically a little trap for airborne junk.
- Improper Cleaning: Using too much water or the wrong cleaner just pushes dirt around or leaves behind a sticky film that grabs more grime. You think you’re cleaning, but no dice.
- Mopping/Vacuuming Residue: Dirty mop water splashing onto baseboards or vacuum brushes kicking fine dust against them builds up an embedded film over time.
- Pet Dander & Hair: Animals shed all the time, and that fine hair with skin cells loves to cling to anything low and static-charged.
- Foot Traffic & Scuffs: Shoes, furniture, toys — anything bumping or scraping the baseboard leaves marks that are tougher to clean than plain dust.
- HVAC System Distribution: Your heating and cooling system keeps air moving, and with it dust and debris that settle at the lowest spots, baseboards included.
Common Mistakes
- Skipping the Pre-Vacuum: Wiping dusty baseboards without vacuuming first is like drying dishes with a dirty rag. You’re just smearing the mess around. Always vacuum first.
- Using Too Much Water: Soaking baseboards with a wet cloth can damage painted surfaces, especially MDF, and leave water marks that attract more dust.
- Ignoring Scuff Marks: A plain wipe won’t take off rubber or paint transfer. Those need spot treatments like a melamine foam eraser or rubbing alcohol, used carefully.
- Using Abrasive Cleaners on Paint: Harsh scrub pads or abrasive cleaners can strip paint or wreck the finish, which makes the baseboards look worse and harder to clean later.
- Forgetting the Top Edge: Dust loves that narrow flat top edge. If you skip it, the dust just falls back down onto the front after you’re done.
- Not Drying Thoroughly: Leaving moisture behind makes a tacky surface that dust sticks to fast, and in humid spaces it can even lead to mildew.
Cost & Time Breakdown
Here’s a rough idea of what you’re looking at, depending on how much you DIY versus hiring a pro. Honestly, baseboards are usually a DIY job unless you’ve got a monster house or a physical limitation.
| Task | DIY Cost | Pro Cost (per linear foot) | Time (per 100 linear feet) |
|---|---|---|---|
| Vacuuming | $0–$5 (electricity) | Included in cleaning rate | 10–15 minutes |
| Deep Cleaning (Wipe) | $5–$15 (cleaners/cloths) | $1.50–$3.00 | 30–60 minutes |
| Scuff Mark Removal | $2–$10 (eraser/alcohol) | Included in cleaning rate | 10–20 minutes |
| Anti-static Application | $5–$10 (spray) | Included in cleaning rate | 5–10 minutes |
| Total (DIY) | $12–$40 | N/A | 55–105 minutes |
| Total (Pro) | N/A | $150–$300 (whole house) | N/A |
Tips & Prevention
- Regular Dusting: A quick pass with a dry microfiber cloth or vacuum brush attachment every week or two keeps buildup from getting out of hand. Stay on it.
- Mind Your Mop: If you mop, watch the splash zone. Use a damp mop, not a soaking wet one, and wipe baseboards after if they get wet.
- Air Filters: Change HVAC filters regularly, at least every 90 days, or more often if you’ve got pets. Cleaner air means less dust settling everywhere.
- Door Sweeps & Weatherstripping: Seal gaps under exterior doors and around windows. That cuts down on outside dirt and dust sneaking in.
- Shoe-Free Zone: A no-shoes rule inside helps a ton. Less tracked-in dirt, fewer scuffs, cleaner floors.
- Furniture Pads: Felt pads on furniture legs help keep scuffs down when things get bumped during vacuuming or moving.
- Consider a Humidifier: In dry climates, bringing indoor humidity up a bit — around 40-50% relative humidity — can help cut static electricity, which cuts down on dust cling.
When to Call a Professional
Look, cleaning baseboards ain’t rocket science, but sometimes you should call in a pro cleaning service. If you’ve got mold along the baseboards — not just dirt, but fuzzy colored patches — that can point to a moisture problem behind the wall, and a cleaner may not be enough. You may need a mold remediation specialist. If your baseboards are unpainted wood and they’ve got deep staining, rot, or insect damage, cleaning won’t save ’em; you’ll need a carpenter or restoration pro. And if you’ve got physical limitations or a huge house with hundreds of linear feet of trim, hiring a team might just make sense.
FAQ
Q: How often should I deep clean my baseboards?
A: I tell homeowners to aim for a deep clean every 3-6 months. If you’ve got heavy traffic, kids, or pets, quarterly is better. Light dusting in between makes the big clean way easier.
Q: Can I use a steam cleaner on baseboards?
A: You can, but I’d be careful. Steam does a good job breaking down grime, but too much moisture — especially on painted MDF baseboards — can cause swelling or mess up the paint. If you use one, move fast and dry everything right away.
Q: What's the best way to clean baseboards with intricate molding?
A: For fancy profiles, a soft-bristled brush — like an old paintbrush or detailing brush — dipped in your cleaning solution works great. It gets into the nooks and crannies a cloth won’t reach, then you can follow with a damp cloth.
Q: My baseboards are painted white and show every mark. Any special tricks?
A: White shows everything, no question. A melamine foam eraser (like Mr. Clean Magic Eraser) is your best friend on white painted baseboards, but use it gently. For general cleaning, stick with the vinegar and dish soap mix. It works without leaving residue.
Q: How can I prevent dust from sticking to baseboards after cleaning?
A: Once they’re fully dry, lightly wipe them with a cloth sprayed with an anti-static spray or even a diluted fabric softener solution. That gives you a barrier that helps repel dust and static cling.
Q: Is it better to clean baseboards before or after vacuuming the floor?
A: Always clean baseboards before you vacuum or mop the floors. That way, anything that falls off during cleaning gets picked up when you do the floor, and you’re not chasing dust twice.
Q: What if my baseboards have a waxy buildup?
A: Waxy buildup usually comes from floor polishes or the wrong cleaners. Try warm water with a bit more white vinegar, or a dedicated wax stripper if you’ve got to — test carefully. Don’t pile on more wax-based products if this keeps happening.
Q: Can I use furniture polish on wooden baseboards?
A: For sealed wooden baseboards, a very light coat of furniture polish can add shine and a little dust resistance. But skip oil-based polish on painted baseboards because it can leave a greasy film that grabs dust. On painted trim, stick with the anti-static spray.
Q: My baseboards have gaps between them and the wall. How do I clean those?
A: For small gaps, use a crevice tool on the vacuum. For bigger gaps that keep coming back, that’s usually house settling, and cleaning won’t fix it. You may need to caulk them for looks and to keep dust and drafts out.
Related Articles
Keep troubleshooting with these hand-picked guides from FixlyGuide:
- The Mystery Smell: Why Your Fridge Stinks (Even After Cleaning It) — That persistent, foul odor in your refrigerator isn't just gross; it's often a sign of hidden issues. Learn the real culprits behind linger…
- The Grimy Secret Under Your Microwave — And How to Scrape It Clean — I've seen it a hundred times: homeowners totally overlook the disgusting, grease-caked filters hiding under their microwave. Cleaning 'em i…
- The Secret to Banishing Old Pet Odors (Even When You Can't Find the Stain) — Don't let hidden pet accidents ruin your home's fresh scent; this guide reveals how to find and eliminate old pet odors and their invisible…
- The Grimy Secret Under Your Kitchen Sink: Why That Smell Won't Go Away — Uncover the real reason for that persistent kitchen sink odor and how to banish it for good with simple DIY steps and materials.
- The 3 Lies Your Carpet Cleaner Tells You (And Why Your Carpet Stinks) — Ever notice those 'cleaned' carpet stains pop right back up, or a lingering funk that just won't quit? It's not bad luck; it's bad science.
- The #1 Mistake Homeowners Make When Sealing a Deck (And How to Fix It) — Discover the crucial, often-missed step in deck sealing that prevents premature wear and water damage, ensuring your wood deck lasts for ye…
What should this project cost?
Enter your project details for a realistic cost range before you call anyone.
Cost depends heavily on which system turns out to be the source.
- Regional adjustment
- National average
- Labor share (typical)
- ~$1,620
- Quotes to collect
- 3 written estimates
Educational estimate based on national averages — not a binding quote. Always confirm with written local estimates.
Get the print-ready PDF of this guide
A clean, ad-free, printable version you can keep on your phone or pin to the workshop wall. Free with a FixlyGuide account.
- Print-optimized layout
- Tools, materials & every step included
- Saved to your account
Frequently asked questions
How often should I deep clean my baseboards?+
I tell homeowners to aim for a deep clean every 3-6 months. For high-traffic areas or homes with pets and kids, you might want to bump that up to quarterly. Regular light dusting in between makes the deep clean much easier.
Can I use a steam cleaner on baseboards?+
You *can*, but I'd be careful. Steam is great for breaking down grime, but too much moisture, especially on painted MDF baseboards, can cause swelling or damage to the paint. If you use one, move quickly and dry thoroughly immediately afterward.
What's the best way to clean baseboards with intricate molding?+
For those fancy profiles, a soft-bristled brush – like an old paintbrush or a detailing brush – dipped in your cleaning solution works wonders. It gets into all the nooks and crannies that a cloth can't reach, then follow up with a damp cloth.
My baseboards are painted white and show every mark. Any special tricks?+
White shows everything, that's for sure. A melamine foam eraser (like Mr. Clean Magic Eraser) is your best friend for white painted baseboards, but use it gently. For general cleaning, stick to the vinegar and dish soap solution, which cleans effectively without leaving residue.
How can I prevent dust from sticking to baseboards after cleaning?+
After drying them completely, lightly wipe them with a cloth sprayed with an anti-static spray or even a diluted fabric softener solution. This creates a barrier that helps repel dust and static cling.
Is it better to clean baseboards before or after vacuuming the floor?+
Always clean baseboards *before* you vacuum or mop your floors. This way, any dust or debris that falls from the baseboards during cleaning will be picked up when you do the floor, ensuring a truly clean finish.
What if my baseboards have a waxy buildup?+
Waxy buildup often comes from floor polishes or incorrect cleaners. Try using a solution of warm water and a bit more white vinegar, or a dedicated wax stripper (test carefully!) to cut through it. Avoid using more wax-based products if this is a recurring issue.
Can I use furniture polish on wooden baseboards?+
For *sealed* wooden baseboards, a very light application of furniture polish can add shine and some dust resistance. However, avoid oil-based polishes on painted baseboards as they can leave a greasy residue that attracts dust. For painted ones, stick to the anti-static spray.
My baseboards have gaps between them and the wall. How do I clean those?+
For small gaps, a crevice tool on your vacuum is best. For larger, persistent gaps, it's a sign of house settling, and cleaning won't fix it. You might need to caulk those gaps for both aesthetics and to prevent dust and drafts from entering.
Discussion
Loading comments…