- Food Debris Accumulation: Even with a disposal, tiny food bits — coffee grounds, vegetable peels, pasta, rice — can slip through and get caught in the P-trap or on rough pipe surfaces. That gives odor-causing bacteria something to feed on.
- Garbage Disposal Neglect: Disposals need regular use and plenty of cold water to flush everything through. If you’re not running enough water, or you’re feeding it too much fibrous stuff, junk gets hung up and starts rotting.
- Dishwasher Drain Backwash: If your dishwasher drains into the sink drain or disposal, it can add to the buildup, especially if the air gap or high loop isn’t set up right. Then dirty water just sits there and gets stagnant.
- Infrequent Use: A sink that hardly gets used can let the water in the P-trap evaporate, which breaks the sewer gas seal and lets stink come straight up from the sewer system.
- Vent Pipe Issues: Not as common, but a blocked or poorly installed vent pipe — that’s the line that lets air into the drain system — can throw off pressure, slow drains down, and sometimes cause odor.
Kitchen · Kitchen remodel
| Project category | Kitchen |
|---|---|
| Problem type | Kitchen remodel |
| Trade required | General contracting |
| Urgency | Planned project |
| Safety risk | Low safety risk |
| DIY suitability | Pro recommended |
| Cost category | Major investment |
| Typical timeline | Design and cabinet lead time 8–16 weeks; build 4–8 weeks |
| Contractor type | Kitchen remodeler or general contractor |
Repair option
Refacing, new counters, or hardware for a fraction of a gut remodel.
Replacement option
Full remodel when layout, plumbing, or electrical needs to change.
Common causes
- Dated layout
- Failing cabinets or counters
- Adding function or resale value
Relevant tools:project cost estimatorcompare quoteshome improvement material prices
Published September 5, 2026Last updated September 5, 2026
Tools & materials you'll need
Affiliate linksAs an Amazon Associate FixlyGuide earns from qualifying purchases — at no extra cost to you. Prices and availability are accurate as of publication and subject to change.
Quick Answer
That lingering funk under your kitchen sink? It’s usually not just old food. It’s grease, soap scum, and rotting bits of organic junk stuck to the inside of your drain pipes and P-trap. Good news: most of the time, you can handle it yourself with stuff you’ve already got under the sink and a little elbow grease. I’ll walk you through how to knock that gunk loose and get the kitchen smelling decent again without having to call a pro — unless, of course, you’ve got a full-on blockage that won’t budge.
The Problem
Alright, let’s talk about that nasty smell drifting up from the kitchen sink. You’ve probably run the disposal, dumped a little bleach in there, maybe even tried a store-bought drain cleaner. Works for a day or two, right? Then bam — it’s back, and sometimes it smells even worse.
I’ve heard that story plenty. Homeowners think it’s just food scraps hanging up in the disposal, but a lot of times the real problem’s deeper in the plumbing. The P-trap and the drain lines are usually the culprits. Grease, soap, coffee grounds, and all those little food scraps you think went down clean, they don’t disappear. They stick to the pipe walls and build up into a slimy mess that bacteria love. And that bacteria is what gives you that rotten-egg or musty smell. It’s not just annoying; it’s your drain telling you it needs a real cleaning.
How It Works
To fix it right, you’ve gotta understand how the kitchen sink drain actually works. It’s a simple setup, but a few parts matter a lot if you want things flowing and smelling right. First, you’ve got the sink basket and strainer. That’s supposed to catch the bigger stuff. Then everything drops into the drain opening, usually through a garbage disposal or straight into the P-trap.
That P-trap, the U-shaped bend under the sink, is doing more work than most folks realize. Its job is to hold a little water all the time. That water seal blocks sewer gas from coming back up into the house. If the trap dries out — maybe the sink hasn’t been used in a while, or you were out of town — you’ll get sewer gas smell. But in a kitchen, the bigger issue is usually the inside of the P-trap and the drain line downstream getting coated with biofilm. That’s the slimy bacteria layer I’m talking about.
Every time you rinse dishes, a little grease, fat, and food debris sticks to that biofilm. Over time it piles up. Pretty soon you’ve got a tiny compost pile living inside the pipe. No joke. That anaerobic decomposition — that’s decay without oxygen — is what makes those real nasty odors like hydrogen sulfide, which smells like rotten eggs, or those sour, rancid acids. It keeps going until you physically remove the buildup, so no miracle spray is gonna call it a day for you.
Beyond the P-trap, the drain line itself can collect the same junk, especially in older cast-iron pipes with rougher interiors or long horizontal runs. And if you’ve got a dishwasher, its drain line often ties into the sink drain or disposal, which adds even more food particles and detergent residue to the mix. Once you understand that little bacterial buffet, the fix makes a lot more sense — you’re not masking the smell, you’re getting rid of what’s causing it.
Step-by-Step Fix
Before you start, grab some gloves. You’ll thank me later. And if you’ve got a garbage disposal, make sure it’s OFF and UNPLUGGED before you stick your hand anywhere near it. Seriously. Don’t get cute with that thing.
Step 1: Prep the Area — Clear out everything from under the sink.
- Get a bucket or some old towels ready. You’re dealing with dirty water, so expect a mess. Crack a window if you can — a little ventilation goes a long way when you’re working on a stink problem.
Step 2: Start with the Disposal — Clean the visible parts.
- If you’ve got a disposal, shut it off and unplug it. Then grab a flashlight and look down into the drain opening. You’d be shocked at what gets hung up in there — onion skins, tiny bits of silverware, even plastic tags. Pull anything you can see with tongs or needle-nose pliers. After that, toss in a tray of ice cubes and a cup of rock salt and run the disposal with cold water. The ice and salt act like an abrasive and scrape off some of the gunk on the grinding plates. Follow that with half a lemon or lime to freshen it up a bit.
Step 3: Baking Soda & Vinegar Power — Attack the biofilm.
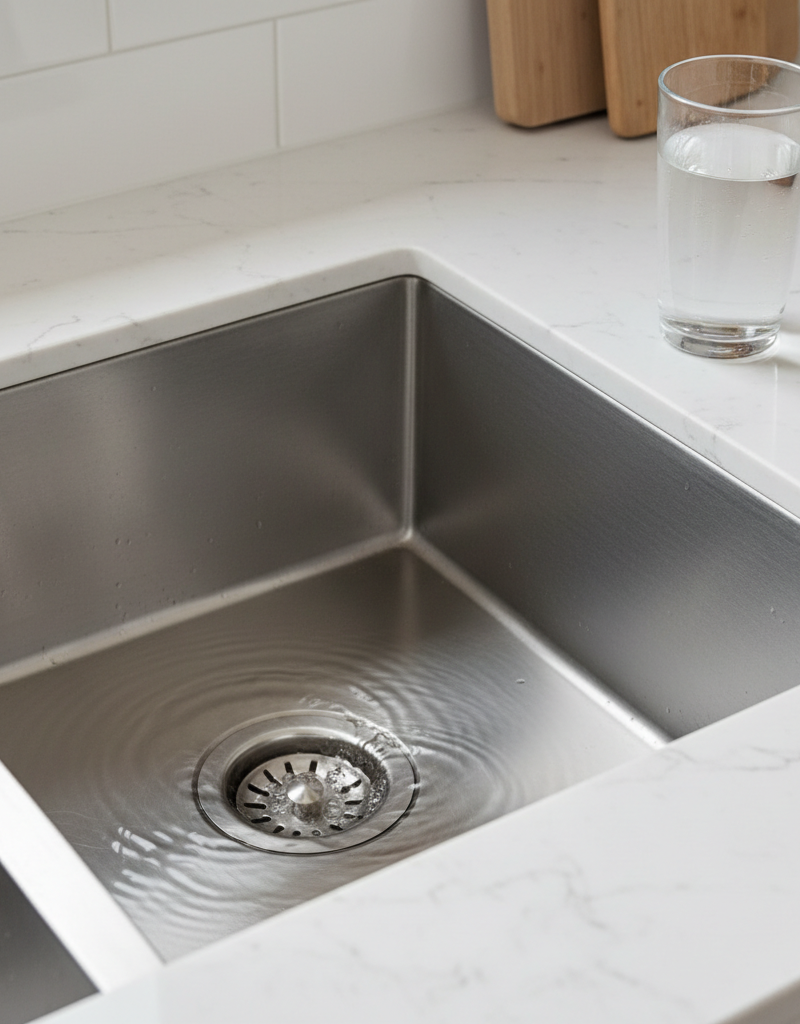
- This is my go-to for light to moderate odors. Pour 1 cup of baking soda down the drain, then follow it with 1 cup of white vinegar. It’ll fizz and foam — that reaction helps break down grease and gunk. Let it sit for at least 30 minutes, and an hour is better. If the smell’s really bad, let it sit overnight. The longer it sits, the more it can work. After that, flush it with a kettle full of boiling hot water — just don’t splash yourself. The heat helps loosen the grease and carries the mess away. I pulled a water heater in Frisco last month that had exactly this kind of drain stink in the kitchen next to it, and this same trick fixed the smell in one shot.
Step 4: The Drain Brush Deep Clean — Reach beyond the visible.
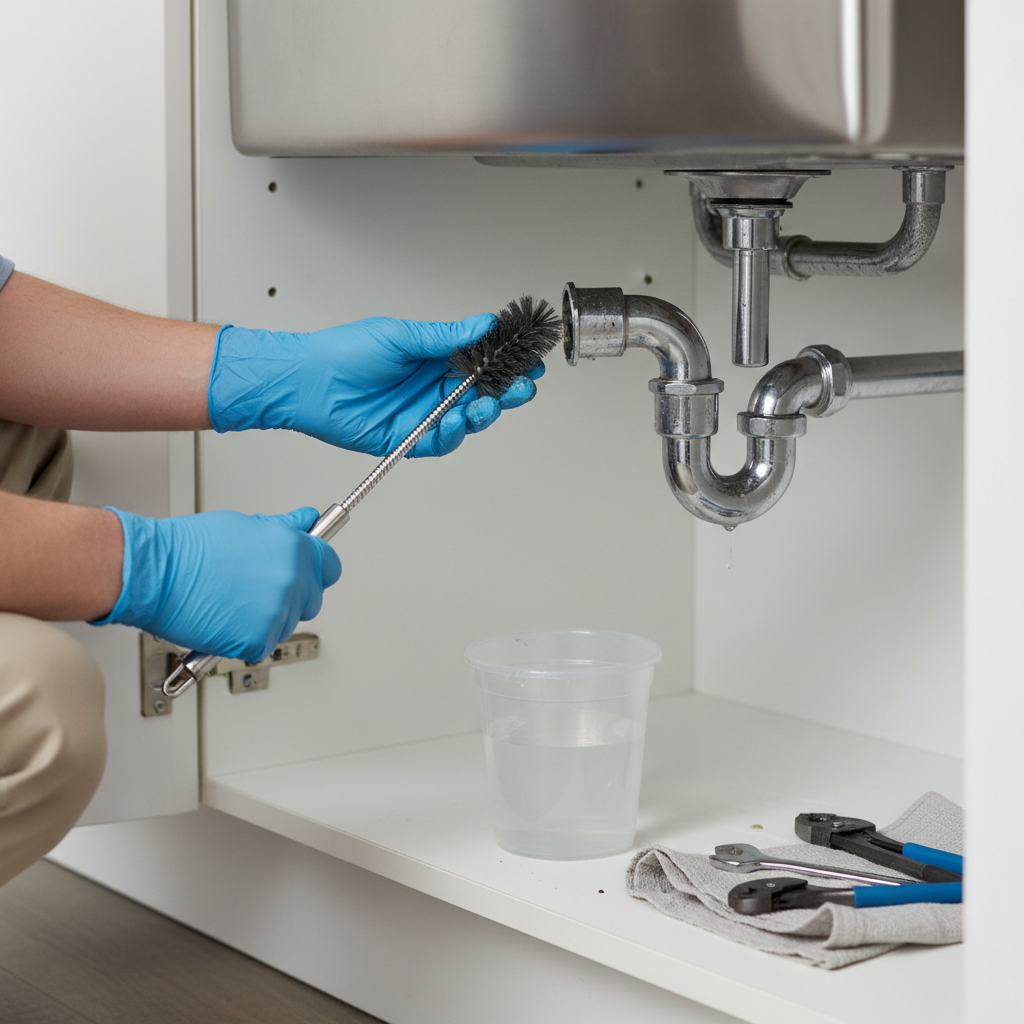
- If the odor keeps hanging on, especially if Step 3 only helped for a little while, you’ve got to get in there and scrub. There are flexible drain brushes made for this. Push one down into the drain opening, past the strainer, and work it around as far as it’ll reach. Twist it, pull it back out, and you’ll probably see black sludge on the bristles. Keep at it, rinsing the brush often, until it comes out mostly clean. That’s what knocks off the biofilm the baking soda and vinegar didn’t fully loosen.
Step 5: Tackle the P-Trap — When all else fails, open it up.
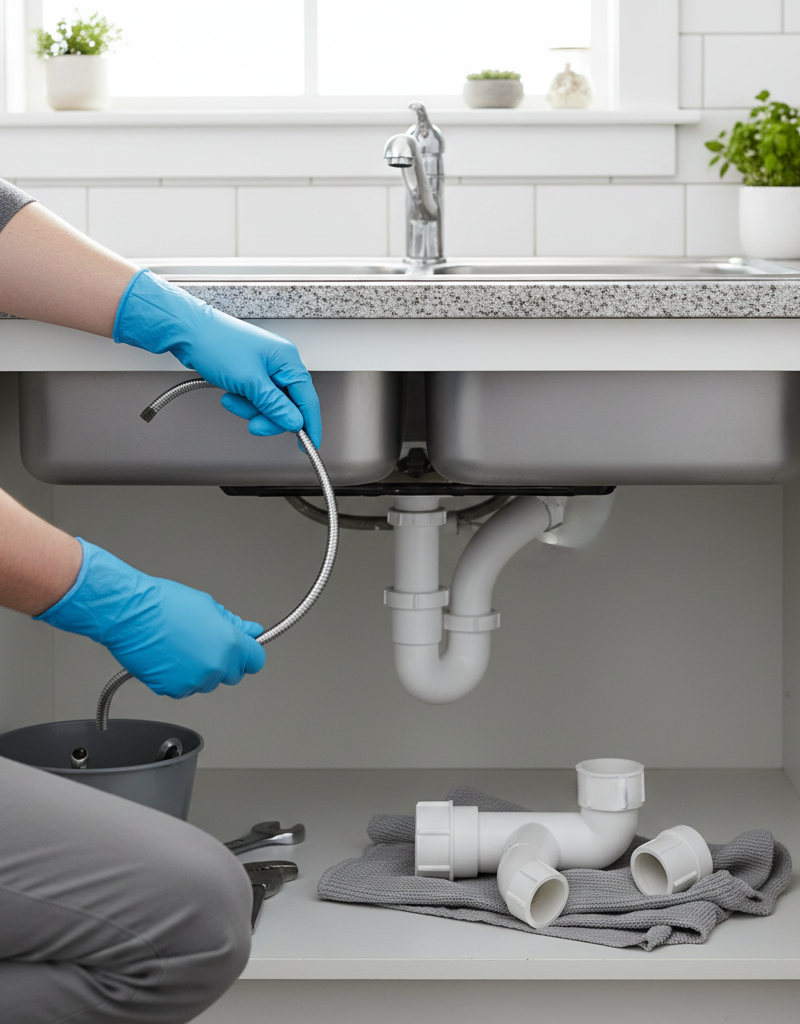
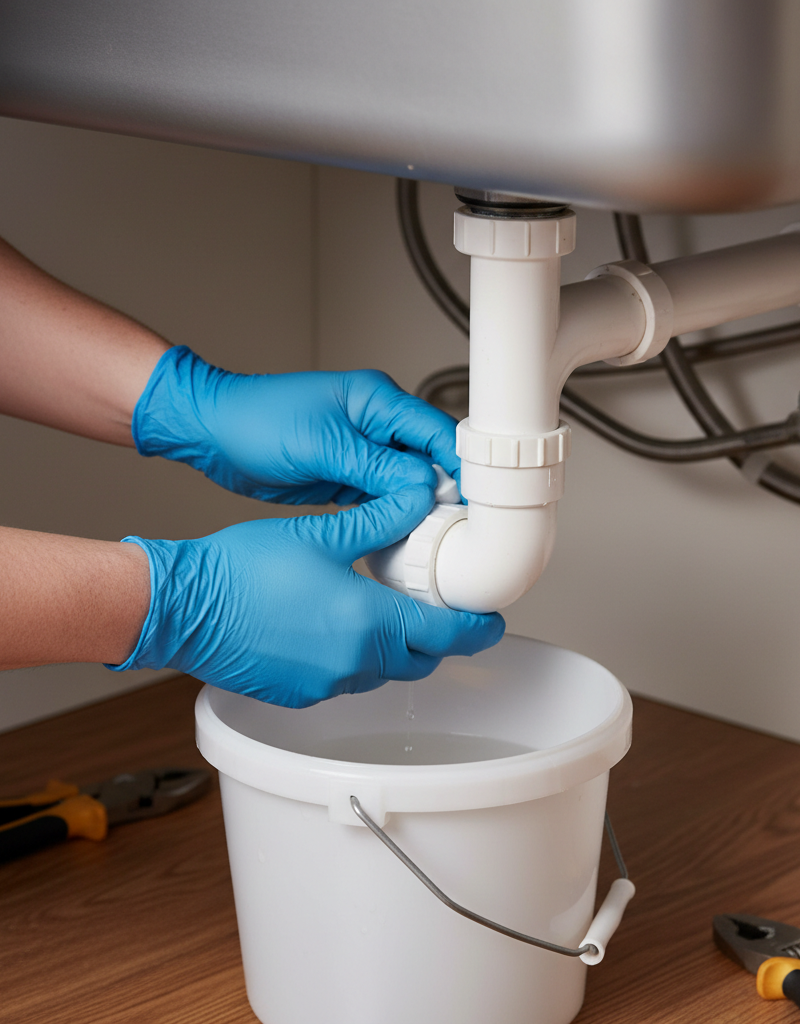
- Safety Warning: This is where things can get messy. If you’re not comfortable with basic plumbing, or if your pipes are old and corroded, it might be time to call a pro. Put your bucket right under the P-trap. Using channel-lock pliers or a basin wrench, loosen the slip nuts on both ends of the P-trap carefully. Pull it free gently. Be ready — dirty water and gunk are gonna come out. Clean the inside of the trap thoroughly. A bottle brush or even an old toothbrush can work great here. Check for blockages or heavy grease buildup. Look at the pipe sections going into and out of the trap as best you can. Put the P-trap back together, hand-tighten the slip nuts, then give them a quarter turn more with your pliers — don’t overtighten, or you’ll crack the plastic. Run water slowly at first and check for leaks. A solid seal matters.
Step 6: Enzymatic Drain Cleaner (Optional) — For preventive maintenance.
- Once the drain’s clean, think about using an enzymatic drain cleaner for maintenance. These cleaners use beneficial bacteria that eat away at organic matter. They’re a lot easier on your pipes than harsh chemical drain openers, and they’re great for keeping biofilm from building back up. Follow the label, and usually you’ll apply it overnight when nobody’s using the sink.
Common Causes
- Grease and Fat Buildup: This is the #1 offender in kitchen sinks. Even a little cooking oil, butter, or gravy down the drain cools off, hardens on the pipe walls, and traps food particles. Bacon grease and ground beef grease do the same thing. It sticks, and then everything else sticks to it.
- Food Debris Accumulation: Even with a disposal, tiny food bits — coffee grounds, vegetable peels, pasta, rice — can slip through and get caught in the P-trap or on rough pipe surfaces. That gives odor-causing bacteria something to feed on.
- Garbage Disposal Neglect: Disposals need regular use and plenty of cold water to flush everything through. If you’re not running enough water, or you’re feeding it too much fibrous stuff, junk gets hung up and starts rotting.
- Dishwasher Drain Backwash: If your dishwasher drains into the sink drain or disposal, it can add to the buildup, especially if the air gap or high loop isn’t set up right. Then dirty water just sits there and gets stagnant.
- Infrequent Use: A sink that hardly gets used can let the water in the P-trap evaporate, which breaks the sewer gas seal and lets stink come straight up from the sewer system.
- Vent Pipe Issues: Not as common, but a blocked or poorly installed vent pipe — that’s the line that lets air into the drain system — can throw off pressure, slow drains down, and sometimes cause odor.
Common Mistakes
- Using Harsh Chemical Drain Cleaners: These are a homeowner’s trap. They usually just burn a hole through the clog instead of removing it, and they can mess up older pipes or cause nasty burns if they splash back. They’re rarely a real fix for biofilm odors.
- Ignoring the Disposal: A lot of folks forget the disposal itself needs cleaning. Grinding food isn’t enough; the chamber and splash guard can get downright nasty and hold onto bacteria.
- Pouring Hot Grease Down the Drain: Big mistake. It cools off, hardens, and coats the pipes, which pretty much guarantees clogs and odors. Pour grease into an old can or jar, let it solidify, and toss it in the trash.
- Not Using Enough Water with Disposal: When you run the disposal, you need a strong, steady stream of cold water for a good 30-60 seconds after the grinding stops. That helps flush everything through the drain system clean.
- Overtightening P-trap Nuts: When you put the P-trap back together, cranking down too hard on those slip nuts can crack the plastic or strip the threads and cause leaks. Hand-tight, then a quarter turn with pliers, is usually plenty.
- Not Cleaning the Overflow: Some sinks have an overflow hole near the top. Gunk can build up in the channel leading to the drain. A little baking soda and vinegar in there, followed by hot water, can help clear it out.
Cost & Time Breakdown
Here’s a look at what you’re likely to spend, and how long it’ll take, depending on how you handle this stinky problem.
| Task | DIY Cost | Pro Cost | Time |
|---|---|---|---|
| Basic drain flush (baking soda/vinegar) | $2–$5 | N/A | 1 hour (passive) |
| Drain brush deep clean | $10–$20 | N/A | 30–60 minutes |
| P-trap removal & cleaning | $0–$10 (for tools) | $150–$300 (minor blockage) | 1–2 hours |
| Enzymatic cleaner application | $15–$30 | N/A | 5 minutes (active) |
| Professional snaking/hydro-jetting | N/A | $200–$500+ | 1–3 hours (pro) |
Tips & Prevention
- Scrape Plates Thoroughly: Before you rinse, scrape every bit of food into the trash. Even small scraps add up fast. That’s the easiest prevention by a mile.
- Cold Water for Disposal: Always run the garbage disposal with plenty of cold water. Cold water helps keep grease solid so the disposal can chop it up before it coats the pipes. Keep the water running for at least 30 seconds after the grinding stops.
- Regular Baking Soda & Vinegar Flush: Once a month, give the drain a preventive flush with 1 cup of baking soda followed by 1 cup of white vinegar. Let it sit for 30 minutes, then flush with hot water. Easy routine. Good payoff.
- Use Drain Screens: Simple mesh drain screens or stoppers catch bigger food bits before they ever get into the drain, which cuts buildup way down.
- Avoid Grease: Never, ever pour cooking grease or oil down the drain. Put it in a jar or can and toss it in the trash. That’s the biggest piece of advice I give anybody asking about drain smells.
- Run Hot Water After Washing: After you’re done with dishes, run the hottest water from the faucet for a minute or two. It helps push softened grease and soap residue farther down the pipes.
- Clean the Disposal Splash Guard: Pull out the rubber splash guard in your disposal and clean it — top and bottom — with an old toothbrush and some dish soap. You’ll be amazed how much grime lives there.
When to Call a Professional
Look, I’m all for DIY, but there are definitely times when it’s smarter, safer, and usually cheaper in the long run to call a licensed plumber. If you’ve tried the baking soda and vinegar trick, cleaned out the disposal, and even taken apart the P-trap, and that nasty smell still won’t quit, or if you’ve got a full blockage, it’s time. A plumber’s got industrial-grade drain snakes that can reach deep into the main lines, or hydro-jetting equipment that blows years of buildup out with high-pressure water. If multiple drains in the house are smelling bad or draining slowly, that could mean a bigger problem in the main sewer line, and that’s well beyond most homeowners. Also, if your P-trap is old cast iron and the nuts are seized, or you think you’ve got a vent pipe problem, don’t risk cracking pipes or making a bigger mess. A pro can figure it out and fix it safely, which saves you a whole lot of headache down the road.
Related Articles
Keep troubleshooting with these hand-picked guides from FixlyGuide:
- The Grimy Secret Under Your Oven: Why Your Kitchen Never Feels Truly Clean — Your oven and range hood are silent culprits in your kitchen's battle against persistent grease and grime. This guide tackles how to deep c…
- The Grimy Secret Under Your Microwave — And How to Scrape It Clean — I've seen it a hundred times: homeowners totally overlook the disgusting, grease-caked filters hiding under their microwave. Cleaning 'em i…
- The Mystery Smell: Why Your Fridge Stinks (Even After Cleaning It) — That persistent, foul odor in your refrigerator isn't just gross; it's often a sign of hidden issues. Learn the real culprits behind linger…
- The Grimy Secret Behind Your Dull Bathroom Faucet — And How to Make It Shine — Discover the real culprit behind your bathroom faucet's dull, grimy appearance and how to quickly restore its shine with a few common house…
- Why Your Kitchen Sink Drain Stinks (Even After You've Cleaned It) — Don't just mask that foul odor from your kitchen sink; get rid of the gunk causing it with this pro-level cleaning method.
- That Nasty Bathroom Sink Smell? It's Not Always the Drain (And the Real Culprit's an Easy Fix) — That lingering stink from your bathroom sink might not be the drain itself, but a hidden culprit often overlooked, and it's simpler to fix…
Should you do this yourself?
Answer five quick questions before you start. Safety outranks savings every time.
Your experience with work like this
How high do you have to work?
Does the job involve any of these?
Will it need a permit?
Specialty tools
Free and instant. Educational guidance only — not a quote, inspection, or professional diagnosis.
What should this project cost?
Enter your project details for a realistic cost range before you call anyone.
Cosmetic refreshes start near $5,000; full remodels commonly $25,000–$45,000.
- Regional adjustment
- National average
- Labor share (typical)
- ~$8,550
- Quotes to collect
- 3 written estimates
Educational estimate based on national averages — not a binding quote. Always confirm with written local estimates.
Fixly Project Decision Box
- DIY difficulty
- Moderate
- Estimated time
- 30 minutes – half a day
- Cost level
- Moderate
Main tools / materials
- Adjustable wrench
- Plunger or drain auger
- Bucket and towels
- Thread tape
When to stop and call a pro
- Water you cannot shut off at the fixture or main
- Sewage backing up into more than one fixture
- Water near electrical panels or outlets
- Gas water heater work beyond relighting a pilot
Need professional help?
Get a Licensed PlumberBefore you start
Check the difficulty, permits, and safety risk — then decide whether to call a pro.
- Estimate this projectGet a cost range for your scope and ZIP before you call anyone.Open
- Get local estimatesSend one request and compare written estimates from vetted pros.Open
Free, no signup required. Estimates are educational guidance, not a quote or an inspection.
Frequently asked questions
Why does my kitchen sink smell like rotten eggs?+
A rotten egg smell usually indicates the presence of hydrogen sulfide gas, which is produced by anaerobic bacteria feeding on decomposing organic matter (like food and grease) in your drain pipes or P-trap. It's a sign of significant biological buildup.
Can a garbage disposal cause drain odors?+
Absolutely. Even if it seems to grind well, food particles can get stuck to the grinding plates, the inside of the chamber, or the rubber splash guard, decomposing and creating foul smells. Regular cleaning of the disposal is crucial.
Are chemical drain cleaners effective for odors?+
While they might offer temporary relief by burning a path through a clog, chemical drain cleaners often don't eliminate the underlying biofilm that causes persistent odors. They can also damage pipes and are hazardous. Natural solutions are usually better for odor control.
How often should I clean my kitchen sink drain?+
For prevention, a monthly flush with baking soda and vinegar is a good routine. If you experience regular odors, you might need to clean the drain and disposal more frequently, perhaps every 2-4 weeks, especially if you cook a lot.
What if the smell returns quickly after cleaning?+
If the smell comes back fast, it means you haven't fully removed the source. The buildup might be deeper in the pipes, or your P-trap has a heavy coating of gunk that needs a more thorough, physical cleaning with a drain brush or by disassembling the trap.
Can a dry P-trap cause sink odor?+
Yes, if the P-trap (the U-shaped bend under the sink) doesn't have water in it, the sewer gas seal is broken, allowing unpleasant odors from the sewer system to enter your home. This often happens in seldom-used sinks.
Is it safe to pour boiling water down the drain?+
For metal pipes, boiling water is generally safe and effective for melting grease and flushing debris. However, if you have old PVC pipes, extremely hot water could potentially soften or warp them over time, so use very hot tap water instead.
What's the best way to prevent grease buildup?+
The absolute best way is to never pour cooking grease or oil down the drain. Scrape all food waste into the trash before rinsing dishes. Regularly flush your drain with cold water when using the disposal and perform monthly baking soda/vinegar treatments.
When should I call a plumber for a smelly drain?+
Call a plumber if you've tried all DIY cleaning methods and the odor persists, if you have a complete blockage, if multiple drains in your home are slow or smelly, or if you suspect a deeper issue like a vent pipe problem or main sewer line blockage.
Can an air gap cause a smelly drain?+
An air gap, usually located on the counter near the sink for the dishwasher drain, can sometimes trap stagnant water or food debris if it gets clogged. Cleaning it regularly can help eliminate odors if that's the source.
Discussion
Loading comments…