- Porous Caulk: Older caulk or bargain-grade stuff can be pretty porous, which gives mold spores plenty of places to dig in. Silicone caulk usually holds up better than acrylic latex.
- Infrequent Cleaning: Letting soap scum, body oils, and water sit on the caulk for too long feeds the mold and gives it a little shield to grow under.
- Leaky Fixtures: A drip or slow leak near the caulk line keeps feeding the moisture problem, and that makes mold growth almost inevitable.
- Lack of Drying: If you don’t wipe down the shower walls and caulk after use, moisture lingers and mold moves in faster. A quick swipe with a squeegee or towel does wonders.
Published August 26, 2026Last updated August 26, 2026
Tools & materials you'll need
Affiliate linksAs an Amazon Associate FixlyGuide earns from qualifying purchases — at no extra cost to you. Prices and availability are accurate as of publication and subject to change.
Quick Answer
That stubborn discoloration on your shower caulk isn’t just plain dirt; nine times out of ten, it’s mold or mildew, and it’s already dug in. A quick scrub with whatever cleaner’s under the sink usually won’t do a lick of good. You’ve got to use a real mold and mildew killer, let it sit, and then usually put some elbow grease into it. If it’s ugly bad — and I mean really bad, like somebody drew a black crayon line all the way around your tub — then you’re probably stripping the old caulk and laying down fresh.
The Problem
I’ve been in thousands of bathrooms, and this is one I hear all the time: “My shower’s clean, but the caulk looks terrible!” And yeah, that gets old fast. You scrub and scrub, and those black, pink, or orange spots just sit there like they pay rent.
Most folks don’t realize what they’re dealing with. It’s not just soap scum or hard water — that’s a different animal. We’re talking mold and mildew, living stuff that loves damp, warm places like a shower. It doesn’t just sit on top, either. It sends little root-like strands into the porous caulk, so a wipe-down doesn’t touch the whole problem. You need to attack it directly, and sometimes the only real fix is cutting out the old bead and starting over.
How It Works
Your shower’s basically a little mold farm if the conditions are right. Every time you take a shower, you’re making a warm, steamy, dark box once the door or curtain closes. Water splashes around, steam hangs in the air, and tiny bits of soap, shampoo, and body wash stick to everything.
Caulk — especially some silicone blends — seals the joint nice, but over time it can still become a breeding ground. A lot of caulk has tiny pores and little nooks where mold spores land and get comfortable. Once they settle in, those hyphae I mentioned go deep into the material. That’s why a surface scrub doesn’t solve it. You’re only cleaning what you can see.
Poorly ventilated bathrooms are the worst. Moisture just lingers, and that damp air keeps the whole mess alive. I always tell people to vent that bathroom for a minimum 15 minutes after every shower. Keep the air moving. Dry stuff out. Otherwise, you’re cleaning the same junk every week and wondering why it keeps coming back.
Step-by-Step Fix
Before you get started, make sure the room’s got good airflow. Open a window, kick on the fan — you don’t want to be huffing strong cleaner fumes in a tight bathroom.
-
Prep the Area – Clear the decks
- Pull out every bottle, soap bar, shampoo, and whatever else is sitting on the ledge or floor. Give yourself room to work. Then rinse the area with warm water to loosen up the surface grime. You’re not really cleaning yet; you’re setting the stage. Keep a couple old towels handy so drips and splashes don’t turn into a mess.
-
Safety First – Protect yourself
- Wear rubber gloves and eye protection, every time. Some of these cleaners are no joke, and you don’t want them on your skin or in your eyes. If the bathroom’s small, I’d throw on a respirator mask too. I got a splash of tile cleaner in my eye back in ’98 on a job in Cupertino, and let me tell you — that afternoon was no picnic. Learn from my dumb mistake.
-
Apply Your Weapon of Choice – Target the enemy
- For light to moderate stains, a dedicated mold and mildew remover — usually a bleach-based spray — is the move. Spray it right on the stained caulk. For the really stubborn dark stuff, I’ve had good luck with a bleach-soaked cotton coil. Basically, you unroll cotton balls into a rope, soak it in household bleach (about 5-6% sodium hypochlorite), and lay it right over the caulk. Leave it there for at least 30 minutes, or even a few hours if it’s ugly. Don’t let it dry out — keep it wet by respraying or soaking it again.
-
Let it Work – Patience, young padawan
- This isn’t one of those spray-and-wipe deals. The chemical needs time to work its way in and kill those mold roots. With spray treatments, I usually tell folks 10-15 minutes. With the bleach-soaked cotton, you’re looking at 2 to 4 hours. The longer you give it, within reason, the better for embedded stains. Just keep the bathroom ventilated while it sits.
-
Scrub it Clean – Elbow grease time
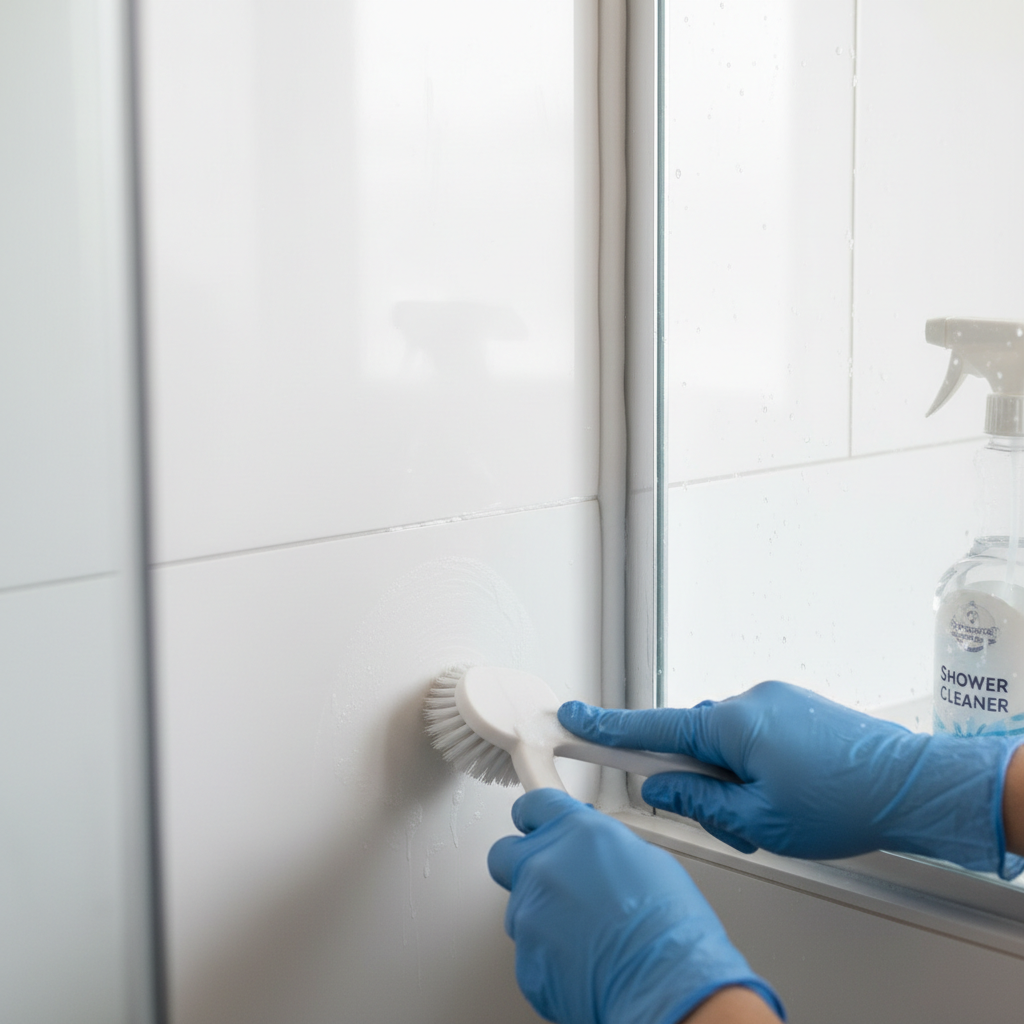
- Once the cleaner’s done its job, grab a stiff-bristled brush — an old toothbrush works great in the tight corners — and scrub the caulk. You should see the stains start lifting. Rinse it real well with warm water and wipe everything down so there’s no chemical residue left behind. If some spots still hang on, go back and repeat steps 3-5.
-
Dry Thoroughly – Don't leave a drop
- Use a clean, dry cloth and wipe the caulk and the surrounding area until it’s dry as you can get it. You don’t want moisture hanging around, because that’s how new mold gets started. A fan or open window helps a bunch here.
-
Consider a Sealant (Optional but Recommended) – Add a layer of defense
- Once everything’s fully dry, put on a caulk sealant. That adds a protective, less porous layer over the old caulk, and it makes it harder for mold and mildew to get a foothold later. Spray it on, wipe off the extra, and follow the product directions. Small step. Big payoff.
-
When All Else Fails: Caulk Removal – Sometimes you just gotta start fresh
- If you’ve hit it a few times and those deep black stains still won’t budge, the mold’s gotten too far in. Time to replace the caulk. You’ll need a caulk removal tool or a utility knife, some mineral spirits to clean off the old residue, and a good mildew-resistant silicone caulk. It’s a bigger job, sure, but a clean new caulk line makes the whole shower look fresh again. Don’t cheap out on the new stuff — get one with a strong fungicide additive. It matters.
Common Causes
- Poor Ventilation: This is the big one. If the air doesn’t move, moisture just hangs around and gives mold and mildew exactly what they want. Run the exhaust fan for 15-20 minutes after every shower. I tell homeowners, if your mirror’s still fogged up 10 minutes after you get out, your fan ain’t cutting it or you’re not running it long enough.
- Porous Caulk: Older caulk or bargain-grade stuff can be pretty porous, which gives mold spores plenty of places to dig in. Silicone caulk usually holds up better than acrylic latex.
- Infrequent Cleaning: Letting soap scum, body oils, and water sit on the caulk for too long feeds the mold and gives it a little shield to grow under.
- Leaky Fixtures: A drip or slow leak near the caulk line keeps feeding the moisture problem, and that makes mold growth almost inevitable.
- Lack of Drying: If you don’t wipe down the shower walls and caulk after use, moisture lingers and mold moves in faster. A quick swipe with a squeegee or towel does wonders.
Common Mistakes
- Using Abrasive Cleaners/Tools: Steel wool and harsh scrub pads can chew up the caulk and leave more tiny pores for mold to grab onto. Stick with a brush or a sponge.
- Not Letting Cleaners Dwell: If you spray mold remover and wipe it off right away, you’re not giving it time to kill the stuff down in the caulk. Let it sit.
- Mixing Cleaning Chemicals: NEVER mix bleach with ammonia-based cleaners (like Windex or some toilet bowl cleaners). That makes toxic chlorine gas, and it can kill you. Read the label first.
- Neglecting Ventilation: A quick fan burst isn’t enough, and neither is no fan at all. You need that air moving for a good 15-20 minutes after every shower.
- Not Replacing Old Caulk: Sometimes caulk is just done. If it’s cracked, peeling, or still badly stained after a few tries, you’re wasting your time trying to save it. Pull it out and re-caulk.
Cost & Time Breakdown
Here’s a rough idea of what you’re looking at for this job:
| Task | DIY Cost | Pro Cost | Time |
|---|---|---|---|
| Mildew Removal (surface) | $10-$25 | N/A (usually DIY) | 30 mins - 2 hours |
| Deep Mold Treatment (cotton) | $15-$30 | N/A (usually DIY) | 2-4 hours |
| Caulk Removal & Reapplication | $30-$70 | $150-$300 | 2-4 hours |
| Professional Mold Remediation | N/A | $500-$2,000+ | 1-3 days |
Tips & Prevention
- Ventilate, Ventilate, Ventilate: Run that bathroom exhaust fan for at least 15-20 minutes after every shower. If you don’t have one, get one installed or crack a window wide.
- Wipe Down After Each Use: Keep a squeegee or a small towel in the shower and give the walls and caulk a quick wipe after your last shower of the day. Takes 30 seconds. Saves you headaches.
- Regular Cleaning: A weekly scrub with a plain bathroom cleaner helps stop buildup before it gets started, and then you’re not fighting a full-blown mess later.
- Check for Leaks: Look over your showerhead, faucet, and tile grout now and then for small leaks. Even a tiny drip, if it never stops, can feed mold.
- Consider Mold-Resistant Caulk: When it’s time to replace the caulk, use a high-quality silicone caulk made with mildewcides. Costs a few bucks more, but I’d spend it.
- Maintain Your Grout: Make sure the grout lines are sealed. Unsealed grout soaks up water, and that keeps the area damp longer than it ought to be.
When to Call a Professional
Look, for surface mold and mildew on caulk, most homeowners can handle it. But there are times when you need to step back and call in the pros. If you’re dealing with mold that’s spread past the caulk — black spots on drywall, staining into the ceiling, or growth under the floor — that’s beyond DIY. If you think the mold’s coming from a plumbing leak behind the wall or under the tub, you need a plumber to fix the source first. And if you’re sensitive to mold or you’ve got breathing issues, messing with strong chemicals and stirring up a big colony is better left to a mold remediation pro with the right gear and the know-how. Don’t gamble with your health; call it a day and get an expert in there.
Related Articles
Keep troubleshooting with these hand-picked guides from FixlyGuide:
- The Mystery Smell: Why Your Fridge Stinks (Even After Cleaning It) — That persistent, foul odor in your refrigerator isn't just gross; it's often a sign of hidden issues. Learn the real culprits behind linger…
- The Grimy Secret Under Your Oven: Why Your Kitchen Never Feels Truly Clean — Your oven and range hood are silent culprits in your kitchen's battle against persistent grease and grime. This guide tackles how to deep c…
- The Secret to Banishing Old Pet Odors (Even When You Can't Find the Stain) — Don't let hidden pet accidents ruin your home's fresh scent; this guide reveals how to find and eliminate old pet odors and their invisible…
- That Mystery Haze on Your Dishware? Your Dishwasher's the Culprit — If your 'clean' dishes come out looking cloudy, streaky, or gritty, it's not you – it's your dishwasher, and I'll show you how to fix it.
- The 'Triple Lift' Trick for Erasing Set-In Couch Stains — Don't despair over that old, set-in stain on your white sofa. Our guide reveals a powerful, three-phase cleaning method using targeted chem…
- That Funky Smell in Your Washing Machine — Tired of your washing machine making your 'clean' clothes smell musty? We'll show you how often you should actually deep clean your washi…
What should this project cost?
Enter your project details for a realistic cost range before you call anyone.
Mid-range remodels commonly $12,000–$22,000; small repairs often under $600.
- Regional adjustment
- National average
- Labor share (typical)
- ~$5,603
- Quotes to collect
- 3 written estimates
Educational estimate based on national averages — not a binding quote. Always confirm with written local estimates.
Get the print-ready PDF of this guide
A clean, ad-free, printable version you can keep on your phone or pin to the workshop wall. Free with a FixlyGuide account.
- Print-optimized layout
- Tools, materials & every step included
- Saved to your account
Frequently asked questions
Why does my shower caulk keep getting moldy?+
It's usually due to persistent moisture and poor ventilation. Mold thrives in damp, warm environments. Ensure your bathroom fan runs for at least 15-20 minutes after every shower and wipe down surfaces to reduce standing water.
Can I use bleach to clean moldy caulk?+
Yes, a dilute bleach solution (or straight household bleach applied with a cotton coil) is highly effective at killing and removing mold from caulk. Always ensure good ventilation and wear protective gear, and never mix bleach with ammonia.
What's the best type of caulk to prevent mold?+
Look for 100% silicone caulk that contains mildewcides or fungicides. These formulations are specifically designed to resist mold growth and offer better long-term protection than acrylic latex caulks.
How often should I clean my shower caulk?+
Beyond a weekly light cleaning, a deep clean with a mold-killing product should be done whenever you notice persistent discoloration or mold growth, typically every few months, depending on usage and ventilation.
When do I need to re-caulk instead of just cleaning?+
If the caulk is cracked, peeling, or if deep-seated black stains remain after multiple thorough cleaning attempts, the mold has likely penetrated too far. At that point, removal and re-caulking with fresh, mildew-resistant caulk is the best solution.
Are there natural alternatives to bleach for moldy caulk?+
While vinegar and baking soda can work for very light, surface mold, they are generally less effective than bleach or dedicated mold removers for embedded or stubborn caulk stains. For tough jobs, I recommend reaching for the strong stuff.
How long does new caulk typically last?+
High-quality silicone caulk, properly applied and maintained, can last 5-10 years or even longer. Lower-quality or improperly applied caulk might only last 1-3 years before it starts to degrade and collect mold.
Does sealing caulk help prevent mold?+
Yes, after your caulk is clean and dry, applying a caulk sealant can add an extra layer of protection. It creates a smoother, less porous surface, making it harder for mold spores to adhere and grow, extending the life of your clean caulk.
Discussion
Loading comments…