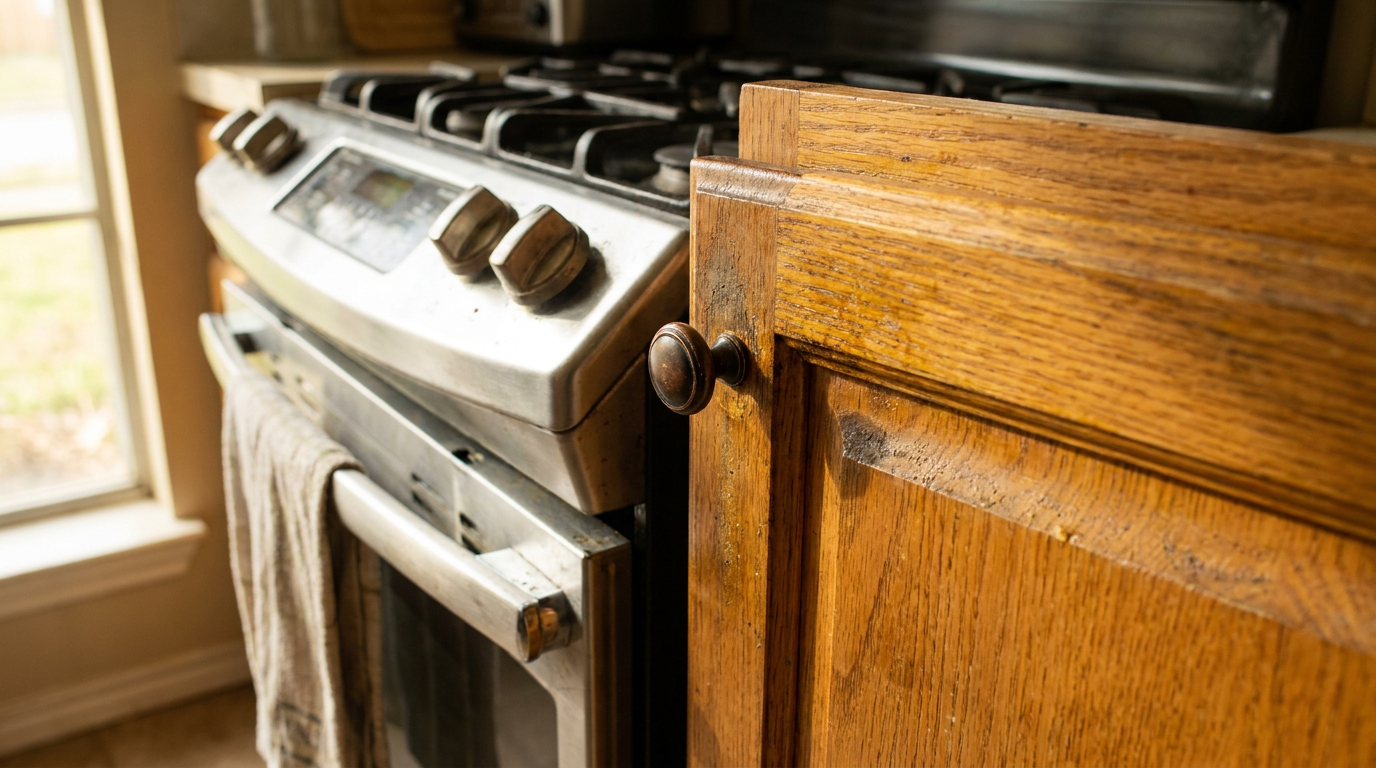
- Aerosolized Cooking Lipids: Frying, sautéing, and baking send microscopic fat molecules airborne. If you don’t have a proper ducted exhaust, those oils settle on surfaces within a 15-foot radius of the range.
- Cleaning Surfactant Build-Up: Multipurpose sprays use detergents and wetting agents. Spray, wipe, and skip the rinse, and those solids dry on the cabinet, leaving a permanent tack that grabs dust.
- Oxidized Clear Coats: High heat and UV exposure break down older polyurethane, shellac, and nitrocellulose lacquer finishes. The plasticizers migrate out, and the surface stays chemically sticky even when it looks clean.
- Using Fabric Softeners on Cleaning Rags: Wash microfiber towels with fabric softener or dryer sheets, and you coat the fibers with silicone and tallow derivatives. Then you’re rubbing wax and oil right back onto the wood.
- Improper Exhaust Fan Usage: Running a range hood on low, or using a ductless recirculating hood with clogged charcoal filters, pushes grease-laden air across upper cabinet faces instead of sending it outside.
Kitchen · Kitchen remodel
| Project category | Kitchen |
|---|---|
| Problem type | Kitchen remodel |
| Trade required | General contracting |
| Urgency | Planned project |
| Safety risk | Low safety risk |
| DIY suitability | Pro recommended |
| Cost category | Major investment |
| Typical timeline | Design and cabinet lead time 8–16 weeks; build 4–8 weeks |
| Contractor type | Kitchen remodeler or general contractor |
Repair option
Refacing, new counters, or hardware for a fraction of a gut remodel.
Replacement option
Full remodel when layout, plumbing, or electrical needs to change.
Common causes
- Dated layout
- Failing cabinets or counters
- Adding function or resale value
Relevant tools:project cost estimatorcompare quoteshome improvement material prices
Published November 1, 2026Last updated November 1, 2026
Tools & materials you'll need
Affiliate links- AmazonConcentrated liquid dish soap2 tbsp · Dye-free, grease-cutting formula
- AmazonWashing soda (sodium carbonate)1/4 cup · Boosts alkalinity to saponify oil
- AmazonPlastic drop cloth or cotton towels1 roll or 2 towels · To protect countertops from moisture
- AmazonMicrocrystalline paste wax1 can · Optional for bare/dry wood protection
As an Amazon Associate FixlyGuide earns from qualifying purchases — at no extra cost to you. Prices and availability are accurate as of publication and subject to change.
Quick Answer
To fix sticky kitchen cabinets that grab every bit of grime, knock off the loose dust with a dry microfiber cloth, then use an alkaline degreaser or a 1:4 mix of concentrated sal soda and warm water (around 115°F to 125°F) with soft-bristle nylon brushes. Work small, follow the wood grain, let it sit for 3 to 5 minutes, wipe it clean with a damp microfiber cloth, and dry it right away. Skip abrasive scouring pads, undiluted vinegar, and ammonia. Those will chew up the protective topcoat and leave the wood tacky for good.
The Problem
You scrub the cabinets, let them dry, and before you know it they feel sticky again. Touch a pull, grab a plate, and your fingers drag across a gummy, dull film. Then dust, pet hair, and stray flour stick to the face frames and door grooves like they were painted on.
What’s going on? That stickiness isn’t normal surface dust. It’s a cooked-up mix of aerosolized cooking fats, steam, airborne junk, and leftover cleaning surfactants that bonded to the wood's clear coat. I’ve pulled a water heater in Frisco last month that had exactly this same kind of greasy film hanging on nearby trim—cooking grease does the same thing in kitchens. Oil vapor hits unventilated air, floats up, lands on vertical cabinet faces, and oxidizes into a plastic-like varnish. Then somebody sprays a general cleaner on it, and all they do is liquefy the top layer, mix it with detergent, and leave a sticky surfactant skin behind when it dries. That’s feeding the mess, not fixing it.
How It Works
Cabinet finishes depend on a protective resin barrier—usually a catalyzed conversion varnish, polyurethane, lacquer, or factory-cured acrylic enamel. When cooking oils vaporize on a hot skillet, reaching 350°F to 400°F, tiny lipid droplets drift through the room. Over time, those lipids polymerize: oxygen cross-links the unsaturated fatty acid chains and turns runny oil into a tough, sticky, semi-solid gel. Ugly stuff. But that’s the chemistry.
Like dissolves like. Plain water beads up on polymerized oil because of surface tension. Acidic household cleaners, like standard white vinegar at 2.5 pH, don’t break down polymerized non-polar lipids very well, and over time they can soften and damage cellulose-based lacquer finishes. If you want to dissolve oxidized grease without wrecking the finish underneath, you need alkaline chemistry (pH 8.5 to 10.5) paired with non-ionic surfactants, or mild citrus terpenes (d-limonene). The alkaline agent saponifies the oils—basically turning fatty acids into water-soluble soap molecules—while the surfactant lowers surface tension so clean water can rinse the emulsified grime away. Miss that rinse, though, and you leave a sticky soap layer that grabs every dust speck your HVAC is tossing around.
Step-by-Step Fix
-
Empty the Immediate Work Area and Clear Countertops — Pull small appliances, cutting boards, and the paper towel holder away from the upper cabinets you’re cleaning. Lay old cotton bath towels or 2-mil plastic sheeting over your laminate, quartz, or butcher-block counters so drips don’t make a mess.
- Tool: 2-mil plastic drop cloth or thick cotton bath towels.
- Safety: Stay clear of open flames if you’re using citrus-solvent cleaners.
-
Dry-Dust the Cabinet Surfaces First — Run a dry, electrostatic microfiber cloth over the crown molding, face frames, raised door panels, and recessed grooves before you add any liquid. If you put wet cleaner on loose dust, you just make gritty paste—and that can scratch the sheen off a semi-gloss finish fast.
- Tool: Clean, plush microfiber towel (300+ GSM).
-
Mix Your Targeted Degreaser Solution — Fill a 2-gallon bucket with 1 gallon of hot tap water (aim for 115°F to 125°F—hot enough to help loosen lipids, but still safe on wood adhesives). Stir in 2 tablespoons of concentrated liquid dish detergent (free of dyes and bleach) and 1/4 cup of washing soda (sodium carbonate), or dilute a commercial heavy-duty citrus wood cleaner per the package directions (usually 4 ounces per gallon).
- Material: Washing soda and premium grease-cutting liquid soap.
- If you’re dealing with 20+ year-old fragile nitrocellulose lacquer, swap the washing soda for 1/4 cup of pure mineral spirits applied sparingly with a rag to avoid water damage.
-
Test an Inconspicuous Spot — Dip a clean white microfiber cloth into the cleaning solution, wring it out so it’s damp, not dripping, and rub a 2-inch square patch on the inside face of a lower cabinet door. Wait 5 minutes and check the cloth for paint transfer or color bleed, then run your bare finger across the wood to make sure the clear coat didn’t go soft or cloudy.
- If paint pigment or finish transfers to your white cloth, stop right there; the topcoat’s already failing, and wet cleaning will strip it down to raw wood.
-
Apply the Solution and Allow Dwell Time — Work in manageable 2x2-foot sections and wipe the damp microfiber rag across the cabinet face frame, stiles, and rails. Don’t soak the wood or let puddles collect where the stiles meet the rails. Let the alkaline solution sit for 3 to 5 minutes so the surfactants can get into the polymerized oil layer.
- Never point spray bottles straight at cabinet fronts; the liquid runs into joints, soaks the end grain, and swells composite cores.
-
Agitate Grooves and Hardware Reliefs with Soft Bristles — Grab a soft-bristle nylon detailing brush or an old, soft toothbrush, dip the bristle tips into the warm cleaning solution, and gently work around the door pulls, hinge plates, and profile corners of raised panels. Keep the pressure light—let the bristles loosen the softened grease without gouging the stain.
- Tool: Soft nylon detailing brush or horsehair trim brush.
- Don’t scrub back and forth with heavy pressure; circle gently over the decorative millwork and coax the trapped film out.
-
Scrape Baked-On Grease Pockets with a Plastic Edge — For heavy, yellowed grease droplets that built up right over the stove or range hood, gently scrape the softened residue with a flexible plastic putty knife held at a shallow 15-degree angle. The softened lipid plug will peel off in curls without gouging or chipping the wood or factory paint.
- Tool: 1.5-inch or 2-inch plastic putty knife (never use steel).
- Keep a moist rag in your other hand so you can catch the grease curls before they hit the floor.
-
Rinse with Clear, Warm Water and a Second Bucket — Fill a second bucket with fresh, hot water (no soap). Take a fresh microfiber cloth, wring it until it’s nearly dry, and wipe the cabinet section thoroughly to lift away the emulsified grease and chemical surfactant residue.
- This step is mandatory: leaving dried soap on the wood creates a sticky, electrostatic film that attracts fresh dust within 48 hours.
-
Towel-Dry Immediately Along the Wood Grain — Follow the damp rinse right away with a dry waffle-weave or thick microfiber towel, wiping firmly with the wood grain. Pay extra attention to bottom rail edges, panel corners, and cabinet bottom lips where gravity likes to park water droplets.
- Tool: Dry, lint-free waffle-weave microfiber towel.
- Make sure moisture isn’t trapped under rubber bumper pads or around European cup hinge mortises.
-
Recondition Dry or Stripped Wood (Optional) — If the cabinets look chalky, dull, or dry after you’ve stripped away years of oil, put a pea-sized amount of high-grade wood paste wax or food-grade mineral oil on a soft buffing cloth. Work it thin across the surface and buff to a satin sheen after 10 minutes to bring back a little moisture and leave a sacrificial dust-repellent barrier.
- Material: Microcrystalline paste wax or pure food-grade mineral oil.
- Skip this step completely if you’ve got factory-painted or foil-wrapped thermofoil cabinets.
Common Causes
- Aerosolized Cooking Lipids: Frying, sautéing, and baking send microscopic fat molecules airborne. If you don’t have a proper ducted exhaust, those oils settle on surfaces within a 15-foot radius of the range.
- Cleaning Surfactant Build-Up: Multipurpose sprays use detergents and wetting agents. Spray, wipe, and skip the rinse, and those solids dry on the cabinet, leaving a permanent tack that grabs dust.
- Oxidized Clear Coats: High heat and UV exposure break down older polyurethane, shellac, and nitrocellulose lacquer finishes. The plasticizers migrate out, and the surface stays chemically sticky even when it looks clean.
- Using Fabric Softeners on Cleaning Rags: Wash microfiber towels with fabric softener or dryer sheets, and you coat the fibers with silicone and tallow derivatives. Then you’re rubbing wax and oil right back onto the wood.
- Improper Exhaust Fan Usage: Running a range hood on low, or using a ductless recirculating hood with clogged charcoal filters, pushes grease-laden air across upper cabinet faces instead of sending it outside.
Common Mistakes
- Reaching for Abrasive Melamine Sponges (Magic Erasers): Melamine foam is basically microscopic abrasive sandpaper, about 3000-grit. It cuts grease fast, sure, but it also grinds off the clear coat sheen and leaves a dull, chalky patch that stains the next time oil hits it.
- Dousing Cabinets with Undiluted White Vinegar: White vinegar has an acidic pH of roughly 2.4 to 3.0. Acid breaks down nitrocellulose and waterborne acrylic coatings over time, clouds clear finishes, and leaves the surface soft and sticky.
- Spraying Cleaners Directly onto Cabinet Doors: Liquid runs down into tongue-and-groove joints where the panel floats inside the door frame. The raw wood edges drink it up, swelling the fiberboard and cracking paint seams at the mitered corners.
- Using Steel Wool or Green Scour Pads: Even light scrubbing with Scotch-Brite green pads creates hundreds of microscopic scratches in the topcoat. Dust and grime pack into those scratches, and now every cleaning job gets harder.
- Skipping the Clean-Water Rinse: The rule with cleaning is simple: anything you put on has to come off. If you don’t rinse away the saponified grease and dissolved surfactants with a clean, damp cloth, you’re leaving behind an adhesive bait trap for airborne kitchen dust.
Cost & Time Breakdown
| Task | DIY Cost | Pro Cost | Time |
|---|---|---|---|
| Quick Touch-Up Degreasing (3-4 doors around range) | $0–$10 | $75–$125 | 20–30 mins |
| Full Kitchen Cabinet Face Deep Clean (20-30 cabinets) | $15–$30 | $250–$450 | 2–4 hours |
| Hardware Removal, Soaking & Detail Scrubbing | $5–$15 | $120–$200 | 1–2 hours |
| Protective Paste Wax Application & Hand Buffing | $12–$25 | $150–$250 | 1.5–2 hours |
| Finish Stripping & Professional Clear-Coat Recoating | $60–$120 | $1,200–$2,800 | 1–3 days |
Tips & Prevention
- Turn the Range Hood Fan on 2 Minutes Before Cooking: Start the exhaust fan early and you set up the draft before the skillet even heats up, so it catches volatile compounds and oil aerosols before they drift over to the cabinets.
- Keep Charcoal Recirculation Filters Fresh: If your range hood recirculates indoor air instead of venting outside through the roof or an exterior wall, change the active charcoal filters every 3 to 6 months. Once they’re saturated, they just blow vaporized grease back into the room.
- Wash Cleaning Towels Without Additives: Wash cabinet microfiber rags in hot water with liquid laundry detergent only. Don’t add bleach, and skip fabric softeners and dryer sheets, which leave silicone waxes right back on the cabinetry.
- Install Stick-On Liners on Cabinet Top Lips: Upper kitchen cabinets with flat tops love collecting hidden grease blankets. Lay brown wax paper or silicone baking sheets across the tops. Every six months, peel them off, toss them, and lay down fresh sheets—no ladder scrub needed.
- Wipe Down Lower Stiles Weekly with a Damp Cloth: Spend 60 seconds every Sunday wiping the three cabinet doors flanking your cooktop with warm water and a drop of dish soap. Knock the fresh oil back before it gets 30 days to cross-link and polymerize, and you’ll save yourself a pile of heavy scrubbing.
When to Call a Professional
If you finish a full degreasing and rinse cycle, let everything dry, and the wood still feels tacky or soft, then it’s not grease anymore—it’s a failed topcoat. Heat, moisture, and harsh chemicals eventually break down clear coats, especially pre-catalyzed lacquer and water-based varnishes, into a sticky mess that won’t cure back out. If you can leave a visible fingernail impression in the clear finish or paint without hitting bare wood, the finish has delaminated at a molecular level.
At that point, no chemical degreaser or scrub brush is going to save it. More washing just keeps dissolving the damaged finish. You’ll need a licensed cabinet refinisher or professional painter. They’ll pull the doors, strip the failing protective coat, neutralize the timber, and spray a durable, factory-grade catalyzed polyurethane or conversion varnish in a controlled spray booth.
FAQ
Why are my cabinets sticky right next to the range hood?
The zone within 24 to 36 inches of your stovetop gets the highest concentration of thermal grease vapor. Every time cooking oils sizzle, tiny droplets drift upward and land on the nearby wood. If your exhaust hood moves fewer than 300 to 400 CFM (cubic feet per minute) of air, those oil droplets cool on the cabinet surface, cross-link with airborne oxygen, and solidify into a sticky polymer within weeks.
Can I use Dawn dish soap to clean sticky cabinets?
Yes, standard blue dish soap is one of the safest and most effective degreasers for cabinetry because it uses non-ionic surfactants that break down food oils without softening modern wood finishes. The key is moderation: use just 1 to 2 tablespoons per gallon of warm water, and always follow with a clean, damp towel rinse to lift away remaining soap film.
Will vinegar ruin the clear coat on my kitchen cabinets?
Frequent or undiluted use of white vinegar can ruin cabinet finishes. Vinegar is an acid (pH ~2.5), while kitchen grease needs alkaline chemistry to break down effectively. Over time, the acetic acid in vinegar etches waterborne clear coats, breaks down polyurethane cross-linking, and clouds lacquer finishes, leaving the surface dull, porous, and prone to faster grease absorption.
How do I tell if my cabinets are dirty or the finish is melting?
Do the fingernail test on an out-of-the-way corner. Clean a small 2-inch patch thoroughly with warm water and mild soap, then dry it. Once dry, press the tip of your fingernail firmly into the wood. If your nail indents a gummy film that moves like soft wax, the finish itself has broken down chemically and needs refinishing. If the surface is rock-hard but sticky to light finger contact, it’s just surface grease build-up.
Is Murphy's Oil Soap good for sticky kitchen cabinets?
No, most cabinet makers and refinishers steer clear of oil-soap products on sticky cabinets. Oil soaps leave behind vegetable oil and tall-oil residue on the wood surface. In a kitchen, that extra oil film mixes with airborne cooking grease and dust, making the sticky layer worse and future refinishing or paint adhesion nearly impossible without heavy chemical stripping.
Why do my cabinets stay sticky even after I scrub them?
Cabinets stay sticky after cleaning for two common reasons: you didn’t rinse off the cleaning surfactant and left a sticky soap film behind, or you used a cleaning pad that damaged an old lacquer topcoat. And if you don’t swap your rinse water often, you end up spreading dissolved cooking grease across the face frame in a thin, even, sticky layer.
What is the best cloth to use for degreasing wood cabinets?
A split-microfiber cloth with a density rating of 300 to 350 GSM (grams per square meter) is ideal. Microfiber fibers split into star-shaped wedges that mechanically grab grease and trap particulates, unlike smooth cotton rags that tend to skate over polymerized oil films. Avoid terrycloth towels that shed lint, and never use abrasive scrubbing pads.
Can I use mineral spirits to remove heavy grease from painted cabinets?
Mineral spirits can be safely used on fully cured factory-painted and polyurethane-finished cabinets to dissolve stubborn grease, since it won’t harm cured finishes when applied lightly. But don’t use mineral spirits on water-based latex wall paints, freshly repainted DIY cabinets that haven’t cured for at least 30 days, or surfaces with failing, soft clear coats. Always spot-test behind a door first.
Related Articles
Keep troubleshooting with these hand-picked guides from FixlyGuide:
- The Grime That Hides: Why Your Baseboards Always Look Dirty — Even after a thorough cleaning, baseboards can quickly look dingy, often due to overlooked deep-seated dirt, static attraction, and imprope…
- Dog Urine Stains on Hardwood? 10 Steps to Remove the Dark Spots and Odor — Erase stubborn black dog urine stains and kill lingering ammonia smells on hardwood floors using an enzyme-and-peroxide protocol that actua…
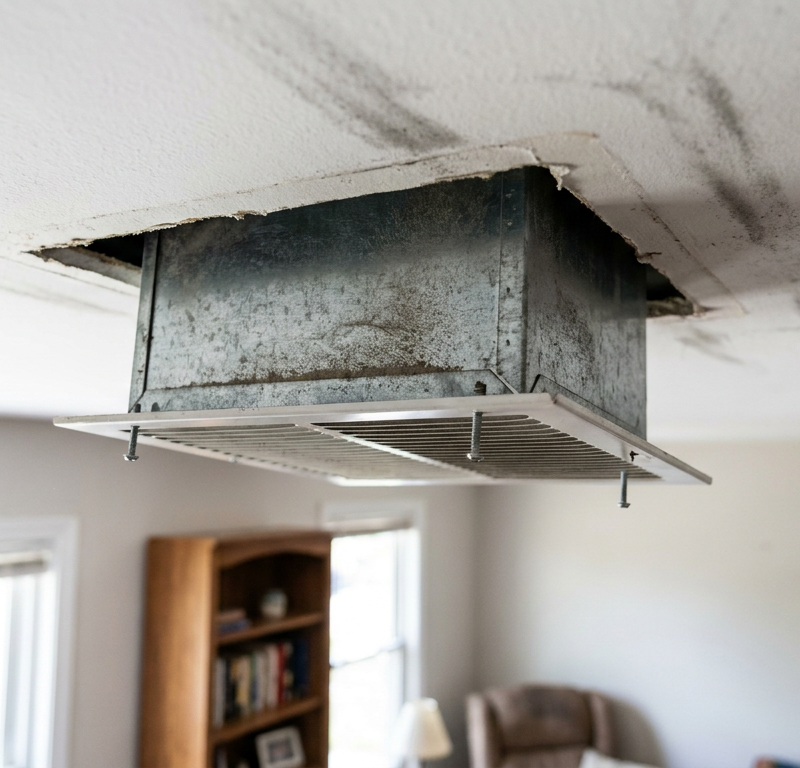
- Vents Blowing Dust? 10 Steps to Deep Clean Registers and When to Call a Pro — Stop furniture dust and dark ceiling streaks at the source. Here is how to deep clean HVAC registers, degrease duct boots, and know when to…
- The Grimy Secret Under Your Microwave — And How to Scrape It Clean — I've seen it a hundred times: homeowners totally overlook the disgusting, grease-caked filters hiding under their microwave. Cleaning 'em i…
- The 3 Lies Your Carpet Cleaner Tells You (And Why Your Carpet Stinks) — Ever notice those 'cleaned' carpet stains pop right back up, or a lingering funk that just won't quit? It's not bad luck; it's bad science.
- The Secret Hairball Fix Plumbers Don't Want You to Know — Tired of standing in ankle-deep water? Most shower clogs are a gnarly mix of hair and soap scum, and you can clear them yourself without ha…
Should you do this yourself?
Answer five quick questions before you start. Safety outranks savings every time.
Your experience with work like this
How high do you have to work?
Does the job involve any of these?
Will it need a permit?
Specialty tools
Free and instant. Educational guidance only — not a quote, inspection, or professional diagnosis.
What should this project cost?
Enter your project details for a realistic cost range before you call anyone.
Cosmetic refreshes start near $5,000; full remodels commonly $25,000–$45,000.
- Regional adjustment
- National average
- Labor share (typical)
- ~$8,550
- Quotes to collect
- 3 written estimates
Educational estimate based on national averages — not a binding quote. Always confirm with written local estimates.
Get the print-ready PDF of this guide
A clean, ad-free, printable version you can keep on your phone or pin to the workshop wall. Free with a FixlyGuide account.
- Print-optimized layout
- Tools, materials & every step included
- Saved to your account
Frequently asked questions
Why are my cabinets sticky right next to the range hood?+
The zone within 24 to 36 inches of your stovetop receives the highest concentration of thermal grease vapor. Every time cooking oils sizzle, tiny vapor droplets drift upward and land on the nearby wood. If your exhaust hood moves fewer than 300 to 400 CFM (cubic feet per minute) of air, those oil droplets cool on the cabinet surface, cross-link with airborne oxygen, and solidify into a sticky polymer within weeks.
Can I use Dawn dish soap to clean sticky cabinets?+
Yes, standard blue dish soap is one of the safest and most effective degreasers for cabinetry because it uses non-ionic surfactants that break down food oils without softening modern wood finishes. The key is moderation: use just 1 to 2 tablespoons per gallon of warm water, and always follow with a clean, damp towel rinse to lift away remaining soap film.
Will vinegar ruin the clear coat on my kitchen cabinets?+
Frequent or undiluted use of white vinegar can ruin cabinet finishes. Vinegar is an acid (pH ~2.5), while kitchen grease requires alkaline chemistry to break down effectively. Over time, the acetic acid in vinegar etches waterborne clear coats, breaks down polyurethane cross-linking, and clouds lacquer finishes, leaving the surface dull, porous, and prone to accelerated grease absorption.
How do I tell if my cabinets are dirty or the finish is melting?+
Perform the fingernail test on an out-of-the-way corner. Clean a small 2-inch patch thoroughly with warm water and mild soap, then dry it. Once dry, press the tip of your fingernail firmly into the wood. If your nail indents a gummy film that moves like soft wax, the finish itself has broken down chemically and requires refinishing. If the surface is rock-hard but sticky to light finger contact, it is simply surface grease build-up.
Is Murphy's Oil Soap good for sticky kitchen cabinets?+
No, professional cabinet makers and refinishers generally advise against using oil-soap products on sticky cabinets. Oil soaps deposit a vegetable oil and tall-oil residue on the wood surface. In a kitchen, this added oil film blends with airborne cooking grease and dust, compounding the sticky layer and making future refinishing or paint adhesion nearly impossible without intensive chemical stripping.
Why do my cabinets stay sticky even after I scrub them?+
Cabinets stay sticky after cleaning for two common reasons: you either failed to rinse off the cleaning surfactant, leaving a sticky soap film behind, or you used a cleaning pad that broke down an old lacquer topcoat. Additionally, if you don't replace your rinse water frequently, you end up redistributing dissolved cooking grease across the face frame in a microscopically thin, even, sticky layer.
What is the best cloth to use for degreasing wood cabinets?+
A split-microfiber cloth with a density rating of 300 to 350 GSM (grams per square meter) is ideal. Microfiber fibers are split into star-shaped wedges that mechanically grab grease and trap particulates, unlike smooth cotton rags that tend to slide over polymerized oil films. Avoid terrycloth towels that drop lint, and never use abrasive scrubbing pads.
Can I use mineral spirits to remove heavy grease from painted cabinets?+
Mineral spirits can be safely used on fully cured factory-painted and polyurethane-finished cabinets to dissolve stubborn grease, as it will not harm cured finishes when applied lightly. However, avoid using mineral spirits on water-based latex wall paints, freshly repainted DIY cabinets that have not cured for at least 30 days, or surfaces with failing, soft clear coats. Always spot-test behind a door first.
Discussion
Loading comments…