- Observe strict dry-time windows before the second coat — Wait the full recoat window listed on the paint label—typically 4 full hours for modern acrylic latex, or 16 to 24 hours for alkyds—before touching the wall again.
- Temperature baseline: Never apply paint if room or surface temperatures sit below 50°F or above 90°F.
- Humidity factor: If the relative humidity exceeds 70%, double the manufacturer's listed drying time before applying the final coat.
General remodeling · Renovation planning
| Project category | General remodeling |
|---|---|
| Problem type | Renovation planning |
| Trade required | General contracting |
| Urgency | Planned project |
| Safety risk | Low safety risk |
| DIY suitability | Pro recommended |
| Cost category | Major investment |
| Typical timeline | Design and permitting often 2–4 months before work starts |
| Contractor type | General contractor |
Repair option
Phase the work and fix the building envelope first.
Replacement option
Full renovation with permits, design, and a general contractor.
Common causes
- Space no longer fits how the household lives
- Resale preparation
- Deferred maintenance stacking up
Relevant tools:project cost estimatorcompare quoteshome improvement material prices
Published October 25, 2026Last updated October 25, 2026
Tools & materials you'll need
Affiliate links- AmazonFlexible putty knife (1.5-inch to 2-inch)For scraping away cured wrinkled film
- AmazonSanding block with 120-grit and 220-grit sandpaperAluminum oxide paper for feathering edges
- AmazonN95 dust mask and safety glassesEssential PPE for sanding paint dust
- Amazon6-inch taping knifeFor skimming low spots on drywall
- Amazon3/8-inch nap roller sleeve and framePrevents applying paint too thick
As an Amazon Associate FixlyGuide earns from qualifying purchases — at no extra cost to you. Prices and availability are accurate as of publication and subject to change.
Quick Answer
Paint wrinkling happens when the skin on a wet coat dries way faster than the paint underneath it, and that top layer puckers, ripples, or starts looking like it’s crawling. I’ve seen it plenty. The fix isn’t fancy: let the wrinkled paint cure all the way out first, usually 3 to 5 days, scrape off the ridged film down to sound material, feather-sand the edges with 120- to 220-grit sandpaper, hit it with a bonding primer, and then repaint under the right temperature and humidity.
The Problem
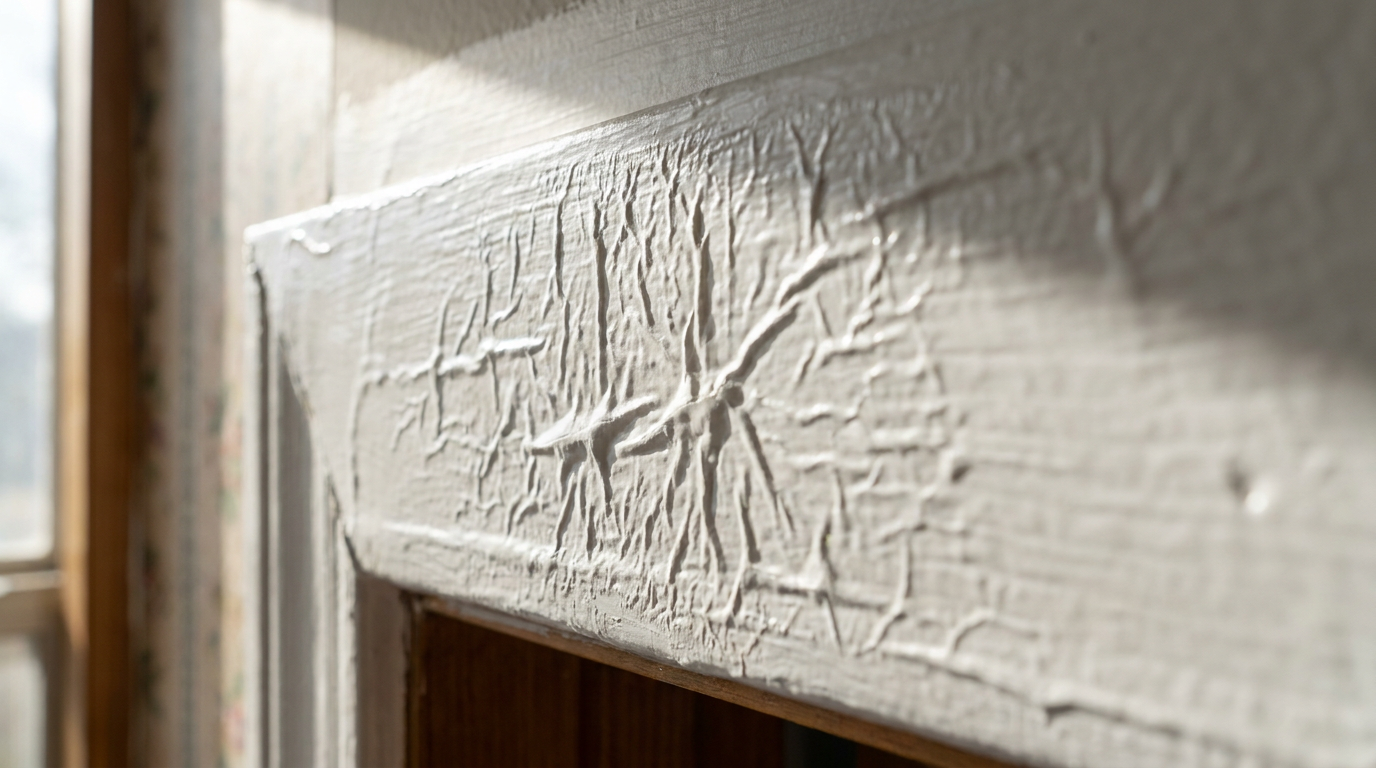
You roll or brush on a fresh coat, walk away thinking you’re about done, then come back an hour or two later and find a mess of tiny wrinkles, puckers, and crinkled skin. Looks like dried elephant hide. Or a prune. No dice.
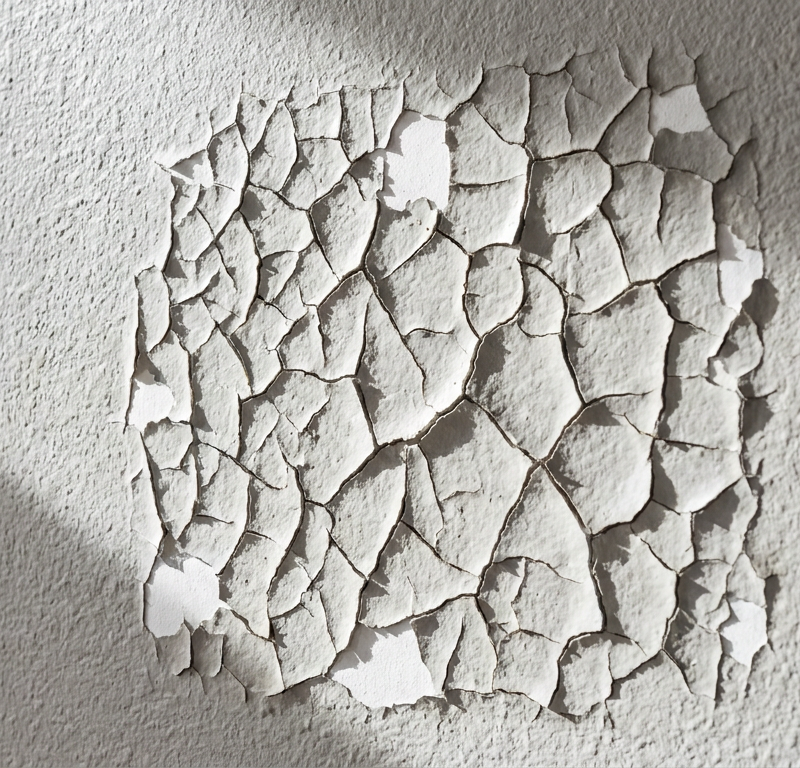
Wrinkling isn’t just ugly. That crinkled film doesn’t have the strength it should. It didn’t cure into one solid sheet, which means there’s still uncured liquid trapped under a dry skin. Leave it alone, or try to paint over it while it’s still soft, and you’ll trap solvents and water under there—then you’re basically asking for peeling, smearing, or both the first time somebody bumps it.
And yeah, it shows up right when folks get impatient: heavy coats on door frames, exterior trim painted during a cold morning that turns into a hot afternoon, or a second coat slapped over an oil-based primer before it’s had time to gas off. I pulled a water heater in Frisco last month that had exactly this kind of rushed finish work around the utility closet trim—same story, same gummy failure.
How It Works
To understand wrinkling, you’ve got to look at how paint goes from liquid in a can to a hard film on the wall. There are two main stages: evaporation and cross-linking, or coalescence.
When you put paint on, the carrier starts leaving. With latex and acrylics, that’s water. With oil or alkyd, it’s mineral spirits. In latex paints, the acrylic particles pull together as the water leaves, then fuse into one continuous film. That’s coalescence. In alkyd paints, curing happens by oxidation—oxygen from the air reacts with the oils in the resin and links everything up into a hardened, plastic-like matrix.
Wrinkling happens when that drying speed gets out of whack across the thickness of the paint film.
If the coat goes on thicker than the manufacturer wants—usually 4 to 5 mils, which is about 0.004 to 0.005 inches—or if the conditions make the surface dry too fast, the top skins over while the paint underneath stays wet and loaded with solvent. As that trapped solvent tries to get out, or as the surface keeps shrinking, the hard skin buckles under pressure. The dried top layer slides over the uncured base and leaves those permanent folds and ripples.
Step-by-Step Fix
Fixing wrinkled paint takes patience. You can’t fix it while it’s still wet. Try to brush it out early and you’ll just make a mashed-up, gummy disaster.
-
Let the wrinkled film cure thoroughly — Step away from the wall and wait at least 72 to 120 hours (3 to 5 full days). Even if the top feels dry, the paint underneath is still soft, sticky, or straight-up jelly-like. Jump in too soon and you’ll gouge drywall paper, and your sandpaper will clog almost instantly with uncured pigment.
- Tool: Putty knife or 5-in-1 painter's tool (for testing).
- Test: Press a thumbnail into the deepest wrinkle; if it feels mushy or you punch through into wet liquid, give it another 48 hours.
-
Isolate and protect the workspace — Lay down heavy 8-mil canvas drop cloths under the repair area, and tape off baseboards with blue painter's tape. Cured wrinkle dust is fine and sticky, and it loves to drift into carpet, wood floors, and just about anything else you didn’t cover.
- Safety: Put on an N95 respirator mask and eye protection before you start scraping or sanding.
- Lead check: If your home was built before 1978, test older paint layers with an EPA-recognized lead test kit before dry-scraping.
-
Scrape off the failed surface skin — Hold a flexible 1.5-inch to 2-inch putty knife at a shallow 30-degree angle and push through the puckered ridges. Take off every bit of loose, wrinkling, or unbound paint until you hit firm paint or bare drywall/wood underneath.
- Safety: Push the blade away from your body at all times; never draw a sharp scraper toward your free hand.
- If this doesn't work: If the paint is gummy and clogs your blade, stop. The solvent hasn’t left yet, and you need to wait another 2 to 3 days.
-
Coarse-sand the hard paint ridges — Wrap 120-grit aluminum oxide sandpaper around a firm, flat sanding block. Sand the edge of the scraped spot in circular motions so you knock down the hard transition where the wrinkled coat met the good paint.
- Don’t just use your fingers behind the paper; they’ll follow the dips and carve little tracks into the wallboard. That thing’s toast if you do.
-
Feather the repair perimeter to a zero edge — Switch to 220-grit sandpaper and widen your sanding area 3 to 4 inches past the damaged spot. Keep working outward until you can drag your bare hand across the repair and not feel a hard line.
- Inspection: Hold a flashlight parallel to the wall (raking light); if you still see a shadow line, keep feathering.
-
Wipe away sanding dust completely — Vacuum the surface with a soft brush attachment, then wipe the sanded drywall or trim with a clean, slightly damp microfiber cloth. For exterior woodwork or spots prepped near oil-based paints, use a tack cloth or a rag dampened with mineral spirits instead of water.
- Never put primer or filler over dust; it kills adhesion and can make later coats blister.
-
Skim-coat deep depressions (if repairing drywall) — If scraping left a recess deeper than 1/16 inch, apply a thin layer of fast-setting joint compound or drywall spackle with a 6-inch taping knife. Press it in firmly, then pull the blade flat across the wall so you don’t leave a pile-up.
- Drying time: Allow standard joint compound to dry for 24 hours (or 90 minutes for chemical-setting hot mud).
- Sanding: Knock down high spots with 220-grit paper until the patch sits flush with the wall around it.
-
Seal the bare patch with a primer — Brush or roll on an even coat of acrylic or oil-based sealing primer across the scraped and patched area, extending 2 inches past the feathered edges. If the old paint was an alkyd enamel, or you hit bare wood, go with an oil-based or high-adhesion bonding primer to block tannins and give the topcoat something to grab.
- Tool: 2-inch synthetic angled sash brush or a 4-inch mini roller with a 3/8-inch nap.
- Thickness: Keep it thin; don’t try to use primer like patch mud.
-
Allow the primer to dry past its recoat window — Wait at least 2 to 4 hours for high-performance latex primers, or a full 24 hours for oil-based formulas, assuming indoor conditions of 70°F and 50% relative humidity.
- Check the can's technical data sheet: Primer that’s only "dry to touch" may still be outgassing, and that can trigger wrinkling in the finish coat.
-
Apply the first topcoat at the correct thickness — Pour paint into a tray, load your roller evenly, and lay down a uniform coat at approximately 3.5 to 4 mils wet film thickness. Work in small sections (roughly 3 feet by 3 feet), rolling in overlapping vertical strokes without leaning on the frame too hard.
- Application rule: Do not over-saturate your roller. If paint squishes out the sides of the sleeve, you’ve got too much on there.
-
Observe strict dry-time windows before the second coat — Wait the full recoat window listed on the paint label—typically 4 full hours for modern acrylic latex, or 16 to 24 hours for alkyds—before touching the wall again.
- Temperature baseline: Never apply paint if room or surface temperatures sit below 50°F or above 90°F.
- Humidity factor: If the relative humidity exceeds 70%, double the manufacturer's listed drying time before applying the final coat.
Common Causes
- Applying paint too thick: A lot of homeowners think one heavy coat saves time. It doesn’t. Once a coat goes past 5 to 6 mils wet, the air skins the top before the bottom has a chance to dry.
- Recoating too soon: Slapping on a second coat while the first is only "dry to the touch" traps moisture and solvents. The top coat pulls on the soft layer underneath and creates those ugly cross-hatched wrinkles.
- Extreme temperature shifts: Painting exterior walls in cold morning air under 50°F, then blasting them with direct sun that heats the surface to 100°F+ an hour later, flashes the skin dry and leaves the lower paint cold and wet.
- Painting over slick, unprimed gloss: Latex paint put straight onto shiny, unsanded oil enamel can’t bite in. As it shrinks, it slides around on that slick base like a sheet that won’t stay tucked in.
- High humidity and poor airflow: Once humidity climbs past 75% to 80%, water leaves the paint too slowly and unevenly. The top skins up while the lower layer stays wet.
- Unstirred paint with settled driers: Old paint separates. If you don’t stir it from the bottom of the can, the top may be loaded with surface dryers while the bottom keeps the resins all bunched up.
Common Mistakes
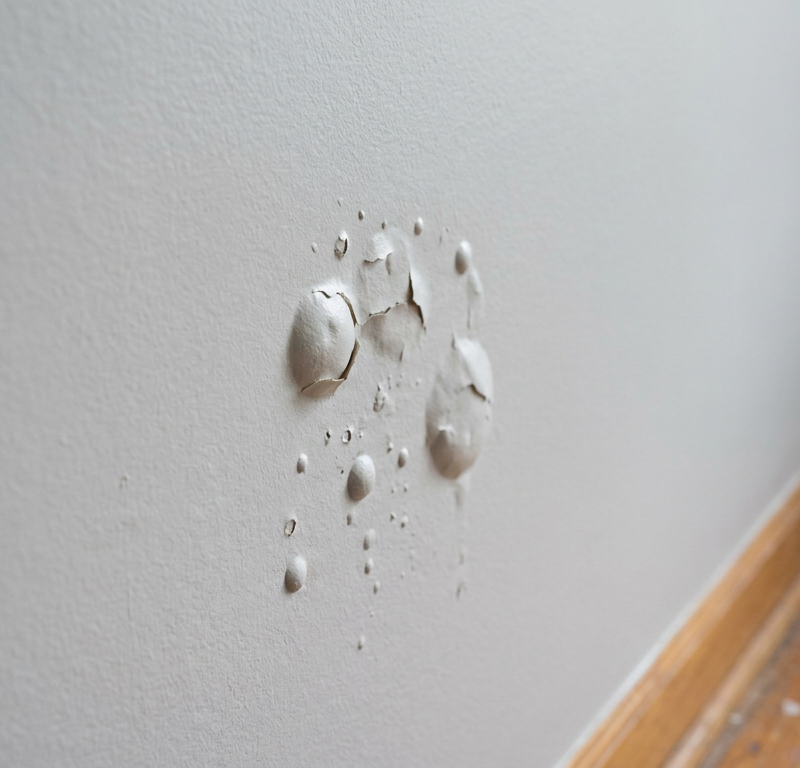
- Trying to brush out wet wrinkles immediately: The second you spot puckering, the urge is to mash it flat with a roller or brush. That just tears the fragile skin, smears the wet layer underneath, and leaves a mess that’s harder to fix later.
- Sanding while the paint core is still wet: Hit wrinkles within 12 hours and you’ll clog sandpaper and roll the soft paint into gummy little beads. Give it at least 3 days before you touch a sanding block.
- Relying on thick coats to avoid priming: Skipping primer and piling on paint to hide dark colors or water stains is a big reason vertical drip-wrinkles happen. Two thin coats beat one heavy coat every time.
- Ignoring the substrate temperature: Your thermostat saying 72°F doesn’t mean the wall is actually 72°F. Cold drywall near drafty window headers can sit at 45°F and slow the cure way down.
- Using a high-nap roller on smooth drywall: A 3/4-inch or 1-inch masonry nap dumps too much paint on a flat wall. Use a 3/8-inch nap for smooth drywall and a 1/2-inch nap for light orange-peel textures.
Cost & Time Breakdown
| Task | DIY Cost | Pro Cost | Time |
|---|---|---|---|
| Scraping & Feather Sanding | $10–$25 (Sandpaper, scraper) | $150–$250 | 1–2 hours |
| Surface Patching & Smoothing | $15–$30 (Mud, taping knife) | $100–$200 | 30–45 mins (plus dry time) |
| Spot Priming | $15–$25 (Quart of primer, brush) | $75–$125 | 20–30 mins |
| Final Finish Recoat (2 thin coats) | $30–$65 (Gallon of paint, roller) | $175–$350 | 1–2 hours |
| Total Project Scope | $70–$145 | $500–$925 | 3–5 hours active (plus curing) |
Tips & Prevention
- Use a wet film thickness gauge: A $5 plastic wet film gauge pushed into wet paint tells you right away if you’re landing at the recommended 4-mil target or laying it on at 8 mils.
- Measure room humidity before opening the can: Keep an inexpensive digital hygrometer in your tool kit; don’t paint indoors or out if ambient relative humidity exceeds 85%.
- Stick to the 4-hour recoat rule for latex: Even if the wall feels dry in 45 minutes, the water in the resin matrix still needs several hours to get out.
- Sand glossy sheens with 150-grit paper first: Any base with a satin, semi-gloss, or high-gloss finish needs a scuff so the new coat has some tooth.
- Check weather forecasts for exterior jobs: Make sure temperatures stay between 50°F and 85°F for at least 24 to 48 hours after your last brush stroke.
When to Call a Professional
Most small wrinkled patches on drywall, baseboards, or interior doors are pretty straightforward once the paint cures. But call a licensed painting contractor if the wrinkling covers whole vaulted ceilings, multi-story siding, or old woodwork you don’t want to mess up.
If you’re seeing wrinkling across the house, that usually points to a bigger problem—uncured factory coatings, moisture trapped behind siding, or ugly incompatibility between old oil paint and modern latex. If scraping gives you more than 15 to 20 square feet of peeling, elastomeric rubber sheets, or you think there’s pre-1978 lead-based paint under there, get an EPA Lead-Safe Certified pro who’s got the containment gear, mechanical scarifiers, and air scrubbers to do it without spreading dust everywhere.
Frequently Asked Questions
Can I just paint over wrinkled paint once it dries?
Nope. Painting over wrinkled paint won’t hide the ridges. New paint follows the texture underneath, so every ripple shows right through. And if the old layer still isn’t fully cured, the fresh coat can soften it back up and lead to peeling later.
Why did my paint wrinkle as soon as the sun hit it?
Direct sun heats the surface fast. The top layer flash-dries and forms a hard skin before the moisture or solvents below can get out. If an exterior surface jumps from 60°F to 95°F in an hour, the trapped moisture pushes up and gives you wrinkling, and sometimes bubbling too.
How long do I have to wait before I can sand wrinkled paint?
Wait at least 3 to 5 days, and up to a full week if it’s humid or cold. The skin may feel dry after a few hours, but the paint underneath stays thick, soft, and gummy because air can’t reach it well. Sand too soon and you’ll tear the drywall paper and clog your paper fast.
Does paint wrinkling happen more with oil-based paint or latex paint?
It’s more common with oil-based, or alkyd, paint because it cures by oxidation, which starts at the air-exposed surface. That said, heavy-body, 100% acrylic latex can wrinkle too if it goes on too thick or somebody recoats before the first coat has coalesced.
Can using the wrong paint roller cause paint to wrinkle?
Yes. A thick-nap roller, like a 3/4-inch or 1-inch nap made for stucco or rough masonry, dumps way too much paint on smooth drywall. That heavy film won’t dry evenly from the bottom up, so the surface skins over and wrinkles while the thick layer underneath struggles along.
Will high humidity cause interior paint to wrinkle?
High humidity above 75% to 80% slows water evaporation a lot. If the room airflow skins the surface while moisture stays trapped under it, the top shrinks at a different rate than the wet base and you get ripples and wrinkles across the wall.
Can I use a heat gun to dry the wrinkled paint faster?
No, don’t do that. A heat gun will blister the wet paint trapped under the skin and can scorch the resin into a sticky, burnt mess. It’s also a fire hazard near framing or older wood siding. Let it cure naturally with gentle airflow from an oscillating fan.
Do I need to prime after sanding down the wrinkled area?
Yes, you do. Spot-priming matters. Once you scrape and sand wrinkled paint down to bare drywall, spackle, or base coats, you’ve got different porosity rates all over the place. If you paint finish coat right over that without primer, you’ll get flashing—those dull, uneven spots in the sheen—and poor adhesion later.
Related Articles
Keep troubleshooting with these hand-picked guides from FixlyGuide:
- The 4-Inch Drywall Hole Fix: Why Spackle Alone Always Fails — Fix a small drywall hole (up to 4 inches) properly with a simple patch kit and avoid common mistakes that lead to visible repairs.
- The 7 Mistakes That Ruin a Perfect Paint Job (and How to Fix Them) — Painting a room like a pro isn't just about technique—it's about avoiding common pitfalls that lead to streaks, drips, and uneven finishes.…
- That Falling Cabinet Door? It's the 15-Minute Hinge Adjustment You're Missing — Don't let a sagging cabinet door drive you nuts—most issues stem from a simple hinge adjustment that you can fix in minutes with just a scr…
- The 7 Critical Mistakes Almost Everyone Makes When Painting a Room — Unlock the secrets to a flawless, professional-looking paint job by avoiding common pitfalls and mastering essential techniques for perfect…
- Paint Bubbling or Blistering? 8 Reasons It's Happening—and How to Fix It for Good — Seeing bubbles or blisters in your new paint job? Here are the eight most common causes, from heat and humidity to surface contamination, a…
- Driveway Expansion Joint Cracking? 11 Steps to Reseal It for Good — Stop weeds, water erosion, and winter frost heave by replacing failed concrete expansion joints with commercial-grade polyurethane and clos…
Should you do this yourself?
Answer five quick questions before you start. Safety outranks savings every time.
Your experience with work like this
How high do you have to work?
Does the job involve any of these?
Will it need a permit?
Specialty tools
Free and instant. Educational guidance only — not a quote, inspection, or professional diagnosis.
Estimate your own project cost
National averages are a starting point. Enter your details for a range that fits your house.
Interior paint estimator
- Paint$96
- Supplies (tape, rollers, drop cloth)$35
- Estimated total (DIY)$131
Hiring a pro? Add roughly $1.50–$4.00/sq ft for labor depending on prep work and trim detail.
Educational estimate only — always confirm with written local bids.
What should this project cost?
Enter your project details for a realistic cost range before you call anyone.
Cost depends heavily on which system turns out to be the source.
- Regional adjustment
- National average
- Labor share (typical)
- ~$1,620
- Quotes to collect
- 3 written estimates
Educational estimate based on national averages — not a binding quote. Always confirm with written local estimates.
Before you start
Check the difficulty, permits, and safety risk — then decide whether to call a pro.
Free, no signup required. Estimates are educational guidance, not a quote or an inspection.
Get the print-ready PDF of this guide
A clean, ad-free, printable version you can keep on your phone or pin to the workshop wall. Free with a FixlyGuide account.
- Print-optimized layout
- Tools, materials & every step included
- Saved to your account
Recommended for DIYers & woodworkers
Sponsored
The Top 20 Tools for Workshops of Any Budget
No stationary machines or power tools required — plus 3 fundamental tools that can't be bought at any price.
Get the free guide
Ted's Woodworking — The #1 Woodworking Resource
Detailed instructions, dimensioned drawings, materials & cutting lists, and 3D schematics for every skill level.
See the plansSponsored: links above are affiliate links. FixlyGuide may earn a commission on qualifying purchases — at no extra cost to you.
Frequently asked questions
Can I just paint over wrinkled paint once it dries?+
No, painting over wrinkled paint will not hide the ridges. Architectural paint conforms directly to the surface texture beneath it, meaning every single ripple and wrinkle will telegraph straight through your new coat. Even worse, adding another wet layer can re-soften the uncured paint underneath, causing widespread delamination and flaking down the road.
Why did my paint wrinkle as soon as the sun hit it?+
Direct sunlight heats the wall surface rapidly, causing the top layer of paint to flash-dry and form a hard skin before the solvents or moisture in the bottom layer have time to escape. When exterior surfaces climb from 60°F to 95°F within an hour, the trapped moisture expands and pushes against the newly formed skin, resulting in severe surface wrinkling and bubbling.
How long do I have to wait before I can sand wrinkled paint?+
You should wait a minimum of 3 to 5 days, and up to a full week in humid or cold environments. While the wrinkled skin might feel dry to the touch within a few hours, the paint underneath is protected from airflow and remains thick, soft, and gummy. Sanding too early will tear the drywall paper and instantly clog your sandpaper.
Does paint wrinkling happen more with oil-based paint or latex paint?+
Wrinkling is historically more common with oil-based (alkyd) paints because they cure through oxidation, which naturally starts at the air-exposed surface. However, modern heavy-body, 100% acrylic latex paints will also wrinkle easily if they are applied too thick or if an inexperienced painter recoats before the initial layer has coalesced.
Can using the wrong paint roller cause paint to wrinkle?+
Yes. Using a thick-nap roller (such as a 3/4-inch or 1-inch nap intended for stucco or rough masonry) on a smooth drywall surface deposits an excessive amount of paint. That heavy film cannot dry evenly from the bottom up, virtually guaranteeing that the surface will skin over and wrinkle as the thick underbelly struggles to cure.
Will high humidity cause interior paint to wrinkle?+
High humidity (above 75% to 80%) dramatically slows down the evaporation of water from water-based paints. If room airflow skins the surface while excessive moisture stays trapped underneath, the surface skin shrinks at a different rate than the wet base, producing pronounced rippling and wrinkling across the wall.
Can I use a heat gun to dry the wrinkled paint faster?+
No, never use a heat gun on wrinkled paint. Applying direct heat will blister the uncured wet paint trapped underneath the skin and can scorch the resin, creating a sticky, scorched mess. It also poses a serious fire hazard if working near framing or older wood siding. Let the paint cure naturally with gentle, ambient airflow from an oscillating fan.
Do I need to prime after sanding down the wrinkled area?+
Yes, spot-priming is essential. When you scrape and sand wrinkled paint down to bare drywall, spackle, or base coats, you create areas with wildly different porosity (suction rates). Applying finish paint directly over these raw patches without primer will lead to flashing—dull, uneven spots in your final sheen—and poor long-term adhesion.
Discussion
Loading comments…