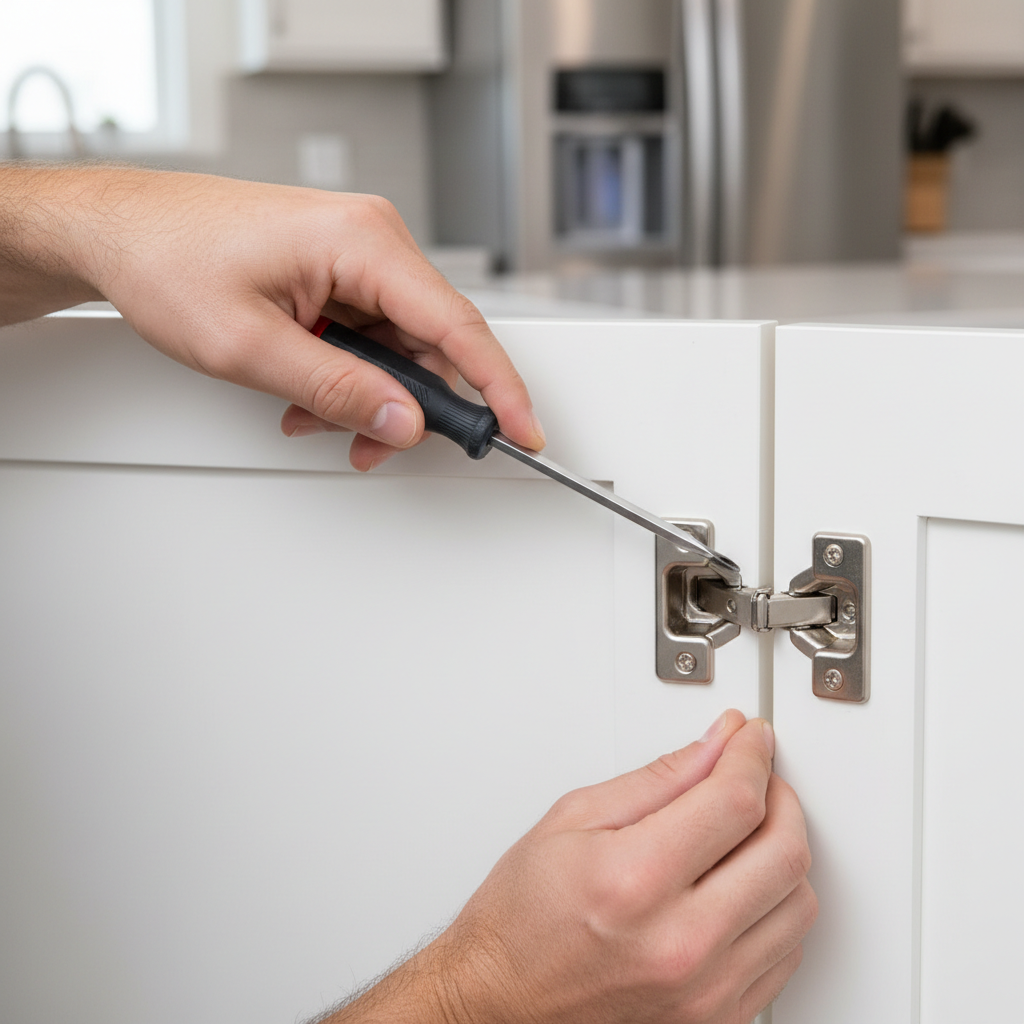
- Gather Your Tools — Get what you need before you start.
- A small step stool or chair if the cabinet is high up. Safety first, always.
- A rag or paper towel to wipe off any gunk you find. This ain’t just about fixing; it’s about cleaning too.
General remodeling · Renovation planning
| Project category | General remodeling |
|---|---|
| Problem type | Renovation planning |
| Trade required | General contracting |
| Urgency | Planned project |
| Safety risk | Low safety risk |
| DIY suitability | Pro recommended |
| Cost category | Major investment |
| Typical timeline | Design and permitting often 2–4 months before work starts |
| Contractor type | General contractor |
Repair option
Phase the work and fix the building envelope first.
Replacement option
Full renovation with permits, design, and a general contractor.
Common causes
- Space no longer fits how the household lives
- Resale preparation
- Deferred maintenance stacking up
Relevant tools:project cost estimatorcompare quoteshome improvement material prices
Published September 18, 2026Last updated September 18, 2026
Tools & materials you'll need
Affiliate linksAs an Amazon Associate FixlyGuide earns from qualifying purchases — at no extra cost to you. Prices and availability are accurate as of publication and subject to change.
Quick Answer
Listen, I’ve seen this a hundred times: a cabinet door that just won’t close right, hangs crooked, or scrapes the frame. Most homeowners figure the door’s warped or the whole cabinet’s going south. Nope. Nine times out of ten, it’s just a simple hinge adjustment. Modern European-style hinges—the ones you see on just about every kitchen cabinet built in the last 30 years—have three adjustment screws. With a Phillips head screwdriver and about 15 minutes, you can get that door hanging straight again. I pulled a water heater in Frisco last month and the kitchen cabinets were doing the exact same thing. Quick fix. Makes the whole room look cleaner, too.
The Problem
You open and close cabinet doors dozens of times a day, right? Over time, all that swinging, plus everyday vibrations and plain old gravity, works those hinge screws loose. Then the door starts acting up. Maybe it sags and scrapes the bottom of the cabinet frame when you try to shut it. Or it drifts to one side and leaves an ugly gap next to the door beside it. Sometimes it’ll even pop open a bit on its own. Annoying? Sure. But it can also chew up the cabinets and doors over time. That constant scraping wears down the finish, and doors that don’t close right can let in dust or pests. The good news is it’s rarely a serious structural issue. It’s almost always those little hinges asking for a tune-up.
How It Works
Most modern cabinet doors use what we call 'European-style' or 'concealed' hinges. These aren’t the old surface-mounted hinges you’d see on a farmhouse door or some antique furniture. These bad boys are hidden inside the cabinet frame and on the back of the door, which is how you get that clean, seamless look when they’re shut. They’re usually two-part assemblies: a mounting plate that screws into the cabinet frame and the hinge arm itself, which attaches to the door. Smart little setup. They’re built with adjustability right in.
Think of these hinges like a mini, precision-engineered robot arm. Each hinge usually has three main adjustment screws, and each one controls a specific movement of the door:
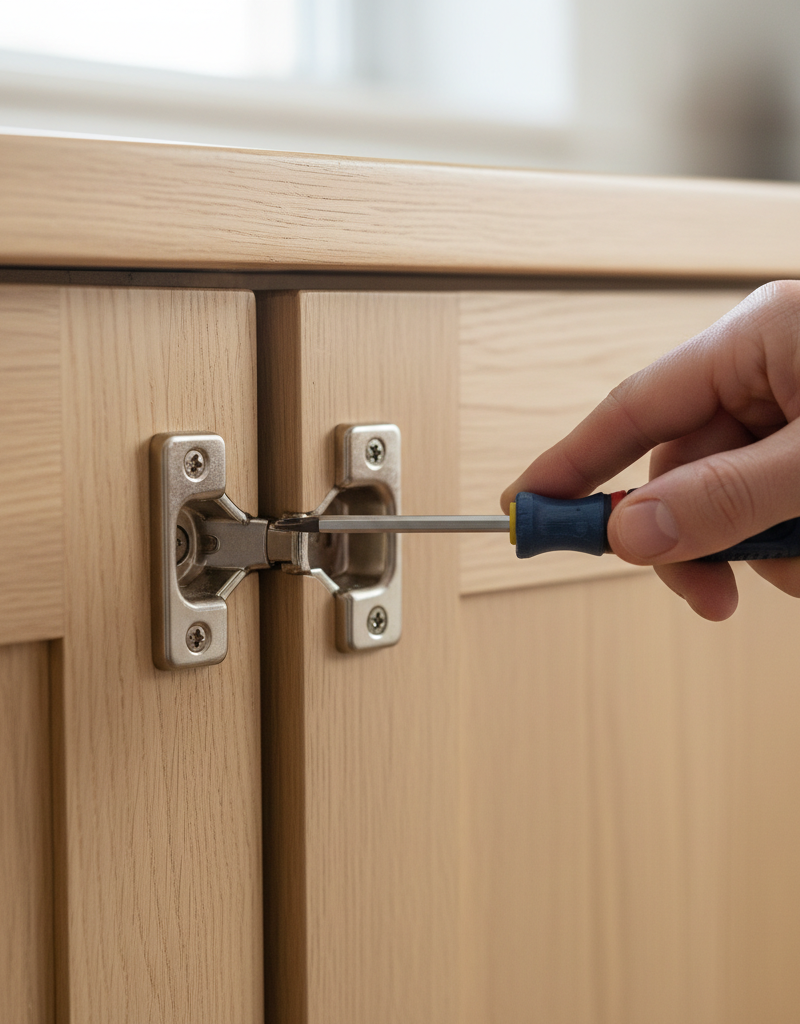
- Side-to-Side (Lateral) Adjustment: This screw, often the one closest to the door edge, moves the door horizontally, either toward or away from the adjacent cabinet or door. This is what you’ll use to get that nice, even gap between doors or between the door and the cabinet side. Turning it clockwise usually pulls the door in, counter-clockwise pushes it out.
- Depth (In-and-Out) Adjustment: This one’s usually a little trickier to spot, sometimes found closer to the cabinet frame. It pushes the door closer to or farther from the cabinet face. If your door isn’t closing flush with the cabinet front, or if it’s bumping the frame before it fully closes, this is the screw you’ll want to mess with. It’s subtle, but it makes a huge difference in how the door sits when closed.
- Height (Up-and-Down) Adjustment: This adjustment is often handled by loosening the screws that secure the hinge arm to the mounting plate on the cabinet frame, letting the whole door slide up or down before you tighten it back. Sometimes there’s a dedicated cam screw for this, but more often, it’s just a matter of loosening and sliding the door itself. This one matters a lot for getting the top and bottom of your door lined up with the cabinet opening or the adjacent door.
These hinges are tough. They’re made to handle thousands of open-and-close cycles. But like any mechanical part, they need a little dialing in now and then. The weight of the door, repeated bumps, and even the house settling can throw them off. Knowing what each screw does is half the battle; the other half is just taking your time and making small tweaks.
Step-by-Step Fix
Alright, let’s get that cabinet door behaving again. Don’t rush it. A little patience goes a long way here. You’ll be surprised what a few screwdriver turns can do.
-
Gather Your Tools — Get what you need before you start.
- Grab your Phillips head screwdriver, maybe a flathead too if some screws are combo-head. You’ll likely need a #2 Phillips. Don’t use a power drill unless you really know what you’re doing; it’s easy to strip screws or overtighten and damage the cabinet.
- A small step stool or chair if the cabinet is high up. Safety first, always.
- A rag or paper towel to wipe off any gunk you find. This ain’t just about fixing; it’s about cleaning too.
-
Assess the Damage — Figure out what’s actually wrong.
- Open and close the door slowly. Where does it rub? Is the gap uneven at the top, bottom, or sides? Does it hit the cabinet frame too soon, or does it stick out when closed? Look closely at how it lines up with the adjacent door or cabinet opening.
- Identify which hinge is causing the most trouble. Often, it’s the top hinge if the door is sagging, or both if the door is really out of whack.
-
Tighten the Basic Mounting Screws First — The simplest fix often works.
- Before you start adjusting, check the main mounting screws that secure the hinge plate to the cabinet frame and the hinge arm to the door. Sometimes these just work loose. Gently tighten them. Don’t overtighten; you’ll strip the wood or the screw head.
- If the door is still sagging or misaligned after tightening: Proceed to the adjustment screws.
-
Adjust Side-to-Side (Lateral) Alignment — Even out those gaps.
- Look for the adjustment screw closest to the cabinet opening, usually visible when the door is open. It’s often the one that moves a small cam or plate horizontally.
- Turn the screw a quarter turn at a time. Close the door and check the gap. Repeat until the gap is even with the adjacent door or the cabinet side. If you have double doors, you want that tiny, consistent space right down the middle.
- Pro Tip: For double doors, you might need to adjust both doors slightly to meet in the middle. Aim for a 1/16-inch to 1/8-inch gap between doors.
-
Adjust Depth (In-and-Out) Alignment — Get that flush finish.
- This screw typically sits deeper in the hinge mechanism, sometimes requiring you to open the door fully to access it. Its job is to pull the door closer to the cabinet or push it further out.
- If your door isn’t flush with the cabinet frame when closed, or if it’s hitting the frame too soon, adjust this screw. Clockwise usually pulls the door in, counter-clockwise pushes it out. Again, tiny turns, then check.
- You want the door to close cleanly and sit flush with the surrounding cabinet fronts.
-
Adjust Height (Up-and-Down) Alignment — Stop the scraping.
- This is often the most critical adjustment for sagging doors. Many hinges allow you to loosen the two main screws that hold the hinge arm to the mounting plate on the cabinet frame.
- Loosen both screws on each hinge about a half turn – just enough so the door can be moved manually up or down. Don’t completely remove them.
- Gently lift or lower the door until it’s perfectly level with the cabinet opening or the adjacent door. Use a small level if you’re feeling fancy, but your eye is usually good enough for cabinet doors.
- Once in position, re-tighten those screws firmly, but again, don’t crank them down until the wood splits. Snug is good.
- If your hinge has a dedicated height adjustment screw: Use that instead of loosening the mounting screws. It’ll be a small screw near the mounting plate that, when turned, will lift or lower the door on a cam.
-
Test and Fine-Tune — The final polish.
- Open and close the door several times. Does it move smoothly? Does it scrape anywhere? Are the gaps consistent all around? Stand back and look at the whole run of cabinets.
- It’s an iterative process. You might adjust one screw, which then slightly affects another alignment, needing a small tweak there. That’s normal. Keep making small adjustments until you’re satisfied.
-
Recheck All Screws — Don’t leave anything loose.
- Once you’re happy with the alignment, give all the hinge screws a final, gentle check to make sure they’re snug. You don’t want to have to do this again next week.
Common Causes
- Daily Use: Plain and simple, constant opening and closing wears on the screws and the hinge mechanism. That’s just part of life in a busy kitchen.
- Cabinet Settling: Houses shift, walls move a little, and cabinets can settle. That can put new stress on hinges and make doors drift out of line over time.
- Loose Mounting Screws: The screws holding the hinge plate to the cabinet frame or the hinge arm to the door can work loose. This is probably the most common culprit.
- Overtightening/Undertightening: If somebody (maybe even you, don’t worry, I’ve done it) overtightened a screw in the past, it could’ve stripped the wood, leading to a loose hinge. Or if they weren’t tight enough, they just vibrated out.
- Heavy Doors: Larger, heavier cabinet doors naturally put more strain on their hinges. If you’ve got solid wood doors, they’ll need more frequent checking than light pantry doors.
- Poor Installation: Sometimes, hinges weren’t installed perfectly level or plumb to begin with, which sets them up for trouble later. This is less common with factory-assembled cabinets but it can happen with DIY installs.
Common Mistakes
- Ignoring the problem: Letting a sagging door scrape means you’re wearing down the finish on both the door and the cabinet frame, and that turns a small fix into a bigger, pricier mess later.
- Overtightening screws: Crank them down too hard, and you’ll strip the wood or snap the screw head. Then you’re really in a bind, maybe looking at wood filler or new screws.
- Adjusting the wrong screw: Each screw does something specific. Wailing away on one without knowing what it does will only make things worse, trust me.
- Assuming the hinge is broken: Most of the time, the hinge itself is perfectly fine; it just needs an adjustment. Don’t replace it before trying a simple tweak.
- Using a power drill: It’s too easy to strip screws or crack wood with the torque of a drill. Use a hand screwdriver for control and feel.
- Not checking all hinges: Even if one hinge looks like the main culprit, small adjustments on the other hinges on the door might be necessary to get everything just right.
Cost & Time Breakdown
Here’s what you’re looking at to get those doors back in line:
| Task | DIY Cost | Pro Cost | Time |
|---|---|---|---|
| Basic Hinge Adjustment | $0 | $75–$150 | 15–30 mins |
| Replace Stripped Screws/Anchors | $5–$10 | $100–$200 | 30–60 mins |
| Replace 1-2 Hinges | $10–$30 | $150–$300 | 1–2 hours |
| Full Cabinet Hinge Adjustment | $0 | $200–$400 | 1–3 hours |
| Repair Door Damage (scraping) | $20–$50 | $250–$500+ | 2–4 hours+ |
Tips & Prevention
- Periodic Check-up: Once or twice a year, give all your cabinet doors a quick once-over. Open and close them, gently wiggle them. If you feel any play or see gaps opening up, grab your screwdriver.
- Gentle Closing: Tell everyone in the house to close cabinet doors gently. Slamming them speeds up the loosening process.
- Don't Overload Doors: Avoid hanging heavy items like dish towels or pot holders on cabinet doors if they’re already prone to sagging. That extra weight really works against the hinges.
- Use the Right Screwdriver: Make sure your Phillips head bit fits snugly into the screw head. A cammed-out or sloppy bit is a recipe for stripped screws. For these smaller hinge screws, a #2 Phillips is usually the ticket.
- Mark Your Adjustments (Optional): If you’re nervous, you can put a tiny pencil mark next to the screw head before you adjust it. That way, you know its original position if you need to go back.
- Consider Soft-Close Dampeners: If your doors are constantly slammed, consider adding aftermarket soft-close dampeners. They reduce impact and prolong hinge life. They’re usually cheap, maybe $5 a piece, and they’re easy to install right onto the existing hinge.
When to Call a Professional
While most hinge adjustments are squarely in the DIY column, there are times when you should absolutely call in a pro. If you’ve tried adjusting the hinges and the problem sticks around, or if the door actually is warped beyond simple adjustment, a carpenter or cabinetmaker is your best bet. If you find stripped screw holes that won’t hold new screws, or if the cabinet frame itself is damaged or separating, that’s structural stuff – call a handyman or cabinet specialist. Also, if your hinges are ancient, corroded, or visibly broken, replacing them can sometimes be a fiddly job, especially if you can’t find exact matches. A pro can source and install the right hardware, making sure everything lines up and your doors work like they should.
FAQ
Q: My cabinet door keeps popping open. Can adjusting the hinges fix this?
A: Absolutely, that’s a classic sign of a depth adjustment issue. The door isn’t seating properly against the cabinet frame. Adjusting the depth screw (the one that moves the door in and out) will likely pull the door in flush, letting the magnetic or spring catch in the hinge engage fully.
Q: How do I know which way to turn the adjustment screws?
A: Generally, turning screws clockwise tightens or pulls things in, while counter-clockwise loosens or pushes them out. With hinge adjustments, it’s best to make small quarter-turn adjustments, then close the door to check the effect. It’s an iterative process, so don’t be afraid to experiment gently.
Q: What if my hinges don’t have three adjustment screws?
A: Older or simpler hinges might not have all three adjustments. Some only allow for side-to-side or depth adjustments. If you can’t find a height adjustment, you’ll need to slightly loosen the screws that attach the hinge plate to the cabinet frame, manually shift the door up or down, and then re-tighten the screws firmly.
Q: Can I use wood glue to fix stripped screw holes?
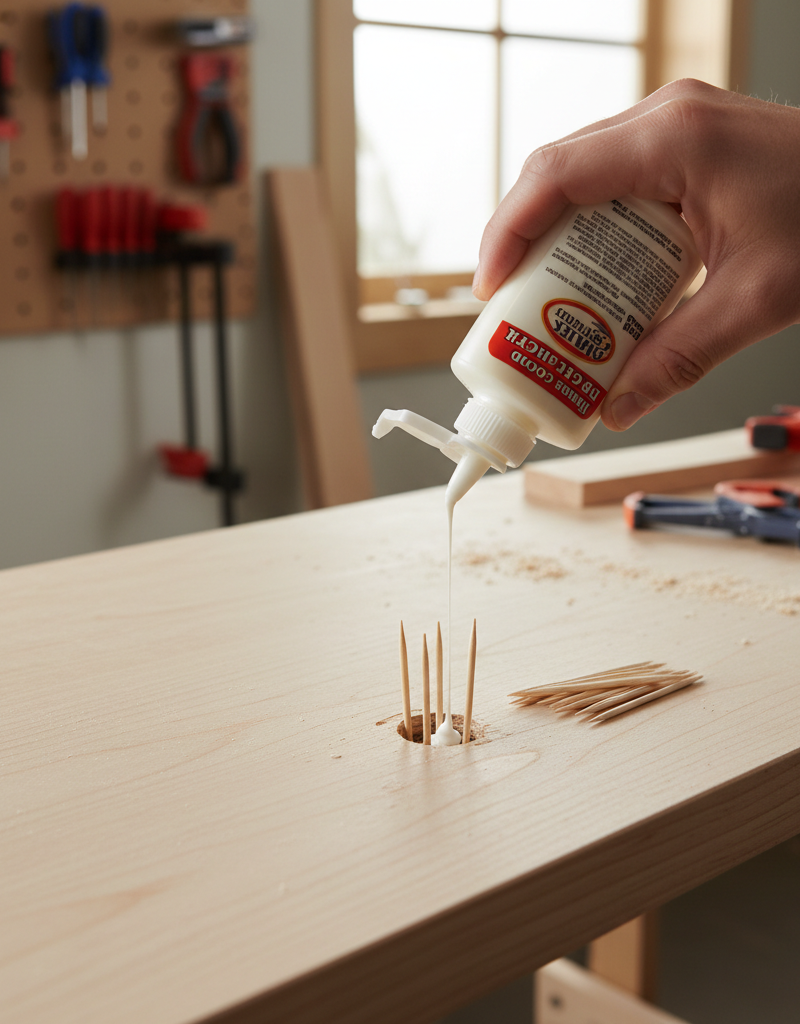
A: Yes, for minor stripping, wood glue mixed with toothpicks or wood splinters can often fill the hole enough to let a screw bite again. Apply glue, insert a few toothpicks, let it dry, then snap off the excess and pre-drill a small pilot hole before reinserting the screw.
Q: My cabinet door looks warped. Can hinges fix that?
A: Minor warpage can sometimes be compensated for with hinge adjustments, especially the depth adjustment. However, if the door is significantly warped (more than, say, 1/8 to 1/4 inch across its width), hinge adjustments won’t fully correct it, and you might need professional repair or door replacement.
Q: How often should I check my cabinet hinges?
A: I usually tell homeowners to give their cabinet hinges a quick check-up once or twice a year, especially for high-traffic kitchen cabinets. It’s like checking the air in your tires—small, regular maintenance keeps bigger headaches from showing up.
Q: What if I adjust the hinges, and the door still scrapes?
A: If the door still scrapes after adjusting, double-check that all screws are tight and that the hinge itself isn’t bent or damaged. If the scraping is severe, it’s possible the cabinet frame itself has shifted or the door is seriously warped. In those cases, it’s time to call a pro.
Q: Do all cabinet hinges work the same way?
A: While modern European-style concealed hinges share similar adjustment principles (side, depth, height), there can be minor variations in screw placement and type depending on the brand and model. Always look over your specific hinges to identify the correct adjustment points.
Q: Can I paint my cabinet hinges?
A: You can, but I wouldn’t recommend it. Painting hinges can gum up the mechanism, making them stiff and hard to adjust, and the paint’ll probably chip and wear off quickly with use. If you want to change their look, it’s better to replace them with new hardware in your desired finish.
Q: What’s the best way to clean my hinges?
A: A simple wipe-down with a damp cloth is usually enough for cleaning hinges. For stubborn grease or grime, a mild degreaser or a dab of dish soap on a cloth works well. Just make sure to dry them thoroughly afterward to prevent rust.
Related Articles
Keep troubleshooting with these hand-picked guides from FixlyGuide:
- The #1 Mistake Homeowners Make Installing Floating Shelves (and How to Fix It) — Discover the most common error DIYers make installing floating shelves into drywall and how to ensure your shelves are secure and level.
- The Hidden Culprit Behind Your Fuzzy Table Saw Cuts (It's Not Just the Blade!) — Fuzzy table saw cuts and tearout are frustrating, but often the problem isn't just your blade; hidden factors like feed rate, blade height,…
- The #1 Mistake Homeowners Make Installing Floating Shelves (and How to Fix It) — Discover the crucial error many DIYers make when mounting floating shelves into drywall and learn the simple steps to ensure a secure, sag-…
- Why Your Cabinet Doors Aren't Square (And How to Fix That Gap) — Frustrated by cabinet doors that won't close flush or hang crooked? I'll show you how to diagnose and fix those annoying gaps, hinges, and…
- The Mystery of Your Stripped Cabinet Hinge: One Simple Fix — Don't let a stripped screw hole ruin your kitchen cabinets. I'll show you how to fix that loose hinge fast, often with just a few household…
- The 15-Minute Deadbolt Swap: Why Your Old Lock Is a Security Risk — Easily replace a failing or outdated deadbolt lock in under 15 minutes, improving your home's security and functionality.
What should this project cost?
Enter your project details for a realistic cost range before you call anyone.
Cosmetic refreshes start near $5,000; full remodels commonly $25,000–$45,000.
- Regional adjustment
- National average
- Labor share (typical)
- ~$8,550
- Quotes to collect
- 3 written estimates
Educational estimate based on national averages — not a binding quote. Always confirm with written local estimates.
Get the print-ready PDF of this guide
A clean, ad-free, printable version you can keep on your phone or pin to the workshop wall. Free with a FixlyGuide account.
- Print-optimized layout
- Tools, materials & every step included
- Saved to your account
Recommended for DIYers & woodworkers
Sponsored
The Top 20 Tools for Workshops of Any Budget
No stationary machines or power tools required — plus 3 fundamental tools that can't be bought at any price.
Get the free guide
Ted's Woodworking — The #1 Woodworking Resource
Detailed instructions, dimensioned drawings, materials & cutting lists, and 3D schematics for every skill level.
See the plansSponsored: links above are affiliate links. FixlyGuide may earn a commission on qualifying purchases — at no extra cost to you.
Frequently asked questions
My cabinet door keeps popping open. Can adjusting the hinges fix this?+
Absolutely, that's a classic sign of a depth adjustment issue. The door isn't seating properly against the cabinet frame. Adjusting the depth screw (the one that moves the door in and out) will likely pull the door in flush, allowing the magnetic or spring catch in the hinge to engage fully.
How do I know which way to turn the adjustment screws?+
Generally, turning screws clockwise tightens or pulls things in, while counter-clockwise loosens or pushes them out. With hinge adjustments, it's best to make small quarter-turn adjustments, then close the door to check the effect. It's an iterative process, so don't be afraid to experiment gently.
What if my hinges don't have three adjustment screws?+
Older or simpler hinges might not have all three adjustments. Some only allow for side-to-side or depth adjustments. If you can't find a height adjustment, you'll need to slightly loosen the screws that attach the hinge plate to the cabinet frame, manually shift the door up or down, and then re-tighten the screws firmly.
Can I use wood glue to fix stripped screw holes?+
Yes, for minor stripping, wood glue mixed with toothpicks or wood splinters can often fill the hole enough to allow a screw to bite again. Apply glue, insert a few toothpicks, let it dry, then snap off the excess and pre-drill a small pilot hole before reinserting the screw.
My cabinet door looks warped. Can hinges fix that?+
Minor warpage can sometimes be compensated for with hinge adjustments, especially the depth adjustment. However, if the door is significantly warped (more than, say, 1/8 to 1/4 inch across its width), hinge adjustments won't fully correct it, and you might need to consider professional repair or door replacement.
How often should I check my cabinet hinges?+
I usually tell homeowners to give their cabinet hinges a quick check-up once or twice a year, especially for high-traffic kitchen cabinets. It's like checking the air in your tires—small, regular maintenance prevents bigger headaches down the road.
What if I adjust the hinges, and the door still scrapes?+
If the door still scrapes after adjusting, double-check that all screws are tight and that the hinge itself isn't bent or damaged. If the scraping is severe, it's possible the cabinet frame itself has shifted or the door is seriously warped. In those cases, it's time to call a pro.
Do all cabinet hinges work the same way?+
While modern European-style concealed hinges share similar adjustment principles (side, depth, height), there can be minor variations in screw placement and type depending on the brand and model. Always examine your specific hinges to identify the correct adjustment points.
Can I paint my cabinet hinges?+
You *can*, but I wouldn't recommend it. Painting hinges can gum up the mechanism, making them stiff and difficult to adjust, and the paint will likely chip and wear off quickly with use. If you want to change their look, it's better to replace them with new hardware in your desired finish.
What's the best way to clean my hinges?+
A simple wipe-down with a damp cloth is usually sufficient for cleaning hinges. For any stubborn grease or grime, a mild degreaser or a dab of dish soap on a cloth works well. Just make sure to dry them thoroughly afterward to prevent rust.
Discussion
Loading comments…