- Overtightening: This is usually the big one. Folks think tighter means better, but all you’re doing is tearing the threads out of the material. Snug is enough.
- Repeated Assembly/Disassembly: Every time you take a screw out and run it back in, you wear down the wood fibers a little more. Sooner or later, they give up.
- Soft Wood or Particle Board: These materials just don’t hold screws like solid hardwood does. Particle board especially can crumble under pressure.
- Using the Wrong Screw: Too small in diameter, and it won’t have enough to bite into. Too large, and you can split the wood or strip it right away.
- Pilot Hole Too Large: Same basic problem. If the pilot hole’s oversized, the screw can’t get a proper grip.
General remodeling · Renovation planning
| Project category | General remodeling |
|---|---|
| Problem type | Renovation planning |
| Trade required | General contracting |
| Urgency | Planned project |
| Safety risk | Low safety risk |
| DIY suitability | Pro recommended |
| Cost category | Major investment |
| Typical timeline | Design and permitting often 2–4 months before work starts |
| Contractor type | General contractor |
Repair option
Phase the work and fix the building envelope first.
Replacement option
Full renovation with permits, design, and a general contractor.
Common causes
- Space no longer fits how the household lives
- Resale preparation
- Deferred maintenance stacking up
Relevant tools:project cost estimatorcompare quoteshome improvement material prices
Published September 9, 2026Last updated September 9, 2026
Tools & materials you'll need
Affiliate linksAs an Amazon Associate FixlyGuide earns from qualifying purchases — at no extra cost to you. Prices and availability are accurate as of publication and subject to change.
Quick Answer
Listen, we’ve all been there. You’re putting up a shelf, or maybe just moving one around, and snap — that screw won’t grab. It just spins. Stripped screw holes are a pain, and they usually come from overtightening, cheap particle board, or just plain old wear from too many take-aparts. Good news? You don’t need some fancy repair kit. I’ll show you how to fix ‘em for good with stuff you probably already have kicking around — wood glue and a few toothpicks or wooden matchsticks. Done right, it’s a solid repair, and that screw’ll bite like new.
The Problem
You know the drill — pun intended. You’ve got a shelf bracket that’s come loose, or maybe a cam lock on some flat-pack furniture that just won’t tighten down. You try to snug the screw up, and instead of that nice little bite, it just spins and spins. Round and round. Annoying as heck, right? It makes shelves wobble, doors sag, and honestly, it’s the kind of little failure that drives people nuts.
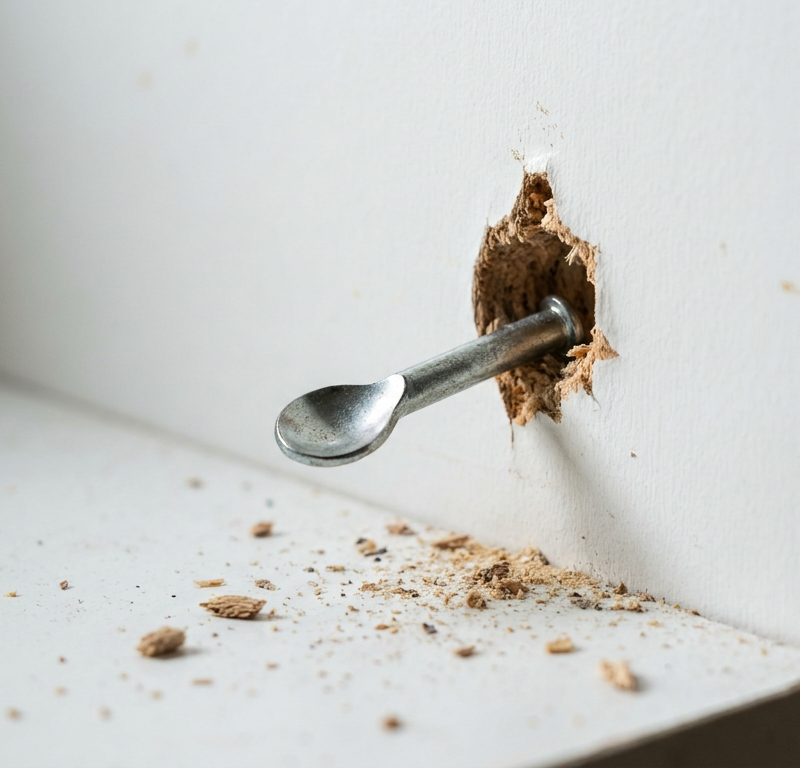
What’s going on is simple: the threads on the screw have chewed up the material they’re supposed to hold onto. That might be wood, particle board, or MDF. Once that material is gone or too loose, the screw loses its grip, and your shelf turns into a problem instead of storage.
How It Works
Here’s the deal. A screw holds by cutting its own threads into the material. Think of it like a tiny spiral staircase. When you drive a screw into wood, the threads bite into the fibers, and those fibers press back on the shaft. That pressure is what gives you the hold.
That works great until the fibers get torn out, mashed down, or worn away. It happens a lot in softer woods, particle board, and MDF, since they don’t have the long grain structure solid hardwood’s got.
Once a screw hole strips, that little internal “staircase” is gone. Nothing left for the threads to grab. So the screw just freewheels. Your job isn’t just to fill the hole — it’s to give the screw something solid to bite into again. That’s where wood glue and a bit of extra wood, like a toothpick or wooden matchstick, come in. The glue binds everything together and makes a new plug inside the old hole. When you drive the screw back in, it cuts fresh threads into that reinforced plug, and now you’ve got a tight connection again.
This isn’t just a band-aid. You’re rebuilding the grip surface. For a standard #8 or #10 wood screw, you’re generally looking for about 1/2 inch to 3/4 inch of thread engagement in solid wood for a good, strong hold. If all you’ve got is 1/8 inch of chewed-up junk, no dice. We’re fixing that.
Step-by-Step Fix
This isn’t rocket science, but you’ve got to take your time. I’ve used this trick on kitchen cabinets, garage shelving, and more busted furniture than I care to count. Just last month, I pulled a kitchen cabinet door off its hinges at a place in Northwood and found the original builder had stripped the screws clean out. Thirty minutes with this method, and that door was hanging firmer than new.
-
Clear the Area – Remove the screw and any loose debris
First thing, pull that stripped screw out. Then poke around in the hole with a small pick or even a straightened paperclip. You want to get rid of any loose fibers, dust, or old glue crumbs. Clean hole, better bond. Simple as that. Don’t skip it. -
Gather Your Fillers – Select your wooden shims
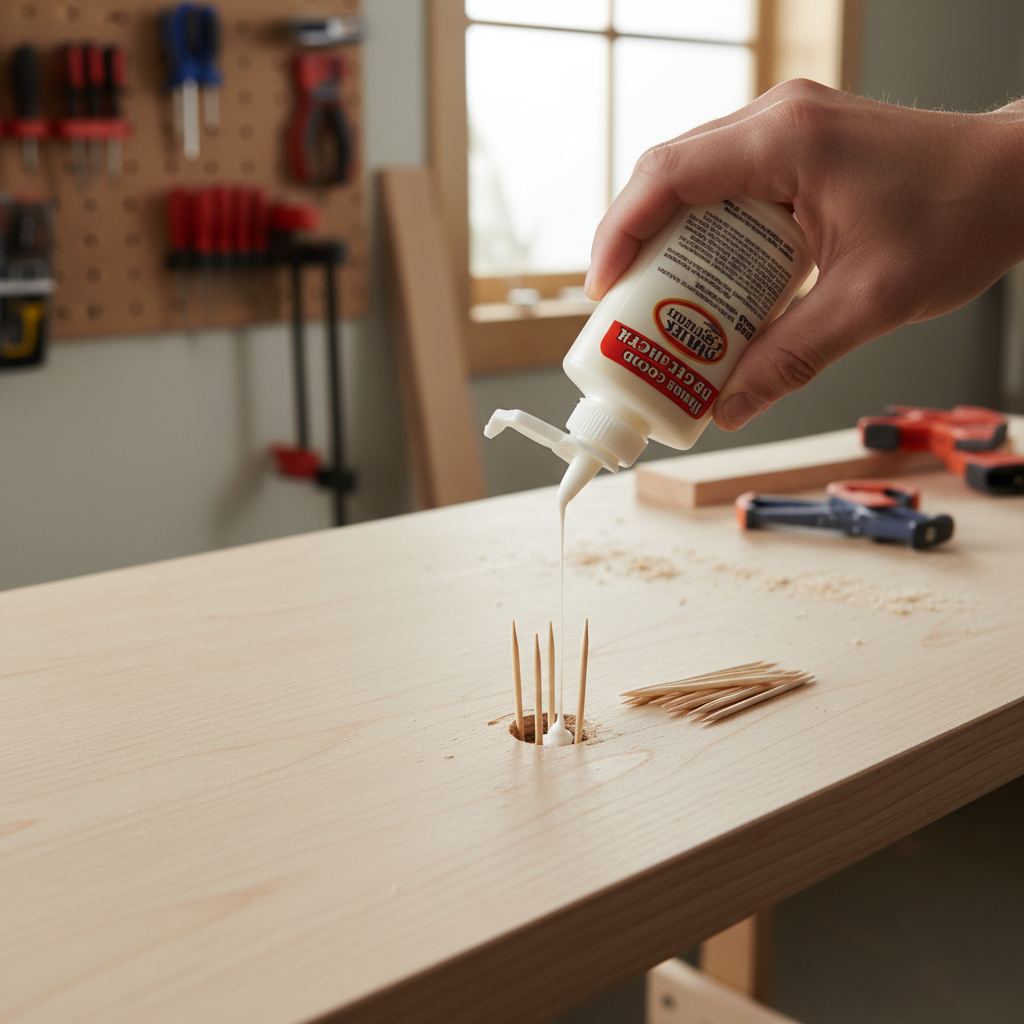
Grab a handful of round wooden toothpicks. If the hole’s really blown out, or you’re working on something bigger, wooden matchsticks without the sulfur tip, or even small wooden dowels (1/8-inch or 3/16-inch work well), are the move. You want something that mostly fills the hole but still leaves room for glue. On old IKEA stuff, those cam-lock holes can be a little bigger, so sometimes you need a fatter dowel. -
Apply the Glue – Generously coat the hole and fillers
Squeeze a good amount of yellow wood glue — like Titebond II — right into the stripped hole. Make sure the inside surfaces are coated well. Then, one by one, dip your toothpicks, matchsticks, or dowels into the glue and push them in firmly. Don’t be shy. Pack ‘em tight. More wood in the hole usually means a stronger plug. You want a snug fit, not a loose bundle of sticks.- Safety Note: Wood glue’s pretty harmless, but don’t get cute with it around your eyes. A little on your fingers is no big deal — just wipe it off.
-
Pack It Tight – Fill the hole until it’s jammed
Keep pushing those glue-coated fillers into the hole until you can’t fit any more. It should be packed solid, maybe even a little proud of the surface. The idea is to make one dense mass the screw can bite into. If the hole’s deep, break the toothpicks in half so they sit flush better. -
Clean Up Excess – Wipe away any squeezed-out glue
Right away, wipe off any glue that squeezes out with a damp cloth. You want the finish looking clean, and dried wood glue is a bear to scrape off later, especially on finished surfaces. Don’t let it sit there. -
Let It Cure – Patience is a virtue, especially with glue
This part matters. Do not drive a screw into wet glue. You’ll just make a mess and wreck the repair. Let it dry all the way. Depending on humidity and the glue, that can take anywhere from 2 to 4 hours. If you want maximum strength, I always tell folks to let it cure overnight — say, 12-24 hours. Let chemistry do its thing. -
Trim the Excess – Cut off protruding wood
Once the glue’s fully dry and hard, use a utility knife, a sharp chisel, or even a small pair of flush-cut pliers to trim off anything sticking out. You want that surface flat and smooth around the hole so the bracket, hinge, or whatever hardware you’re reinstalling sits flat.- Tool Tip: A sharp utility knife works best here. Just don’t gouge the wood around it.
-
Redrill (Optional but Recommended) – Create a pilot hole
You can often drive the screw straight into the new plug, especially if it’s a small screw. But I like to redrill a little pilot hole. It keeps the screw going in straight and helps keep that fresh plug from splitting. Pick a drill bit a little smaller than the shank of your screw, not the threads. Drill just deep enough for the screw to get started — about half the screw’s length. For a #8 screw, I’d grab a 7/64-inch bit. -
Drive the Screw – Reinstall with care
Now put the screw back in. Go slow. You should feel it bite into the new wood plug. Stop as soon as it snuggs up — don’t overdo it. That’s how we got here in the first place, right? The shelf should be rock solid now.
Common Causes
- Overtightening: This is usually the big one. Folks think tighter means better, but all you’re doing is tearing the threads out of the material. Snug is enough.
- Repeated Assembly/Disassembly: Every time you take a screw out and run it back in, you wear down the wood fibers a little more. Sooner or later, they give up.
- Soft Wood or Particle Board: These materials just don’t hold screws like solid hardwood does. Particle board especially can crumble under pressure.
- Using the Wrong Screw: Too small in diameter, and it won’t have enough to bite into. Too large, and you can split the wood or strip it right away.
- Pilot Hole Too Large: Same basic problem. If the pilot hole’s oversized, the screw can’t get a proper grip.
Common Mistakes
- Using wood filler or spackle: These don’t have the guts to hold a screw long-term. They’ll crumble again.
- Trying to force it: If the screw isn’t biting, stop. Don’t keep spinning it — you’re just making the hole worse.
- Not letting the glue cure: Rookie move. Wet glue has no strength worth talking about. Give it time.
- Not packing the hole tightly enough: A loose handful of toothpicks won’t cut it. Jam ‘em in there until it’s really full.
- Overtightening the new screw: You’re after a snug fit, not a repeat performance. Snug’s good. Cranked down is bad.
Cost & Time Breakdown
Fixing a stripped screw hole is about as cheap as repairs get if you’ve already got basic supplies on hand. Here’s the rundown:
| Task | DIY Cost | Pro Cost | Time |
|---|---|---|---|
| Gather supplies | $0–$10 | N/A | 5 minutes |
| Prepare hole & apply glue | $0–$10 | N/A | 10–15 minutes |
| Glue curing | $0 | N/A | 2–24 hours |
| Trim & reinstall screw | $0 | N/A | 5–10 minutes |
| Total for one hole | $0–$10 | N/A | 30 min + cure |
Tips & Prevention
- Pre-drill always: Especially in hardwoods or particle board, the right-size pilot hole makes life easier and helps keep things from stripping out.
- Don’t overtighten: Use a hand screwdriver or set your drill clutch low. Stop when it feels snug.
- Use appropriate screws: Match the diameter and length to the material and the load. No guessing.
- Consider wood inserts: If you’re taking furniture apart all the time, threaded wood inserts give you a much tougher metal-on-metal connection than a screw-in-wood setup.
- Check shelf loads: If you keep loading shelves past their limit, those screws are gonna be working overtime, and they’ll fail sooner or later. Know the weight limit.
When to Call a Professional
Look, fixing a stripped screw hole usually isn’t a pro job. It’s the kind of repair most homeowners can handle without breaking a sweat. But if that stripped screw is part of a bigger structural issue — say, a load-bearing wall — or you’ve got a bunch of stripped screws in a fancy cabinet and you don’t want to make it worse, that’s when you call a carpenter or handyman. Same goes for antique furniture or anything with real sentimental value. A pro can often make an invisible repair without beating up the finish. If you’re not confident, don’t force it. Especially if the piece can’t be replaced.
Related Articles
Keep troubleshooting with these hand-picked guides from FixlyGuide:
- The Mystery of Your Stripped Cabinet Hinge: One Simple Fix — Don't let a stripped screw hole ruin your kitchen cabinets. I'll show you how to fix that loose hinge fast, often with just a few household…
- The $10 Shower Fix Plumbers Don't Want You to Know — Stop that annoying drip! I'll show you how to fix a leaky shower faucet yourself, saving you money and preventing water waste.
- Why Your Freestanding Shelf Wobbles Like a Drunk Sailor (and the 5-Minute Fix) — Don't let a shaky shelf ruin your organization or your peace of mind. I'll show you how to stabilize that wobbly unit in minutes, no matter…
- The Giant Drywall Hole: 3 Hidden Mistakes That Make Fixing It Worse — Don’t just spackle over that huge drywall hole; learn the right way to repair it and avoid common mistakes that lead to an even bigger head…
- The 4-Inch Drywall Hole Fix: Why Most DIY Patches Fail (And How to Do It Right) — Don't let a small drywall hole become a recurring nightmare – discover the secret to a seamless, lasting repair that disappears into your w…
- The Secret Reason Your Interior Door Sticks (It's Not Always Humidity) — A sticking interior door is a common household nuisance, often attributed to humidity, but frequently caused by easily fixable issues like…
Should you do this yourself?
Answer five quick questions before you start. Safety outranks savings every time.
Your experience with work like this
How high do you have to work?
Does the job involve any of these?
Will it need a permit?
Specialty tools
Free and instant. Educational guidance only — not a quote, inspection, or professional diagnosis.
What should this project cost?
Enter your project details for a realistic cost range before you call anyone.
Cost depends heavily on which system turns out to be the source.
- Regional adjustment
- National average
- Labor share (typical)
- ~$1,620
- Quotes to collect
- 3 written estimates
Educational estimate based on national averages — not a binding quote. Always confirm with written local estimates.
Get the print-ready PDF of this guide
A clean, ad-free, printable version you can keep on your phone or pin to the workshop wall. Free with a FixlyGuide account.
- Print-optimized layout
- Tools, materials & every step included
- Saved to your account
Recommended for DIYers & woodworkers
Sponsored
The Top 20 Tools for Workshops of Any Budget
No stationary machines or power tools required — plus 3 fundamental tools that can't be bought at any price.
Get the free guide
Ted's Woodworking — The #1 Woodworking Resource
Detailed instructions, dimensioned drawings, materials & cutting lists, and 3D schematics for every skill level.
See the plansSponsored: links above are affiliate links. FixlyGuide may earn a commission on qualifying purchases — at no extra cost to you.
Frequently asked questions
What causes screw holes to strip?+
Screw holes typically strip from overtightening, which grinds away the wood fibers, or from repeated removal and re-insertion of screws. Softer materials like particle board are more prone to stripping than solid wood.
Can I use wood filler or spackle to fix a stripped screw hole?+
No, wood filler or spackle generally don't have enough structural integrity to hold a screw effectively. They will likely crumble under the pressure of the screw's threads, leading to a quick re-strip.
How long does wood glue need to dry for a stripped screw hole repair?+
For optimal strength, wood glue should cure for at least 2-4 hours, but I always recommend letting it sit overnight (12-24 hours). Rushing the cure time will weaken the repair significantly.
What kind of glue should I use for this repair?+
Yellow wood glue, often labeled as carpenter's glue, is ideal. Brands like Titebond II or Gorilla Wood Glue create a strong bond with wood fibers and dry hard enough for screws to grip.
Do I need to drill a pilot hole after fixing the stripped hole?+
While not always strictly necessary, I highly recommend drilling a small pilot hole into the newly repaired plug. This helps guide the screw straight and prevents splitting the fresh wood plug.
Can this method be used on metal or plastic?+
This specific method is designed for wood, particle board, and MDF. For stripped holes in metal or plastic, you'd typically need different solutions like threaded inserts or epoxy compounds.
What size toothpicks or dowels should I use?+
Use regular round toothpicks for most common screw sizes. For larger, more severely stripped holes, wooden matchsticks (without the tip) or small wooden dowels (1/8-inch or 3/16-inch) work better to fill the void.
How can I prevent screw holes from stripping in the future?+
Always pre-drill pilot holes of the correct size, avoid overtightening screws (especially in softer materials), and consider using threaded inserts for connections that will be frequently disassembled.
Is this repair strong enough for heavy shelves?+
Absolutely. When done correctly with quality wood glue and tightly packed wood, this repair can be as strong, if not stronger, than the original material, providing a very solid anchor for your screws.

Discussion
Loading comments…