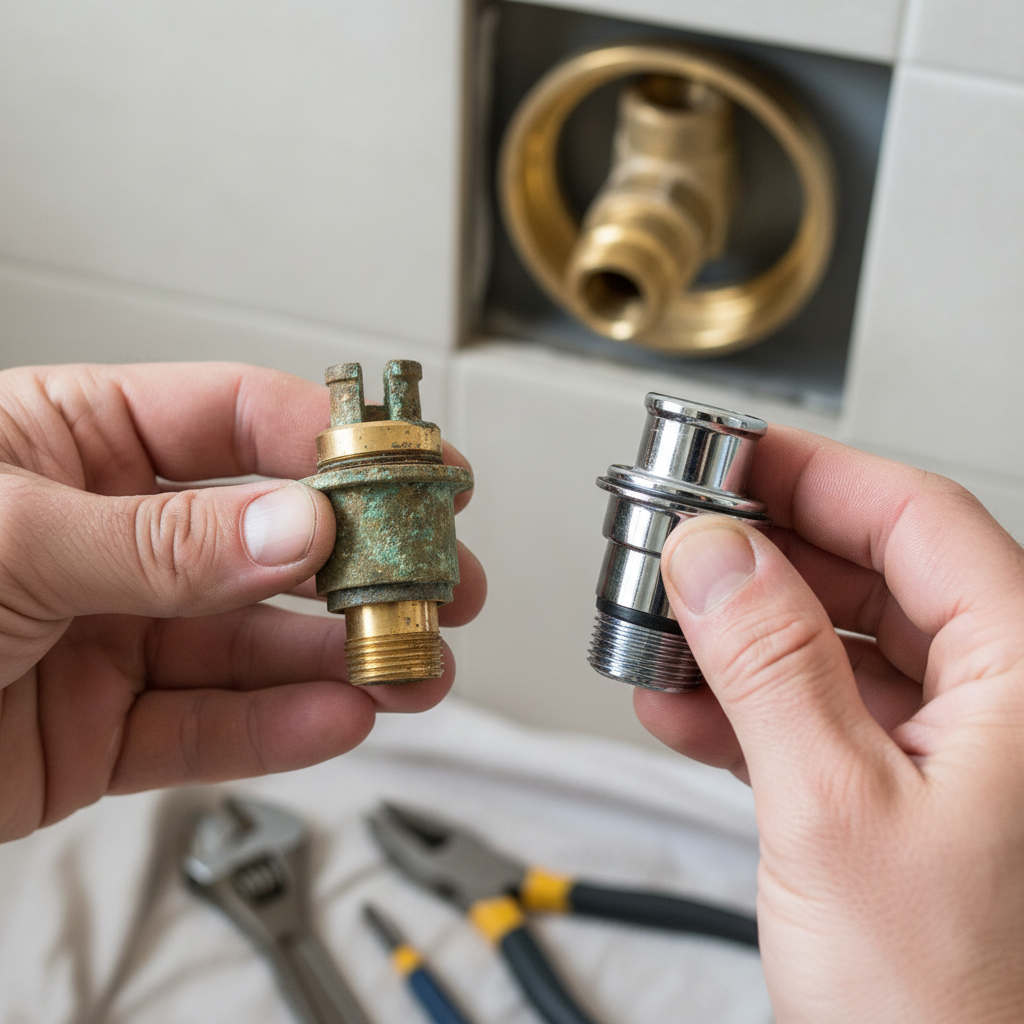
- Worn-out Washers or O-Rings: This is the big one, especially in older compression faucets. Rubber wears out over time from constant use and hot water.
- Damaged Cartridge: In single-handle faucets, the cartridge itself can fail. Internal seals break down, or the plastic parts crack or warp, and then water sneaks through.
- Mineral Buildup: Hard water leaves deposits that can chew up seals or keep parts from seating the way they should.
- High Water Pressure: Too much pressure stresses faucet parts and wears them out faster, which leads to early leaks.
Plumbing · Leak
| Project category | Plumbing |
|---|---|
| Problem type | Leak |
| Trade required | Plumbing |
| Urgency | Emergency — act now |
| Safety risk | High safety risk |
| DIY suitability | DIY for experienced homeowners |
| Cost category | Low cost |
| Typical timeline | Shut water off now; repair usually same or next day |
| Contractor type | Licensed plumber |
Repair option
Isolate at the shutoff, replace the failed component, and dry the cavity fully.
Replacement option
Repipe the run or the branch when corrosion is widespread.
Common causes
- Failed supply line or shutoff valve
- Worn washers, cartridges, or P-trap connections
- Pinhole corrosion in older copper
Relevant tools:emergency checklistdiy or hire a pro
Published August 28, 2026Last updated August 28, 2026
Tools & materials you'll need
Affiliate linksAs an Amazon Associate FixlyGuide earns from qualifying purchases — at no extra cost to you. Prices and availability are accurate as of publication and subject to change.
Quick Answer
That steady drip-drip-drip from your shower isn't just annoying; it's burning water and money while you stand there listening to it. Most leaky shower faucets come down to worn internal parts—rubber washers, O-rings, or a cartridge that's plain worn out. The good news? A lot of these fixes are homeowner-friendly, and the parts usually cost less than a decent lunch. I'll show you how to track down the bad part and swap it out so your shower quits making that noise.
The Problem
There's nothing like that relentless drip… drip… drip when you're trying to relax after a long day. Or sleep. That's the real kicker. Beyond the annoyance, a leaky shower faucet is literally money going down the drain—gallons of it over time. I've seen houses where a small leak was wasting hundreds of gallons a month, pushing water bills up and, if the water gets behind tile or into drywall, setting the stage for mold. So no, this isn't just about saving a few bucks. It's about keeping the house sound.
How It Works
Alright, let's crack open how these shower faucets actually work so you know what you're dealing with. Most modern shower valves, especially single-handle setups, use a cartridge or a set of washers and O-rings to control flow and temperature. When you turn the handle, you're moving that internal mechanism, which lines up or blocks ports for hot and cold water and sends the mixed water out through the showerhead or tub spout.
Think of the cartridge as the heart of the faucet. It's a cylindrical plastic or brass assembly with openings and seals. Inside, there are usually ceramic discs or rubber parts that rotate or slide to let hot water, cold water, or both pass through. Over time, mineral deposits, everyday wear from friction, or a little grit in the water can chew up those seals. Once they start failing, water finds a path it shouldn't, and that's your drip. Two-handle faucets usually use compression washers or ceramic disc cartridges for each handle, same basic idea—seal the flow, stop the leak. Once you understand that, you're not just swapping random parts; you're fixing the weak spot.
Step-by-Step Fix
Here's how I tackle a leaky shower faucet. You've got this.
-
Turn Off the Water Supply — Safety First, Always
- Go to your main water shut-off valve, usually in the basement, crawl space, or utility closet, and turn it clockwise until the water's off. Don't skip this unless you want a flood instead of a fix. If you're lucky, you might have shut-off valves just for the bathroom or even the shower behind an access panel—check those first. Once it's off, open a nearby faucet to bleed off pressure and make sure the water's really dead.
-
Remove the Faucet Handle — Exposing the Guts
- Look for a small screw under the handle or hiding under a decorative cap. Pop the cap off with a small flathead screwdriver or even your fingernail. Usually it's plastic. Back out the screw—often Phillips, sometimes Allen. Once it's out, the handle should pull straight off. If it's stuck, wiggle it a bit, but don't go full gorilla on it. Some handles use a set screw on the side instead of the front.
-
Take Off the Escutcheon (Faceplate) — Getting Deeper
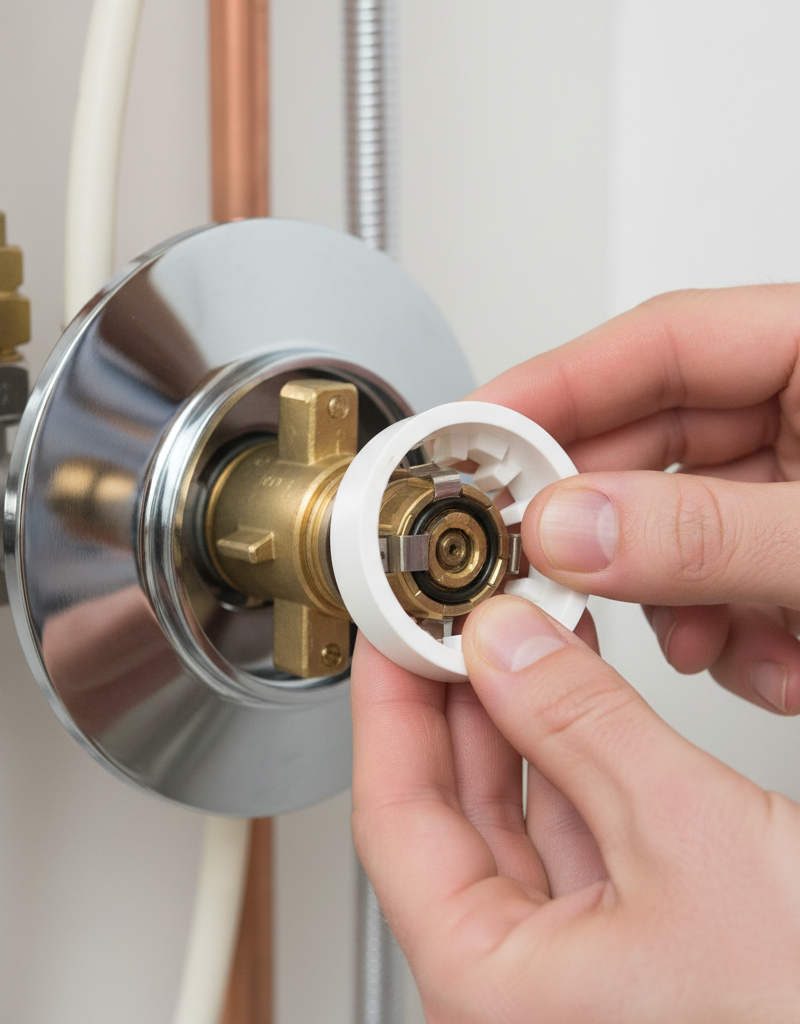
- With the handle off, you'll see the faceplate, or escutcheon, covering the wall opening. It's usually held on by two or four screws. Remove those and pull the escutcheon away from the wall. If it's sealed with old caulk, you may need to gently pry it loose. That exposes the valve body and the cartridge nut or retaining clip.
-
Identify Your Faucet Type & Cartridge — The Critical ID Step
- This is where things can change. You may see a big brass nut holding a cartridge in place, or a retaining clip—usually a small U-shaped piece of metal—at the top of the cartridge. On older two-handle faucets, you'll see stems with packing nuts. Snap a photo of the exposed valve assembly. That picture, and the old part itself if you can get it out cleanly, is what'll save you a headache at the hardware store.
-
Remove the Old Cartridge/Stems — Out with the Old
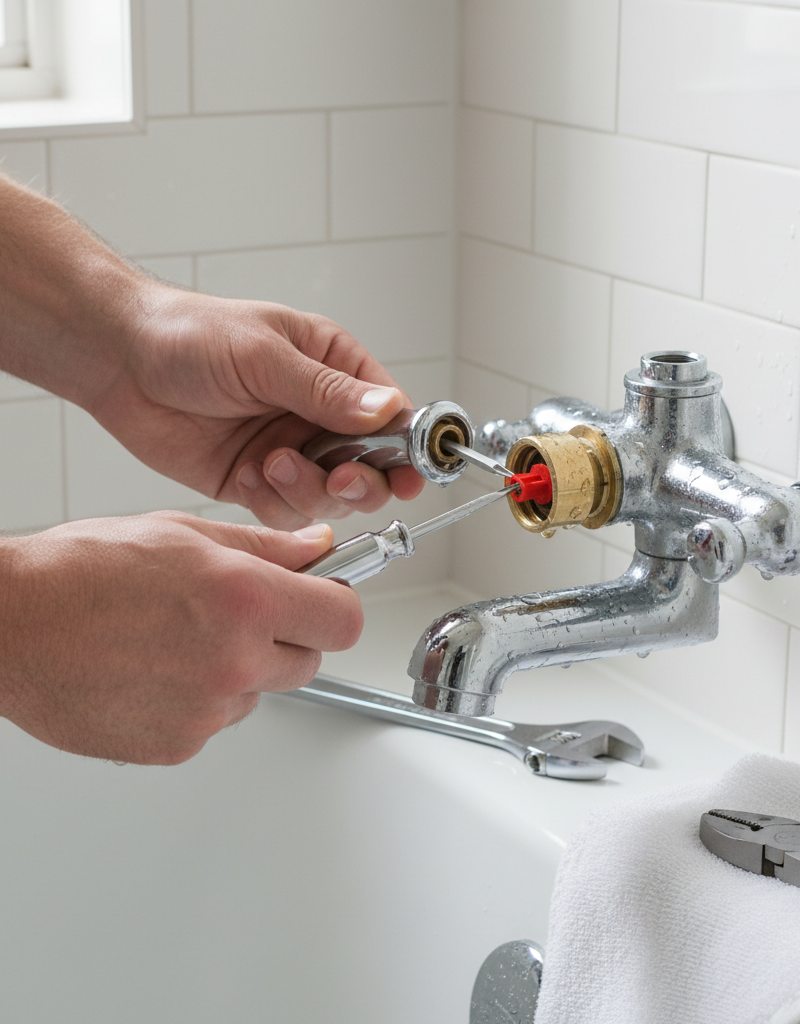
- For single-handle cartridges: If there's a retaining clip, pull it straight out with needle-nose pliers. Then grab the cartridge stem with pliers and pull it straight out. It might take a firm twist and pull. If it's held by a large nut, loosen and remove that nut first with a socket wrench or adjustable wrench. Once the nut's off, pull the cartridge out. Don't be shocked if it comes out in pieces—that's often why it was leaking.
- For two-handle stems: Use a crescent wrench to loosen the packing nut on each stem. Once loose, unscrew the whole stem assembly. The rubber washer at the bottom is usually the troublemaker here. Keep track of which stem is hot and which is cold; they often run opposite directions.
-
Inspect and Replace Components — The Fix!
- Take your old cartridge or stems to the hardware store. Trust me, trying to explain it over the phone is a waste of time. They'll help you match it up. If you've got a two-handle faucet, you'll be replacing the rubber washers at the base of the stems and maybe the O-rings higher up. For a cartridge, you're buying a whole new assembly. I usually tell folks to grab an OEM (Original Equipment Manufacturer) part if they can, but good aftermarket parts are out there. Pick up a small packet of plumber's grease too—it makes the install smoother and helps the seals do their job.
-
Install the New Cartridge/Stems — In with the New
- For cartridges: Put a thin layer of plumber's grease on the O-rings of the new cartridge. Carefully push it into the valve body, making sure any tabs or keys line up with the slots inside the valve. Reinstall the retaining clip or snug down the cartridge nut. Don't crank the nut down too hard—snug is the goal.
- For stems: Swap in the new rubber washers and O-rings. Grease 'em lightly with plumber's grease. Thread the stem assemblies back into the valve body and tighten the packing nuts. Same deal here—snug, not hammered tight.
-
Reassemble the Faucet — Putting it all back together
- Put the escutcheon back on and tighten the screws. Make sure any "hot" and "cold" markings are lined up. Slide the handle back on, and check that "off" is actually off. Put the handle screw back in and snap the cap on.
-
Turn Water On & Test — The Moment of Truth
- Slowly turn your main water supply back on. Head back to the shower and look for leaks. Turn the shower on and off a few times, testing both hot and cold and the different handle positions. Watch the handle and escutcheon closely for drips. If it's still leaking, shut the water off and go back through it—sometimes a washer isn't seated right or a nut isn't quite tight enough.
Common Causes
- Worn-out Washers or O-Rings: This is the big one, especially in older compression faucets. Rubber wears out over time from constant use and hot water.
- Damaged Cartridge: In single-handle faucets, the cartridge itself can fail. Internal seals break down, or the plastic parts crack or warp, and then water sneaks through.
- Mineral Buildup: Hard water leaves deposits that can chew up seals or keep parts from seating the way they should.
- Improper Installation: Sometimes a brand new faucet leaks because something wasn't seated right or a connection wasn't tightened properly during install. I pulled a water heater in Frisco last month that had exactly this kind of tiny-debris problem—brand new parts, still leaking like crazy.
- High Water Pressure: Too much pressure stresses faucet parts and wears them out faster, which leads to early leaks.
Common Mistakes
- Forgetting to Shut Off Water: Yeah, I know, sounds obvious—but I've walked into more than a few flooded bathrooms because somebody got eager. Always confirm the water's off before you start.
- Forcing Parts: If a handle or cartridge won't come off easy, don't just muscle it. You'll snap plastic or strip threads. There's usually a trick—a hidden screw, a certain angle, or a corroded part that needs a little penetrating oil.
- Not Identifying the Faucet Correctly: There are hundreds of faucet designs out there. Guessing at the part without matching the old one or knowing the brand/model is a great way to make two trips to the store. Take a picture, or better yet, bring the old part with you.
- Overtightening: "If some is good, more is better," right? Nope. Overtightening nuts and screws can strip threads, crack plastic parts, or deform washers and create new leaks.
- Skipping Plumber's Grease: A small dab of silicone plumber's grease on O-rings and rubber washers makes a big difference in sealing and how long the repair lasts.
- Ignoring the Supply Lines: Sometimes what looks like a "faucet leak" is really coming from the hot or cold supply lines feeding the valve. Check those connections too, especially if the leak seems to be behind the wall plate.
Cost & Time Breakdown
| Task | DIY Cost | Pro Cost | Time |
|---|---|---|---|
| Diagnosis & Part Sourcing | $0–$10 | Included in service | 30 min – 1 hour |
| Replacement Cartridge/Washers | $8–$50 | Included in service | 15 min – 30 min |
| Plumber's Grease/Tools | $5–$20 (if needed) | Included in service | 5 min |
| Total Repair | $13–$80 | $150–$300 (avg) | 1–2 hours |
Tips & Prevention
- Know Your Faucet: Keep the model number or instruction manual for your shower valve. If you ever need parts, you'll be glad you did. Better yet, snap a photo of the cartridge before you even have a leak. Future you will thank you.
- Soft Water is Your Friend: If you live where the water's hard, think about a whole-house water softener. It'll help every plumbing fixture last longer, not just the shower. Less mineral buildup means less chewing on seals.
- Don't Ignore Drips: A small drip now turns into a bigger, pricier problem later. Deal with it as soon as you see it. You could be wasting 10 gallons of water a day, which adds up to 3,650 gallons a year for one steady drip. That's a pile of water and money.
- Check Water Pressure: If you're fighting leaks in more than one fixture, grab a simple water pressure gauge—they screw onto an outdoor spigot. Your home's pressure shouldn't exceed 80 PSI. If it does, you may need a pressure reducing valve installed by a pro.
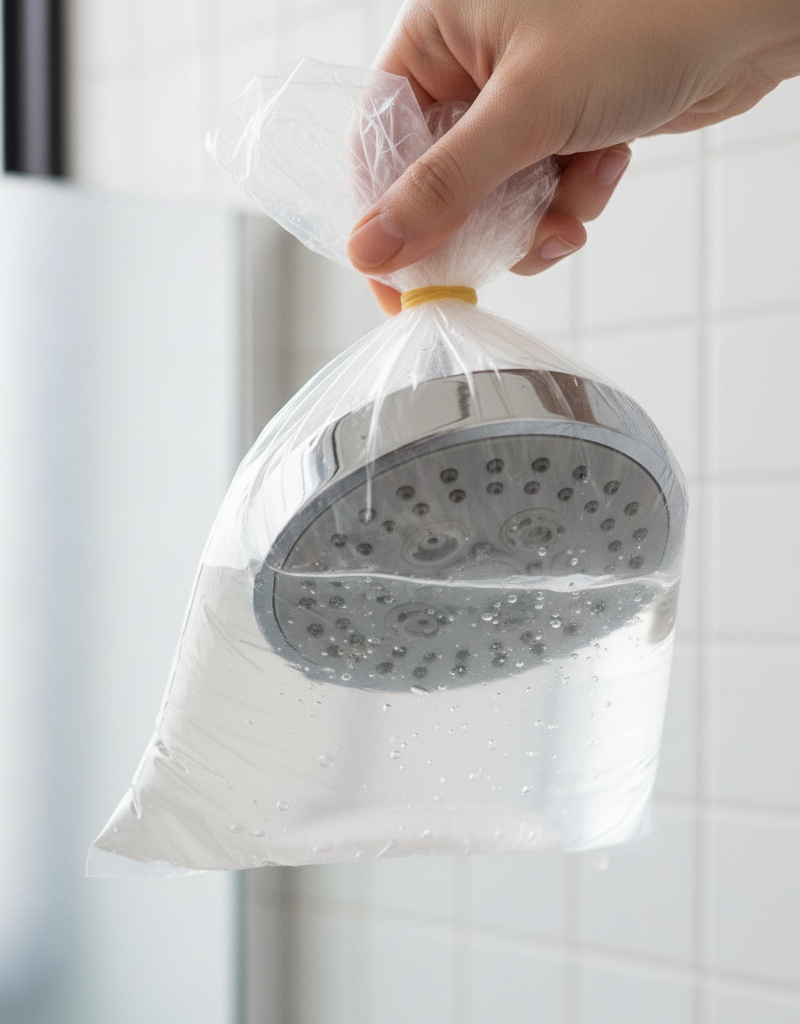
- Regular Cleaning: Keeping your showerhead and faucet clear of mineral buildup—a little vinegar soak works wonders—can keep debris from getting into the valve body and ruining seals.
- Gentle Operation: Don't yank the faucet handle like you're starting a tractor. Gentle use helps the internal parts last. You don't need to force it past its stop.
When to Call a Professional
Look, I'm all for DIY, but there are times when you just gotta call in the pros. If you've followed these steps and your shower's still dripping, or you can't find the right replacement part after a trip to the store, it's time. Same goes if you run into corroded pipes, water spraying from behind the wall, or a main shut-off valve that won't budge. Shut it down and make the call. Big water damage or old, brittle plumbing can turn a small leak into an expensive mess fast. A licensed plumber can sort out tricky repairs, handle wall-cavity damage, or replace the whole valve body if that's what it takes, and you'll know it's done right.
Related Articles
Keep troubleshooting with these hand-picked guides from FixlyGuide:
- Swap Your Leaky Faucet This Weekend, No Plumber Needed — Ready to stop that annoying drip and give your kitchen an instant upgrade? This guide shows you how to replace a kitchen faucet yourself. W…
- That Puddle By Your Shower? The Seal Trick You Don't Know — Stop that frustrating puddle on your bathroom floor by understanding the real reason your beautiful frameless shower door leaks and how a s…
- Why Your Cabinet Doors Aren't Square (And How to Fix That Gap) — Frustrated by cabinet doors that won't close flush or hang crooked? I'll show you how to diagnose and fix those annoying gaps, hinges, and…
- That Peeling Caulk Hides a $2,000 Mistake. Here's the Fix. — Stop re-caulking your shower every year. Discover the professional method, from meticulous prep to the right materials, for a waterproof ba…
- The 4-Inch Drywall Hole Fix: Why Most DIY Patches Fail (And How to Do It Right) — Don't let a small drywall hole become a recurring nightmare – discover the secret to a seamless, lasting repair that disappears into your w…
- The $5 Single-Handle Faucet Fix Plumbers Don't Want You to Know — Stop that annoying drip! Most single-handle faucet leaks are caused by worn-out O-rings or seals, a repair homeowners can easily tackle in…
Should you do this yourself?
Answer five quick questions before you start. Safety outranks savings every time.
Your experience with work like this
How high do you have to work?
Does the job involve any of these?
Will it need a permit?
Specialty tools
Free and instant. Educational guidance only — not a quote, inspection, or professional diagnosis.
What should this project cost?
Enter your project details for a realistic cost range before you call anyone.
Common repairs run $150–$650; repipes and water-heater replacements reach $1,500–$4,500.
- Regional adjustment
- National average
- Labor share (typical)
- ~$754
- Quotes to collect
- 3 written estimates
Educational estimate based on national averages — not a binding quote. Always confirm with written local estimates.
Fixly Project Decision Box
- DIY difficulty
- Moderate
- Estimated time
- 30 minutes – half a day
- Cost level
- Moderate
Main tools / materials
- Adjustable wrench
- Plunger or drain auger
- Bucket and towels
- Thread tape
When to stop and call a pro
- Water you cannot shut off at the fixture or main
- Sewage backing up into more than one fixture
- Water near electrical panels or outlets
- Gas water heater work beyond relighting a pilot
Need professional help?
Get a Licensed PlumberBefore you start
Check the difficulty, permits, and safety risk — then decide whether to call a pro.
- Estimate this projectGet a cost range for your scope and ZIP before you call anyone.Open
- Get local estimatesSend one request and compare written estimates from vetted pros.Open
Free, no signup required. Estimates are educational guidance, not a quote or an inspection.
Get the print-ready PDF of this guide
A clean, ad-free, printable version you can keep on your phone or pin to the workshop wall. Free with a FixlyGuide account.
- Print-optimized layout
- Tools, materials & every step included
- Saved to your account
Recommended for DIYers & woodworkers
Sponsored
The Top 20 Tools for Workshops of Any Budget
No stationary machines or power tools required — plus 3 fundamental tools that can't be bought at any price.
Get the free guide
Ted's Woodworking — The #1 Woodworking Resource
Detailed instructions, dimensioned drawings, materials & cutting lists, and 3D schematics for every skill level.
See the plansSponsored: links above are affiliate links. FixlyGuide may earn a commission on qualifying purchases — at no extra cost to you.
Frequently asked questions
How much does it cost to fix a leaky shower faucet?+
For a DIY repair, you're usually looking at $8-$50 for a new cartridge or washers. If you need a plumber, expect to pay $150-$300, mostly for labor. It's a significant saving to do it yourself.
How long does it take to fix a leaky shower faucet?+
Most homeowners can tackle this job in about 1 to 2 hours, including the time to turn off the water and gather tools. Experienced DIYers might do it in under an hour. Sourcing the correct part can add to the time.
Why is my shower faucet still leaking after I replaced the cartridge?+
If it's still leaking, double-check that the new cartridge is fully seated and the retaining clip or nut is snug. Sometimes, debris can get lodged in the valve body during installation, preventing a proper seal. Also, ensure you got the exact right replacement part for your specific faucet model.
Do I need to turn off the main water supply to fix a shower leak?+
Yes, absolutely. You must turn off the main water supply to your house or, if available, the specific shut-off valves for your bathroom/shower. Failing to do so will result in a significant water mess as soon as you start disassembling the faucet.
How do I know what kind of shower cartridge to buy?+
The best way is to remove the old cartridge first and take it with you to the hardware store. Photos of the old cartridge and the exposed valve body can also help store employees match it. Knowing your faucet's brand and model number is a huge advantage if you have that information.
What tools do I need to fix a leaky shower?+
You'll typically need a Phillips head screwdriver, a flathead screwdriver, needle-nose pliers, an Allen wrench (sometimes), an adjustable wrench or socket set, and plumber's grease. Sometimes a specialized cartridge puller tool might be helpful for stubborn cartridges.
Can a leaky shower cause mold?+
Yes, a persistent leak can definitely lead to mold growth, especially if water is seeping behind tiles or into the wall cavity. This is why it's crucial to fix leaks promptly to prevent more significant, costly issues down the line.
How much water does a dripping shower waste?+
Even a slow drip can waste a surprising amount of water. A faucet dripping at one drip per second can waste over 3,000 gallons of water per year. A steady stream can waste tens of thousands of gallons annually, significantly impacting your water bill.
Discussion
Loading comments…