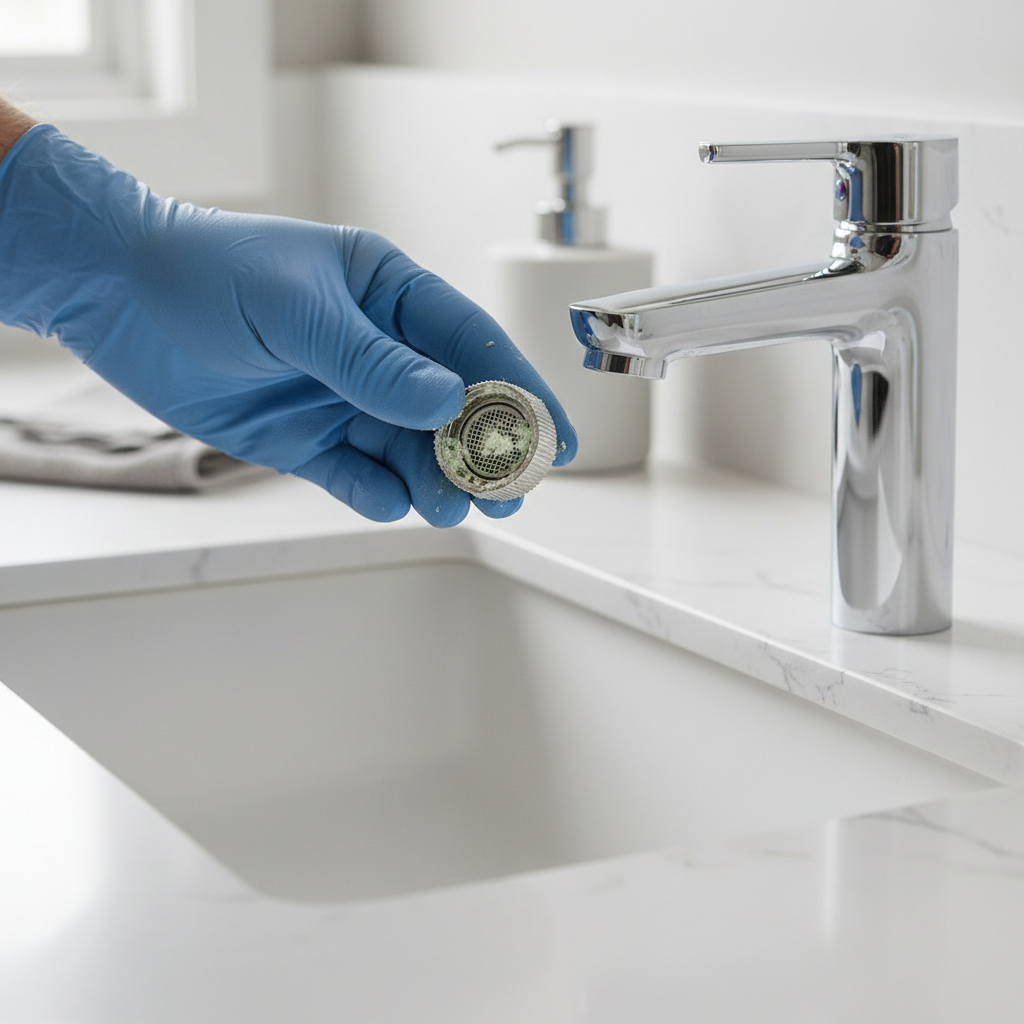
- Inspect and Clean the Aerator — The most common culprit.
- Most aerators unscrew counter-clockwise by hand. If it’s stuck, you might need a pair of pliers. Wrap the pliers’ jaws with electrical tape or a rag to protect the finish.
- Reassemble the aerator and screw it back onto the faucet spout, hand-tightening it. Don’t overtighten.
- Turn the water back on slowly and check the flow. If it’s fixed, congrats. If not, move to the next step.
General remodeling · Renovation planning
| Project category | General remodeling |
|---|---|
| Problem type | Renovation planning |
| Trade required | General contracting |
| Urgency | Planned project |
| Safety risk | Low safety risk |
| DIY suitability | Pro recommended |
| Cost category | Major investment |
| Typical timeline | Design and permitting often 2–4 months before work starts |
| Contractor type | General contractor |
Repair option
Phase the work and fix the building envelope first.
Replacement option
Full renovation with permits, design, and a general contractor.
Common causes
- Space no longer fits how the household lives
- Resale preparation
- Deferred maintenance stacking up
Relevant tools:project cost estimatorcompare quoteshome improvement material prices
Published September 3, 2026Last updated September 3, 2026
Tools & materials you'll need
Affiliate linksAs an Amazon Associate FixlyGuide earns from qualifying purchases — at no extra cost to you. Prices and availability are accurate as of publication and subject to change.
Quick Answer
When your bathroom faucet starts trickling instead of flowing, the culprit’s usually not complicated. I’ve seen it a thousand times: mineral buildup in the aerator, a gunked-up cartridge, or maybe some sediment caught in the supply lines. Good news? Most times, it’s a quick, cheap fix you can handle yourself. Don’t jump to replace the whole faucet just yet—let’s get it flowing like new again.
The Problem
You know the drill. You turn on the faucet, expect a decent stream, and instead you get a weak, sputtering trickle. It’s aggravating, especially when you’re trying to wash your hands or brush your teeth and the sink’s barely putting out enough water to wet a rag. This isn’t just an annoyance; a consistently low flow can be a sign of bigger issues down the line, or it can mean the faucet’s own parts are doing their job—catching debris—and are now clogged themselves. It’s rarely a sign of some huge plumbing disaster inside the walls; usually, the issue is right there at the faucet.
How It Works
Let’s talk about how your faucet should work. Water pressure comes into your house, typically around 40-80 PSI (pounds per square inch). It moves through the main supply lines, then branches off to individual fixtures like your bathroom sink. Under your sink, you’ve got two flexible supply lines—one hot, one cold—hooked to stop valves, then up to the faucet body. Inside the faucet, there’s a cartridge or a set of washers and seats. That’s the heart of the whole thing; it controls the flow of water and mixes hot and cold to hit your desired temperature. When you lift the handle, the cartridge lets water through. When you move it side to side, it blends the hot and cold. Then the water comes out the spout, passing through the aerator. The aerator isn’t just there for looks; it’s a little screen that mixes air into the water stream, makes it feel softer, keeps splashdown under control, and cuts water use, usually to about 1.2 to 1.5 gallons per minute (GPM) for bathroom faucets. Over time, hard water deposits (minerals like calcium and magnesium) and sediment from your water supply can build up at these choke points—especially the aerator and the cartridge—pinching off flow. It’s like trying to breathe through a stuffed-up nose; you just don’t get enough air. I pulled a bathroom faucet in Frisco last month that had exactly this problem, and the aerator was packed solid like concrete dust.
Step-by-Step Fix
Before you start, make sure you’ve got good lighting under the sink. You don’t want to be fumbling around in the dark.
-
Safety First — Shut Off the Water — Crucial step to prevent a flood.
- Reach under the sink and turn the two stop valves (usually chrome or brass knobs) clockwise until they’re snug. If you don’t have individual stop valves or they won’t turn, you’ll have to shut off the main water supply to your house. Don’t skip this, I’m serious—I once saw a homeowner forget this, and let’s just say their bathroom looked like a waterpark for a minute.
- Turn on the faucet to drain any remaining water in the lines and confirm the water is off.
-
Inspect and Clean the Aerator — The most common culprit.
- Most aerators unscrew counter-clockwise by hand. If it’s stuck, you might need a pair of pliers. Wrap the pliers’ jaws with electrical tape or a rag to protect the finish.
- Carefully remove the aerator. It’s usually a small metal or plastic piece with a screen. You’ll likely find mineral deposits, grit, or even tiny bits of pipe scale. My buddy Frank, over in Springfield, found a dead bug in his once—you never know what’s in there.
- Rinse the aerator under strong running water. Use a small brush (an old toothbrush works great) or a toothpick to knock loose any stubborn debris. For heavy mineral buildup, soak the aerator in a small bowl of white vinegar for 15-30 minutes. The acid in the vinegar will break down the calcium.
- Reassemble the aerator and screw it back onto the faucet spout, hand-tightening it. Don’t overtighten.
- Turn the water back on slowly and check the flow. If it’s fixed, congrats. If not, move to the next step.
-
Clean or Replace the Faucet Cartridge — The faucet’s inner workings.
- This step varies a bit depending on your faucet type (single-handle, two-handle, compression, disc, ball, or cartridge). For most modern single-handle faucets, you’ll have a ceramic disc cartridge. For older two-handle faucets, it might be a compression stem with rubber washers.
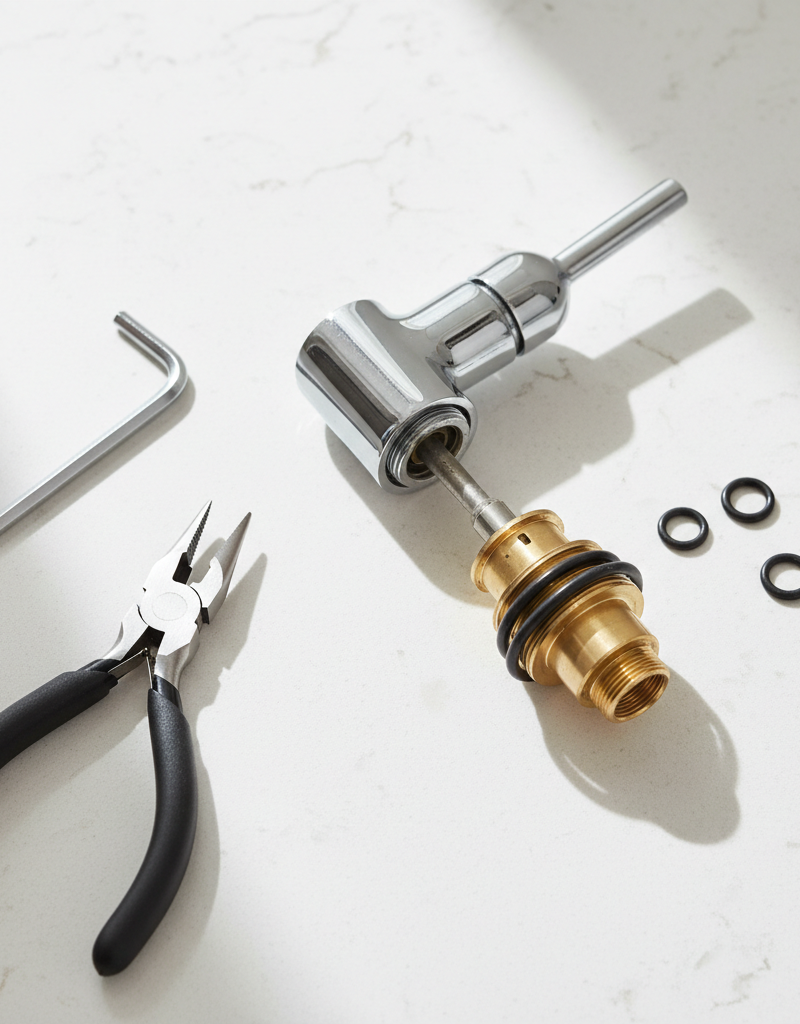
- Remove the handle: Look for a small screw under a decorative cap (pop it off with a small screwdriver or hex key) or on the back/side of the handle. Unscrew it and pull the handle off.
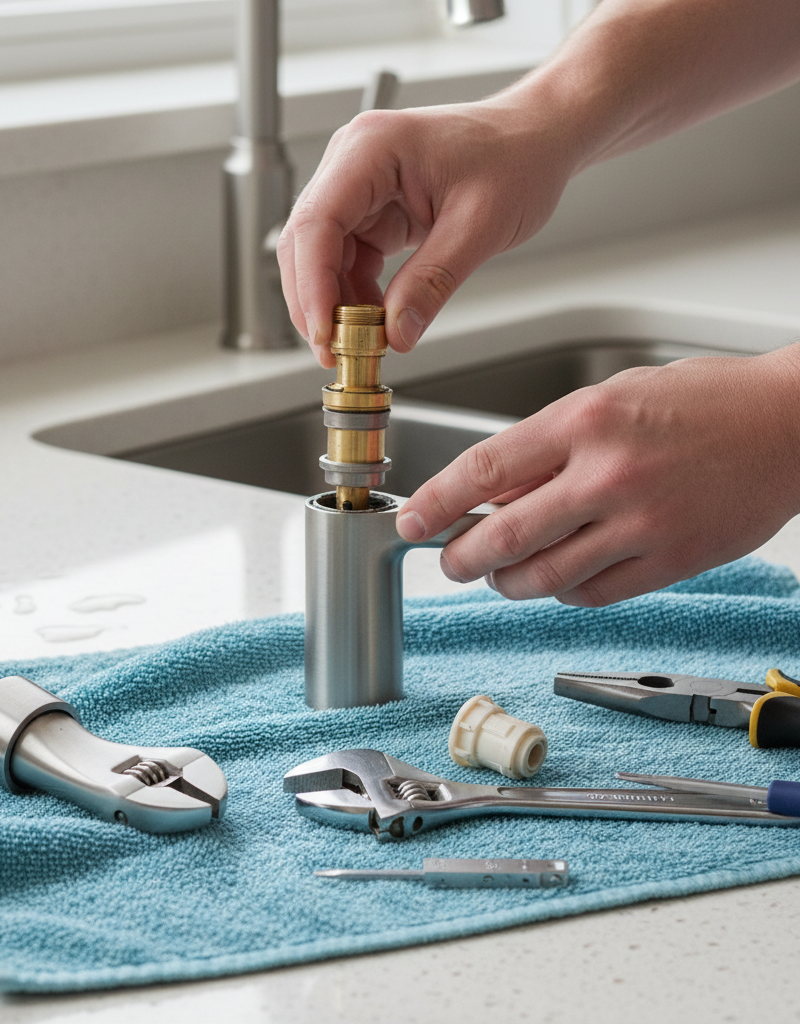
- Access the cartridge/stem: You’ll usually see a retaining nut or clip holding the cartridge in place. Remove it. You might need a deep socket wrench or specialized cartridge pliers for some models. Take a picture of how it looks before you pull it out—it’ll save you a headache later.
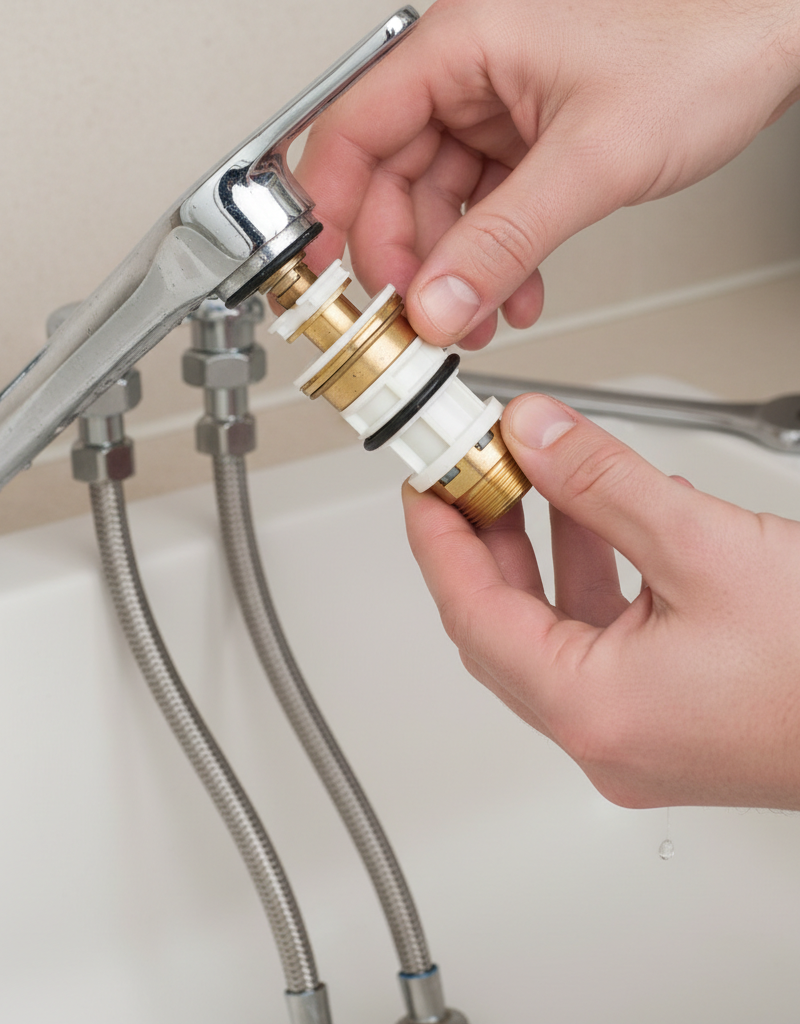
- Remove the cartridge/stem: Carefully pull the cartridge straight up and out. Some might be a bit stiff. For compression stems, unscrew the packing nut and pull the stem out.
- Inspect and clean: Look for cracks, wear, or significant mineral buildup on the cartridge or rubber seals. You can try soaking a mineral-heavy cartridge in vinegar for an hour or so, scrubbing it gently with a non-abrasive pad. For compression faucets, replace any worn rubber washers and O-rings. If the cartridge itself is cracked or heavily corroded, you’re better off replacing it.
- Replacement: Take the old cartridge to your local hardware store to match it exactly. Make sure you get the right brand and model if possible. They’re usually around $15-$30.
- Reinstall: Insert the cleaned or new cartridge, making sure it’s correctly oriented (some have specific alignment tabs). Secure it with the retaining nut or clip, then reattach the handle.
- Turn the water back on slowly and check the flow. If there’s still no luck, we’ve got one more common spot.
-
Check Supply Lines and Stop Valves — The hidden highway.
- With the water off again, disconnect the flexible supply lines from the stop valves under the sink. Have a small bucket or towel ready; there will be some residual water.
- Inspect the ends of the supply lines and the stop valves themselves for any debris. Sometimes sediment or even a stray piece of old pipe scale gets caught right at the valve or in the mesh screen that some supply lines have built in.
- You can gently open the stop valves (with a bucket underneath!) for a split second to flush out any debris, but be careful—the pressure can be surprisingly strong.
- Reconnect the supply lines, hand-tighten the nuts, then give them a quarter-turn with a wrench. Don’t crank them down—you’ll damage the seals. Just snug enough so they don’t leak.
- Turn the water back on gradually and check for leaks and improved flow. If you’ve done all this and still have low flow, it’s time to consider a professional or a more extensive system issue.
Common Causes
- Mineral Buildup (Hard Water): This is the big one, especially if you live in an area with hard water. Calcium and magnesium deposits cling to surfaces inside your pipes, faucet, and aerator, slowly constricting water flow. It’s like cholesterol in your arteries.
- Sediment and Debris: Bits of rust, pipe scale, sand, or other sediment can break loose from your water lines (especially after municipal water work or if you have old galvanized pipes) and get caught in the aerator screen or faucet cartridge.
- Worn Faucet Cartridge/Washers: Over years of use, the internal components that control water flow can degrade, crack, or get fouled with mineral deposits, losing their ability to regulate flow effectively.
- Partially Closed Stop Valves: Sometimes, the shut-off valves under the sink get partially closed without anyone realizing it, especially after cleaning or other work. It’s an easy oversight.
- Kinked Supply Lines: The flexible supply lines connecting the faucet to the stop valves can get kinked or bent, restricting flow. This usually happens during installation or if something gets shoved against them under the sink.
Common Mistakes
- Forgetting to shut off the water: Sounds basic, right? But I’ve seen it happen. Result? A messy flood and cabinets that take a beating.
- Overtightening the aerator or supply lines: You can strip threads or crack plastic components. Hand-tight plus a quarter turn with a wrench is usually all you need for supply lines; aerators are often hand-tight only.
- Using harsh chemicals: Never try to clean your faucet by pouring corrosive drain cleaners into it. You’ll wreck the finish, chew up the internal parts, and probably won’t solve the problem.
- Ignoring the problem: A slow drip or low flow might seem minor, but it can point to buildup that eventually leads to a complete blockage or puts strain on other parts of your plumbing system.
- Replacing the whole faucet prematurely: A lot of homeowners see low flow and figure the faucet’s shot. Most times, a simple cleaning or cartridge replacement gets it back to new condition for a fraction of the cost.
- Not checking both hot and cold: If only one side is slow, it points to an issue with that specific supply line or the hot/cold side of the cartridge, which narrows down your troubleshooting fast.
Cost & Time Breakdown
| Task | DIY Cost | Pro Cost | Time |
|---|---|---|---|
| Aerator Cleaning | $0 (vinegar) | N/A | 15-30 mins |
| Cartridge Cleaning | $0 (vinegar) | N/A | 30-60 mins |
| Cartridge Replacement | $15–$50 | $150–$300+ | 1–2 hours |
| Supply Line Inspection/Flush | $0 | N/A | 15-30 mins |
| Full Faucet Replacement (DIY) | $50–$300+ | $300–$600+ | 2–4 hours |
Tips & Prevention
- Regular Aerator Cleaning: Once or twice a year, unscrew your aerators and give them a good cleaning. It’s especially important if you have hard water. It’s a five-minute job that saves a lot of headaches.
- Water Softener: If you’re constantly battling hard water issues across your whole home, investing in a whole-house water softener can pay off by extending the life of all your plumbing fixtures and appliances. It’s a bigger upfront cost, but it’ll save you in the long run.
- Use Stop Valves: Periodically open and close your stop valves under the sink. This helps keep them from seizing up and flushes out any minor sediment that might be gathering there. Do this gently, don’t force them.
- Sediment Filters: If your water utility reports high sediment, a whole-house sediment filter can be a game-changer, protecting all your fixtures from gritty buildup.
- Know Your Faucet Brand/Model: If you ever need to replace a cartridge, knowing the brand and model number of your faucet can save you a trip to the hardware store for the wrong part. Check the underside of the faucet body or look at your home’s original builder documents.
When to Call a Professional
You’ve tried everything, cleaned the aerator, replaced the cartridge, flushed the lines, and that faucet is still spitting at you like a grumpy cat. That’s when you call in the pros. If you’re dealing with consistently low water pressure throughout the whole house, not just one faucet, that points to a bigger system-wide issue—like a failing pressure regulator, serious pipe corrosion in your main lines, or a problem with your well pump. Also, if you’ve got PEX or copper supply lines that you’re not comfortable disconnecting, or if your stop valves are seized and won’t budge, don’t force it and risk breaking something. A licensed plumber can diagnose tricky pressure problems, replace old galvanized piping, or safely deal with stubborn valves without turning your bathroom into a swimming pool. They’ve got the right tools and the know-how to get it done without making a bigger mess.
Related Articles
Keep troubleshooting with these hand-picked guides from FixlyGuide:
- That Heavy Mirror? It Needs More Than Just a Nail — Stop guessing with drywall anchors; the physics of shear force and toggle bolt ratings are the secret to keeping your heavy mirror securely…
- The $10 Shower Fix Plumbers Don't Want You to Know — Stop that annoying drip! I'll show you how to fix a leaky shower faucet yourself, saving you money and preventing water waste.
- Your New Faucet Leaks at the Base? The 50-Cent O-Ring Fix — That brand new kitchen faucet shouldn't be dripping at the base; here's the surprisingly common reason why it's happening and the specific…
- That New Grout Is Already Cracking? Here’s the Hidden Cause — Cracked grout weeks after a renovation is often a sign of a deeper issue with your subfloor or tile installation, not just a problem with t…
- The Hidden Culprit Behind Your Fuzzy Table Saw Cuts (It's Not Just the Blade!) — Fuzzy table saw cuts and tearout are frustrating, but often the problem isn't just your blade; hidden factors like feed rate, blade height,…
- The $5 Secret to Fixing a Leaky Single-Handle Faucet — A persistent drip from your single-handle faucet is often a simple fix, saving you money and preventing water waste.
Should you do this yourself?
Answer five quick questions before you start. Safety outranks savings every time.
Your experience with work like this
How high do you have to work?
Does the job involve any of these?
Will it need a permit?
Specialty tools
Free and instant. Educational guidance only — not a quote, inspection, or professional diagnosis.
What should this project cost?
Enter your project details for a realistic cost range before you call anyone.
Mid-range remodels commonly $12,000–$22,000; small repairs often under $600.
- Regional adjustment
- National average
- Labor share (typical)
- ~$5,603
- Quotes to collect
- 3 written estimates
Educational estimate based on national averages — not a binding quote. Always confirm with written local estimates.
Fixly Project Decision Box
- DIY difficulty
- Moderate
- Estimated time
- 30 minutes – half a day
- Cost level
- Moderate
Main tools / materials
- Adjustable wrench
- Plunger or drain auger
- Bucket and towels
- Thread tape
When to stop and call a pro
- Water you cannot shut off at the fixture or main
- Sewage backing up into more than one fixture
- Water near electrical panels or outlets
- Gas water heater work beyond relighting a pilot
Need professional help?
Get a Licensed PlumberGet the print-ready PDF of this guide
A clean, ad-free, printable version you can keep on your phone or pin to the workshop wall. Free with a FixlyGuide account.
- Print-optimized layout
- Tools, materials & every step included
- Saved to your account
Recommended for DIYers & woodworkers
Sponsored
The Top 20 Tools for Workshops of Any Budget
No stationary machines or power tools required — plus 3 fundamental tools that can't be bought at any price.
Get the free guide
Ted's Woodworking — The #1 Woodworking Resource
Detailed instructions, dimensioned drawings, materials & cutting lists, and 3D schematics for every skill level.
See the plansSponsored: links above are affiliate links. FixlyGuide may earn a commission on qualifying purchases — at no extra cost to you.
Frequently asked questions
Why is my bathroom faucet suddenly slow?+
A sudden drop in flow usually means a blockage. Check the aerator first—it's the most common spot for mineral buildup or sediment to get trapped. If that's clear, a piece of debris might have lodged itself in the cartridge.
Can I fix a slow faucet without calling a plumber?+
Absolutely! Most slow faucet issues—like a clogged aerator or a gunked-up cartridge—are straightforward DIY fixes. You'll save money and gain a good understanding of your home's plumbing with just a few basic tools.
What is an aerator and why does it get clogged?+
The aerator is the small screen at the tip of your faucet spout. It mixes air into the water, making the stream smooth and conserving water. It gets clogged because it acts as a filter, trapping mineral deposits (from hard water) and any sediment present in your water supply.
How often should I clean my faucet aerator?+
If you have hard water, I recommend cleaning your aerators at least once a year, or even twice. If your water quality is generally good, you might get away with every two years. It's a quick preventative measure that keeps the water flowing freely.
What if only one side (hot or cold) of my faucet is slow?+
If just one side is affected, the problem is usually isolated to that specific hot or cold water pathway. Check the stop valve under the sink for that side, or inspect the corresponding side of the faucet cartridge for blockages or wear.
How do I know if I need to replace the faucet cartridge?+
If cleaning the aerator and supply lines doesn't fix the low flow, and you notice persistent drips or difficulty controlling temperature, then it's a good bet your cartridge is worn out. Look for cracks or heavy corrosion when you remove it.
Can hard water cause other plumbing problems?+
You bet it can. Hard water doesn't just clog faucets; it can reduce the efficiency of your water heater, leave scale buildup in pipes, and shorten the lifespan of appliances that use water. A whole-house water softener is a common solution for persistent hard water issues.
Is it safe to use vinegar to clean faucet parts?+
Yes, white vinegar is a safe and effective, natural acid for dissolving mineral buildup (calcium and lime) from faucet aerators and cartridges. Just make sure to rinse the parts thoroughly with water afterward. Don't use stronger, corrosive acids.
What if my entire house has low water pressure?+
If *all* your faucets and showers have low pressure, the issue isn't with a single faucet. It could be a problem with your main water shut-off valve, a failing pressure regulator, or even a main line leak. At that point, it's definitely time to call a professional plumber.
Discussion
Loading comments…