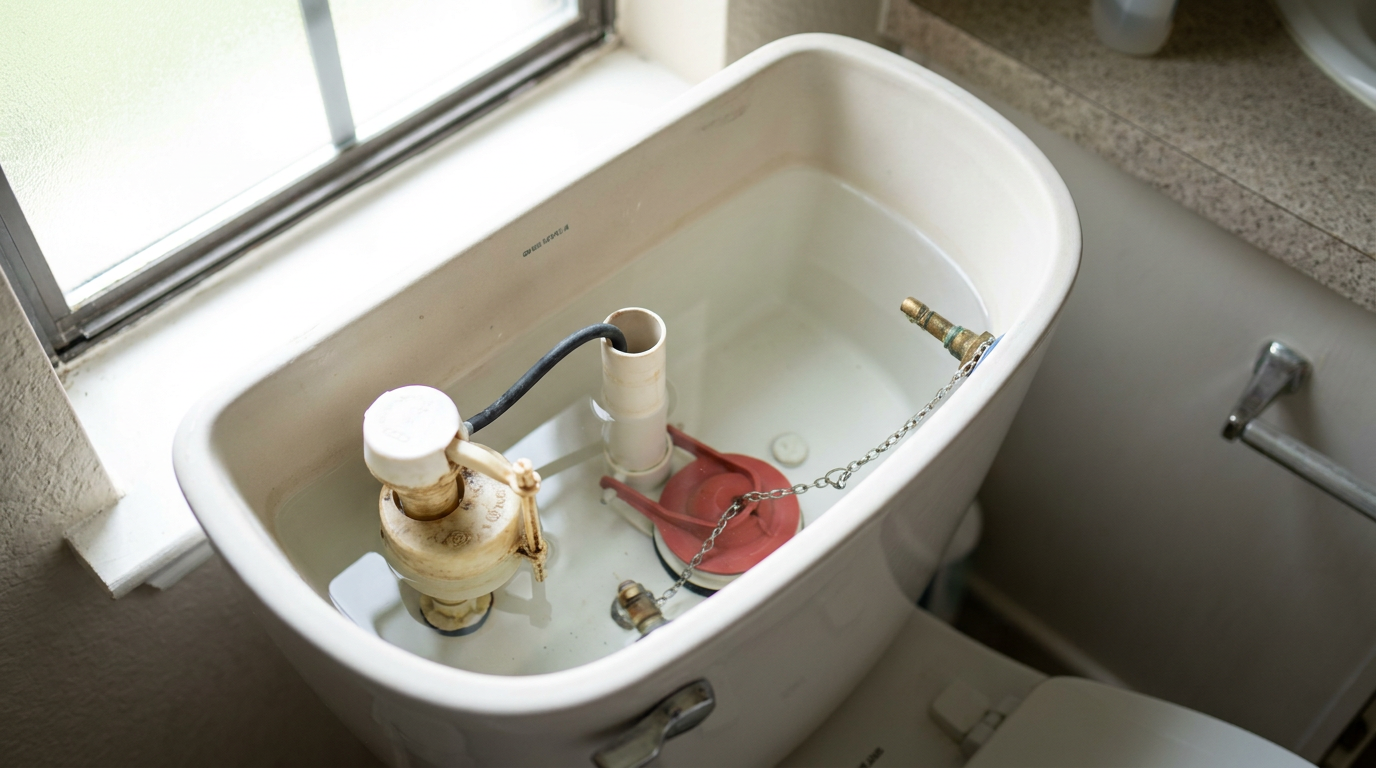
- Worn-Out Flapper: The 1 culprit. Rubber breaks down over time, especially in water with a lot of chlorine.
- Incorrect Float Height: Set too high, water keeps overflowing. Set too low, and the flush gets weak.
- Improper Refill Tube Length: A tube that’s too long and sits in the overflow pipe water will siphon water out of the tank.
- Tangled or Incorrectly Sized Flapper Chain: Too much or too little slack keeps the flapper from sealing the way it should.
- Leaky Fill Valve: A slow internal leak in the fill valve can overfill the tank and keep it running.
General remodeling · Renovation planning
| Project category | General remodeling |
|---|---|
| Problem type | Renovation planning |
| Trade required | General contracting |
| Urgency | Planned project |
| Safety risk | Low safety risk |
| DIY suitability | Pro recommended |
| Cost category | Major investment |
| Typical timeline | Design and permitting often 2–4 months before work starts |
| Contractor type | General contractor |
Repair option
Phase the work and fix the building envelope first.
Replacement option
Full renovation with permits, design, and a general contractor.
Common causes
- Space no longer fits how the household lives
- Resale preparation
- Deferred maintenance stacking up
Relevant tools:project cost estimatorcompare quoteshome improvement material prices
Published October 15, 2026Last updated October 15, 2026
Tools & materials you'll need
Affiliate linksAs an Amazon Associate FixlyGuide earns from qualifying purchases — at no extra cost to you. Prices and availability are accurate as of publication and subject to change.
Quick Answer
If your toilet keeps running, it’s almost always something inside the tank with one of three parts: the flapper, the float, or the refill tube. A tired flapper leaks water from the tank into the bowl, which keeps the fill valve working overtime. If the float’s set too high, water just keeps spilling into the overflow tube. And if the refill tube is too long and dips below the water line, it can siphon water out of the tank and kick the fill valve back on. Don’t sweat it—those are simple, cheap fixes, and you can usually handle ’em yourself.
The Problem
You flush the toilet, it refills, and then... it just keeps running. Maybe you hear a steady hiss. Maybe it shuts off, then starts up again for a few seconds every few minutes like it can’t make up its mind. Either way, that sound isn’t just irritating; it’s water—and your money—going straight down the drain. A single running toilet can waste 200 gallons of water or more per day, which can tack on $20, $50, or even more to your monthly water bill. Leave it alone too long, and you’re also asking for premature wear on the toilet parts and maybe some water damage, even if that part’s less common.
How It Works
To fix a running toilet, you’ve got to know what’s happening inside that porcelain tank. It’s a pretty simple setup, honestly. When you press the flush handle, it lifts a rubber seal called the flapper (or a similar flush valve seal). That lets a tankful of water (about 1.6 gallons in modern toilets) rush down into the bowl and push waste out through the drain.
As the water level drops, two things happen. First, the flapper drops back into place and seals the opening to the bowl. Second, a float (either a big ball or a plastic cup) falls with the water level. That drop opens the fill valve, which lets fresh water into the tank. The fill valve does two jobs at once: most of the water goes into the tank, but a small stream also runs through a thin refill tube and down the overflow tube to refill the bowl. As the tank fills, the float rises with it. Once the float hits its preset height, it shuts off the fill valve. Then the toilet sits there quiet as a mouse until the next flush. If it’s running, something in that cycle’s off.
Step-by-Step Fix
Before you start, turn off the water supply to the toilet using the small valve on the wall or floor behind it. Flush the toilet once to empty the tank. Keep an old towel nearby for drips—there’s always a couple.
1. Check the Refill Tube
- Tools: None
- Safety: The water is clean.
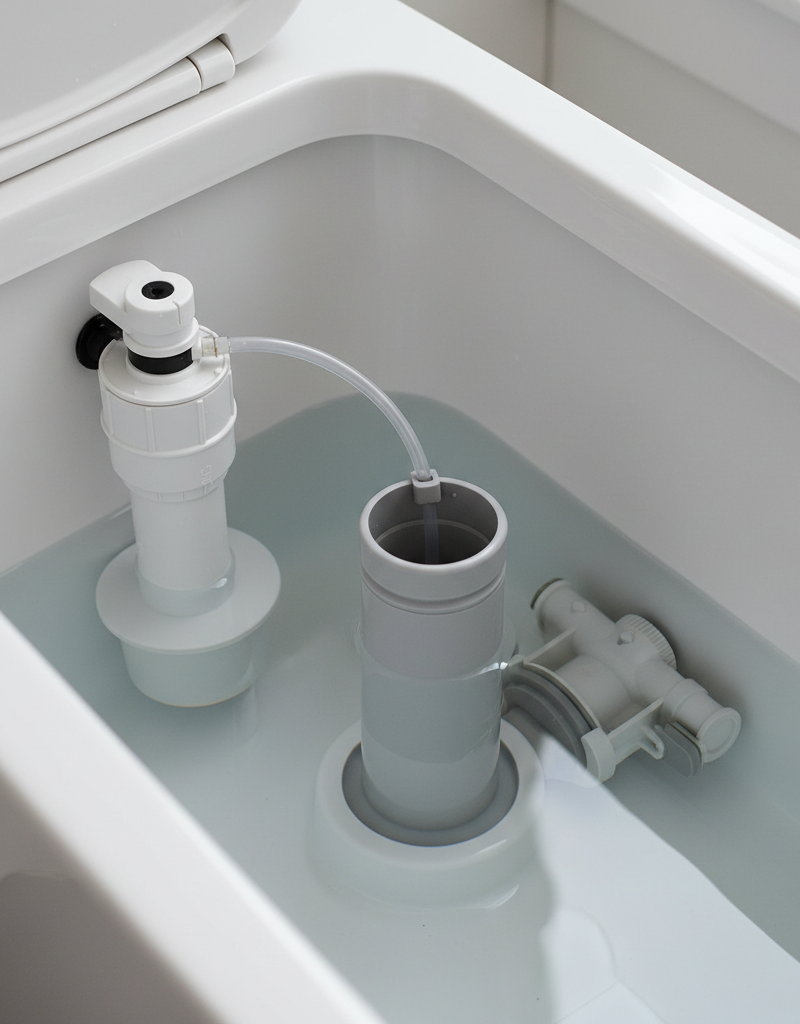
The thin refill tube clips to the top of the tall plastic overflow tube. It needs to sit above the water level in the tank. If the end of the tube is shoved down inside the overflow tube below the water line, it can create a siphon effect and slowly pull water out of the tank, which makes the toilet run. I pulled a water heater in Frisco last month that had exactly this kind of sneaky siphon issue—same idea, different fixture. Just pull the tube out, trim it so it sits about 1/2 inch above the overflow tube opening, and clip it back in place.
2. Inspect the Flapper
- Tools: Fingers, maybe a new flapper
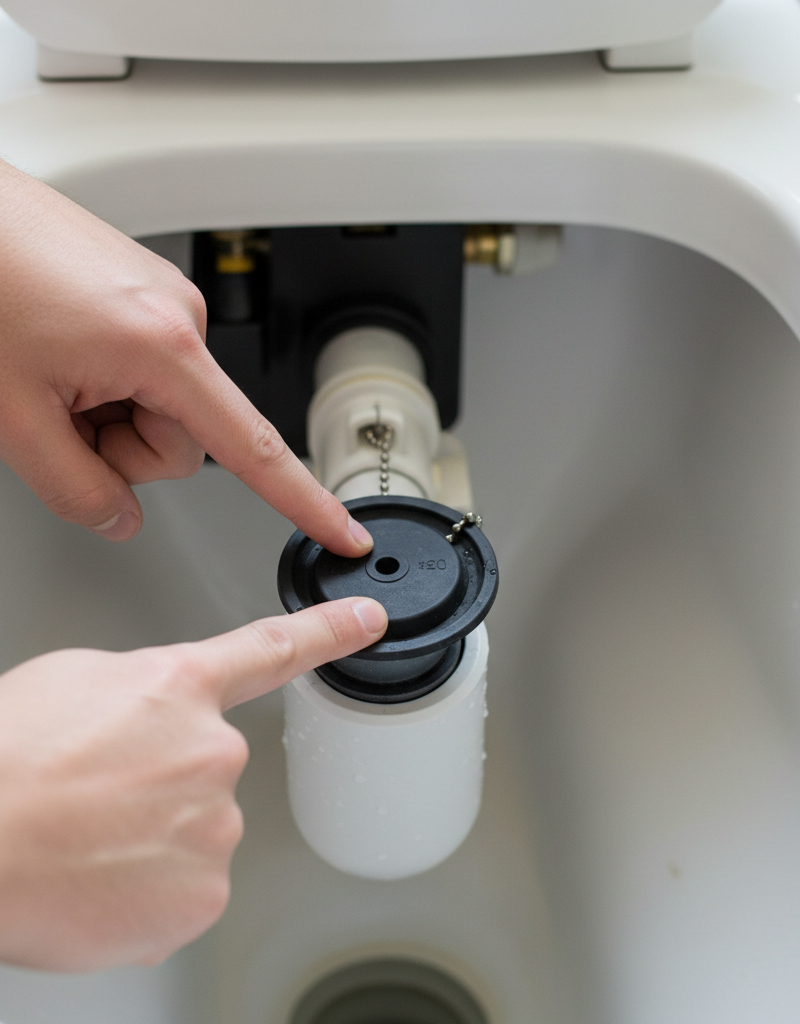
With the tank empty, run your finger around the flapper and the valve seat it rests on. Feel any warping, brittleness, or crusty mineral buildup? Old flappers break down and stop sealing right. Sometimes you can get by with a good wipe-down. If it looks worn out, that thing’s toast. New ones usually run about $5–$10, and this is the most common reason a toilet keeps running. Just make sure you grab the right type for your toilet model (e.g., 2-inch or 3-inch).
3. Test the Flapper Chain
- Tools: None
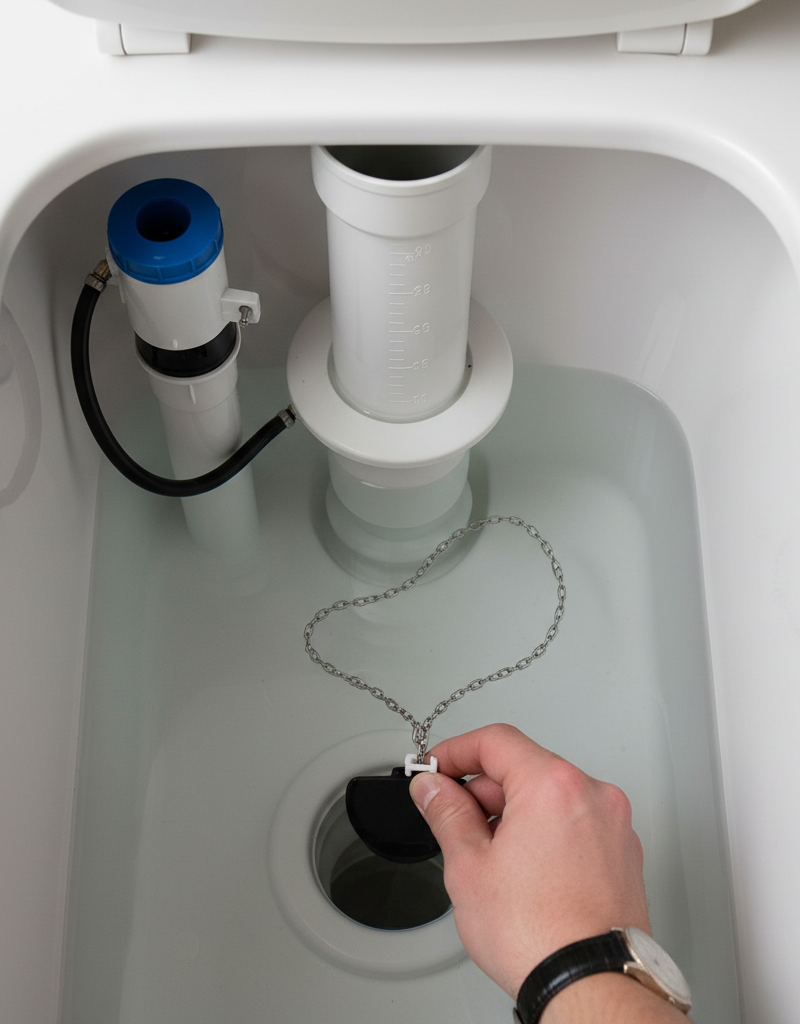
The chain between the flush handle lever and the flapper needs a little slack—about 1/2 inch. Too much slack, and it can get hung up under the flapper and mess up the seal. Too little, and it’ll hold the flapper open just a hair, which leaks water. Adjust the clip on the chain until it’s just right. No need to overthink it.
4. Adjust the Float Height
- Tools: Screwdriver or your fingers
If the tank water level is too high, it’ll spill right over the top of the overflow tube. That’s a float issue. On older ball-style floats, there’s usually a screw on top of the fill valve where the arm connects; turning it counter-clockwise lowers the ball and drops the water level. On modern cup-style floats, you’ll either find a similar screw or a clip you can pinch and slide to lower the float cup. The right water level is usually marked on the inside of the tank or should be about 1 inch below the top of the overflow tube.
5. Check for a Leaky Fill Valve
- Tools: A few drops of food coloring (optional)
If you’ve done all that and the toilet still runs off and on, the fill valve itself might be leaking. To test it, make sure the tank is full. Put a few drops of food coloring into the tank water. Don’t flush. Wait 20-30 minutes. If colored water shows up in the bowl, you’ve got a slow leak from the flapper. If the bowl water stays clear but you hear the toilet kick on every now and then, the fill valve’s probably bleeding water into the tank, raising the level until it spills into the overflow—your fill valve needs replacing.
6. Clean the Flush Valve Seat
- Tools: Scouring pad (non-scratch)
Sometimes the flapper’s fine, but the plastic or brass ring it seals against—the flush valve seat—is dirty. Mineral buildup or grit can rough up the surface and keep it from sealing clean. With the water off and the tank empty, remove the flapper and scrub the seat with a non-scratch scouring pad until it feels smooth.
7. Replace the Fill Valve
- Tools: Wrench, bucket, new fill valve kit
If the fill valve’s bad, it’s time to replace it. A full fill valve kit usually costs about $15–$25. After shutting off the water and emptying the tank, use a sponge to get the last bit of water out. Set a bucket under the supply connection. Unscrew the locknut on the outside of the tank (underneath) that holds the fill valve in place, and disconnect the supply line too. The old valve lifts right out. Install the new one by the manufacturer’s instructions—it’s a straightforward swap.
8. Replace the Entire Flush Valve Assembly
- Tools: Wrench, sponge, new flush valve kit
This is the biggest job here, and it means pulling the tank off the bowl. If the flush valve seat itself is cracked or badly corroded, you’ll need to replace the whole center assembly, overflow tube and all. That’s a more advanced DIY job. You’ve got to unbolt the tank from the bowl, replace the assembly, then bolt it back together with fresh tank-to-bowl bolts and gaskets. If that sounds like too much hassle, yeah—call a plumber.
Common Causes
- Worn-Out Flapper: The #1 culprit. Rubber breaks down over time, especially in water with a lot of chlorine.
- Incorrect Float Height: Set too high, water keeps overflowing. Set too low, and the flush gets weak.
- Improper Refill Tube Length: A tube that’s too long and sits in the overflow pipe water will siphon water out of the tank.
- Tangled or Incorrectly Sized Flapper Chain: Too much or too little slack keeps the flapper from sealing the way it should.
- Leaky Fill Valve: A slow internal leak in the fill valve can overfill the tank and keep it running.
- Dirty Valve Seat: Mineral deposits or debris on the seat where the flapper seals.
Common Mistakes
- Buying the Wrong Flapper: There are 2-inch and 3-inch flappers, plus specific styles for certain toilet brands. Take the old one with you and match it up.
- Setting the Water Level Too High: That wastes water and causes a lot of running toilets. Always aim for about 1" below the top of the overflow tube.
- Stretching the Refill Tube: Don’t try to force a short refill tube to reach; make sure the clip holds it securely above the overflow pipe opening.
- Over-tightening Connections: Plastic nuts and bolts can crack if you crank them down too hard. Hand-tight plus a quarter-turn with a wrench is usually enough.
- Ignoring a Small Leak: That little hiss might seem harmless, but it’s costing you money every minute. Take care of it sooner rather than later.
Cost & Time Breakdown
| Task | DIY Cost | Pro Cost | Time |
|---|---|---|---|
| Adjust Float/Chain/Tube | $0 | $80–$150 (min.) | 5 minutes |
| Replace Flapper | $5–$15 | $100–$180 | 15 minutes |
| Replace Fill Valve | $15–$25 | $150–$250 | 30–45 minutes |
| Replace Flush Valve | $20–$40 | $200–$350 | 1–2 hours |
| Replace Entire Toilet | $200–$500+ | $400–$800+ | 2–4 hours |
Tips & Prevention
- Drop Test: Once a year, put a few drops of food coloring in your toilet tank. Wait 30 minutes without flushing. If color shows up in the bowl, you’ve got a flapper leak.
- Look for Longevity: When you buy a replacement flapper, look for models made to resist chlorine and hard water.
- Know Your Water Shutoff: Make sure everybody in the house knows where the toilet’s water shutoff valve is and how to turn it (usually clockwise).
- Don't Use In-Tank Cleaners: Those blue tablets that sit in the tank can cut the life of your flapper and other rubber/plastic parts way down.
- Check the Water Level: Every few months, just lift the lid and eyeball the water level. Is it still about an inch below the overflow tube?
When to Call a Professional
Most running toilet issues are perfect for a DIY fix. Still, you should call a licensed plumber if you spot any of these signs. If the shutoff valve behind the toilet is frozen, corroded, or leaks when you try to turn it, stop right there. A busted valve can turn into a major flood in a hurry. If you see water pooling on the floor around the base of the toilet, especially after you’ve replaced parts, it could mean a cracked bowl, a bad wax ring seal, or an over-tightened bolt—all of which are more involved repairs. And if you’ve swapped out all the internal parts and the toilet still runs, it’s time for a pro to figure out what’s going on.
Related Articles
Keep troubleshooting with these hand-picked guides from FixlyGuide:
- The Hard Water Secret: Why Your Shower Head Sprays Sideways (and the 10-Minute Fix) — Hard water mineral buildup can reduce shower head pressure and cause erratic spray patterns. Learn how to restore flow and direction in und…
- The Grimy Secret Under Your Bathroom Sink: Why Your Faucet Is Slow — A slow-flowing bathroom faucet is often more than just an annoyance; it's a clear sign of mineral buildup or internal damage that's surpris…
- Why Your New Inductor Cooktop Won't Turn On (And the Easy Fix) — Don't panic if your new induction cooktop isn't firing up after installation; it's a common issue with a straightforward electrical cause.
- Why Is My New Paint Cracking? 9 Causes of 'Alligatoring' and How to Fix It — Seeing fine, alligator-skin cracks in your new paint? It's a common problem called 'alligatoring'—here are the nine most likely causes and…
- The Nasty Truth About Your Slow Kitchen Drain (And How to Unclog It for Free) — Don't let a sluggish kitchen sink drain ruin your day—most clogs are easy fixes with common household items, saving you a costly plumber's…
- Window Won't Lock? 6 Reasons It's Misaligned—and How to Fix It — Can't get your window to lock? It's usually a simple alignment issue you can fix yourself in under 30 minutes with a few basic tools.
Should you do this yourself?
Answer five quick questions before you start. Safety outranks savings every time.
Your experience with work like this
How high do you have to work?
Does the job involve any of these?
Will it need a permit?
Specialty tools
Free and instant. Educational guidance only — not a quote, inspection, or professional diagnosis.
What should this project cost?
Enter your project details for a realistic cost range before you call anyone.
Common repairs run $150–$650; repipes and water-heater replacements reach $1,500–$4,500.
- Regional adjustment
- National average
- Labor share (typical)
- ~$754
- Quotes to collect
- 3 written estimates
Educational estimate based on national averages — not a binding quote. Always confirm with written local estimates.
Fixly Project Decision Box
- DIY difficulty
- Moderate
- Estimated time
- 30 minutes – half a day
- Cost level
- Moderate
Main tools / materials
- Adjustable wrench
- Plunger or drain auger
- Bucket and towels
- Thread tape
When to stop and call a pro
- Water you cannot shut off at the fixture or main
- Sewage backing up into more than one fixture
- Water near electrical panels or outlets
- Gas water heater work beyond relighting a pilot
Need professional help?
Get a Licensed PlumberRecommended for DIYers & woodworkers
Sponsored
The Top 20 Tools for Workshops of Any Budget
No stationary machines or power tools required — plus 3 fundamental tools that can't be bought at any price.
Get the free guide
Ted's Woodworking — The #1 Woodworking Resource
Detailed instructions, dimensioned drawings, materials & cutting lists, and 3D schematics for every skill level.
See the plansSponsored: links above are affiliate links. FixlyGuide may earn a commission on qualifying purchases — at no extra cost to you.
Frequently asked questions
Why does my toilet run for a few seconds every 10 minutes?+
This is called a 'phantom flush' and is almost always caused by a slow leak from a worn-out or dirty flapper. Water seeps from the tank into the bowl, the water level drops, and the fill valve kicks on briefly to refill the tank. Replacing the flapper usually solves this.
Can I just use one of those blue cleaning tablets in my tank?+
It's best not to. Those tablets often contain harsh chemicals like bleach that can corrode the rubber flapper and other plastic parts in your tank, causing them to fail much faster. This can actually cause the leaks you're trying to prevent.
How do I know if I need a 2-inch or 3-inch flapper?+
Most toilets made before 2005 use a 2-inch flapper. Most newer, high-efficiency toilets use a 3-inch flapper to allow for a faster, more powerful flush with less water. The best way to be sure is to turn off the water, flush, and measure the drain opening or take the old flapper with you to the hardware store.
Is it worth it to repair an old toilet, or should I just buy a new one?+
If your toilet was made before the mid-1990s, it might be using 3.5 gallons per flush or more. A new EPA WaterSense toilet uses just 1.28 gallons. In that case, replacing it could save you over $100 a year on your water bill, so a new toilet will pay for itself in a few years.
What happens if the refill tube is not in the overflow pipe?+
The refill tube has a critical job: it refills the toilet bowl with water after a flush. If it's not clipped in place and aimed down the overflow tube, the bowl won't get enough water, leading to a weak flush and potential clogs. Always make sure it's secure.
The screws holding my tank to the bowl are rusty. What should I do?+
Rusty bolts are a common problem. If you need to remove the tank, spray them with penetrating oil and let them sit for an hour. If they still won't budge or if they break, you'll need to cut them off with a mini-hacksaw. Always use a new set of tank bolts with rubber gaskets when you reassemble.
My toilet makes a loud 'bang' when it finishes filling. What is that?+
That sound is likely a 'water hammer.' It happens when the fill valve shuts off abruptly, causing a shockwave in your plumbing pipes. You can often fix this by installing a water hammer arrestor on the water supply line, or by slightly closing the water supply valve to reduce the flow speed.
Why is there condensation all over my toilet tank?+
This happens in humid weather when the cold water inside the tank cools the outside of the porcelain, causing moisture in the air to condense on it. While not a running toilet issue, it can be a problem. You can try a toilet tank liner kit or, in severe cases, have a plumber install a mixing valve to slightly warm the water entering the tank.
Discussion
Loading comments…