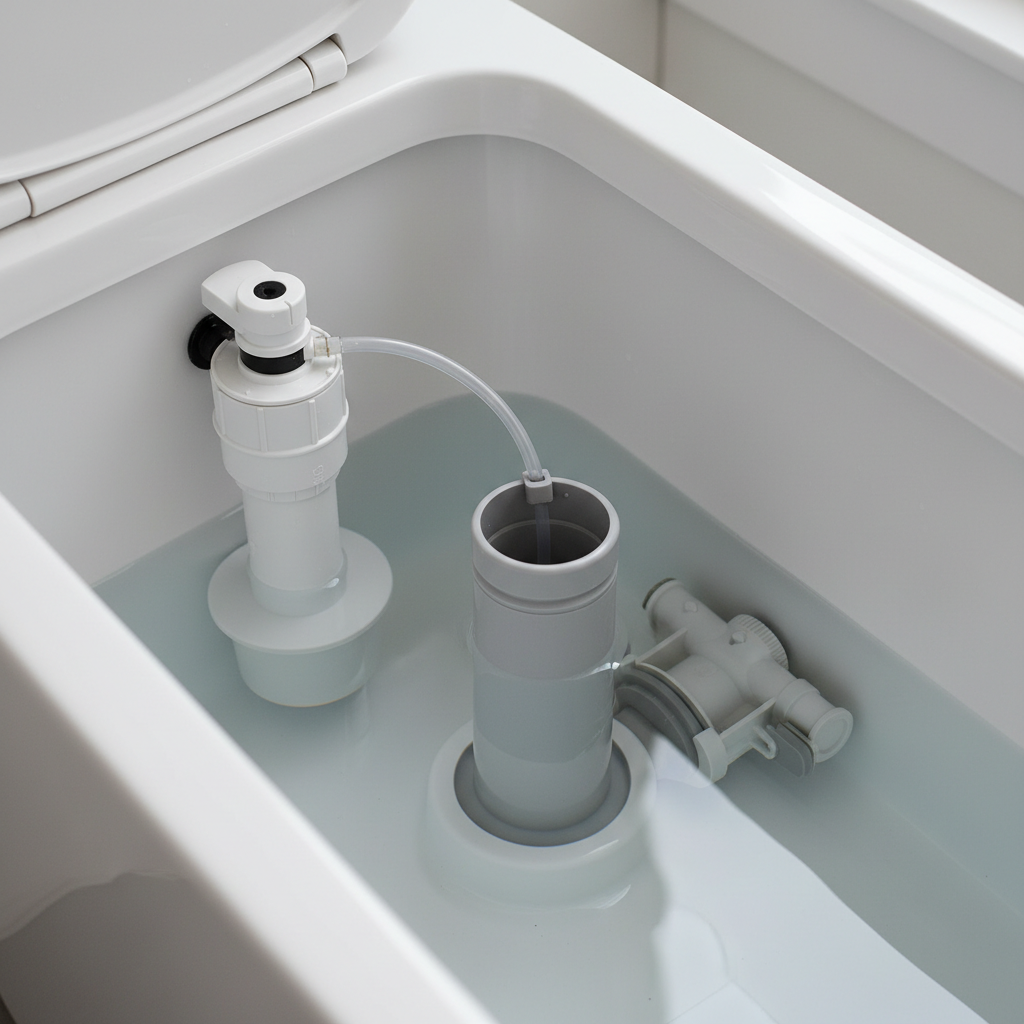
- Misadjusted Float: The float mechanism is set too high, causing water to fill past the overflow tube and constantly cycle out. This is probably 70% of the running toilet calls I get.
- Worn or Damaged Fill Valve Seal: Over time, the rubber gasket inside the fill valve can wear out, collect mineral deposits, or get torn, so it won’t shut off clean.
- Old or Deteriorated Flapper: Rubber flappers can get stiff, warped, or cracked, and once that seal’s bad, you’re chasing your tail. Hard water absolutely chews these up.
- Kinked or Misplaced Refill Tube: If the small refill tube siphons water from the tank continuously, even a perfectly good fill valve will look like it’s running.
- Sediment or Debris: Little particles from the water supply can get lodged in the fill valve’s mechanism and stop it from closing fully.
Plumbing · Leak
| Project category | Plumbing |
|---|---|
| Problem type | Leak |
| Trade required | Plumbing |
| Urgency | Emergency — act now |
| Safety risk | High safety risk |
| DIY suitability | DIY for experienced homeowners |
| Cost category | Low cost |
| Typical timeline | Shut water off now; repair usually same or next day |
| Contractor type | Licensed plumber |
Repair option
Isolate at the shutoff, replace the failed component, and dry the cavity fully.
Replacement option
Repipe the run or the branch when corrosion is widespread.
Common causes
- Failed supply line or shutoff valve
- Worn washers, cartridges, or P-trap connections
- Pinhole corrosion in older copper
Relevant tools:emergency checklistdiy or hire a pro
Published July 26, 2026Last updated August 17, 2026
Tools & materials you'll need
Affiliate linksAs an Amazon Associate FixlyGuide earns from qualifying purchases — at no extra cost to you. Prices and availability are accurate as of publication and subject to change.
Quick Answer
That constant hiss and trickle from your toilet — what we pros call a "phantom flush" — usually points to one main suspect: the fill valve. Folks love to blame the flapper first, and sure, sometimes it is. But more often, that tall plastic tower on the left side of your tank is the one causing the grief. It might be out of adjustment, letting water sneak past when it shouldn’t, or the seal inside it’s gunked up or worn out. A small tweak or a simple part swap usually shuts the thing up and keeps a little money in your pocket on the next water bill.
The Problem
You know the sound: that soft, steady hiss, maybe followed by a full refill cycle, even though nobody’s touched the handle. It’s not just irritating. It’s water and money going right down the drain — sometimes hundreds of gallons a day. I’ve been on calls where a homeowner’s bill jumped $50 or more in a single month because a toilet was quietly running in the background. Most people point straight at the flapper, and sometimes they’re dead on, especially if it’s old and brittle. But more often than not, when the toilet keeps running like it’s got something to prove, the real problem is the fill valve and how it’s managing the tank level. If that valve doesn’t shut off clean when the water hits the right mark, it just keeps trying to fill, sending extra water up and over the overflow tube and right into the bowl. Endless loop. No dice.
How It Works
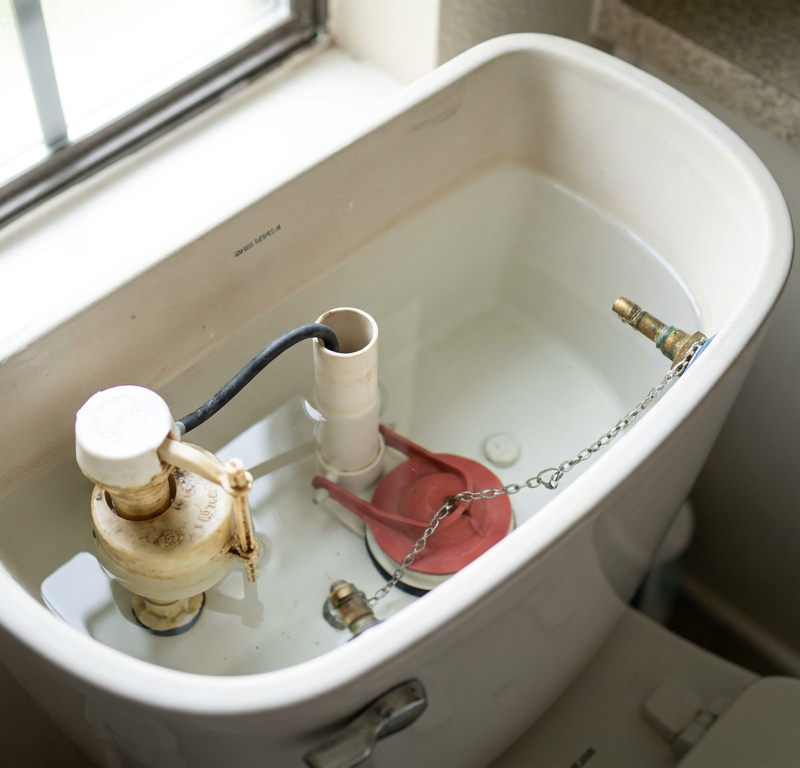
Alright, let’s crack open that porcelain lid and see what’s going on in there. You’ve got three main players in the tank: the flush valve, the fill valve, and the float mechanism. When you flush, the flush valve — where the flapper lives — lifts up and lets tank water rush into the bowl, starting the siphon that clears everything out. Once the tank empties, the flapper drops back down and seals the tank off from the bowl.
Then the fill valve jumps in. That’s the vertical assembly, usually on the left side of the tank, tied into your water supply line. As the tank refills, the water level rises and lifts a float. Older toilets usually have a big ball float hanging off a rod. Newer ones tend to use a little cup-style float riding up and down on the fill valve shaft. Either way, once the water gets high enough, that float pushes a lever or cam inside the valve and shuts the water off. A small refill tube also sends a bit of water into the overflow pipe during all this, which helps refill the bowl to the right level.
That cutoff point is the whole ballgame. If the float isn’t set right — or if the fill valve itself is tired, stuck, or loaded up with grit — it won’t shut off all the way. Water keeps creeping in, or it rises too high and spills over the overflow tube, then the tank starts trying to refill again. That’s your running toilet, plain and simple. I’ve pulled plenty of Korky and Fluidmaster valves that’d had it after years of hard water beating on ’em. Sometimes it’s an easy adjustment. Sometimes you’ve gotta replace the whole assembly and call it a day.
Step-by-Step Fix
Before you start, turn off the water to the toilet! There’s usually a small chrome shut-off valve on the wall or floor behind the toilet, to the left. Turn it clockwise until it’s snug. Then flush the toilet to empty the tank.
-
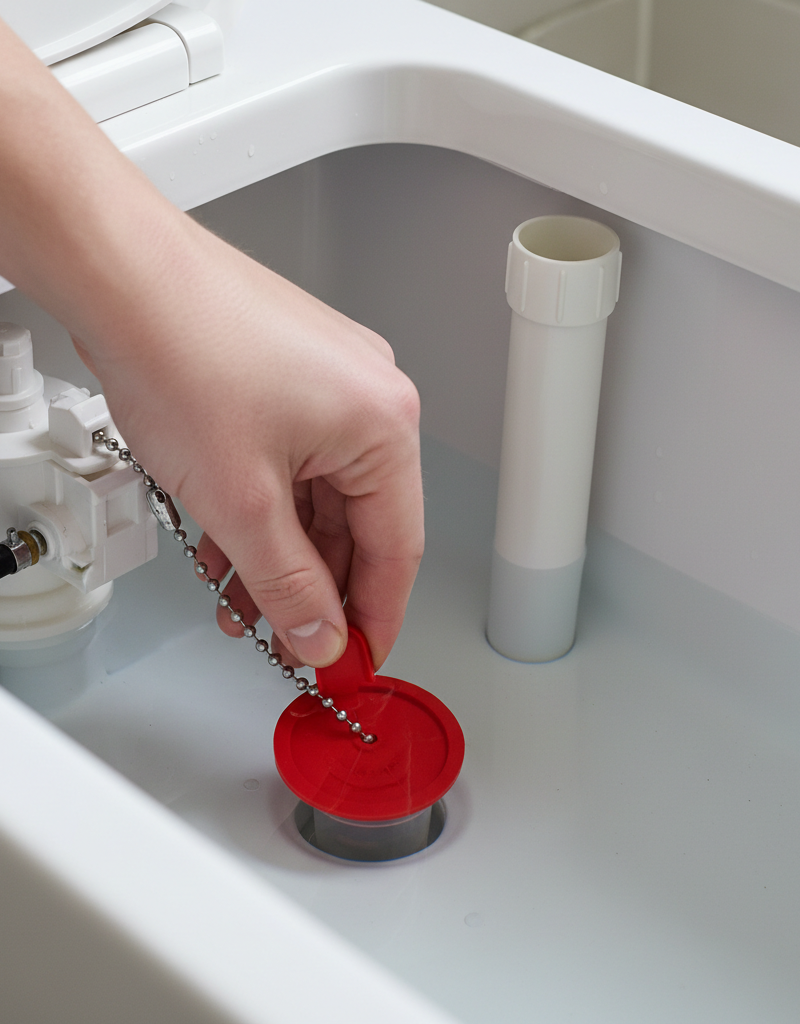
Inspect the Flapper and Chain — Check the flapper first. It’s that rubber or plastic disc/cup at the bottom opening of the tank. Look for cracks, warping, or deterioration. Make sure the chain connecting it to the flush handle isn’t too tight (holding it open) or too loose (getting caught). There should be about 1/2 inch of slack in the chain when the flapper is seated.
- If it seems okay: Move on to the next step. Flapper issues usually make for a slow leak, not a tank that keeps refilling nonstop.
-
Adjust the Fill Valve Float — This is the most common fix. The fill valve has a float that tells it when to stop filling. In most modern toilets, you’ll see a small clip or screw adjustment on the top of the fill valve stem (the main tower). You want the water level to be about 1 inch below the top of the overflow tube. If the water level is higher, it’s just spilling over.
- For cup-style floats: Look for a metal clip or plastic screw on the side of the fill valve stem. Squeeze the metal clip or turn the screw to move the float cup down. That makes the fill valve shut off sooner. I usually aim for the water line to be right around the 'fill line' often molded into the tank or about an inch from the top of that central overflow pipe. Most Korky and Fluidmaster units adjust this way.
- For ball-and-rod floats (older toilets): Bend the metal rod gently downwards. That lowers the ball and makes the valve shut off sooner. Take it easy — you don’t want to snap the rod.
-
Check the Refill Tube — The small, flexible tube running from the top of the fill valve into the overflow tube needs to be aimed down into the overflow tube, but not shoved too far down, or it can siphon water out. Make sure it’s not kinked and that water is flowing into the overflow tube, but not past the top opening of the overflow tube itself. If it’s too low, it can create a siphon that keeps the tank draining. It should terminate above the static water level in the overflow tube.
-
Inspect the Fill Valve Seal — If adjusting the float doesn’t work, the internal seal in the fill valve might be the problem. Turn off the water again and flush the toilet. Most fill valves can be partially disassembled. For common Fluidmaster 400A models, you can typically twist the cap counter-clockwise about an eighth of a turn and lift it off. Underneath, you’ll find a small rubber diaphram seal.
- Look for: Debris, mineral buildup, or tears in the seal. Clean it with a soft brush or a little vinegar. If it’s torn, you’ll need a replacement fill valve repair kit, which usually just includes this small gasket. It’s a cheap part, usually under five bucks.
- Reassemble: Place the clean or new seal back in, align the cap, and twist it clockwise until it locks. Turn the water back on slowly and check for leaks and proper operation.
-
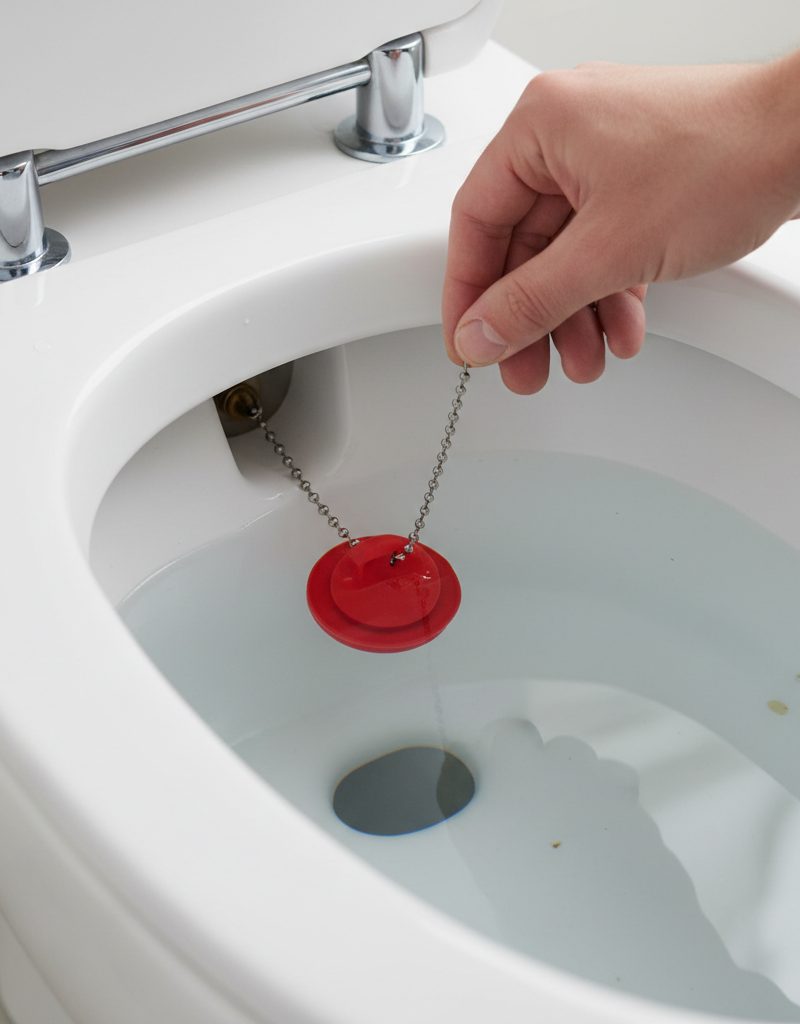
Identify if the Flapper is the True Culprit (Dye Test) — If you’re still not sure whether it’s the flapper or the fill valve, here’s how to tell. Drop a few drops of food coloring (dark blue or green works best) into the tank water. Wait about 15-20 minutes without flushing. If you see colored water appear in the toilet bowl, then your flapper isn’t sealing properly, and that’s where your water is going. If the bowl water stays clear, then the fill valve is the issue, causing water to go down the overflow. I use this trick all the time; it’s foolproof.
-
Replace the Flapper (if necessary) — If the dye test showed a flapper leak, you’ll need to replace it. Turn off the water and flush to empty the tank. Disconnect the old flapper from the chain and unhook it from the pegs on the flush valve. Take the old one to the hardware store to find an exact match. Universal flappers exist, but getting the right one designed for your toilet’s gallons-per-flush (GPF) rate is best. Install the new flapper, adjust the chain for about 1/2 inch of slack, and turn the water back on.
-
Replace the Entire Fill Valve (if all else fails) — If you’ve tried all the adjustments and cleaning, and the fill valve still isn’t shutting off, it’s time for a new one. This is a moderate DIY job. You’ll need to turn off the water, flush and sponge out all the remaining water from the tank. Disconnect the supply line from the bottom of the toilet tank, then loosen the large nut holding the fill valve in place under the tank. Pull the old one out, insert the new one, tighten the nut (hand-tight, then a quarter turn with channel locks—don't overtighten and crack the tank!), reconnect the supply line, and turn the water back on slowly. Adjust the float as in Step 2. A good quality fill valve like a Fluidmaster 400A or Korky will set you back about $20-30 and typically takes me about 30-45 minutes on a standard install. Just last month, I swapped one out in a 1980s Kohler in a house over in Maplewood after the old one's plastic parts had gone so brittle they couldn’t hold a seal anymore. New valve fixed it right up, quiet as a mouse.
Common Causes
- Misadjusted Float: The float mechanism is set too high, causing water to fill past the overflow tube and constantly cycle out. This is probably 70% of the running toilet calls I get.
- Worn or Damaged Fill Valve Seal: Over time, the rubber gasket inside the fill valve can wear out, collect mineral deposits, or get torn, so it won’t shut off clean.
- Old or Deteriorated Flapper: Rubber flappers can get stiff, warped, or cracked, and once that seal’s bad, you’re chasing your tail. Hard water absolutely chews these up.
- Kinked or Misplaced Refill Tube: If the small refill tube siphons water from the tank continuously, even a perfectly good fill valve will look like it’s running.
- Sediment or Debris: Little particles from the water supply can get lodged in the fill valve’s mechanism and stop it from closing fully.
- Corroded Flush Handle: Sometimes the handle linkage gets sticky or corroded, keeping the flapper from dropping all the way back into place.
Common Mistakes
- Blaming the Flapper Automatically: Too many homeowners spend time and money swapping the flapper when the fill valve’s the real problem. Do the dye test first!
- Overtightening Connections: When installing a new fill valve or reconnecting the supply line, overtightening plastic nuts can crack the toilet tank or the plastic threads on the valve pretty fast, and then you’ve got a much bigger headache. Hand-tight plus a quarter turn with a wrench is usually enough.
- Ignoring the Water Level: If you don’t set the water level right — about 1 inch below the overflow tube — you’re just asking for trouble. That goes for adjustments and brand-new valve installs.
- Using the Wrong Flapper: Universal flappers sometimes work, but matching the original flapper type and its GPF (gallons per flush) rating gives you better performance and better water savings. One-size-fits-all often means one-size-fits-none.
- Forgetting to Clean: Mineral deposits and gunk build up on seals and moving parts. A lot of times, a gentle cleaning does the trick instead of a full replacement.
- Not Turning Off the Water Supply: Always, always turn off the water to the toilet before doing any work inside the tank. You don’t want an unexpected fountain on your hands.
Cost & Time Breakdown
| Task | DIY Cost | Pro Cost | Time |
|---|---|---|---|
| Adjust Float or Refill Tube | $0 | $75 - $150 | 5 - 10 minutes |
| Replace Flapper | $8 - $20 | $85 - $175 | 15 - 30 minutes |
| Clean Fill Valve Seal | $0 | $75 - $150 | 15 - 20 minutes |
| Replace Fill Valve | $20 - $35 | $120 - $250 | 45 - 90 minutes |
| Complete Toilet Tank Repair Kit | $30 - $50 | $150 - $300 | 60 - 120 minutes |
Tips & Prevention
- Listen Actively: Pay attention to any odd sounds from your toilet. A faint hiss or gurgle can be the first clue you’ve got a running toilet before it turns into a full-blown phantom flush.
- Annual Dye Test: Once a year, do the food coloring dye test (mentioned in Step 5) to check for silent leaks from your flapper. Cheap insurance.
- Check the Chain Slack: Every so often, make sure your flapper chain has about 1/2 inch of slack. Too tight or too loose can give you trouble later.
- Clean Regularly: If you’ve got hard water, use a toilet tank cleaner made for tanks, not just the bowl, every few months to cut down on mineral buildup on internal parts, especially the fill valve seal.
- Inspect Rubber Components: When you clean, or if something seems off, give the flapper and any other rubber seals a quick look for cracks, warping, or loss of flexibility.
- Consider a Quality Fill Valve: If you’re replacing a fill valve, spending a few extra dollars on a solid brand like Korky or Fluidmaster usually buys you better longevity and quieter operation.
When to Call a Professional
Most running toilet problems are solid DIY work, but there are times you need a licensed plumber. If you’ve replaced both the flapper and the fill valve and the toilet still runs, something more complicated is going on — maybe water pressure, maybe an internal tank issue, maybe the porcelain itself. If you find continuous leaking from under the toilet base after working on it, or if you overtighten a nut and crack the tank or the porcelain, you’re past a simple fix. A cracked tank means a full toilet replacement, and that’s not a fun Saturday. Same goes for very old, corroded parts that won’t budge, or if you’re just not comfortable messing with water supply lines. A pro can knock it out quickly and cleanly without risking an unexpected flood. I’d rather you call me than crank down on a plastic nut like you’re changing a tire and end up with a hairline crack you don’t spot until the floor starts getting wet.
I always tell homeowners: if it feels like you’re about to break something, or if the leak won’t stop, just pick up the phone. A hundred bucks for a service call beats a new toilet and drywall repair, every time.
Related Articles
Keep troubleshooting with these hand-picked guides from FixlyGuide:
- The 30-Second Toilet Fix Plumbers Don't Want You to Know — A running toilet can waste hundreds of gallons of water per day, but often the fix is incredibly simple and takes under a minute.
- The $5 Flapper Trick Plumbers Hope You Don't Know About Your Running Toilet — Discover the secret $5 flapper trick that often fixes a running toilet, saving you money on parts and plumber call-outs.
- The $2 Trick to Stop a Running Toilet (Plumbers Don't Want You to Know) — Discover the simple, two-dollar fix that can stop your running toilet in minutes, saving water and preventing costly repairs.
- The $5 Secret to Silencing a Running Toilet (Plumbers Hope You Don't Know) — A running toilet is usually caused by a simple issue with the flapper or its chain, leading to constant water waste and higher utility bill…
- The Secret Culprit Behind Your Dishwasher's Standing Water (It's Not Always a Clog) — Don't assume a clog is the only reason your dishwasher isn't draining; often, the fix is simpler than you think.
- The Surprising Culprit Behind Your Wobbling Ceiling Fan (It's Not Always Loose Screws) — A wobbling ceiling fan is annoying and potentially dangerous. Learn how to diagnose and fix the most common causes, from imbalanced blades…
Should you do this yourself?
Answer five quick questions before you start. Safety outranks savings every time.
Your experience with work like this
How high do you have to work?
Does the job involve any of these?
Will it need a permit?
Specialty tools
Free and instant. Educational guidance only — not a quote, inspection, or professional diagnosis.
What should this project cost?
Enter your project details for a realistic cost range before you call anyone.
Common repairs run $150–$650; repipes and water-heater replacements reach $1,500–$4,500.
- Regional adjustment
- National average
- Labor share (typical)
- ~$754
- Quotes to collect
- 3 written estimates
Educational estimate based on national averages — not a binding quote. Always confirm with written local estimates.
Fixly Project Decision Box
- DIY difficulty
- Moderate
- Estimated time
- 30 minutes – half a day
- Cost level
- Moderate
Main tools / materials
- Adjustable wrench
- Plunger or drain auger
- Bucket and towels
- Thread tape
When to stop and call a pro
- Water you cannot shut off at the fixture or main
- Sewage backing up into more than one fixture
- Water near electrical panels or outlets
- Gas water heater work beyond relighting a pilot
Need professional help?
Get a Licensed PlumberGet the print-ready PDF of this guide
A clean, ad-free, printable version you can keep on your phone or pin to the workshop wall. Free with a FixlyGuide account.
- Print-optimized layout
- Tools, materials & every step included
- Saved to your account
Frequently asked questions
Why does my toilet keep running even after I flush?+
The most common reason is that the fill valve isn't shutting off properly, causing water to continuously flow into the tank and often spill into the overflow tube. It could also be a leaky flapper, but the fill valve is a more frequent culprit for constant running.
How do I know if it's the flapper or the fill valve?+
Perform a dye test. Add a few drops of food coloring to the tank water. Wait 15-20 minutes without flushing. If colored water appears in the bowl, the flapper is leaking. If the bowl water stays clear, the fill valve is the problem.
Where is the fill valve in my toilet tank?+
The fill valve is typically the tall, vertical plastic assembly located on the left side of your toilet tank, where the water supply line connects at the bottom. It often has a small float cup or a ball float attached to it.
How do I adjust the water level in my toilet tank?+
Most modern fill valves have a small clip or screw on the side of the stem that allows you to move the float cup up or down. Lowering the float makes the valve shut off earlier. Aim for the water level to be about 1 inch below the top of the overflow tube.
Can a running toilet cause a high water bill?+
Absolutely. A running toilet can silently waste hundreds of gallons of water per day, leading to a significant increase in your water bill. It's one of the most common causes of unexplained high water usage.
What's the overflow tube, and why is it important?+
The overflow tube is the vertical pipe in the center of your toilet tank. Its main purpose is to prevent the tank from overflowing onto your floor if the fill valve fails. Water can also run down this tube if your tank's water level is set too high.
How long does it take to fix a running toilet?+
Most minor adjustments, like lowering the float or checking the refill tube, can take as little as 5-10 minutes. Replacing a flapper might take 15-30 minutes, and a full fill valve replacement around 45-90 minutes for a DIYer.
Should the refill tube be submerged in water?+
No, the small refill tube that goes from the fill valve into the overflow tube should *not* extend below the static water level in the overflow tube. If it does, it can create a siphoning action that continuously drains water from the tank, making your toilet run.
When should I call a plumber for a running toilet?+
If you've replaced both the flapper and the fill valve and the toilet still runs, or if you encounter leaks under the toilet, crack the porcelain, or feel uncomfortable working with the water supply, it's best to call a licensed plumber to prevent further damage.
Discussion
Loading comments…