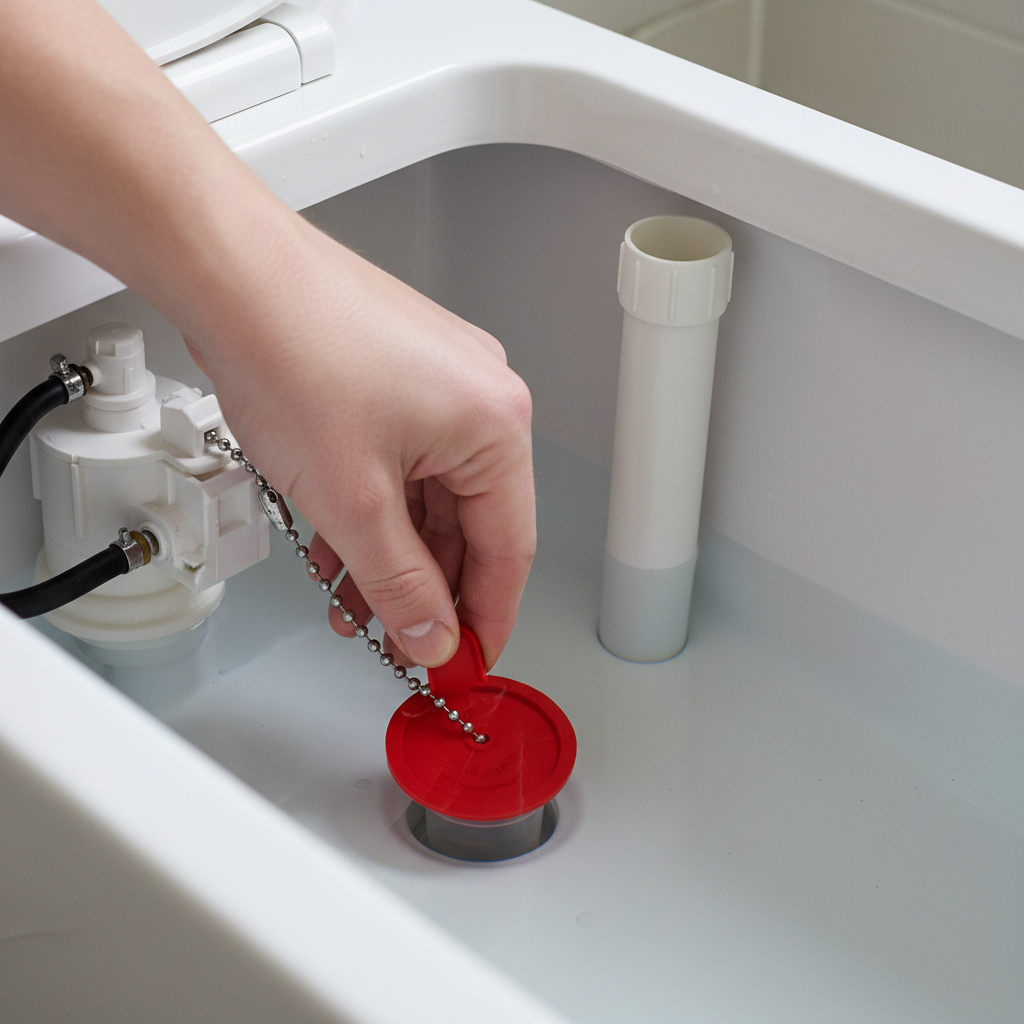
- Improper Flapper Chain Length: If the chain is too taut, it holds the flapper slightly open. If it’s too long, it can snag under the flapper, preventing it from closing fully.
- High Water Level: The float ball or cup is set too high, causing the water level to rise above the overflow tube. Water then continuously drains into the overflow tube and into the bowl.
- Faulty Fill Valve (Ballcock Assembly): The fill valve itself may be defective and not shutting off the water completely, even when the float reaches the correct level. This is less common but can happen due to internal wear or debris.
- Refill Tube Siphon Effect: If the refill tube is inserted too far into the overflow tube, it can sometimes create a continuous siphoning effect, perpetually draining the tank.
Plumbing · Leak
| Project category | Plumbing |
|---|---|
| Problem type | Leak |
| Trade required | Plumbing |
| Urgency | Emergency — act now |
| Safety risk | High safety risk |
| DIY suitability | DIY for experienced homeowners |
| Cost category | Low cost |
| Typical timeline | Shut water off now; repair usually same or next day |
| Contractor type | Licensed plumber |
Repair option
Isolate at the shutoff, replace the failed component, and dry the cavity fully.
Replacement option
Repipe the run or the branch when corrosion is widespread.
Common causes
- Failed supply line or shutoff valve
- Worn washers, cartridges, or P-trap connections
- Pinhole corrosion in older copper
Relevant tools:emergency checklistdiy or hire a pro
Published July 22, 2026Last updated August 17, 2026
Tools & materials you'll need
Affiliate linksAs an Amazon Associate FixlyGuide earns from qualifying purchases — at no extra cost to you. Prices and availability are accurate as of publication and subject to change.
Quick Answer
A running toilet that won't stop continuously drains water from the tank into the toilet bowl, often due to a poor seal from the flapper valve or an improperly set fill valve. The most common culprit is a flapper that has lost its flexibility, is misaligned, or has mineral buildup preventing a tight seal. Replacing the flapper or adjusting the chain length and fill valve height are usually quick and inexpensive fixes homeowners can perform themselves.
The Problem
You hear it – that faint, persistent hiss or gurgle coming from your bathroom. Or perhaps you walk in to find ripples in the toilet bowl water even when no one has flushed it recently. This isn't just an annoyance; it’s a silent drain on your wallet and a significant waste of water. A continuously running toilet can waste hundreds, even thousands, of gallons of water per day, leading to unexpectedly high water bills. Beyond the financial impact, it’s an inefficient use of a precious resource. Most homeowners immediately assume a complex internal issue, but more often than not, the problem lies with one of a few easily replaceable or adjustable components inside the tank.
The key to solving a persistently running toilet is accurate diagnosis. Is the water level too high, spilling into the overflow tube? Is the flapper failing to seal completely? Or is the fill valve itself not shutting off properly? Each scenario points to a slightly different fix, but all are well within the grasp of an average DIYer with basic tools and a little guidance. Ignoring a running toilet won't make it stop; it will only continue to drive up your water bill and stress your plumbing system unnecessarily.
How It Works
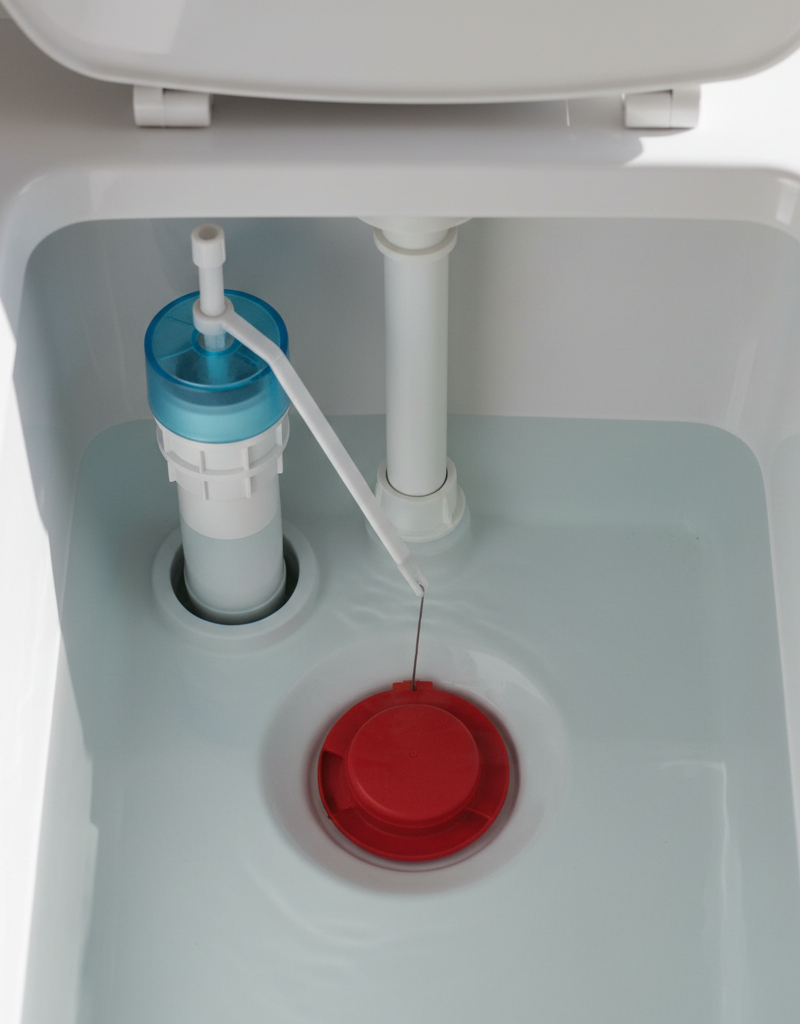
Understanding how your toilet's tank operates is crucial for troubleshooting. When you flush, the handle lifts a chain connected to the flapper valve (also called a tank ball or flush valve seal) at the bottom of the tank. This flapper opens, allowing water to rush from the tank into the bowl, initiating the siphoning action that clears waste. As the tank empties, the flapper falls back into place, sealing the tank outlet.
Simultaneously, the fill valve (also called a ballcock) senses the drop in water level via a float. Once the flapper reseals, the fill valve opens, refilling the tank with fresh water and also sending a small stream through a refill tube into the overflow pipe to replenish the bowl's trap seal. When the water level in the tank reaches the preset height, the float rises, triggering the fill valve to shut off the water supply. The overflow tube is a safety mechanism; if the fill valve malfunctions and overfills the tank, excess water flows into this tube and harmlessly into the bowl, preventing water from spilling onto your bathroom floor. A running toilet means one of these components – the flapper, the fill valve, or the float – isn't performing its job correctly, leading to a constant flow or seepage of water.
Step-by-Step Fix
Before you begin any work, turn off the water supply to the toilet. Look for the shut-off valve on the wall or floor behind the toilet, usually a small chrome or plastic handle. Turn it clockwise until it stops. Flush the toilet to empty the tank and bowl, then sponge out any remaining water from the tank to get a clear view of the components.
1. Test the Flapper Seal – The most common culprit
Drop a few drops of food coloring or a dye tablet into the toilet tank (not the bowl). Wait 15-20 minutes without flushing. If color appears in the toilet bowl, your flapper valve is leaking. This is the most common reason for a running toilet.
2. Adjust the Flapper Chain – Too tight or too loose can cause issues
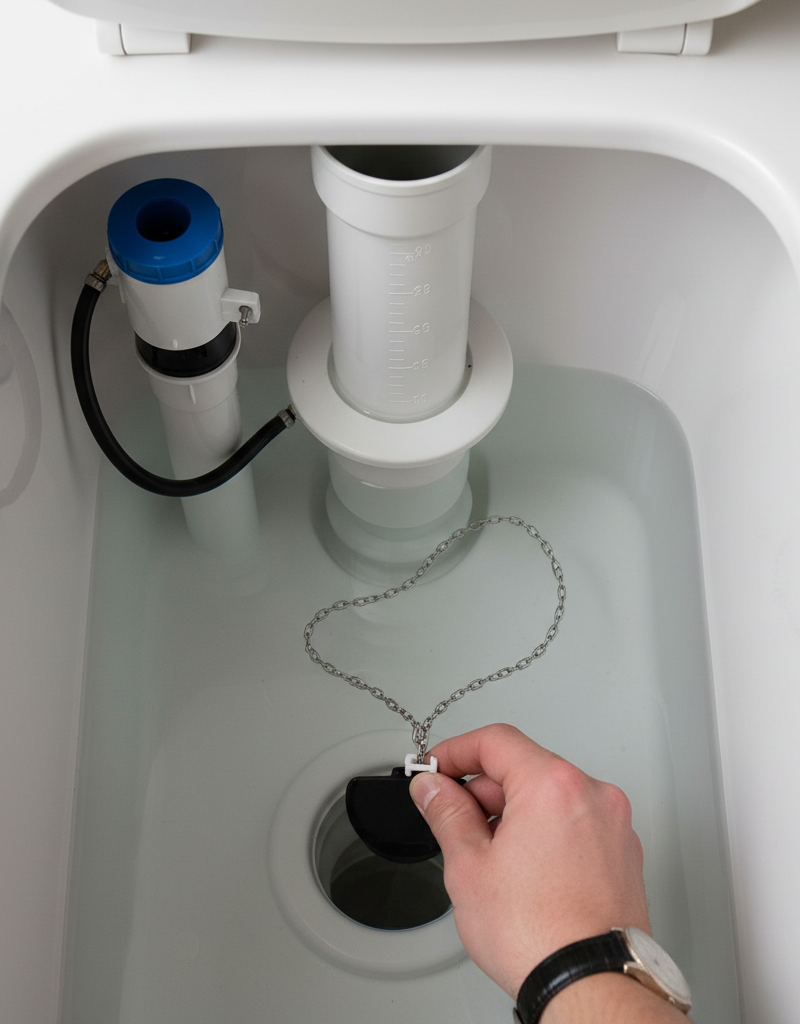
If the flapper chain is too short, it might not allow the flapper to seal completely. If it's too long, it can get caught under the flapper. There should be about 1/2 to 1 inch of slack in the chain when the flapper is closed. Adjust the chain length using the hook to a different hole in the flush lever arm.
3. Inspect and Clean the Flapper – Mineral buildup can prevent a good seal
Carefully remove the old flapper. Some flappers clip onto ears on the overflow tube, while others have a ring that slides over the bottom of the overflow tube. Inspect the flapper for signs of wear, cracks, stiffening, or mineral buildup. Clean any visible buildup from the flapper and the flush valve seat (the opening the flapper covers) with a non-abrasive scrubber. Reseal the flapper and retest. If it still leaks, replacement is likely needed.
4. Replace the Flapper – An inexpensive and effective fix
Take your old flapper to a hardware store to ensure you get a compatible replacement. Modern universal flappers often work, but matching the brand (Fluidmaster, Kohler, TOTO) can ensure the best fit. Install the new flapper according to the manufacturer's instructions, ensuring a snug fit over the flush valve seat and proper chain length. Turn the water back on, let the tank fill, and retest with food coloring.
5. Adjust the Fill Valve Float – Water level too high means constant overflow
If the water level in the tank consistently rises above the overflow tube or comes within an inch of the top of the tube, the float mechanism on your fill valve needs adjustment. The water level should typically be about 1/2 to 1 inch below the top of the overflow tube.
- For older ballcock-style fill valves with a float ball: Bend the metal float arm gently downward until the water shuts off at the correct level.
- For newer vertical float cup-style fill valves: There will be an adjustment screw or a clip on the vertical shaft. Turn the screw or slide the clip to lower the float cup, which will in turn lower the water shut-off point.
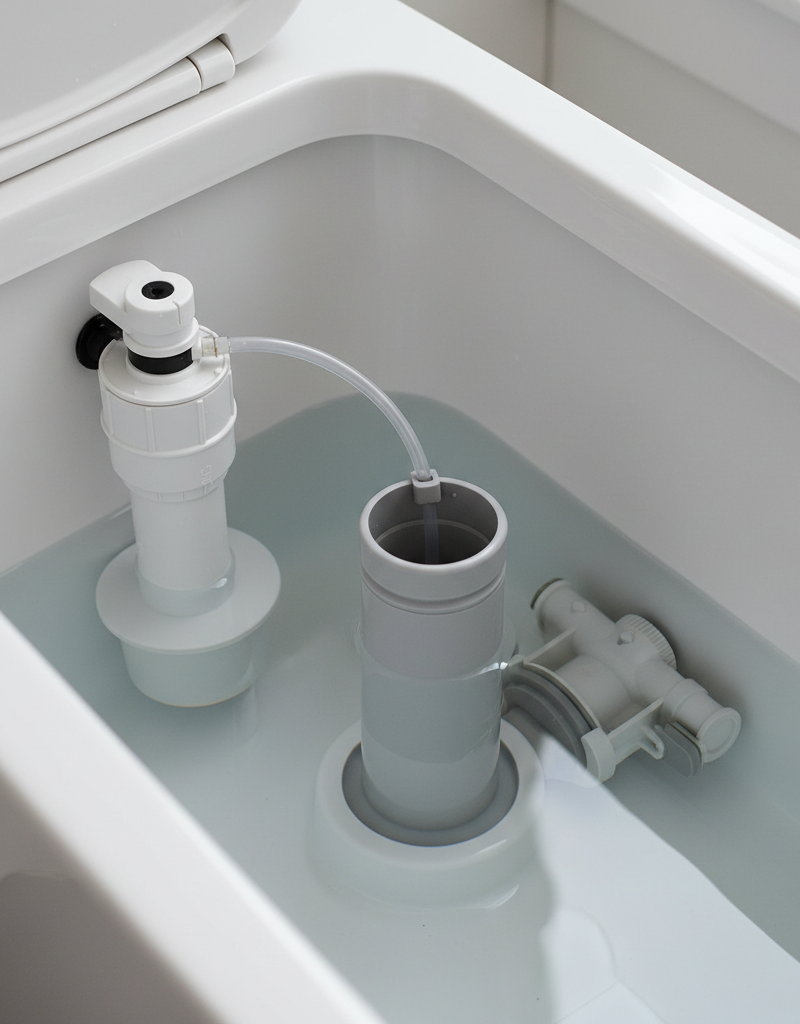
6. Check the Fill Valve Refill Tube – Improper placement can create a continuous siphon
The small refill tube from the fill valve should be directed into the overflow tube, but not pushed too far down. It should ideally be positioned just above the opening of the overflow tube. If it’s submerged or creating a continuous siphon, it could cause the toilet to run intermittently. Trim it if necessary so it directs water without dipping into the overflow water.
7. Flapper Seating During Refill – Water pressure can push it open
Sometimes, as the tank refills, the initial rush of water can slightly lift or unseat a perfectly good flapper before the tank is full. One trick is to lightly hold the flapper down until the tank has mostly refilled. If this stops the running, you might have strong water pressure or a flapper that's just on the edge of its service life. Ensure the chain has enough slack and the flapper is properly seated. If the problem persists, try a heavier or rigid flapper if your toilet type allows.
Common Causes
- Worn or Damaged Flapper Valve: The most frequent offender. Rubber or silicone flappers degrade over time, losing flexibility and developing cracks, preventing a complete seal against the flush valve seat. Mineral deposits can also build up, roughing the surface.
- Improper Flapper Chain Length: If the chain is too taut, it holds the flapper slightly open. If it’s too long, it can snag under the flapper, preventing it from closing fully.
- High Water Level: The float ball or cup is set too high, causing the water level to rise above the overflow tube. Water then continuously drains into the overflow tube and into the bowl.
- Faulty Fill Valve (Ballcock Assembly): The fill valve itself may be defective and not shutting off the water completely, even when the float reaches the correct level. This is less common but can happen due to internal wear or debris.
- Damaged Flush Valve Seat: The ceramic or plastic rim where the flapper rests might have chips, cracks, or mineral buildup that prevents the flapper from forming a watertight seal. This is a more advanced fix, sometimes requiring a flush valve replacement.
- Refill Tube Siphon Effect: If the refill tube is inserted too far into the overflow tube, it can sometimes create a continuous siphoning effect, perpetually draining the tank.
Common Mistakes
- Ignoring the Silent Leak: Many homeowners only notice a running toilet when it's audible. Always perform the food coloring test periodically to catch silent leaks before they inflate your water bill. A toilet can leak for months unnoticed.
- Buying the Wrong Flapper: Not all flappers are universal. While many generic options exist, specific toilet brands and models often require specific flapper types for optimal sealing (e.g., specific chain lengths, ear placements, or material compositions). Always check your toilet's model number or take the old flapper to the store.
- Over-tightening the Flapper Chain: A common mistake is to adjust the flapper chain too tightly, thinking it will ensure a better seal. In reality, a chain that's too taut prevents the flapper from fully dropping and sealing, essentially holding it open slightly and causing a leak.
- Setting the Water Level Too High: Believing a higher water level means a better flush, homeowners might adjust the fill valve float to its maximum height. If the water level reaches the top of the overflow tube, it will continuously drain, leading to an endless cycle of refilling and overflowing.
- Forgetting to Clean the Flush Valve Seat: Even with a brand-new flapper, if the old mineral buildup or debris on the ceramic flush valve seat isn't cleaned, the new flapper won't be able to form a proper seal, and the toilet will continue to run.
- Not Checking the Refill Tube: Overlooking the small refill tube's position can lead to ongoing problems. If it's pushed too far into the overflow pipe or completely disconnected, it can cause the toilet to run without refilling the bowl adequately or create a continuous siphon.
Cost & Time Breakdown
| Task | DIY Cost | Pro Cost | Time |
|---|---|---|---|
| Food coloring test | $0–$2 | N/A | 15–20 minutes |
| Flapper adjustment | $0 | N/A | 5–10 minutes |
| Flapper replacement | $8–$25 | $75–$150 | 15–30 minutes |
| Fill valve adjustment | $0 | N/A | 10–15 minutes |
| Fill valve replacement | $15–$40 | $100–$250 | 30–60 minutes |
| Entire toilet internals kit | $25–$50 | $150–$300 | 45–90 minutes |
Tips & Prevention
- Regular Food Coloring Test: Perform the food coloring test every 6 months to detect silent leaks early. It's the simplest and most effective preventative measure.
- Optimal Water Level: Ensure the water level in the tank is always about 1/2 to 1 inch below the top of the overflow tube. This prevents overflow and puts less stress on the fill valve components.
- Check Flapper Condition: Periodically inspect the flapper for signs of wear, cracks, or mineral buildup. Replace it proactively every 3-5 years, especially if you have hard water, as rubber degrades over time.
- Listen for Sounds: Pay attention to any hissing, gurgling, or phantom flushing sounds when the toilet hasn't been used. These are clear indicators of internal leaks.
- Clear Mineral Buildup: If you have hard water, regularly clean the flush valve seat and flapper with a mild descaler or vinegar to prevent mineral deposits from interfering with the seal.
- Don't Over-tighten: When adjusting the flapper chain or any other components, avoid overtightening. Hand-tight is usually sufficient for internal plastic toilet parts to prevent damage.
When to Call a Professional
While most running toilet issues are DIY-friendly, there are specific situations where a licensed plumber is the best course of action. If you've replaced the flapper and adjusted the fill valve, and the toilet continues to run, the problem might be more complex, residing within the flush valve itself, which could be cracked or improperly seated. If you suspect the toilet bowl itself has a hairline crack, leading to continuous slow drainage (though this is rare for 'running' issues), a professional can diagnose this accurately. Moreover, if you find water pooling around the base of the toilet or suspect a leak where the toilet connects to the drain line, it indicates a wax ring or drain seal failure, which is a more involved repair requiring removal and resetting of the toilet. Finally, if you're dealing with an older, integrated flushing mechanism that's not easily serviceable with standard replacement parts, a plumber can advise on the best course of action, which might include replacing the entire toilet. Don't hesitate to call a pro if you're uncomfortable with any step or if the problem persists after your best efforts; the cost of a plumber is often less than the long-term cost of wasted water.
Related Articles
Keep troubleshooting with these hand-picked guides from FixlyGuide:
- The 30-Second Toilet Fix Plumbers Don't Want You to Know — A running toilet can waste hundreds of gallons of water per day, but often the fix is incredibly simple and takes under a minute.
- The $2 Trick to Stop a Running Toilet (Plumbers Don't Want You to Know) — Discover the simple, two-dollar fix that can stop your running toilet in minutes, saving water and preventing costly repairs.
- The $5 Flapper Trick Plumbers Hope You Don't Know About Your Running Toilet — Discover the secret $5 flapper trick that often fixes a running toilet, saving you money on parts and plumber call-outs.
- The $5 Secret to Silencing a Running Toilet (Plumbers Hope You Don't Know) — A running toilet is usually caused by a simple issue with the flapper or its chain, leading to constant water waste and higher utility bill…
- The 3 Hidden Reasons Your Toilet Tank Fills Slowly (And How to Fix Each) — Discover the common culprits behind a slow-filling toilet tank, from crucial valve issues to subtle obstructions, and learn how to restore…
- The #1 Hidden Culprit Behind Your Whole-House Low Water Pressure (It's Not Your City!) — Discover the most common, often overlooked cause of low water pressure throughout your entire home and how to fix it yourself.
Should you do this yourself?
Answer five quick questions before you start. Safety outranks savings every time.
Your experience with work like this
How high do you have to work?
Does the job involve any of these?
Will it need a permit?
Specialty tools
Free and instant. Educational guidance only — not a quote, inspection, or professional diagnosis.
Questions to ask before you sign
Ask every contractor the same questions and the cheapest bid stops looking cheapest. Check them off as you go — your progress is saved on this device.
Free, no signup. Bring this to every walkthrough so you compare bids on the same terms.
What should this project cost?
Enter your project details for a realistic cost range before you call anyone.
Common repairs run $150–$650; repipes and water-heater replacements reach $1,500–$4,500.
- Regional adjustment
- National average
- Labor share (typical)
- ~$754
- Quotes to collect
- 3 written estimates
Educational estimate based on national averages — not a binding quote. Always confirm with written local estimates.
Fixly Project Decision Box
- DIY difficulty
- Moderate
- Estimated time
- 30 minutes – half a day
- Cost level
- Moderate
Main tools / materials
- Adjustable wrench
- Plunger or drain auger
- Bucket and towels
- Thread tape
When to stop and call a pro
- Water you cannot shut off at the fixture or main
- Sewage backing up into more than one fixture
- Water near electrical panels or outlets
- Gas water heater work beyond relighting a pilot
Need professional help?
Get a Licensed PlumberHandle this before it gets worse
First steps that limit damage, then a way to reach a qualified pro.
- Emergency repair checklistThe first steps that limit damage before a pro arrives.Open
- Get local estimatesSend one request and compare written estimates from vetted pros.Open
- Estimate this projectGet a cost range for your scope and ZIP before you call anyone.Open
Free, no signup required. Estimates are educational guidance, not a quote or an inspection.
Frequently asked questions
Why does my toilet keep running after flushing?+
The most common reason a toilet keeps running after flushing is a faulty flapper valve. Over time, the rubber or silicone flapper can stiffen, crack, or become covered in mineral deposits, preventing it from forming a tight seal over the flush valve opening. This allows water to continuously leak from the tank into the bowl.
How can I tell if my toilet has a silent leak?+
To check for a silent leak, put a few drops of food coloring or a dye tablet into the toilet tank (not the bowl). Wait 15-20 minutes without flushing. If any color appears in the toilet bowl, you have a silent leak, most likely due to a faulty flapper valve.
What should the water level be in my toilet tank?+
The water level in your toilet tank should typically be about 1/2 to 1 inch below the top of the overflow tube. If the water level is higher than this, it will continuously drain into the overflow tube and into the bowl, causing the toilet to run.
Can a running toilet cause a high water bill?+
Yes, absolutely. A running toilet can be one of the biggest hidden culprits behind a mysteriously high water bill. Even a small, continuous leak can waste hundreds or even thousands of gallons of water per day, adding significantly to your monthly utility costs.
Discussion
Loading comments…