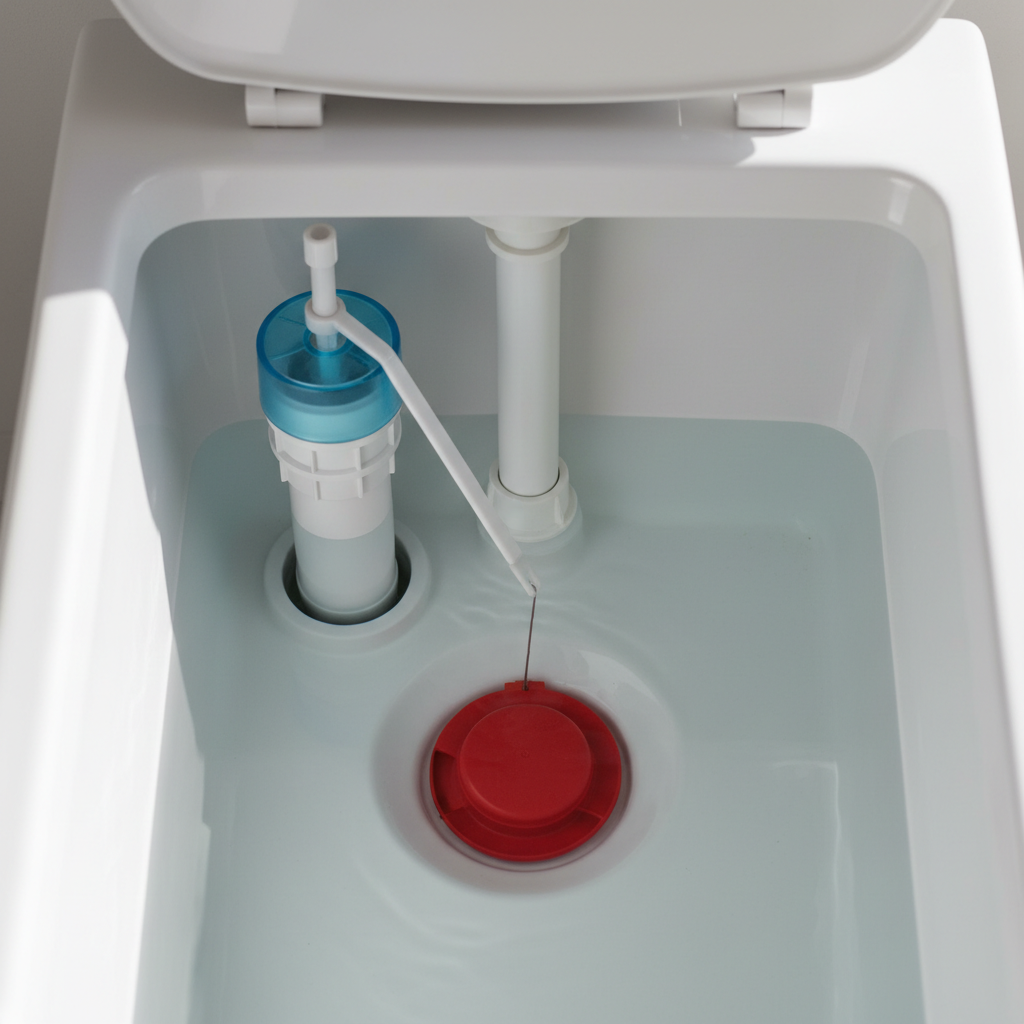
- Incorrect Chain Length: The chain connecting the flush handle lever to the flapper can be too short (keeping the flapper slightly open) or too long (getting caught under the flapper), both preventing a complete seal.
- Faulty Fill Valve: The internal components of the fill valve itself can wear out or become clogged with sediment, preventing it from fully closing the water supply, resulting in a constant trickle into the tank or overflow tube.
- Sediment or Debris on Flush Valve Seat: Mineral buildup (from hard water) or small pieces of debris can accumulate on the rim where the flapper sits, creating tiny gaps that allow water to escape into the bowl.
- High Water Pressure: In some rare cases, excessively high home water pressure can overcome the sealing ability of the fill valve, leading to a constant drip. This is usually noticed throughout the house with other fixtures as well.
Plumbing · Leak
| Project category | Plumbing |
|---|---|
| Problem type | Leak |
| Trade required | Plumbing |
| Urgency | Emergency — act now |
| Safety risk | High safety risk |
| DIY suitability | DIY for experienced homeowners |
| Cost category | Low cost |
| Typical timeline | Shut water off now; repair usually same or next day |
| Contractor type | Licensed plumber |
Repair option
Isolate at the shutoff, replace the failed component, and dry the cavity fully.
Replacement option
Repipe the run or the branch when corrosion is widespread.
Common causes
- Failed supply line or shutoff valve
- Worn washers, cartridges, or P-trap connections
- Pinhole corrosion in older copper
Relevant tools:emergency checklistdiy or hire a pro
Published July 23, 2026Last updated August 17, 2026
Tools & materials you'll need
Affiliate linksAs an Amazon Associate FixlyGuide earns from qualifying purchases — at no extra cost to you. Prices and availability are accurate as of publication and subject to change.
Quick Answer
That persistent running water in your toilet bowl is usually a symptom of one of three main culprits: a faulty flapper valve, an ill-adjusted fill valve, or a misaligned float arm. Often, the fix is disarmingly simple, requiring little more than your hands and a few minutes of your time. Before you even think about calling a plumber, understanding these common issues will empower you to perform a quick diagnostic and often a DIY repair, saving you money and the headache of constant flushing.
The Problem
You hear it, usually at night when the house is quiet: the subtle (or not-so-subtle) hiss or gurgle of your toilet's tank inexplicably refilling, or a constant trickle of water into the bowl. This isn't just an annoyance; it's a significant water waste, potentially adding hundreds of dollars to your annual water bill. A constantly running toilet can dump gallons of water down the drain every hour, silently inflating your utility costs and putting unnecessary strain on your plumbing system. The underlying issue is that the toilet isn't properly sealing after a flush, or the fill cycle isn't completing correctly, leading to a continuous or intermittent flow of fresh water into the tank and then straight into the bowl and down the drain.
How It Works
To understand how to fix a running toilet, it's essential to grasp the basic mechanics of how a toilet operates. When you press the flush handle, a chain lifts the flapper valve at the bottom of the tank. This flapper, typically made of rubber, uncovers the flush valve opening, allowing water to rush from the tank into the bowl, initiating the siphon action that evacuates waste. As the tank empties, the flapper falls back into place, sealing the flush valve opening. Simultaneously, the float arm (or cup-style float) drops with the water level. This drop activates the fill valve, which begins refilling the tank with fresh water from your home's supply line. As the water level rises, the float arm or cup rises with it. Once the water reaches a predetermined level, the float mechanism signals the fill valve to shut off the water flow. A small refill tube also channels a portion of this fresh water into the overflow tube, which in turn refills the toilet bowl's trap seal. If any part of this delicate sequence — the flapper sealing, the float signaling, or the fill valve shutting off — malfunctions, your toilet will continue to run, endlessly trying to achieve a full tank or a proper seal.
Step-by-Step Fix
Safety Note: Before working inside the toilet tank, always turn off the water supply to prevent accidental flooding. The shut-off valve is usually located on the wall behind or to the side of the toilet, connected by a flexible supply line. Turn it clockwise until the water flow stops.
-
Remove the Tank Lid— *Access the internal components. Carefully lift the ceramic tank lid and set it aside on a protected, flat surface where it won't be easily knocked over or broken. This will give you a clear view of the flapper, float, and fill valve assembly. Observe the components as they are, looking for any obvious obstructions or misalignments before touching anything.
-
Conduct the Dye Test— *Pinpoint the exact leak. Drop a few drops of food coloring (blue or green works best) or a toilet tank dye tablet into the toilet tank water. Do not flush the toilet. Wait for 15-20 minutes. If you see colored water appear in the toilet bowl, it indicates that water is leaking from the tank into the bowl, almost certainly due to a faulty flapper valve or a leaky flush valve seal. If no color appears, the issue is likely with the fill valve or float mechanism.
-
Check the Flapper Valve and Chain— *The most common culprit.
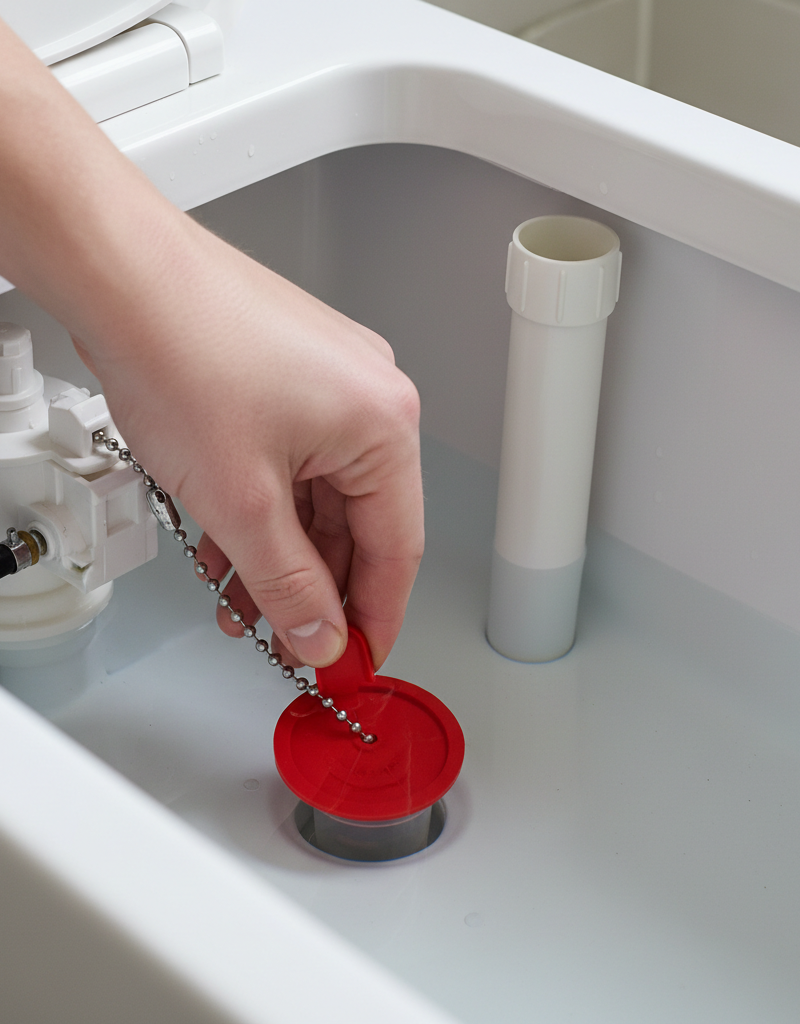
- Inspect the Flapper: If the dye test was positive, lift the flapper and visually inspect it. Look for any signs of wear, cracks, tears, mineral buildup, or warping on the rubber. A flapper that is no longer soft and pliable, or that has visible damage, won't create a proper seal. If it's a newer flapper but still leaking, ensure it's properly seated in the flush valve opening. Sometimes a slight adjustment or reseating is all it needs.
- Adjust the Chain: The flapper's chain should have just a little slack (about 1/2 to 1 inch) when the flapper is seated. If the chain is too taut, it can prevent the flapper from fully closing. If it's too loose, it can get caught under the flapper, also preventing a seal. Adjust the chain length by moving the clip to a different link. Ensure the chain isn't tangled around the overflow tube.
- Clean the Flush Valve Seat: Turn off the water, flush the toilet to empty the tank, and then use your finger or a scouring pad (without harsh chemicals!) to clean the rim of the flush valve seat where the flapper rests. Mineral buildup or debris can prevent a good seal. Turn the water back on slowly.
- If this doesn't work: Replace the flapper. Make sure to get one that matches your toilet's brand and model (universal flappers exist but matching is better). This is a simple DIY task, usually involving unclipping the old flapper and clipping on the new one, along with adjusting the chain.
-
Inspect the Fill Valve and Float— *Ensure proper shut-off.
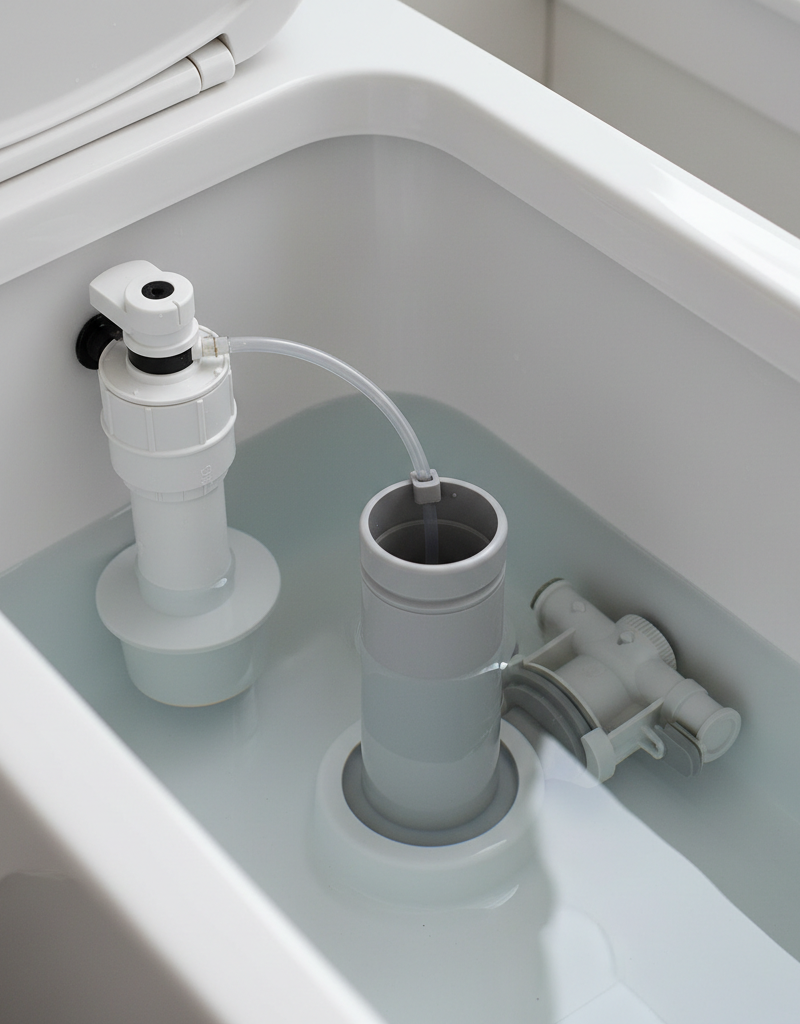
- Float Arm/Cup: If you have an older toilet with a ball-float arm, gently lift the arm. If the running stops, gently bend the arm downwards a small amount so the float can shut off the water at a lower level. For newer toilets with a cup-style float around the fill valve, slide the adjustment clip up or down the rod to set the water level. The water level should typically be about 1 inch below the top of the overflow tube. If the water level is too high, it constantly spills into the overflow tube, causing the toilet to run.
- Fill Valve Function: Press down on the float to confirm the fill valve completely shuts off. If it continues to trickle or hiss, the fill valve itself might be faulty or have internal debris, preventing a full shut-off. A common issue here is a worn-out rubber gasket inside the fill valve, which can often be replaced by purchasing a fill valve repair kit.
- Refill Tube: Ensure the small refill tube extending from the fill valve is properly directed into the overflow tube and is not too far down, creating a siphoning effect, or spraying water outside the overflow tube. It should be above the water line, just inside the tube.
- If this doesn't work: The fill valve is likely defective and needs replacement. This is a moderate DIY task but often necessary if the float adjustments don't solve the issue. Purchase a universal fill valve replacement kit (e.g., Fluidmaster 400A) and follow the instructions carefully.
-
Check for Suction/Siphon— *Rare but possible. After a flush, ensure there's no continuous suction sound or gurgling after the tank has refilled. This could indicate a partial clog in the drain or vent pipe, causing a slow siphon effect that continuously draws water from the bowl and makes the toilet try to refill. This is usually accompanied by a lower-than-normal water level in the bowl.
-
Tighten Mounting Screws— *A less common but easy fix. Sometimes, if the toilet tank is slightly loose, or if the flapper is old, the gap between the tank and bowl can cause a subtle misalignment leading to a poor flapper seal. While generally not the primary cause of a running toilet, ensuring tank stability can sometimes help. (Only do this AFTER checking flapper and fill valve issues, as it's less likely related.) Be very careful not to over-tighten, which can crack the porcelain.
Common Causes
- Worn or Damaged Flapper Valve: Over time, the rubber flapper can lose its pliability, crack, warp, or become covered in mineral deposits, preventing it from forming a perfect seal against the flush valve seat. This is the single most common cause of a running toilet.
- Incorrect Chain Length: The chain connecting the flush handle lever to the flapper can be too short (keeping the flapper slightly open) or too long (getting caught under the flapper), both preventing a complete seal.
- Malfunctioning Float Mechanism: Whether it's a traditional ball-float arm or a modern cup-style float, if it's set too high, stuck, or damaged, it won't signal the fill valve to shut off the water when the tank is full. This causes water to continuously flow into the overflow tube.
- Faulty Fill Valve: The internal components of the fill valve itself can wear out or become clogged with sediment, preventing it from fully closing the water supply, resulting in a constant trickle into the tank or overflow tube.
- Sediment or Debris on Flush Valve Seat: Mineral buildup (from hard water) or small pieces of debris can accumulate on the rim where the flapper sits, creating tiny gaps that allow water to escape into the bowl.
- High Water Pressure: In some rare cases, excessively high home water pressure can overcome the sealing ability of the fill valve, leading to a constant drip. This is usually noticed throughout the house with other fixtures as well.
Common Mistakes
- Ignoring the Dye Test: Many DIYers jump straight to replacing parts without first confirming if the leak is from the flapper/flush valve or the fill valve. The dye test is crucial for accurate diagnosis.
- Over-tightening Tank Bolts: While checking tank stability, over-tightening the bolts that connect the tank to the bowl can crack the porcelain, leading to a much more expensive repair (a new toilet).
- Using Harsh Cleaners: Using abrasive or chemical-laden cleaners inside the toilet tank can damage rubber components like the flapper and seals, accelerating their wear and tear.
- Guessing on Flapper Size/Type: Flappers aren't always universal. Using the wrong size or style of flapper for your toilet's flush valve can lead to continued leaks or inefficient flushing. Always try to match the original or consult your toilet manufacturer's guide.
- Setting the Water Level Too High: An incorrectly set float mechanism that allows the water level to be above the overflow tube will cause the toilet to constantly run or
Related Articles
Keep troubleshooting with these hand-picked guides from FixlyGuide:
- The $2 Trick to Stop a Running Toilet (Plumbers Don't Want You to Know) — Discover the simple, two-dollar fix that can stop your running toilet in minutes, saving water and preventing costly repairs.
- The 30-Second Toilet Fix Plumbers Don't Want You to Know — A running toilet can waste hundreds of gallons of water per day, but often the fix is incredibly simple and takes under a minute.
- The 30-Second Toilet Fix Plumbers Don't Want You to Know — Stop that phantom-flushing toilet with this quick guide to diagnosing and fixing the most common silent water leaks.
- The $5 Single-Handle Faucet Fix Plumbers Don't Want You to Know — Stop that annoying drip! Most single-handle faucet leaks are caused by worn-out O-rings or seals, a repair homeowners can easily tackle in…
- The $5 Flapper Trick Plumbers Hope You Don't Know About Your Running Toilet — Discover the secret $5 flapper trick that often fixes a running toilet, saving you money on parts and plumber call-outs.
- The 3 Hidden Reasons Your Dryer Takes Forever – And the Easy Fixes — If your dryer is taking too long to dry clothes, the culprit is often reduced airflow, which can be easily resolved with a few simple check…
Should you do this yourself?
Answer five quick questions before you start. Safety outranks savings every time.
Your experience with work like this
How high do you have to work?
Does the job involve any of these?
Will it need a permit?
Specialty tools
Free and instant. Educational guidance only — not a quote, inspection, or professional diagnosis.
What should this project cost?
Enter your project details for a realistic cost range before you call anyone.
Common repairs run $150–$650; repipes and water-heater replacements reach $1,500–$4,500.
- Regional adjustment
- National average
- Labor share (typical)
- ~$754
- Quotes to collect
- 3 written estimates
Educational estimate based on national averages — not a binding quote. Always confirm with written local estimates.
Fixly Project Decision Box
- DIY difficulty
- Moderate
- Estimated time
- 30 minutes – half a day
- Cost level
- Moderate
Main tools / materials
- Adjustable wrench
- Plunger or drain auger
- Bucket and towels
- Thread tape
When to stop and call a pro
- Water you cannot shut off at the fixture or main
- Sewage backing up into more than one fixture
- Water near electrical panels or outlets
- Gas water heater work beyond relighting a pilot
Need professional help?
Get a Licensed PlumberBefore you start
Check the difficulty, permits, and safety risk — then decide whether to call a pro.
- Estimate this projectGet a cost range for your scope and ZIP before you call anyone.Open
- Get local estimatesSend one request and compare written estimates from vetted pros.Open
Free, no signup required. Estimates are educational guidance, not a quote or an inspection.
Get the print-ready PDF of this guide
A clean, ad-free, printable version you can keep on your phone or pin to the workshop wall. Free with a FixlyGuide account.
- Print-optimized layout
- Tools, materials & every step included
- Saved to your account
Frequently asked questions
Why does my toilet keep running after flushing?+
The most common reasons are a worn-out flapper valve that isn't sealing properly, an incorrectly set float arm that prevents the fill valve from shutting off, or a faulty fill valve that continuously trickles water into the tank or overflow tube.
How do I know if my flapper is bad?+
Perform a dye test: put a few drops of food coloring into the toilet tank. Wait 15-20 minutes without flushing. If colored water appears in the toilet bowl, your flapper valve or flush valve seal is leaking and needs attention.
Can I fix a running toilet myself?+
Yes, most running toilet issues are simple DIY fixes. Replacing a flapper or adjusting the float and fill valve are common repairs that homeowners can easily perform with basic tools and parts, often without needing a professional plumber.
How much water does a running toilet waste?+
A continuously running toilet can waste many gallons of water per hour, potentially hundreds of gallons per day. This adds significantly to your water bill and is a major source of household water waste.
What is the correct water level in a toilet tank?+
The water level in the toilet tank should typically be about one inch below the top of the overflow tube. This prevents water from constantly spilling into the overflow tube and ensures proper flushing.

Discussion
Loading comments…