- Empty and Inspect – First job: clear it off completely. Yep, everything. Then take a slow walk around the unit and look for gaps where panels meet, odd angles, or hardware that looks out of place.
- Tools: Nothing needed yet, just your eyeballs.
- Safety: Work on a flat, open surface. If it’s tall, have somebody spot you if you need to lean it over.
General remodeling · Renovation planning
| Project category | General remodeling |
|---|---|
| Problem type | Renovation planning |
| Trade required | General contracting |
| Urgency | Planned project |
| Safety risk | Low safety risk |
| DIY suitability | Pro recommended |
| Cost category | Major investment |
| Typical timeline | Design and permitting often 2–4 months before work starts |
| Contractor type | General contractor |
Repair option
Phase the work and fix the building envelope first.
Replacement option
Full renovation with permits, design, and a general contractor.
Common causes
- Space no longer fits how the household lives
- Resale preparation
- Deferred maintenance stacking up
Relevant tools:project cost estimatorcompare quoteshome improvement material prices
Published September 12, 2026Last updated September 12, 2026
Tools & materials you'll need
Affiliate linksAs an Amazon Associate FixlyGuide earns from qualifying purchases — at no extra cost to you. Prices and availability are accurate as of publication and subject to change.
Quick Answer
Look, I’ve put together more flat-pack furniture than I care to count. If your new IKEA shelf or some other particle-board special is already doing the hula, don’t start beating yourself up just yet. Nine times out of ten, it’s something simple: loose cam locks, dowels that never quite seated, or a floor that’s not as level as you thought. Crack it open, snug those cam locks, make sure the dowels are all the way home, and shim the low side so the thing sits right. And if it’s tall? Anchor it to the wall. That’s not decoration — that’s safety.
The Problem
So you spent an hour, maybe two, fighting with Allen wrenches and those cheerful little diagram booklets, then step back and watch your brand-new shelf sway like it’s got a mind of its own. You’re thinking, “Did I miss something? Is this thing junk?” Usually, no. It’s rarely the particle board itself, and it’s not always user error either. What I see most often is a fastener that isn’t fully engaged — cam lock, dowel, screw, take your pick — or a floor that’s out of level just enough to twist the whole unit. That tiny bit of play turns into a big wobble at the top. And that isn’t just annoying. It’s a real safety issue, especially if you’ve got kids or pets running around.
I pulled a bookcase in Frisco last month that had exactly this leak in the logic: all the hardware was “in,” but nothing was actually tight. Books on top, toy bins on the bottom, whole thing leaning like it was tired. Seen it plenty of times in older homes, too — floors settle, corners go out, and that poor shelf never had a chance.
How It Works
Flat-pack furniture, whether it’s from IKEA, Target, or a dozen other places, leans on a pretty simple joinery system: cam locks, dowels, and usually a handful of screws. It’s a puzzle, really. The dowels are the little wooden pegs that line the panels up and help keep side-to-side movement in check. They slide into pre-drilled holes.
The cam locks are doing the heavy lifting. They’re those round metal fittings that sit in one panel while a bolt — sometimes called a cam dowel or cam screw — threads into the adjoining panel. Turn the cam, and it grabs the bolt head, pulling the two pieces tight. Nice and snug. If that cam doesn’t rotate all the way, or the bolt never fully threads in, you’ve got a loose joint. And even a hair of play down low turns into inches of sway at the top of a tall unit.
Then there’s the base. If the floor’s off, even a little, the unit twists. Missing a plastic foot can do the same thing. The particle board itself isn’t magic either — it’ll hold screws fine when everything’s fresh, but if you keep backing them out and running them back in, those holes can strip fast. Once that happens, no dice. That’s why the first assembly matters so much, and why I’m always pushing a wall anchor on anything tall.
Step-by-Step Fix
Alright, let’s get this thing stable. Don’t rush it. A few extra minutes now saves you a headache later.
-
Empty and Inspect – First job: clear it off completely. Yep, everything. Then take a slow walk around the unit and look for gaps where panels meet, odd angles, or hardware that looks out of place.
- Tools: Nothing needed yet, just your eyeballs.
- Safety: Work on a flat, open surface. If it’s tall, have somebody spot you if you need to lean it over.
-
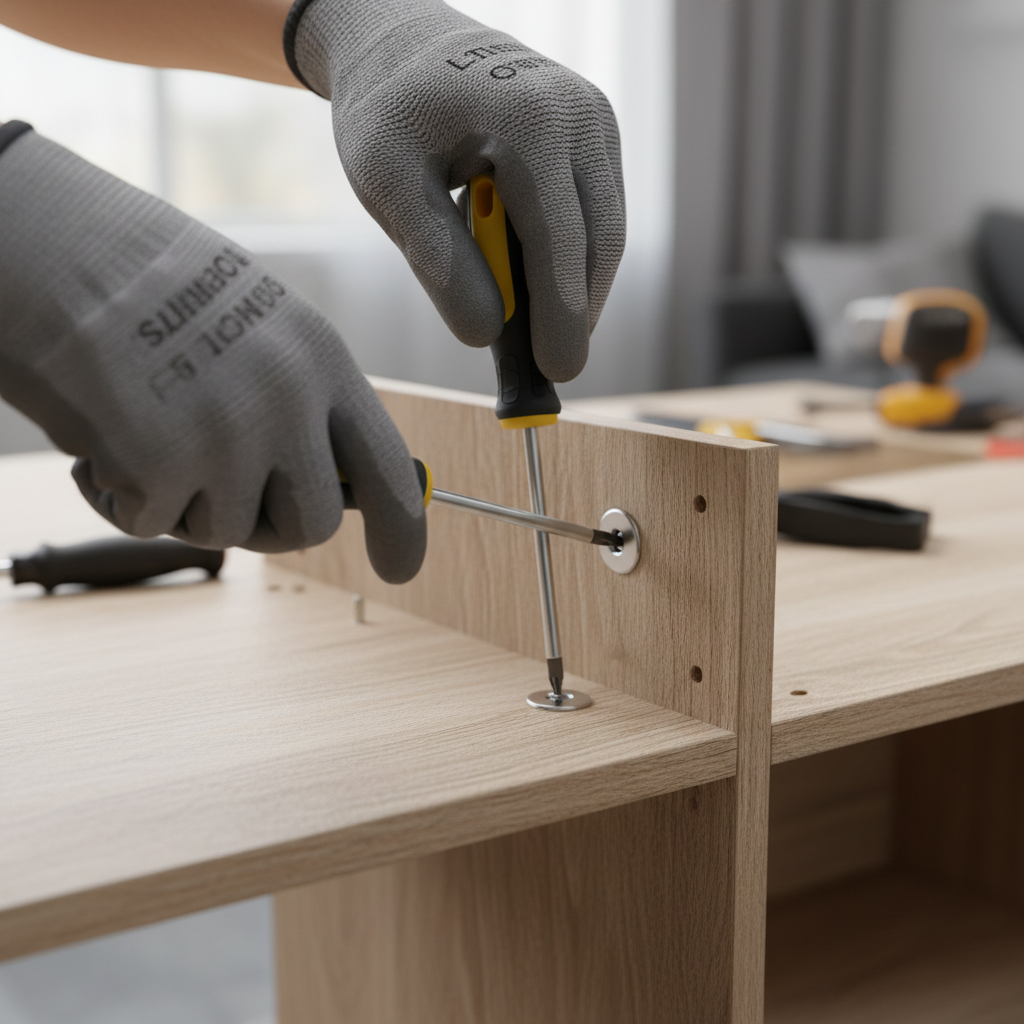
Tighten All Cam Locks – This is usually the culprit. Go around the whole unit with a Phillips head or flathead screwdriver — whichever actually fits the cam slot — and turn each one clockwise until it’s snug. You should feel it grab and pull the panels together. Don’t reef on it and chew up the particle board, but don’t leave them loose either.
- Tools: Phillips head or flathead screwdriver.
-
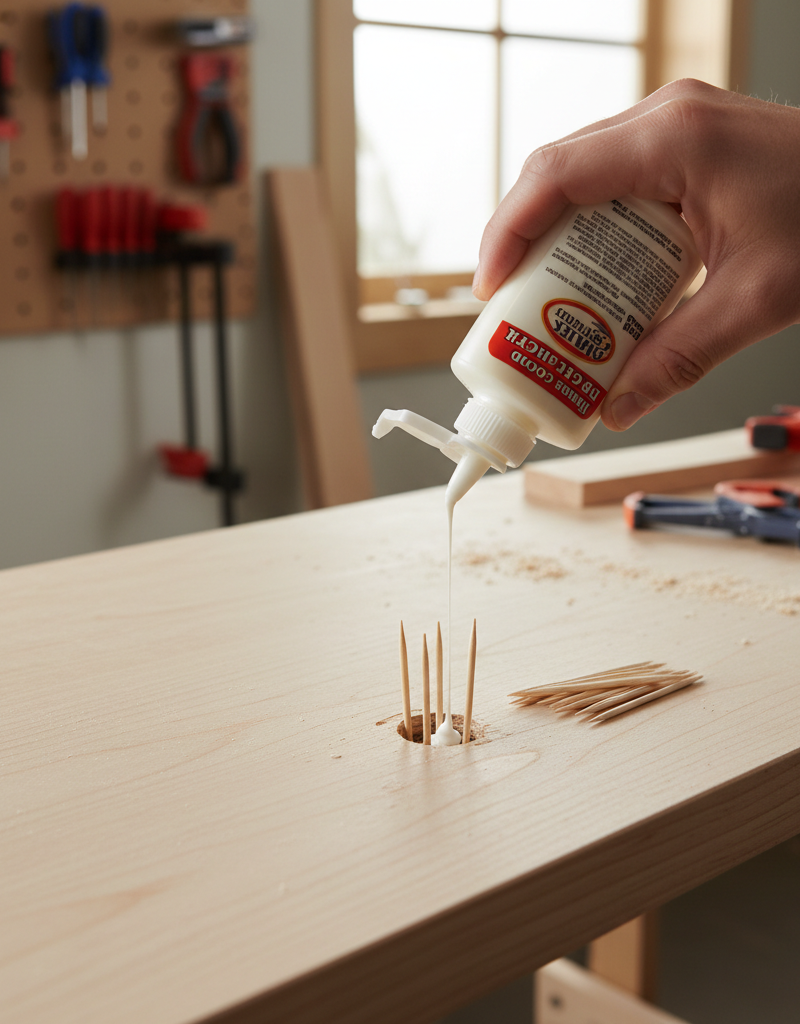
Check Dowel Seating – Those little wooden dowels are there for alignment and strength. Sometimes they’re just sitting proud of the hole. Press on any loose panels and make sure the dowels are fully seated. If one’s bent or split, replace it. If you’re assembling from scratch, a tiny dab of wood glue (PVA glue) on each end of the dowel can make a big difference, even though most instructions won’t tell you that.
- Materials: Small bottle of wood glue (optional, for new assembly or reassembly).
-
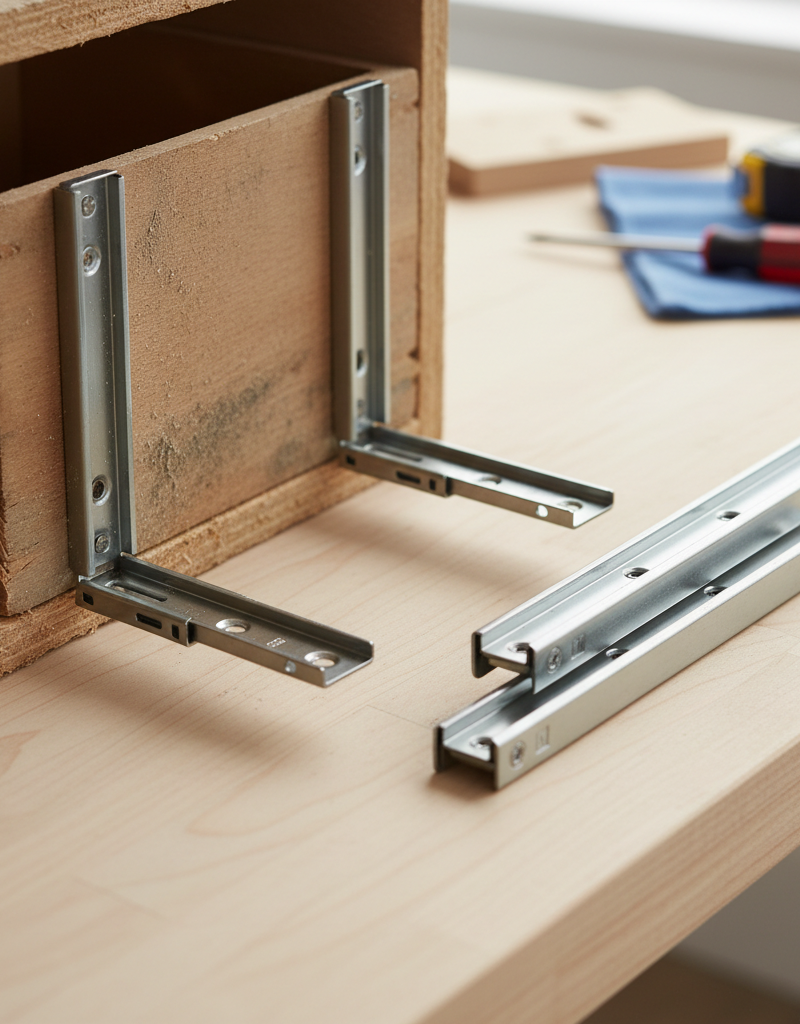
Verify All Screws and Fasteners – Most units have more than just cam locks. Look for standard screws on back panels, drawer slides, and trim pieces. Tighten every one you can find. Those tiny back-panel screws may seem like nothing, but a tight back can add a surprising amount of stiffness.
- Tools: Appropriate screwdriver (usually Phillips).
-
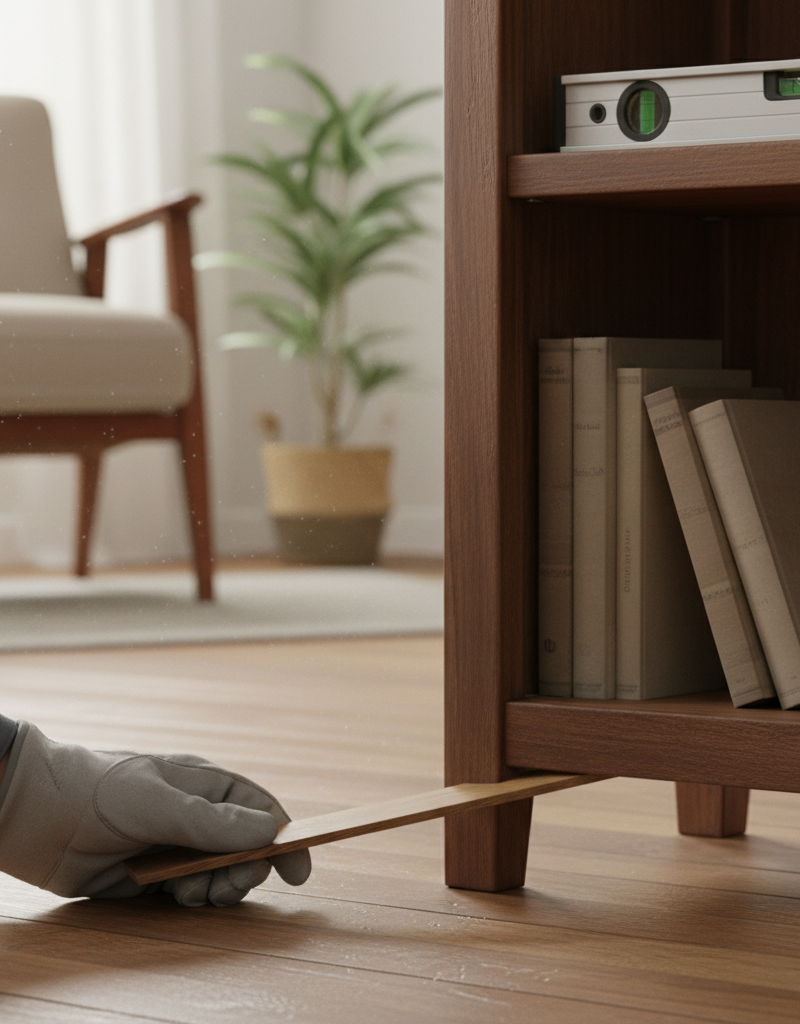
Assess Floor Levelness and Shim – Put a level on the top shelf, then check a side shelf too. If it’s off front-to-back or side-to-side, the floor’s probably the issue. That twist puts constant stress on the joints. Gently lift the low corners and slide thin shims — furniture shims, or even folded cardboard in a pinch — under the feet until the unit sits level.
- Tools: Carpenter's level (2 ft minimum recommended).
- Materials: Furniture shims or sturdy cardboard.
-
Install or Reinstall Back Panel – The back panel matters a lot more than folks think. It acts like a big shear wall and keeps the unit from racking into a parallelogram. Make sure it’s squared up with the frame and fastened with every nail or screw it came with. If it only has little brad nails, I’d consider a few extra small screws around the edges for better hold.
- Tools: Hammer (for brad nails) or screwdriver (for screws).
- Materials: Small brad nails or screws (optional).
-
Anchor to the Wall (CRITICAL Safety Step) – This is the big one, especially on tall or top-heavy units. Most flat-pack furniture comes with anti-tip hardware, so use it. Find a stud with a stud finder, mark it, and fasten the bracket to solid wood. Then attach the strap or bracket to the shelf and connect the two. If you can’t hit a stud, use heavy-duty drywall anchors rated for the load.
- Tools: Stud finder, drill, appropriate drill bits, screwdriver, pencil.
- Materials: Anti-tip hardware (usually included), wall anchors (if no stud), level.
- Safety: Always anchor tall or unstable furniture. Kids climb. Pets bump. One shove is all it takes, and the result can be ugly.
-
Reload with Care – Once it’s tight, level, and anchored, go ahead and load it back up. Spread the weight around, and keep the heavier stuff on the lower shelves. Don’t blow past the stated weight limit, which you can usually find in the instructions or on the manufacturer’s site.
Common Causes
After fixing hundreds of these things, I can tell you it usually comes down to a short list of repeat offenders:
- Loose Cam Locks: Number one, every time. If they’re not fully turned, you’ve got play in the joint.
- Unseated Dowels: Those little pegs need to be all the way in. If they’re sticking out, they’re not doing much for you.
- Uneven Floors: Happens a lot in older homes. If the base isn’t level, the whole unit twists and wobbles.
- Missing or Inadequate Back Panel Fasteners: The back panel gives you a ton of racking resistance. A few tiny nails won’t always cut it.
- No Wall Anchor: On tall units, that’s asking for trouble. The anchor helps with tip-over risk and overall rigidity.
- Overloading: Every shelf has a limit. Too many heavy books or collectibles will stress the joints and cause sagging.
Common Mistakes
Don’t beat yourself up — everybody makes mistakes. These are the ones I see all the time with flat-pack shelves:
- Skipping the Wall Anchor: “It feels fine,” and then a kid climbs it or the thing gets bumped. Tall furniture gets anchored, period.
- Overtightening Cam Locks: Snug is good. Cranking them down too hard can strip the particle board and ruin the joint.
- Ignoring the Back Panel: Folks look at that flimsy sheet and figure it’s just there to keep dust out. Nope. It’s structural.
- Using the Wrong Screwdriver: A cam lock isn’t one-size-fits-all. If the driver doesn’t fit right, you’ll strip it fast.
- Assembling on an Uneven Surface: Build it on a lumpy rug or sloped floor, and you can bake the wobble right in from the start.
- Guessing on Dowel Depth: Don’t assume they’re seated. Push them home so the next panel lines up properly.
Cost & Time Breakdown
Let’s break down what it takes to get this shelf standing tall.
| Task | DIY Cost | Pro Cost | Time |
|---|---|---|---|
| Empty and Inspect | $0 | $0 | 5-10 minutes |
| Tighten Hardware | $0 | $0 | 10-20 minutes |
| Shim & Level Unit | $2-$10 (shims) | $0-$20 | 15-30 minutes |
| Wall Anchoring (w/ stud) | $0-$5 (hardware) | $50-$100+ | 15-30 minutes |
| Wall Anchoring (no stud/hvy) | $10-$20 (anchors) | $75-$150+ | 20-40 minutes |
| Re-assembly (major issues) | $0-$10 (glue) | $100-$200+ | 1-2 hours |
Tips & Prevention
- Use Wood Glue on Dowels: On a fresh build, a small drop of PVA wood glue on each end of the dowels can really strengthen the joints. It’s not in the booklet, but it works. Just don’t do it if you want to tear the thing apart easily later.
- Don’t Overload: Know the shelf’s limits. Put the heavier stuff low. If it starts sagging, you’ve gone too far.
- Check Annually: I like to tell folks to re-tighten the cam locks and screws once a year, especially after a move. Stuff settles. Vibration works things loose.
- Consider a Sturdier Back Panel: If I want real rigidity, I’ll sometimes swap the thin cardboard back for a sheet of plywood or hardboard and screw it to the frame. Makes a big difference.
- Level From the Start: Build on a flat, level surface if you can. Then once it’s in place, check it again with shims.
- Measure for Studs: Before you hang or anchor any tall shelf, figure out where the studs are. Solid wood beats drywall anchors every time.
When to Call a Professional
You know, sometimes a DIY fix turns into a DIY mess. If you’ve gone through all these steps and the shelf is still wobbling, or the particle board is damaged to the point that the fasteners won’t bite anymore, it might be time to bring in a handyman or general contractor. Same goes for a very large or heavy unit if you’re not sure about the wall anchoring. You do not want this thing falling on somebody. If the structure looks compromised — cracked panels, stripped holes, or the whole unit is just plain unstable — a pro can tell you whether it’s salvageable or if replacement is the safer move. Don’t gamble with heavy furniture in a house with kids or elderly folks. I’ve seen too many close calls.
Related Articles
Keep troubleshooting with these hand-picked guides from FixlyGuide:
- Why Your Freestanding Shelf Wobbles Like a Drunk Sailor (and the 5-Minute Fix) — Don't let a shaky shelf ruin your organization or your peace of mind. I'll show you how to stabilize that wobbly unit in minutes, no matter…
- The $10 Secret to Never Fixing a Stripped Screw Hole in Your Shelves Again — I'll show you how a common, cheap material can permanently fix stripped screw holes in shelves and furniture, saving you from wobbly repair…
- The Giant Drywall Hole: 3 Hidden Mistakes That Make Fixing It Worse — Don’t just spackle over that huge drywall hole; learn the right way to repair it and avoid common mistakes that lead to an even bigger head…
- That New Grout Is Already Cracking? Here’s the Hidden Cause — Cracked grout weeks after a renovation is often a sign of a deeper issue with your subfloor or tile installation, not just a problem with t…
- That Annoying Sawhorse Wobble: The Simple Fix Your Shop Needs — Don't let a wobbly sawhorse ruin your cuts or—worse—cause an accident. I'll walk you through the real reasons your sawhorses are unstable a…
- The 7 Critical Home Inspection Mistakes Most Homeowners Make (and How to Spot Them) — Discover the crucial home inspection mistakes homeowners commonly overlook and learn how to identify potential problems before they become…
Should you do this yourself?
Answer five quick questions before you start. Safety outranks savings every time.
Your experience with work like this
How high do you have to work?
Does the job involve any of these?
Will it need a permit?
Specialty tools
Free and instant. Educational guidance only — not a quote, inspection, or professional diagnosis.
What should this project cost?
Enter your project details for a realistic cost range before you call anyone.
Cost depends heavily on which system turns out to be the source.
- Regional adjustment
- National average
- Labor share (typical)
- ~$1,620
- Quotes to collect
- 3 written estimates
Educational estimate based on national averages — not a binding quote. Always confirm with written local estimates.
Before you start
Check the difficulty, permits, and safety risk — then decide whether to call a pro.
- Estimate this projectGet a cost range for your scope and ZIP before you call anyone.Open
- Get local estimatesSend one request and compare written estimates from vetted pros.Open
Free, no signup required. Estimates are educational guidance, not a quote or an inspection.
Get the print-ready PDF of this guide
A clean, ad-free, printable version you can keep on your phone or pin to the workshop wall. Free with a FixlyGuide account.
- Print-optimized layout
- Tools, materials & every step included
- Saved to your account
Recommended for DIYers & woodworkers
Sponsored
The Top 20 Tools for Workshops of Any Budget
No stationary machines or power tools required — plus 3 fundamental tools that can't be bought at any price.
Get the free guide
Ted's Woodworking — The #1 Woodworking Resource
Detailed instructions, dimensioned drawings, materials & cutting lists, and 3D schematics for every skill level.
See the plansSponsored: links above are affiliate links. FixlyGuide may earn a commission on qualifying purchases — at no extra cost to you.
Frequently asked questions
Why do new IKEA shelves wobble?+
New IKEA or flat-pack shelves often wobble due to loose cam locks, dowels that aren't fully seated, or assembly on an uneven floor. Small misalignments can lead to significant instability in the overall structure.
Can I prevent my IKEA shelf from wobbling in the first place?+
Yes, by carefully ensuring all cam locks are fully tightened, dowels are completely seated, and the unit is assembled on a level surface. Using wood glue on dowels during assembly can also significantly enhance stability.
What are cam locks and how do they work?+
Cam locks are cylindrical metal fasteners used in flat-pack furniture. They insert into one panel and, when turned, grab a bolt threaded into an adjacent panel, pulling the two pieces tightly together to form a strong joint.
How important is wall anchoring for a shelf?+
Wall anchoring is crucial, especially for tall or top-heavy shelves. It prevents tipping, which is a major safety hazard, and adds significant overall rigidity and stability to the furniture unit.
What kind of shims should I use to level my shelf?+
You can use specialized furniture shims, often plastic or wood, available at hardware stores. In a pinch, sturdy folded cardboard can work for temporary leveling, but dedicated shims offer better long-term stability.
My shelf came with small nails for the back panel. Is that enough?+
While the small nails provided work, adding a few extra small screws around the perimeter of the back panel can dramatically improve its rigidity. The back panel is a key structural component preventing racking.
Can I use wood glue on all joints for extra strength?+
You can use wood glue on wooden dowel joints for extra strength, but be aware that this will make the furniture very difficult or impossible to disassemble in the future. Avoid glue on cam lock joints.
How often should I check my shelves for stability?+
It's a good practice to check all your flat-pack shelves for stability annually. Things can loosen over time due to vibration, settling, or movement, so a quick re-tightening can prevent future issues.
What if my particle board is stripped where a screw goes in?+
If a screw hole in particle board is stripped, you can try using a larger screw, filling the hole with wood filler and redrilling, or inserting a wood dowel and re-drilling. For cam locks, you might need a specialized repair kit or to relocate the fastener slightly.
Is it safe to put heavy items on the top shelf?+
No, it's best practice to place heavier items on the lower shelves. This lowers the center of gravity of the unit, significantly reducing the risk of tipping and improving overall stability.
Discussion
Loading comments…