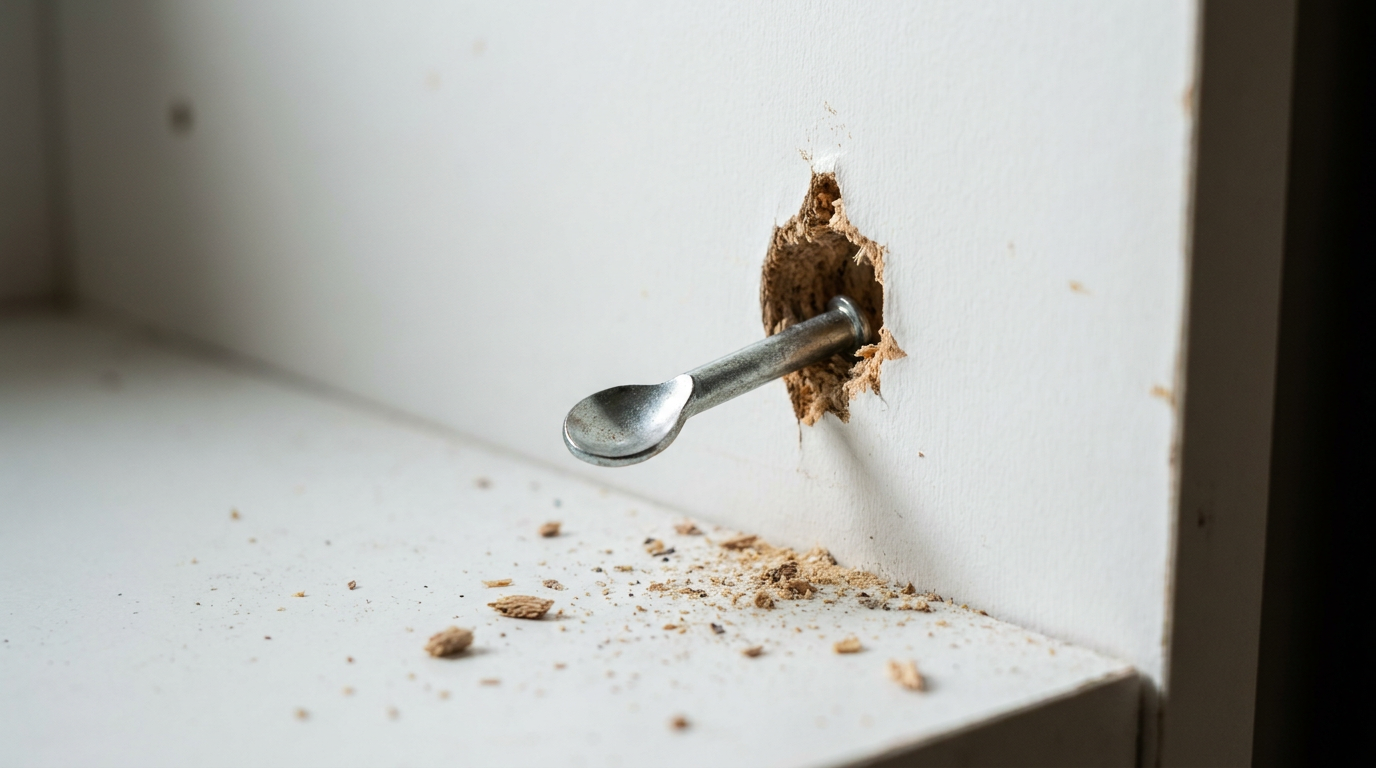
- Overloading: Every shelf has a weight limit. Push past it and the wood fibers around the pin holes compress faster.
- Low-Quality Material: Cheaper particleboard and MDF are less dense and wear out quicker. Solid wood and good plywood hold up much better.
- Vibration: Even little vibrations from walking, doors slamming, or a stereo can make pins walk out of loose holes over time.
- Humidity Swings: In humid places like North Texas, wood and wood composites swell and shrink. That movement can loosen the holes little by little.
- The Wrong Pins: Using 5mm pins, which are common in European furniture, in 1/4-inch holes, which are common in US furniture, creates just enough slop to cause failure. They’re not interchangeable.
General remodeling · Renovation planning
| Project category | General remodeling |
|---|---|
| Problem type | Renovation planning |
| Trade required | General contracting |
| Urgency | Planned project |
| Safety risk | Low safety risk |
| DIY suitability | Pro recommended |
| Cost category | Major investment |
| Typical timeline | Design and permitting often 2–4 months before work starts |
| Contractor type | General contractor |
Repair option
Phase the work and fix the building envelope first.
Replacement option
Full renovation with permits, design, and a general contractor.
Common causes
- Space no longer fits how the household lives
- Resale preparation
- Deferred maintenance stacking up
Relevant tools:project cost estimatorcompare quoteshome improvement material prices
Published October 16, 2026Last updated October 16, 2026
Tools & materials you'll need
Affiliate linksAs an Amazon Associate FixlyGuide earns from qualifying purchases — at no extra cost to you. Prices and availability are accurate as of publication and subject to change.
Quick Answer
When an adjustable shelf collapses, it’s usually because the drilled pin holes in the cabinet or bookcase walls have gotten enlarged or stripped out over time. Vibration, overloading, or plain old wood compression lets the shelf pins wobble and fall out. The fix isn’t just swapping in new pins; you’ve got to repair the holes themselves so they grip the pins tight again. For most particleboard or MDF furniture, this is a 15-minute fix with wood filler and a drill.
The Problem
You hear a sudden crash from the living room. That’s the sound of a fully loaded bookshelf giving up the ghost. One corner of an adjustable shelf has dropped, and now books, picture frames, and all the little knick-knacks are piled on the floor. Or maybe it’s in the kitchen, where the shelf holding your favorite plates has tilted out of nowhere, with the little metal pin that was supposed to carry the load now sitting on the shelf below.
This isn’t some random fluke. I see it all the time in furniture that uses a pin-and-hole setup for adjustable shelving, from high-end custom cabinets to flat-pack bookcases. The pins themselves are rarely the problem—they’re just simple pegs of metal or plastic. The real culprit is the hole. Over time, the material around that hole, usually MDF, particleboard, or even soft plywood, gets compressed, worn, and wallowed out. That snug fit turns sloppy. The pin can’t stay perfectly perpendicular to the cabinet wall anymore, and under the shelf load, it tilts, wiggles, and eventually drops out.
How It Works
Think about the physics for a second. A tiny metal pin, maybe 1/4-inch in diameter, is holding up one corner of a shelf loaded with 20, 30, or even 50 pounds of stuff. All that weight gets transferred straight onto the bottom edge of that pin, and then into the small patch of cabinet material it’s resting on. That’s a lot of force in one tiny spot.
On new furniture, the holes are drilled to match the pin diameter. A 1/4-inch pin fits into a 1/4-inch hole. Nice and snug. The pin sits level, the shelf stays put, and everybody’s happy. But most mass-market furniture is made from particleboard or Medium-Density Fiberboard (MDF). That stuff is basically wood dust and glue pressed into a board. Cheap, stable, sure. But it doesn’t have the long-grain strength of solid wood.
Every time you move the shelf, every little vibration from someone walking by, every bit of seasonal wood movement wears that hole a little more. The fibers compress. The hole gets just a hair egg-shaped. Before long, it’s not really a 1/4-inch hole anymore; it’s more like a 9/32-inch-ish oval. Now the pin can lean. Once it leans, that thing’s toast. The force isn’t just going down anymore—it’s pushing outward too, and that’s what pulls the pin right out. It’s especially common with the L-shaped or “spoon” style pins, because those rely on a tight fit to stay put.
I pulled a bookcase in Frisco last month that had exactly this leak-of-a-problem—except it was shelves, not water. One pin kept spitting itself out every few weeks until the whole side started sagging. Same story every time.
Step-by-Step Fix
Here’s how I’d permanently fix those worn-out shelf pin holes so they’re stronger than new. We’ll use wood filler, which is the best bet for particleboard and MDF.
1. Empty and Remove the Shelf
- Start by taking everything off the bad shelf and the shelves below it. Pull the shelf board and any pins that are still hanging on. You need a clean workspace, no dice otherwise.
2. Clean Out the Hole
- Tools: A small pick or the end of a paperclip.
- Use a pick, a small nail, or even a straightened paperclip to scrape out loose debris, wood dust, and any failed finish from inside the hole. You’re trying to get back to a surface the filler can actually bite into. A quick puff of canned air or a vacuum with a crevice tool works great here.
3. Over-Drill (Slightly)
- Tools: Drill, drill bit that is 1/16-inch larger than the hole.
- This feels backward, but you want a clean, even surface for the filler to grab onto. If your pins are 1/4-inch, use a 5/16-inch drill bit. Wrap painter’s tape around the bit to mark the depth—you do not want to punch through the back of the cabinet. Drill slowly and gently. You’re getting rid of the weak, compressed material.
4. Pack the Hole with Filler
- Tools: Stainable, paintable wood filler, putty knife.
- Use a good two-part epoxy filler or a standard wood filler and press it firmly into the hole. Don’t just smear the top. Pack it in deep with a putty knife or your finger. Leave a little mound on the surface. That way you fill every void and cover any shrinkage while it dries.
5. Let It Cure Completely
- This is the step folks rush, and it bites them. Be patient. A standard wood filler might need 2-4 hours to harden. A two-part epoxy filler might be ready in as little as 15-30 minutes. Check the label. It’s got to be rock-hard before you drill again. If it’s even a little soft, it’ll tear out.
6. Sand it Flush
- Tools: 120-grit sandpaper.
- After the filler cures, use a small piece of sandpaper to level the excess flush with the cabinet surface. Now you’ve got a solid, flat patch with the old hole filled in.
7. Mark the Exact Center
- Tools: A spare shelf pin, a ruler or square.
- You need to re-drill the hole in the exact original location. Put the shelf back in, supported by the three good pins. Use a square so it’s level and sitting at the right height. Then use a spare pin to mark the dead center of your new filler patch. A light tap on the pin should leave a clean indentation for the drill bit.
8. Re-Drill the Final Hole
- Tools: Drill, drill bit matching the pin size (e.g., 1/4-inch).
- Again, wrap tape around your drill bit as a depth stop. Line up the tip with the mark you made and drill the new hole. Keep it slow and steady so it stays straight. This new hole is in fresh, solid material, so the pin should fit nice and snug.
9. Test the Fit
- Put the shelf pin in. It should be tight—you might need a firm push or a light tap to seat it all the way. That’s exactly what you want. Tight pin, stable shelf.
10. Reload the Shelf
- Put the shelf back, load it up, and you’re done. The repaired hole is now a lot stronger than the original factory-drilled one.
Common Causes
- Overloading: Every shelf has a weight limit. Push past it and the wood fibers around the pin holes compress faster.
- Low-Quality Material: Cheaper particleboard and MDF are less dense and wear out quicker. Solid wood and good plywood hold up much better.
- Vibration: Even little vibrations from walking, doors slamming, or a stereo can make pins walk out of loose holes over time.
- Humidity Swings: In humid places like North Texas, wood and wood composites swell and shrink. That movement can loosen the holes little by little.
- The Wrong Pins: Using 5mm pins, which are common in European furniture, in 1/4-inch holes, which are common in US furniture, creates just enough slop to cause failure. They’re not interchangeable.
Common Mistakes
- Just Buying New Pins: If the hole is worn out, a new pin of the same size won’t save you. It’ll fall out just like the old one.
- Using Glue: Don’t just squirt wood glue into the hole and shove the pin back in. That makes a weak, brittle bond that’ll crack under load. You need solid material in there.
- Wrapping the Pin: Taping the pin or wrapping it in foil is only a temporary patch at best. It doesn’t give you a real long-term fix and can fail without warning.
- Drilling Too Deep: Drill through the outside of your bookcase or cabinet and you’ve got a permanent cosmetic mess. Always use a depth stop on the bit.
- Not Waiting for the Filler to Cure: Drilling into soft filler just makes a bigger mess. You’ll be cleaning it out and starting over. Wait until it’s rock solid.
Cost & Time Breakdown
| Task | DIY Cost | Pro Cost | Time |
|---|---|---|---|
| Repair 4-8 shelf pin holes | $5–$15 (for wood filler) | $125–$200 (handyman service call) | 20-30 minutes (plus dry time) |
| Upgrade to shelf sleeves | $15–$30 | N/A | 45 minutes |
| Replace particleboard bookcase | $50–$300+ | N/A | 1-2 hours (assembly) |
Tips & Prevention
- Use Sleeves for New Furniture: If you’re buying new shelving or anything important, think about metal shelf support sleeves. They’re small inserts you tap into the drilled holes. The pin rides in the metal sleeve instead of the wood, so the wear problem pretty much goes away. They run about $10 for a pack of 50.
- Mind the Load: Pay attention to what’s living on that shelf. Heavy stuff like textbooks, canned goods, and cast iron pans belong on lower, fixed shelves if you can swing it. Spread the weight out.
- Check Pins Periodically: Once a year, give the shelf pins a quick push with your finger. If you feel wiggle or play, that hole’s starting to fail and you should fix it before it drops.
- Choose the Right Pin: L-shaped bracket pins give you more surface area and stability than simple round pegs. For heavy-duty use, look for locking shelf pins that clip onto the shelf so the shelf can’t get bumped up and off the pins.
When to Call a Professional
Honestly, this is almost always a DIY job. If the cabinet wall itself is splitting, water-damaged, or crumbling, though, no amount of hole repair is gonna fix that. And if you’re dealing with a valuable antique, I’d bring in a furniture restoration specialist. But for 99% of bookcases, kitchen cabinets, and entertainment centers, this is a repair you can absolutely handle yourself.
Related Articles
Keep troubleshooting with these hand-picked guides from FixlyGuide:
- That Falling Closet Rod? It’s The Tiny Anchor You’re Using. — Your closet rod keeps collapsing because the standard plastic anchors can't grip drywall; the fix is to anchor it properly to a wall stud o…
- That Falling Cabinet Door? It's the 15-Minute Hinge Adjustment You're Missing — Don't let a sagging cabinet door drive you nuts—most issues stem from a simple hinge adjustment that you can fix in minutes with just a scr…
- The Grimy Secret Under Your Bathroom Sink: Why Your Faucet Is Slow — A slow-flowing bathroom faucet is often more than just an annoyance; it's a clear sign of mineral buildup or internal damage that's surpris…
- The $10 Secret to Never Fixing a Stripped Screw Hole in Your Shelves Again — I'll show you how a common, cheap material can permanently fix stripped screw holes in shelves and furniture, saving you from wobbly repair…
- That 'Stud-Only' Belief? A Myth for Heavy Shelves — Tired of shelves ripping out of your drywall? The common advice to 'only use studs' is incomplete. Discover the modern anchoring techniques…
- The Humid House Headache: Why Your AC Can't Keep Up (and the Simple Fix) — Ever wonder why your AC is blasting but your house still feels muggy? I've seen it hundreds of times; your system might be oversized or jus…
Should you do this yourself?
Answer five quick questions before you start. Safety outranks savings every time.
Your experience with work like this
How high do you have to work?
Does the job involve any of these?
Will it need a permit?
Specialty tools
Free and instant. Educational guidance only — not a quote, inspection, or professional diagnosis.
What should this project cost?
Enter your project details for a realistic cost range before you call anyone.
Cosmetic refreshes start near $5,000; full remodels commonly $25,000–$45,000.
- Regional adjustment
- National average
- Labor share (typical)
- ~$8,550
- Quotes to collect
- 3 written estimates
Educational estimate based on national averages — not a binding quote. Always confirm with written local estimates.
Recommended for DIYers & woodworkers
Sponsored
The Top 20 Tools for Workshops of Any Budget
No stationary machines or power tools required — plus 3 fundamental tools that can't be bought at any price.
Get the free guide
Ted's Woodworking — The #1 Woodworking Resource
Detailed instructions, dimensioned drawings, materials & cutting lists, and 3D schematics for every skill level.
See the plansSponsored: links above are affiliate links. FixlyGuide may earn a commission on qualifying purchases — at no extra cost to you.
Frequently asked questions
What's the difference between 5mm and 1/4-inch shelf pins?+
They are very close in size, but not identical. A 1/4-inch pin is 6.35mm, so it will not fit in a 5mm hole. A 5mm pin will be very loose in a 1/4-inch hole, which can cause the shelf to fail. Always use the correct size pin for your furniture.
Can I just use a bigger shelf pin?+
This is a temporary fix at best. It might work for a while, but the oversized pin will accelerate the wear on the hole, and eventually, it will fail too. It's better to repair the hole and use the original pin size.
Are metal pins better than plastic ones?+
Yes, almost always. Metal pins, especially steel, are far stronger and less likely to deform or break under load. Clear plastic pins are prone to becoming brittle over time and can snap unexpectedly.
My shelf holes are stripped. Should I use wood glue?+
No. Wood glue is designed to bond wood-to-wood surfaces and has poor gap-filling properties. A dedicated wood filler or epoxy putty will create a much stronger and more durable repair by actually replacing the missing material.
What are the best types of shelf pins for heavy items?+
For heavy loads, look for locking shelf supports or L-shaped bracket-style pins. These provide a larger support surface for the shelf and prevent it from being accidentally lifted or bumped off the pins.
How can I prevent my shelf pin holes from wearing out in the first place?+
The best prevention is to install metal shelf support sleeves into the holes when the furniture is new. These sleeves line the hole and provide a durable metal surface for the pin to rest on, protecting the surrounding wood from wear.
Is epoxy filler better than regular wood filler for this repair?+
For particleboard or MDF, a two-part epoxy filler is generally superior. It cures faster, is incredibly strong, and doesn't shrink. However, a good quality, stainable/paintable wood filler will also work perfectly well if you let it cure completely.
The holes are on a dark-colored cabinet. How can I make the repair less obvious?+
Most wood fillers are a neutral tan, but they are paintable. After sanding the cured filler flush, use a small artist's brush and a matching furniture touch-up marker or paint to blend the repair with the surrounding finish. Once the pin is in, it will be virtually invisible.

Discussion
Loading comments…