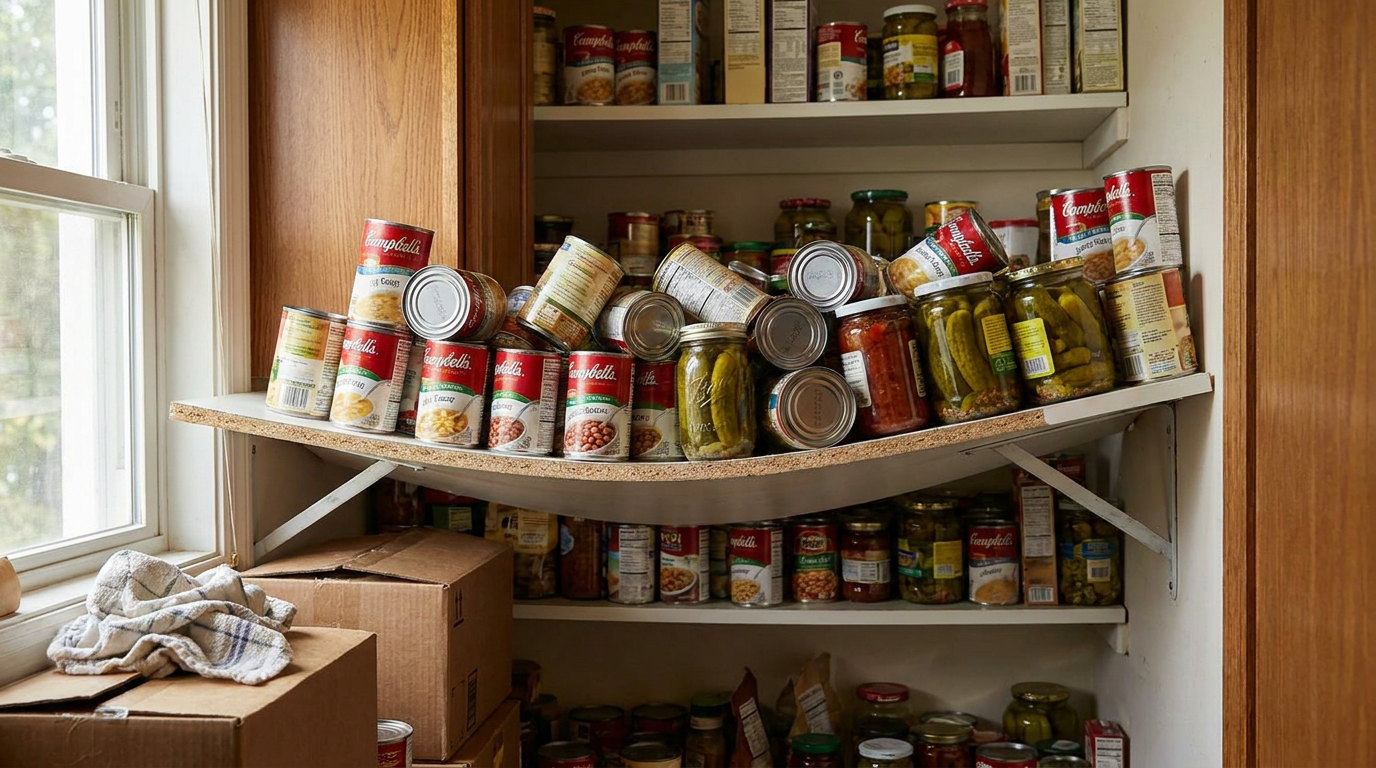
- Wrong Material: The 1 problem. Standard 5/8" particle board or MDF just can’t handle the concentrated weight of pantry staples over a span of 30+ inches.
- Span Is Too Long: The farther a shelf has to reach between supports, the weaker it gets. A shelf that’s fine at 24 inches wide will sag badly at 36 inches without a center bracket.
- Overloading: Even a decent shelf has limits. Pack a bunch of 15-ounce cans into one small area and you’ve created a point load that can still beat up plywood.
- Humidity/Spills: Moisture from spills or high humidity (real common in North Texas summers) can make particle board swell and weaken, which speeds up the sag.
- Weak Supports: Sometimes the shelf is okay, but the little plastic clips holding it up crack, or the wall cleats pull away from the drywall.
General remodeling · Renovation planning
| Project category | General remodeling |
|---|---|
| Problem type | Renovation planning |
| Trade required | General contracting |
| Urgency | Planned project |
| Safety risk | Low safety risk |
| DIY suitability | Pro recommended |
| Cost category | Major investment |
| Typical timeline | Design and permitting often 2–4 months before work starts |
| Contractor type | General contractor |
Repair option
Phase the work and fix the building envelope first.
Replacement option
Full renovation with permits, design, and a general contractor.
Common causes
- Space no longer fits how the household lives
- Resale preparation
- Deferred maintenance stacking up
Relevant tools:project cost estimatorcompare quoteshome improvement material prices
Published October 6, 2026Last updated October 6, 2026
Tools & materials you'll need
Affiliate linksAs an Amazon Associate FixlyGuide earns from qualifying purchases — at no extra cost to you. Prices and availability are accurate as of publication and subject to change.
Quick Answer
If your pantry shelves are sagging, it’s almost always because they’re made from standard particle board or MDF, and that stuff just isn’t built for heavy cans, jars, and bulk foods. The sag shows up slow. Sneaky, too. The material bends a little at a time under constant weight in the same spot. The real fix is to swap in 3/4-inch plywood and stiffen it up with reinforcement, like a 1x2 cleat along the front edge and a few more shelf brackets.
The Problem
You unload a big grocery run, stack everything nice and neat, and it looks fine. Then a few weeks later, there it is—a dip in the middle of the shelf, like it’s got a grudge. Your cans of beans and tomatoes start drifting toward the center. That sag isn’t just ugly; it’s your shelf telling you it’s getting tired. Most pantry shelves are built from 5/8-inch or even 1/2-inch particle board with a melamine skin, and that’s fine for cereal boxes and chip bags. It’s not fine for a 20-pound bag of flour or a dozen heavy glass jars. Constant pressure pushes past what the material can handle, so it starts to deform. Ignore it long enough and that shelf’ll keep on bowing until it gives up, and then you’ve got groceries on the floor and a mess nobody wants.
How It Works
Think of a shelf like a little bridge. It’s got to hold weight across a span, and the strength comes down to two things: what it’s made of and how far apart the supports are. Most builder-grade pantries use long stretches of particle board sitting on small clips or a simple wooden rail (a cleat) at the back and sides. Particle board is basically wood dust and glue pressed into a sheet. Cheap? Sure. Tough? No dice. It doesn’t have much long-grain strength, so it bends, or “deflects,” pretty easy under load.
Plywood is a different animal. It’s made from thin layers of wood veneer glued together, with each layer’s grain running the opposite direction from the next. That cross-grain construction gives it a lot more stiffness and bend resistance. A 3/4-inch sheet of plywood can carry a lot more weight over the same span than particle board can. Add a front support—a 1x2 hardwood “nose” or “cleat”—and you’re basically turning that flat shelf into a shallow “T-beam.” That’s what stops the sag from starting in the first place.
Step-by-Step Fix
-
Empty and Measure the Shelf: First thing, clear everything off the sagging shelf and the one below it so you’ve got room to work. Measure the exact depth and width of the old shelf with a tape measure. Write it down. A typical pantry shelf is 12 to 16 inches deep.
-
Remove the Old Shelf: Chances are the shelf is held by small plastic or metal clips, or it’s sitting on wooden cleats screwed to the pantry walls. Pry it up gently. If it’s stubborn, a pry bar might do the trick, but don’t go tearing up the drywall. Once it’s out, check the support cleats on the walls. If they’re loose or cracked, this is the time to beef them up with longer screws driven into wall studs.
-
Cut the New Plywood Shelf: Head to the hardware store and grab a sheet of 3/4-inch cabinet-grade plywood—sanded pine is fine, or birch if you want a smoother face. Have them cut it to the dimensions you measured. Most big-box stores’ll knock out the first couple cuts for free. Saves you a headache and a pile of sawdust at home. A 4x8 foot sheet can make several shelves.
-
Cut the Front Cleat: Here’s the part that really matters. You need a piece of 1x2 hardwood, like oak or poplar, cut to the same width as your new shelf. This gets glued and screwed to the front underside of the plywood shelf, which gives you that T-beam shape that fights bending. That’s the magic piece in this whole repair.
-
Attach the Cleat: Lay the plywood shelf upside down on a flat surface. Run a bead of wood glue along one of the 1-inch faces of the 1x2 cleat. Press it tight to the underside of the shelf, flush with the front edge. Clamp it down. Then drive 1-1/4 inch wood screws through the cleat and into the plywood every 6-8 inches so it’s locked in solid. Let the glue dry for at least an hour. I pulled a pantry shelf in Frisco last month that had exactly this kind of sag, and the front edge was so soft you could press it with one finger—toast is toast.
-
Sand and Finish (Optional but Recommended): Plywood edges can be rough, especially after cutting. Hit the front cleat and all the edges with 120-grit sandpaper. If you want, prime and paint it to match the inside of the pantry. A good semi-gloss paint helps protect the wood from spills, too. Let it dry all the way, usually 24 hours.
-
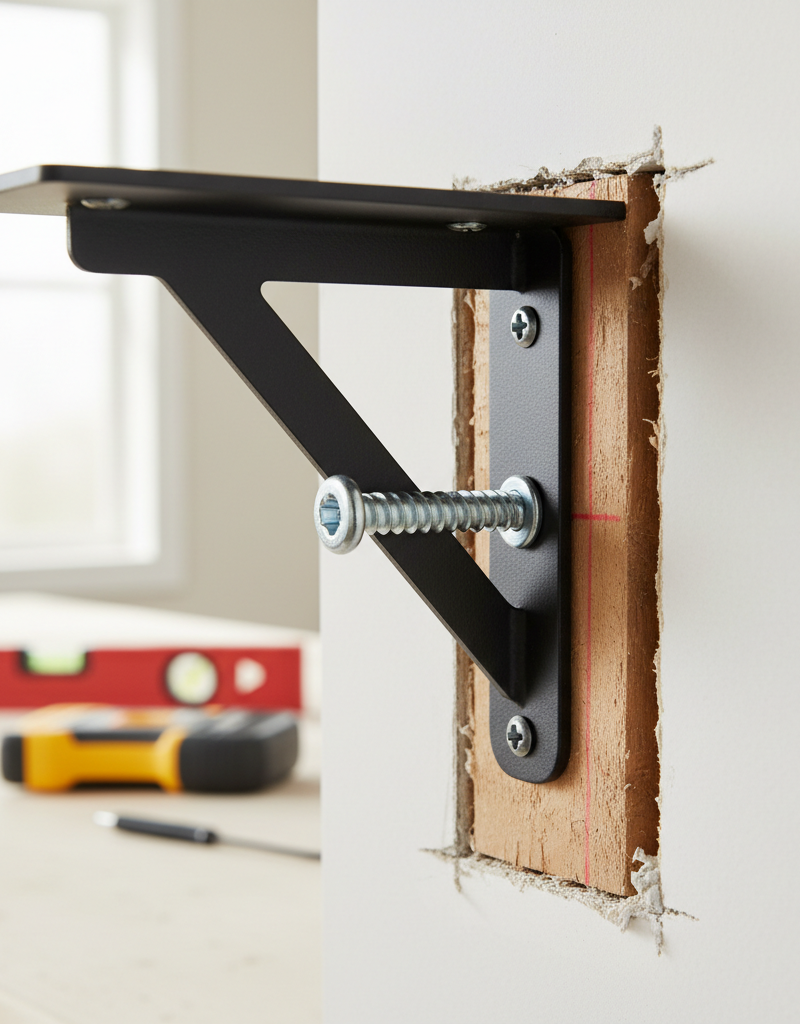
Add a Center Support Bracket: If the shelf is wider than 36 inches, you need a center support. Not optional. A heavy-duty metal shelf bracket works well. Find the center of the shelf width along the back wall of the pantry. Use a stud finder to locate a stud. If you find one, great. If not, you’ll need a sturdy drywall anchor rated for at least 50 pounds. Set the bracket so the top lines up dead level with your side support cleats.
-
Install Your New Shelf: Slide your new, reinforced shelf into the pantry. It should sit tight on the side and back cleats, and now on your new center bracket too. Press down on it—you’ll feel the difference right away. Solid. No wobble. Now you can load it with cans, jars, and bulk goods without sweating a collapse.
Common Causes
- Wrong Material: The #1 problem. Standard 5/8" particle board or MDF just can’t handle the concentrated weight of pantry staples over a span of 30+ inches.
- Span Is Too Long: The farther a shelf has to reach between supports, the weaker it gets. A shelf that’s fine at 24 inches wide will sag badly at 36 inches without a center bracket.
- Overloading: Even a decent shelf has limits. Pack a bunch of 15-ounce cans into one small area and you’ve created a point load that can still beat up plywood.
- Humidity/Spills: Moisture from spills or high humidity (real common in North Texas summers) can make particle board swell and weaken, which speeds up the sag.
- Weak Supports: Sometimes the shelf is okay, but the little plastic clips holding it up crack, or the wall cleats pull away from the drywall.
Common Mistakes
- Flipping the Shelf Over: People try it all the time. It might look better for a minute, but the shelf just starts sagging the other way. Doesn’t fix the root problem.
- Adding a Center Bracket Alone: Helps some, sure. But it doesn’t stop the front edge from bowing between the corners and the bracket, so you still end up with a weird “W” shape.
- Using Thinner Plywood: Don’t cheap out and grab 1/2-inch plywood. You need the full 3/4-inch thickness for real rigidity.
- Not Using Wood Glue on the Cleat: Screws by themselves aren’t enough. The glue ties the shelf and cleat together so they act like one piece. Skip it and you cut the strength gain in half.
- Ignoring the Back Wall: If your shelf sits on a back cleat, make sure that cleat is screwed into studs. If it’s just hanging off drywall with a few weak anchors, that’s a failure waiting to happen.
Cost & Time Breakdown
| Task | DIY Cost | Pro Cost | Time |
|---|---|---|---|
| Replace One 4-ft Sagging Shelf | $30–$50 | $150–$250 | 2–3 hours |
| Reinforce Existing Shelf with Cleat | $15–$25 | $100–$175 | 1–2 hours |
| Install Center Support Bracket | $10–$20 | $75–$125 | 30 minutes |
| Retrofit Entire Pantry (4 shelves) | $100–$200 | $500–$900+ | 1 full day |
Tips & Prevention
- Store Heavy Items Near the Sides: Put heavy cans, jars, and bags of flour or sugar closer to the side supports, not dead center. The middle of the span is the weakest spot.
- Use the 2/3 Bracket Rule: For open shelving, make sure your support brackets reach at least 2/3 of the shelf’s depth. A 12-inch deep shelf needs at least an 8-inch bracket.
- Install a Front Cleat from Day One: Even if your shelves are decent, adding a 1x2 hardwood cleat under the front edge is a cheap, 15-minute upgrade that’ll make them a lot stronger.
- Check Your Supports Annually: Once a year, empty a shelf and check that the support clips aren’t cracked and the wall cleats are still firmly attached.
- Wipe Up Spills Immediately: Don’t let liquids sit on particle board shelves. They soak in, weaken the fibers, and pretty much guarantee a sag down the road.
- Consider Can Organizers: Use stepped plastic organizers for cans. They spread the weight out better than stacking them in a pyramid right in the middle.
When to Call a Professional
This is a pretty manageable DIY job, but call a carpenter or handyman if the real problem is the wall itself. If the drywall around the support cleats is soft, crumbling, or showing signs of water damage, you’ve got a bigger issue that needs to be handled before you hang anything safely. Also, if your pantry is part of a custom cabinet system and you’re not comfortable making permanent changes, bring in a pro so the fix matches the original construction.
What should this project cost?
Enter your project details for a realistic cost range before you call anyone.
Cost depends heavily on which system turns out to be the source.
- Regional adjustment
- National average
- Labor share (typical)
- ~$1,620
- Quotes to collect
- 3 written estimates
Educational estimate based on national averages — not a binding quote. Always confirm with written local estimates.
Get the print-ready PDF of this guide
A clean, ad-free, printable version you can keep on your phone or pin to the workshop wall. Free with a FixlyGuide account.
- Print-optimized layout
- Tools, materials & every step included
- Saved to your account
Recommended for DIYers & woodworkers
Sponsored
The Top 20 Tools for Workshops of Any Budget
No stationary machines or power tools required — plus 3 fundamental tools that can't be bought at any price.
Get the free guide
Ted's Woodworking — The #1 Woodworking Resource
Detailed instructions, dimensioned drawings, materials & cutting lists, and 3D schematics for every skill level.
See the plansSponsored: links above are affiliate links. FixlyGuide may earn a commission on qualifying purchases — at no extra cost to you.
Frequently asked questions
Can I just flip my sagging shelf over?+
You can, but it's a very temporary fix. The particle board has already been weakened and will just start to sag in the opposite direction. To solve the problem for good, you need to replace or reinforce the shelf with stronger materials.
What's the best material for pantry shelves?+
For heavy loads, 3/4-inch plywood is the best choice for DIY-friendly pantry shelves. It's much stronger and more sag-resistant than the particle board or MDF that comes with most homes. Adding a 1x2 hardwood cleat along the front edge makes it even stronger.
How much weight can a 3/4-inch plywood shelf hold?+
A properly supported 3/4-inch plywood shelf, 12 inches deep, can typically hold about 40-50 pounds per linear foot. A 3-foot wide shelf could support 120 pounds or more, especially if it has a center support bracket and a front cleat.
How do I know if my pantry shelves are overloaded?+
The most obvious sign is a visible sag or bow in the middle of the shelf. You might also notice the shelf pulling away from the wall, or the small plastic or metal support clips looking strained or cracked. If cans and jars tend to slide toward the middle, it's definitely overloaded.
Do I need a center bracket for my pantry shelf?+
Yes, it's highly recommended for any shelf span wider than 36 inches, especially when storing heavy items. For spans over 48 inches, a center bracket is absolutely essential to prevent sagging, even with 3/4-inch plywood.
Can I use MDF instead of plywood for my pantry shelves?+
You can, but it's not ideal for heavy loads. While MDF is smooth and easy to paint, it's not as structurally strong as plywood and is more susceptible to sagging over time. If you use MDF, it's critical to add a 1x2 front cleat and a center support for any significant span.
What kind of screws should I use to attach the support cleats to the wall?+
You should use #8 or #10 wood screws that are long enough to penetrate at least 1.5 inches into the wall studs. For a standard 1/2-inch drywall wall, that means you'll need screws that are at least 2.5 inches long.
My pantry has wire shelves that are sagging. How do I fix those?+
Sagging wire shelves are usually caused by either overloading or support clips failing. You can try adding more wall clips to distribute the weight. For a more robust fix, you can install a wooden cleat (a 1x2 board) on the wall underneath the shelf to provide continuous support.
Discussion
Loading comments…