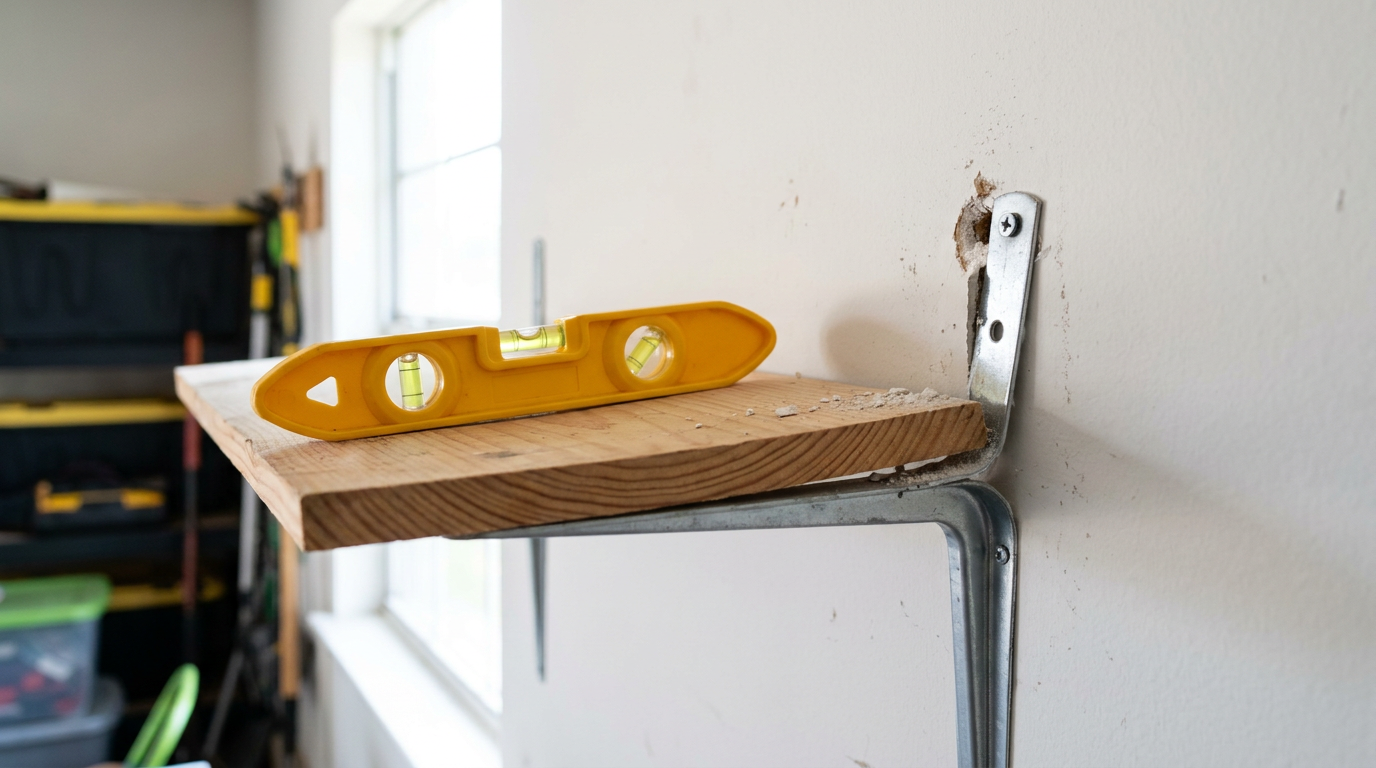
- Back out the failing hardware cleanly — Back the loose upper screws out with a cordless driver or hand screwdriver. Pull the bracket down off the wall.
- If an old ribbed plastic anchor sits loose in the drywall, don’t shove it through into the cavity; grab the collar with needle-nose pliers and pull it straight out.
- If the screw was driven into wood but stripped, pull the screw and check the tip: if it’s packed with wood pulp, the hole stripped because the screw was too narrow or over-torqued.
General remodeling · Renovation planning
| Project category | General remodeling |
|---|---|
| Problem type | Renovation planning |
| Trade required | General contracting |
| Urgency | Planned project |
| Safety risk | Low safety risk |
| DIY suitability | Pro recommended |
| Cost category | Major investment |
| Typical timeline | Design and permitting often 2–4 months before work starts |
| Contractor type | General contractor |
Repair option
Phase the work and fix the building envelope first.
Replacement option
Full renovation with permits, design, and a general contractor.
Common causes
- Space no longer fits how the household lives
- Resale preparation
- Deferred maintenance stacking up
Relevant tools:project cost estimatorcompare quoteshome improvement material prices
Published November 17, 2026Last updated November 17, 2026
Tools & materials you'll need
Affiliate linksAs an Amazon Associate FixlyGuide earns from qualifying purchases — at no extra cost to you. Prices and availability are accurate as of publication and subject to change.
Quick Answer
If your wall-mounted shelves are sloping downward toward the room, the top fasteners are pulling away from the wall framing or giving up inside the drywall. Get the load off right now before the whole setup lets go and drops your stuff. To fix sloped shelving for good, find your studs with a magnetic or electronic stud finder, swap out weak hardware for 3-inch #10 structural wood screws driven straight into framing, or use 3/16-inch steel snap toggles if the studs just won’t line up.
The Problem
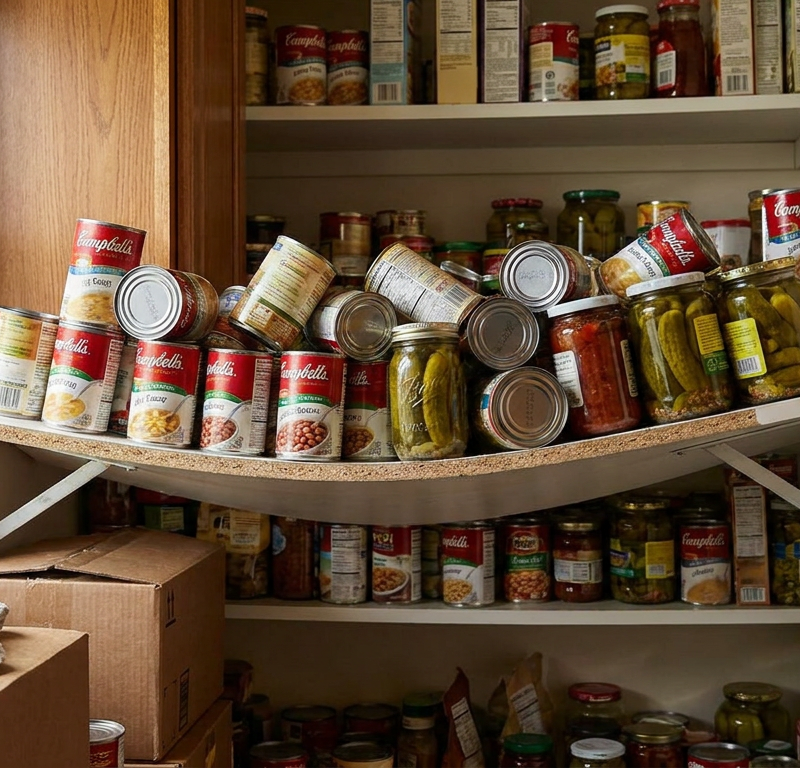
Walk into your kitchen, garage, or laundry room and look at your shelves from the side. Are they level with the floor, or do they lean down into the room? When a shelf starts to pitch forward, gravity turns every spice jar, paint can, or ceramic bowl into something you really don’t want hitting the floor.
A lot of homeowners think the board’s warped. Nine times out of ten, the wood’s fine—the wall connection is what’s failing.
Drywall has almost no real tensile strength. Put 40 pounds of books or tools on a 10-inch deep shelf, and that bracket turns into a class-one lever. That load doesn’t just push down; it creates a nasty outward rotational force ("cantilever moment") that yanks hard on the top screw while shoving the bottom heel of the bracket into the drywall. Plastic conical plugs, cheap drive-in hollow wall anchors, or puny 1-1/4-inch drywall screws will strip out or crush the gypsum in short order. Once that top anchor creeps forward by even an eighth of an inch, the shelf starts looking crooked fast.
Leave it long enough, and the drywall core turns to chalky white dust behind the paint. Then the anchor slips clean out and the whole thing rips off the wall.
How It Works
Shelf failure comes down to plain physics: cantilever mechanics and fastener sheer vs. tension ratings.
Every shelf bracket works like a pry bar. The horizontal arm carries the shelf board and its load, the vertical arm presses against the wall, and the 90-degree corner is the fulcrum. Once weight hits the shelf, the forces split in two directions. The lower leg of the bracket pushes inward against the wall with compressive force. Drywall handles that pretty well because the stud or wall plate is right behind it.
The top mounting hole sees the opposite: pure tension. The bracket wants to pivot forward around its bottom corner, pulling the top fastener straight out of the wall like a hammer yanking a nail.
A 12-inch deep shelf loaded with 50 pounds centered at 6 inches out creates 300 inch-pounds of rotational torque. If your bracket has an 8-inch vertical leg, that top fastener has to resist about 37.5 pounds of continuous outward pull. A standard plastic ribbed anchor might be rated for maybe 10 to 15 pounds of tension in 1/2-inch drywall before the plastic teeth shave right off.
        Load (Down)
           ↓
[ Shelf Board ]==============o (Downward tilt)
||                          /
|| (Top Screw: Pulls OUT)  /
|| <=== [TENSION]         /
||                       /
|| (Fulcrum)            /  (Rotational Torque)
||                     /
|| (Bottom: Pushes IN)/
|| ===> [COMPRESSION]
[Wall]
To keep the shelf dead level in the real world, that top fastener has to bite deep into the solid wood center of a 2x4 stud (good for over 200 pounds of pull-out resistance) or clamp behind the drywall with a wide steel toggle wing that spreads the tension across a big patch of gypsum. I pulled a water heater in Frisco last month that had exactly this kind of sloppy anchor failure on a utility shelf nearby—same story, same ugly pull-out.
Step-by-Step Fix
Before you touch a screwdriver, empty the shelf. Don’t risk a heavy dish set or a jug of motor oil dropping while you’re working.
-
Clear the shelf and inspect the gap — Strip the shelf bare and set a 24-inch torpedo or box level across the depth (front-to-back) of the shelf board. Watch how many degrees or fractions of an inch it dips out of level. Look straight at the upper bracket flange against the wall: you’ll probably see a visible gap of 1/16 to 1/4 inch where the screw head and anchor are creeping out.
- If the bracket sits flush against the wall but the shelf still dips, the metal bracket itself has bent past its 90-degree angle; bent brackets have to be replaced, not re-anchored.
- Safety check: If you see electrical faceplates directly above or below this bracket, be extra careful before driving any new fasteners into that stud cavity.
-
Dismount the shelf board and inspect the brackets — Unscrew the underside mounting screws that lock the shelf plank to the brackets. Lift the plank off and set it aside. Test the bracket by hand: wiggle the vertical flange. If the top screw moves even a little in and out of the wall surface, that anchor’s done.
-
Back out the failing hardware cleanly — Back the loose upper screws out with a cordless driver or hand screwdriver. Pull the bracket down off the wall.
- If an old ribbed plastic anchor sits loose in the drywall, don’t shove it through into the cavity; grab the collar with needle-nose pliers and pull it straight out.
- If the screw was driven into wood but stripped, pull the screw and check the tip: if it’s packed with wood pulp, the hole stripped because the screw was too narrow or over-torqued.
-
Locate the true stud center — Take a strong neodymium magnet or a multi-sensor electronic stud finder and sweep the wall 12 inches to the left and right of the damaged hole.
- A magnetic stud finder will stick right to the drywall screws holding the gypsum board to the 2x4s; trace two or three vertical screw heads with light pencil marks to find the exact plumb center of the stud.
- Tap a 1-1/2-inch finish nail or a 1/16-inch drill bit through the drywall across the suspected stud zone to find the solid wood edges; the stud is only 1-1/2 inches wide, and hitting the edge can make structural screws split the wood and pull out under tension.
-
Re-anchor into solid wood studs whenever possible — If you can shift the brackets sideways to line up with studs, that’s the gold-standard repair. Mark your new height line with a 48-inch level.
- Pre-drill a pilot hole through the drywall and 2 inches into the stud framing using a 1/8-inch drill bit.
- Drive a 3-inch, #10 structural wood screw (such as a GRK or Spax cabinet screw with an integrated washer head) through the top bracket hole directly into the framing.
- Stop driving the second that washer head seats firmly against the bracket metal; overdriving will sink the bracket into the drywall and throw the shelf out of square.
-
Install steel toggle bolts if studs are out of reach — If layout or looks mean the bracket has to land on hollow drywall between framing members, forget plastic anchors. Grab 3/16-inch or 1/4-inch steel strap toggles (like Toggler Snaptoggles).
- Drill a clean 1/2-inch hole right through the enlarged blowout hole left by the old failed anchor.
- Slide the solid metal channel flat alongside the plastic straps, push it through the hole until it flips open flat against the backside of the drywall, slide the plastic cap snug against the front wall face, and snap off the plastic legs flush.
- Thread the machine bolt through the top bracket hole and turn it into the metal toggle channel with a hand screwdriver until fully torqued. The steel channel spreads the pull-out force across a 2-inch span of drywall paper backing.
-
Shim the lower bracket heel if the wall is dished — Older homes with lath-and-plaster or sloppy drywall joints often have hollow spots or bows in the wall plane. Set the bracket flat against the wall; if the top is tight but the bottom vertical heel drops into a depression, the shelf will naturally pitch forward.
- Slip a plastic horseshoe shim (1/16-inch or 1/8-inch thickness) behind the bottom hole of the bracket before driving the lower fastener.
- The bottom fastener carries almost no pull-out force; a standard 1-1/4-inch drywall screw or light anchor is enough for the lower hole just to keep the bracket vertical and stop side-to-side pivoting.
-
Reinstall the shelf board and verify 90-degree square — Set the shelf plank back across the brackets. Before you drive the retaining screws from below, place an 8-inch carpenter’s framing square or speed square directly between the wall and the shelf deck.
- If the angle is slightly greater than 90 degrees (sloping down), insert a 1/16-inch shim between the bottom edge of the wall bracket and the wall surface to tilt the shelf plane back up.
- If the shelf measures dead 90 degrees or tilts back toward the wall by 1/32-inch, you’re good. Secure the underside screws into the shelf board.
-
Perform a progressive load test — Don’t reload the shelf to full capacity right away. Put about 25% of the total weight along the back edge against the wall. Check the front edge with your torpedo level. Add the rest of the weight evenly across the surface. Check it again. The bubble should sit dead center without any flex or movement at the upper wall fasteners.
Common Causes
Why do shelves dump their loads forward? It usually comes down to one of these mechanical mistakes:
- Reliance on plastic expansion plugs under tension: Ribbed plastic drywall plugs are built for shear loads (pulling straight down against a flat surface, like a light picture frame). Under horizontal pull-out tension from a bracket, their ribbed teeth just chew through the soft gypsum core.
- Short drywall screws: Using 1-1/4-inch or 1-5/8-inch bugle-head drywall screws into studs. Through 1/2-inch drywall, a 1-1/4-inch screw only bites 3/4-inch into the framing. The tapered bugle head can also pull right through thin stamped bracket holes.
- Missing the stud center: Driving a screw into the outer 1/8-inch bevel of a 2x4 stud. The screw grabs at first, but as soon as weight hits the shelf, it tears loose from the soft sapwood edge.
- Exceeding the bracket's depth ratio: Hanging a 14-inch wide shelf board on an 8-inch deep bracket. The overhang creates a huge lever arm and triples the tension on the top fastener. The bracket horizontal arm should support at least 70% to 80% of the shelf's total depth.
- Bowed wall framing: Studs in residential construction are rarely plumb. If the wall itself bows out at the top plate or dishes inward at mid-span, a bracket installed dead flat to the drywall will copy that inward slope.
Common Mistakes
- Re-drilling into the same blown-out drywall hole with a larger plastic anchor. When a 1/4-inch anchor pulls out, homeowners often grab a 3/8-inch anchor and pound it into the ragged hole. The inside drywall core has already cracked in a 2-inch circle. What to do instead: Either slide a steel snap toggle into that hole so its metal wing bridges well past the fractured gypsum, or patch the drywall and move the bracket 2 inches over into clean material.
- Tightening the top screw until the drywall crushes. Running a high-torque impact driver on a bracket screw until the metal flange sinks 1/4-inch into the wall surface ruins the drywall paper. Drywall gets its strength from the paper skin; once torn, the gypsum crumbles, and that’s the end of the bracket. What to do instead: Set your drill clutch low or finish the last three turns by hand with a ratcheting screwdriver.
- Ignoring the bracket’s internal angle. Stamped sheet-metal brackets from big-box stores are often bent a little out of square right off the shelf (often 92° or 93° instead of 90°). What to do instead: Check brackets with a speed square on your workbench before installation. Tap them gently on an anvil or vise to square them up, or return them for heavy-duty welded triangular brackets.
- Using adhesive to "help" a loose bracket. Smearing liquid nails or construction adhesive behind a pulling bracket does nothing except wreck the drywall finish when the bracket eventually rips free. Anchoring depends on mechanical fasteners grabbing solid structural timber or clamping plates.
Cost & Time Breakdown
| Task | DIY Cost | Pro Cost | Time |
|---|---|---|---|
| Re-anchor 2 brackets to solid studs | $5 – $10 (structural screws) | $120 – $180 | 25 – 40 mins |
| Hollow-wall repair with heavy-duty snap toggles | $8 – $15 (pack of 4 toggles) | $120 – $180 | 30 – 45 mins |
| Replace weak brackets with welded heavy-duty units | $25 – $50 (brackets & hardware) | $160 – $240 | 45 – 60 mins |
| Drywall blowout patch & relocation (if ruined) | $15 – $25 (spackle, tape, texture) | $200 – $350 | 1 – 2 hours (plus drying) |
Tips & Prevention
- Follow the 75% bracket support rule: Make sure the horizontal arm of your bracket reaches at least three-quarters of the shelf board's depth. If you’ve got an 11-1/4-inch deep board (standard 1x12 lumber), your bracket arm needs to be at least 8-1/2 to 9 inches long.
- Space brackets no more than 32 inches apart: Even with heavy wood shelves, spacing brackets 48 inches apart lets the wood sag in the middle, which pulls the front edge down. In kitchens, garages, or book storage, mount brackets every 16 inches—hit every wall stud if you can.
- Inspect fasteners annually in high-humidity zones: In laundry rooms, basements, and humid bathrooms, seasonal moisture softens drywall core gypsum, causing toggle anchors to bed deeper into the board and tilt forward. Give your brackets a firm up-and-down shake once a year to catch looseness early.
- Place heaviest items directly over bracket locations: Stack bulky cast-iron pots, heavy reference books, or paint cans right above the bracket arms instead of in the middle span or perched on the front edge of the shelf.
When to Call a Professional
Most sloped shelves are easy enough to cure with better fasteners and proper stud location. Still, step back and call a licensed handyman or carpenter if the drywall is sagging, soft, or visibly water-damaged around the mounting points; fasteners won’t hold in moisture-degraded gypsum, and the leak has to be fixed first. Call a pro too if you’re dealing with older lath-and-plaster walls that crumble into fine sand when drilled, or if structural metal metal-stud framing in high-rise condos calls for specialized self-drilling commercial toggles and careful framing knowledge so you don’t strip out the ultra-thin 25-gauge steel tracks.
Related Articles
Keep troubleshooting with these hand-picked guides from FixlyGuide:
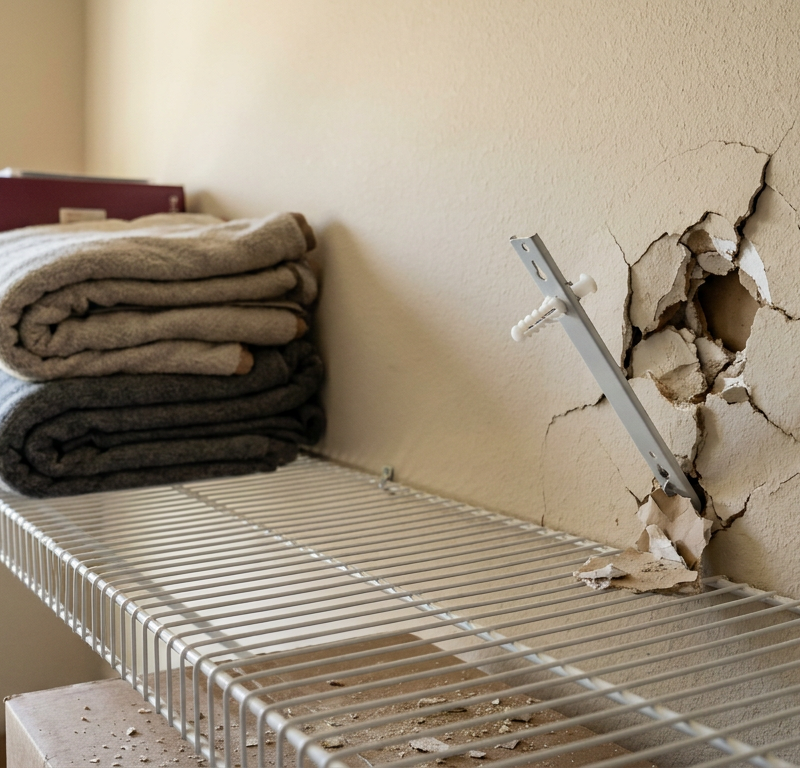
- Wire Shelving Pulling Out of Drywall? 5 Causes and the Permanent Fix — Fix falling wire shelving pulling out of drywall permanently using heavy-duty toggle bolts or a solid wood cleat anchored into framing stud…
- Why Your New IKEA Shelf is Already Wobbly (It's Not the Instructions) — Even flat-pack furniture like IKEA shelves can become wobbly soon after assembly if common mistakes are made; learn how to identify the cau…
- Paint Bubbling or Blistering? 8 Reasons It's Happening—and How to Fix It for Good — Seeing bubbles or blisters in your new paint job? Here are the eight most common causes, from heat and humidity to surface contamination, a…
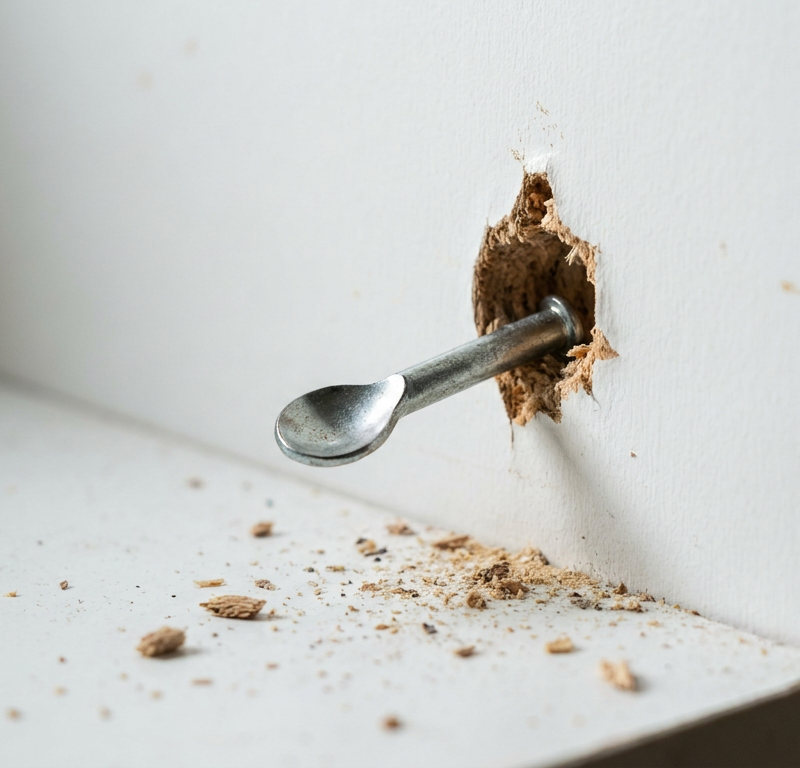
- The Mystery of the Loose Screws: Why Your Wood Furniture Keeps Coming Apart — Discover why screws in your wood furniture repeatedly loosen, causing instability, and learn the simple, lasting fix that avoids constant r…
- The Hard Water Secret: Why Your Shower Head Sprays Sideways (and the 10-Minute Fix) — Hard water mineral buildup can reduce shower head pressure and cause erratic spray patterns. Learn how to restore flow and direction in und…
- Deck Ledger Leaking Water? How to Fix Flashing and Rot in 10 Steps — Water leaking between your deck and house can rot structural rim joists. Learn how to diagnose, repair, and install deck ledger board flash…
Should you do this yourself?
Answer five quick questions before you start. Safety outranks savings every time.
Your experience with work like this
How high do you have to work?
Does the job involve any of these?
Will it need a permit?
Specialty tools
Free and instant. Educational guidance only — not a quote, inspection, or professional diagnosis.
What should this project cost?
Enter your project details for a realistic cost range before you call anyone.
Cost depends heavily on which system turns out to be the source.
- Regional adjustment
- National average
- Labor share (typical)
- ~$1,620
- Quotes to collect
- 3 written estimates
Educational estimate based on national averages — not a binding quote. Always confirm with written local estimates.
Get the print-ready PDF of this guide
A clean, ad-free, printable version you can keep on your phone or pin to the workshop wall. Free with a FixlyGuide account.
- Print-optimized layout
- Tools, materials & every step included
- Saved to your account
Recommended for DIYers & woodworkers
Sponsored
The Top 20 Tools for Workshops of Any Budget
No stationary machines or power tools required — plus 3 fundamental tools that can't be bought at any price.
Get the free guide
Ted's Woodworking — The #1 Woodworking Resource
Detailed instructions, dimensioned drawings, materials & cutting lists, and 3D schematics for every skill level.
See the plansSponsored: links above are affiliate links. FixlyGuide may earn a commission on qualifying purchases — at no extra cost to you.
Frequently asked questions
Why did my shelf tilt even though I used the anchors included in the box?+
Standard ribbed plastic anchors are designed to hold sheer loads (pulling straight down), not tension loads (pulling out horizontally). A loaded shelf acts as a pry bar, pulling the top screw straight out of the wall. Always use 3-inch screws driven directly into wall studs, or heavy-duty steel snap toggles if studs are inaccessible.
Can I fix a sloped shelf without anchoring into a wall stud?+
Yes, but you cannot use plastic expansion plugs. You must use 3/16-inch or 1/4-inch steel toggle bolts or strap toggles (such as Snaptoggles). These clamp a solid metal channel across the backside of the drywall paper, distributing the pull-out force over a wide area and safely holding up to 50 to 80 pounds per bracket.
What size screw should I use to mount a shelf bracket to a stud?+
Use a 3-inch #10 structural wood screw with a washer or pan head. Through 1/2-inch drywall, this leaves approximately 2-1/2 inches of continuous thread embedded deep into the solid center of the 2x4 framing stud, providing hundreds of pounds of pull-out resistance.
Can I reuse the same screw hole if my anchor pulled out?+
No. Drywall anchors hold their strength from the intact paper facing and dense gypsum core. Once an anchor pulls out, the gypsum behind the hole is shattered. Driving a screw into that cavity will fail immediately. You must either use a toggle bolt that spans past the damage or patch the drywall and shift the bracket.
Should a wall shelf be pitched slightly backward toward the wall?+
A slight backward pitch of roughly 1/16 to 1/32 of an inch toward the wall is acceptable and often desirable for heavy utility shelves, as the brackets will flex slightly under full load. However, a shelf should never pitch downward into the room.
How do I fix a shelf bracket if the wall surface itself is uneven?+
Place your torpedo level on the wall itself. If the wall leans outward, the bracket will tilt with it. To correct this, insert plastic horseshoe shims behind the lower mounting hole of the bracket until the horizontal arm reads dead level.
Why is the shelf sloping if the bracket is still solidly tight to the wall?+
If the shelf arm stays square against the wall, placing too much weight on the front edge of a thin shelf board (like 1/2-inch MDF or particle board) can cause the board itself to cup or warp forward. Replace the board with 3/4-inch cabinet-grade plywood or solid 1-by lumber, or add a front lip stiffener.
Can I use black drywall screws to mount my heavy shelves?+
Standard drywall screws are brittle, hardened steel designed exclusively to hold hanging sheetrock under static tension. They lack shear strength and will snap cleanly at the head when subjected to the angular, shifting leverage loads generated by loaded utility shelves. Always use structural wood screws or cabinet screws.
Discussion
Loading comments…