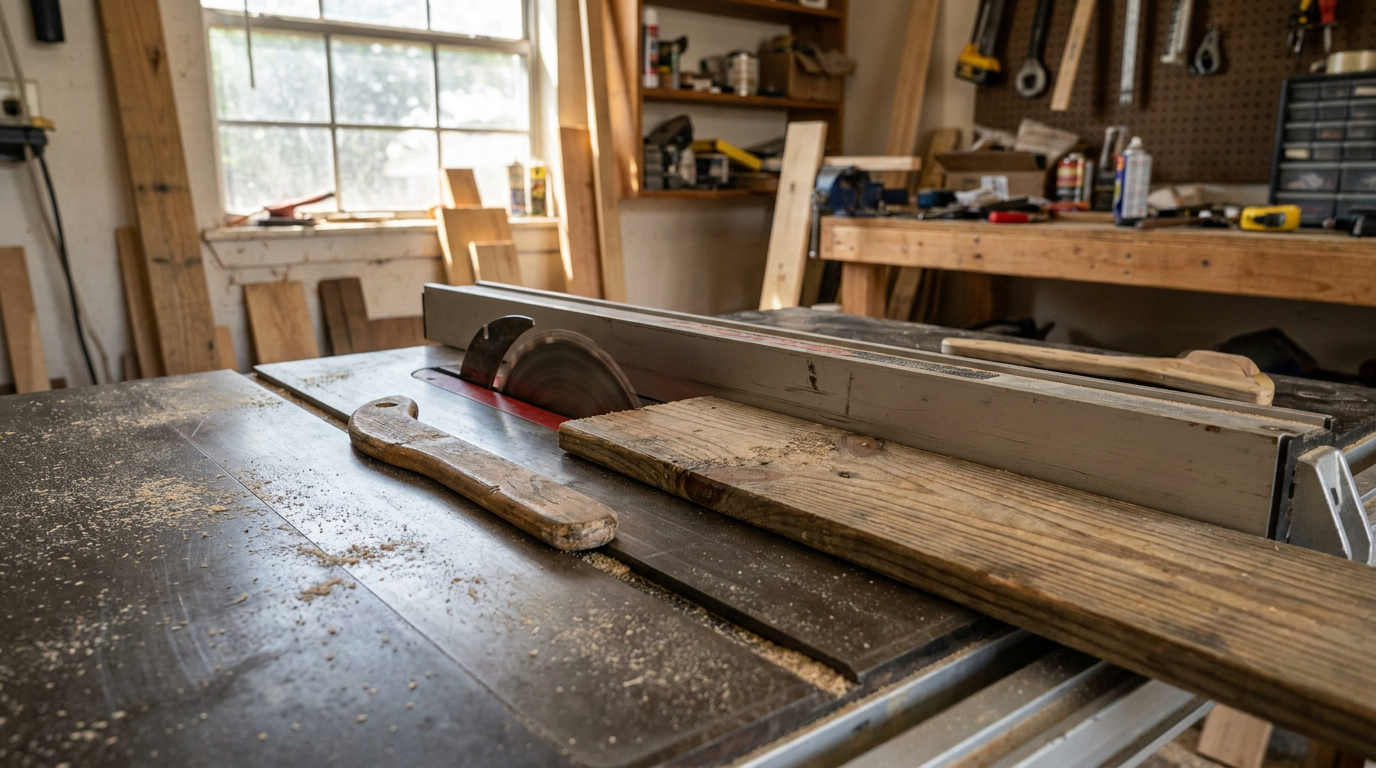
- Set Proper Blade Height — Raise the blade until the carbide teeth clear the top of your stock by no more than 1/8 to 1/4 inch (essentially one full tooth gullet).
- A blade buried too low creates more friction and makes you push harder.
- A blade raised 2 inches too high exposes too much cutting edge and gives you a nasty vertical hook if the cut binds.
General remodeling · Renovation planning
| Project category | General remodeling |
|---|---|
| Problem type | Renovation planning |
| Trade required | General contracting |
| Urgency | Planned project |
| Safety risk | Low safety risk |
| DIY suitability | Pro recommended |
| Cost category | Major investment |
| Typical timeline | Design and permitting often 2–4 months before work starts |
| Contractor type | General contractor |
Repair option
Phase the work and fix the building envelope first.
Replacement option
Full renovation with permits, design, and a general contractor.
Common causes
- Space no longer fits how the household lives
- Resale preparation
- Deferred maintenance stacking up
Relevant tools:project cost estimatorcompare quoteshome improvement material prices
Published November 18, 2026Last updated November 18, 2026
The shop list for this build
Hand-picked tools & materials — shop on Amazon, ships fast.
Hand tools & jigs
· Layout, joinery, and the everyday workbench essentials.- Shop on AmazonDial indicator or brass setup bar· 1
Why it's here: For blade and fence alignment
- Shop on AmazonHex key set· 1 set
Why it's here: To adjust table trunnions and fence screws
- Shop on AmazonL-shaped push shoe· 1
Why it's here: Long-sole push block
- Shop on AmazonFeatherboard· 1 or 2
Why it's here: Magnetic or miter-slot clamp
- Shop on AmazonAluminum straightedge· 1
Why it's here: At least 24 inches long
Materials & hardware
· Lumber, fasteners, glue, abrasives — the consumables.- Shop on AmazonRiving knife or aftermarket splitter· 1
Why it's here: Matched to blade kerf thickness
Finishes & coatings
· Stains, dyes, top-coats, and prep products.- Shop on AmazonPaste wax· 1 can
Why it's here: For cast iron tabletop and fence face
Quick Answer
Table saw kickback happens when wood binds between the spinning blade and rip fence or pinches behind the cut, launching the workpiece back at speeds exceeding 100 mph. To keep that from turning ugly, I always want a riving knife or splitter in place, the stock riding flush against a fence that's actually set right, no warped lumber sneaking into the cut, and a push stick on anything narrower than 6 inches. If the wood starts pinching or lifting, kill the power right then with your hip or knee—don’t move your hands around trying to be a hero.
The Problem
Table saw kickback is violent, terrifying, and it happens in under 50 milliseconds. Faster than you can blink. You’re ripping a 1x4 or trimming down a piece of 3/4-inch plywood, and all at once a wood missile comes flying into your gut or punches a hole through your garage drywall. I pulled a water heater in Frisco last month and the homeowner had a garage wall with a clean saw-gun hole right through the sheetrock. Same story, different day. Worse, that backward force can drag your leading hand straight into the teeth.
Most homeowners figure kickback comes from pushing too hard or running a dull blade. A dull blade sure doesn’t help, but kickback is a physics problem. Friction, kinetic transfer, wood tension—that’s the whole mess. Once you understand what makes the stock bind, you’re a lot closer to keeping your fingers where they belong and not spending the afternoon in an ER waiting room.
How It Works
A standard 10-inch table saw blade spinning at 3,450 to 4,000 RPM creates a rim speed of roughly 100 to 120 mph. The front teeth cut downward, pressing your stock hard into the cast iron or aluminum tabletop. That downward force is what gives you control. But the back teeth on that same blade are moving straight up at the exact same speed.
Kickback happens when wood touches those rising rear teeth.
Top View of Table Saw Kickback Dynamics:
======================================================
 [Rip Fence] -----------------------------------------
      |               ^
      |   (Pinch!)    |  Wood binds here
      v               v
 [Board] ---> [Blade Back Teeth (UPWARD FORCE)] -> LAUNCH!
      ^               ^
      |   (Cut Line)  |  Wood enters here
      |               v
 [Board] ---> [Blade Front Teeth (DOWNWARD FORCE)] (Normal Cut)
======================================================
If the board drifts off the rip fence, rotates even 1/32 of an inch, or has internal tension that closes the kerf behind the blade, the wood grabs those upward-moving rear teeth. The teeth lift the back of the workpiece off the table. Once it’s airborne, the spinning blade acts like a gear rack, turning rotational energy into straight-line force and sending the board right back at you.
Without a riving knife—a curved steel plate sitting roughly 1/8 inch behind the blade that matches the blade’s curve—there’s nothing keeping the kerf open or stopping the board from pivoting into the rear teeth. No dice.
Step-by-Step Fix
Follow this setup and cutting routine every time you fire up the saw. It’s not fancy. It just works.
-
Install and Align the Riving Knife — Unplug your saw and mount the factory riving knife or aftermarket splitter directly behind the blade arbor. The gap between the arc of the knife and the blade teeth must measure between 1/8 inch and 5/16 inch (3 mm to 8 mm), and the knife must sit perfectly centered with the blade’s kerf thickness.
- I like to run an aluminum straightedge along both sides of the blade body to make sure the knife doesn’t wander left or right.
- If your older contractor saw doesn’t have a riving knife mount, install an aftermarket micro-splitter into a custom zero-clearance insert plate.
-
Check Blade-to-Miter-Slot Parallelism — Mount a dial indicator or a brass setup bar in your right miter slot and measure the distance to a marked tooth at the front of the blade, then rotate that same tooth to the back and measure again. The difference must be under 0.002 inches.
- If the rear of the blade toes toward the fence, loosen the trunnion bolts under the cabinet and bump the assembly until it’s parallel.
- Don’t force a cut if the blade is cocked; that thing’s begging to bind on a through-cut.
-
Align the Rip Fence Parallel to the Blade — Lock your rip fence down and measure the distance from the fence face to the miter gauge slot at both the front and rear of the table. The rear measurement should either be dead parallel or kick out away from the blade by 0.002 to 0.005 inches (known as "run-out").
- A fence that toes inward toward the blade rear makes a narrowing funnel and crushes wood into the upward-spinning teeth.
- Adjust the set screws on your fence’s locking head using a 5 mm hex wrench until the gap is dialed in.
-
Joint and True Your Lumber Edges — Never run rough, cupped, or live-edge lumber directly against the rip fence. The edge riding the fence has to be dead straight; if a curved edge hits the fence, the board rocks mid-cut, pinches the blade, and fires backward.
- Run warped boards through a jointer first, or clamp the board into a plywood straight-line rip jig with toggle clamps.
- If you’re using construction lumber (like 2x4s or 2x6s), let it acclimate in your shop for at least 72 hours and rip off the rounded factory edges using a dedicated sled.
-
Set Proper Blade Height — Raise the blade until the carbide teeth clear the top of your stock by no more than 1/8 to 1/4 inch (essentially one full tooth gullet).
- A blade buried too low creates more friction and makes you push harder.
- A blade raised 2 inches too high exposes too much cutting edge and gives you a nasty vertical hook if the cut binds.
-
Position Your Body Out of the Line of Fire — Stand strictly to the left of the rip fence line, with your hips lined up with the left miter slot.
- Don’t stand dead-center behind the workpiece or blade.
- Keep your feet shoulder-width apart so you don’t get knocked off balance if the workpiece jerks forward.
-
Deploy Push Sticks and Featherboards for Narrow Cuts — Clamp a plastic or wooden featherboard to the table surface ahead of the blade to hold the stock flat against the fence, and use an L-shaped push shoe for any rip under 6 inches wide.
- Put the featherboard before the blade’s front teeth, never right beside or behind the blade where it would squeeze the kerf together.
- Use a push stick with a heel that hooks over the rear of the board while downward pressure keeps the stock seated on the table.
-
Execute the Cut with Balanced Two-Hand Feed — Push the wood smoothly forward with your right hand on the push stick, using your left hand only as an outward guide against the fence well ahead of the blade.
- Once your left hand comes within 6 inches of the front blade teeth, lift it and set it safely behind you or on the table rail.
- Feed the workpiece all the way past the riving knife and blade teeth until it clears the rear edge of the table.
-
Clear the Offcut Safely — Leave loose offcuts sitting on the outfeed table until the blade spins down to a dead stop.
- Don’t reach across a spinning blade with bare fingers to grab a cutoff strip.
- If an offcut vibrates toward the blade, use a 2-foot scrap stick to slide it clear, or just tap the large paddle emergency stop switch with your knee.
Common Causes
Kickback doesn’t happen by magic. One of these five mechanical issues causes it virtually every single time:
- Missing Riving Knife or Splitter: By far the leading cause in home shops. Folks pull the stock blade guard assembly to make non-through cuts (like dados or rabbets) and never put the knife back. The cut kerf closes up behind the blade because of internal wood stress, and it grabs the upward-spinning teeth.
- Fence Misalignment (Toe-in): If your rip fence angles toward the rear of the blade by even 1/64 of an inch, it traps the wood against the rising teeth like a wedge.
- Ripping Warped or Tensioned Lumber: Kiln-dried framing lumber from big-box stores carries a ton of internal stress. When you cut through it, the fibers release and the kerf can bow open or clamp shut on the blade body.
- Using the Miter Gauge and Rip Fence Simultaneously: Homeowners crosscutting short boards often bump the end against the rip fence as a length stop while pushing with the miter gauge. The cutoff gets trapped between the fence and spinning blade, spins sideways, and launches instantly.
- Freehand Cutting: Trying to cut a line without the edge firmly referenced against either the rip fence or a crosscut sled. The smallest wrist twist can pivot the board into the blade teeth.
Common Mistakes
- Using a pencil-style push stick instead of an L-shoe: Those skinny plastic sticks give you downward force on one spot, but they don’t control tilt or forward shove worth a lick. Build or buy a long wooden push shoe that hooks the tail of the board and presses down along 8 to 10 inches of the workpiece surface.
- Reaching behind the blade to pull wood through: Don’t grab the outfeed side of a board while the blade’s still turning. If the wood catches, your hand gets yanked straight backward across the spinning arbor before your reflexes even get a vote.
- Trapping crosscuts against the rip fence: If you need repeatable crosscuts, clamp a 3/4-inch wood spacer block to the fence ahead of the blade. The board registers against the block for length, but once it touches the blade, it sits in free air with plenty of clearance.
- Leaving the fence loose: Always slap down your fence locking lever and give the rear of the fence a hard shove with your palm to verify it doesn’t deflect before you make the cut.
- Standing directly in the kickback path: Leaning over the cut line to check your pencil mark puts your chest and neck right in the line of fire. Stand off to the side and look down diagonally.
Cost & Time Breakdown
| Task / Solution | DIY Cost | Pro Service Cost | Time Required |
|---|---|---|---|
| Align Blade & Fence Parallel | $0 (Hex keys + ruler) | $120–$180 (Shop tune-up) | 30–45 mins |
| Retrofit Splitter / Zero-Clearance Insert | $35–$65 (Insert + kit) | $150 (Bench fee + parts) | 45 mins |
| Install Magnetic Featherboard & Push Shoe | $25–$50 (Materials) | N/A | 15 mins |
| Upgrade to Anti-Kickback Ripping Blade | $45–$90 (24T blade) | N/A | 10 mins |
| Build Dedicated Crosscut / Straight-Line Sled | $30–$60 (Plywood + rails) | $150–$250 (Custom jigs) | 2–3 hours |
Tips & Prevention
- Listen to the motor pitch: If the motor bogs down, drops in pitch, or the wood starts smoking during a cut, stop pushing. The kerf is pinching. Hit the off switch with your knee immediately.
- Inspect boards for internal bow before cutting: Sight down the edge of every board. If it has a bad crook, crown the hollow side toward you on a sled or trim it down into shorter lengths with a miter saw first.
- Keep your saw table waxed: Apply paste wax (like Johnson's or Renaissance Wax) to the cast-iron table and fence face every 30 to 60 days. Slick surfaces cut feed friction by 60%, and that helps keep the board moving instead of jerking.
- Wedge the kerf on long rips: If you’re ripping an 8-foot piece of hardwood and see the cut seam starting to squeeze together behind the splitter, slip a small plastic shim or wooden wedge into the cut kerf to hold it open.
- Check fence parallel every season: Temperature swings and seasonal humidity changes in unconditioned North Texas garages move cast-iron tables and aluminum rails around. Re-verify fence alignment with your calipers twice a year.
When to Call a Professional
Most table saw maintenance, alignment, and safety setups can be handled with hand tools in your garage. Still, you should step back and call an electric motor technician or machinery repair service if:
- The motor arbor shaft has measurable run-out (radial play) exceeding 0.003 inches, which points to damaged arbor bearings that need a hydraulic press to service.
- The table saw trunnions (the cast-iron brackets that mount the motor and blade assembly to the table) are cracked, stripped, or rusted solid, preventing parallel alignment.
- Your saw trips the 20-amp breaker under zero load, which usually means internal stator winding shorts or a blown motor start capacitor.
- The cast-iron tabletop is warped or dished across its width by more than 0.015 inches, and that takes precision machine-shop blanchard grinding to fix.
For structural tool damage or heavy electrical faults, trying to cobble together a repair just piles on the risk. Replace the tool or pay a machinery repair tech.
Frequently Asked Questions
Can kickback happen if I have a riving knife installed?
Yes, though a riving knife cuts the risk way down. Kickback can still happen if your rip fence toes inward toward the blade, if you cut twisted or severely cupped boards that ride up over the knife, or if you pinch an offcut between the blade and fence during a crosscut. The riving knife keeps the kerf open and stops lateral rotation into the rear teeth, but bad feeding can still lift the stock.
What is the difference between a riving knife and a splitter?
A riving knife mounts to the saw’s internal arbor trunnion, so it moves up, down, and tilts with the blade and stays within 1/8 inch of the teeth at all times. A splitter mounts to a fixed point on the saw table or throat plate behind the blade; it doesn’t rise or fall with the blade, which makes it less useful on shallow cuts and impossible to use for non-through cuts.
What should I do if a board pinches the blade mid-cut?
Don’t try to force the board forward, and don’t yank it backward. Hold the workpiece rock-steady against the fence and tabletop with your push stick, keep forward downward pressure, and use your knee or hip to bump the paddle shutoff switch. Stand dead still until the blade stops spinning completely, then use a wooden wedge to pry the kerf open before you remove the board.
Why do European woodworkers rarely experience kickback?
European machinery rules require riving knives on all saws, standard riving-knife-mounted overhead dust hoods, and short rip fences. A European-style rip fence ends just past the center of the saw blade arbor instead of running all the way across the table. That leaves open space on the outfeed side, so once the wood is cut, the offcut can’t get trapped against the fence.
Is an anti-kickback pawl system necessary if I have a riving knife?
Anti-kickback pawls—the spring-loaded metal teeth that drag along the wood behind the blade guard—give you another layer of mechanical bite, but they’re not strictly necessary if you’ve got a properly aligned riving knife. Lots of woodworkers pull the pawls because they scratch soft woods like pine and walnut, or snag on reversing cuts, while a riving knife gives you passive protection without marring the project.
Can I rip a 2x4 on a table saw without kickback?
Yes, but you’ve got to respect it because construction-grade 2x4s hold a lot of internal moisture and drying stress. Don’t run a 2x4 through the saw with the rough, bowed, or crowned face against the fence. Joint or flatten one face and one edge first, or use a straight-line ripping sled. If the 2x4 starts binding, stop immediately, since framing lumber’s famous for clamping onto table saw blades.
Does blade sharpness affect table saw kickback?
A dull or resin-coated blade ramps kickback risk way up. When carbide teeth are dull, they can’t slice clean wood fibers; they plow and compress the wood instead. That means you’ve got to shove harder to get the board through. More pressure forward means a better chance the wood slips, rotates, or jumps up off the table surface into the rear teeth.
Why can't I use my miter gauge and rip fence together?
Using both creates a closed trap. The miter gauge pushes the workpiece forward at a fixed 90-degree angle, while the rip fence traps the cut piece between the blade body and the fence face. As the cut finishes, the severed block has nowhere to go; if it twists even a fraction of a millimeter, the upward-moving back teeth bite into it and fling it backward at lethal speeds. Always use a standalone stop block clamped ahead of the blade.
What push stick design provides the best kickback protection?
A notched push shoe (often called an L-shoe or push block) is a lot better than standard V-groove or stick-style pushers. An L-shoe spreads downward pressure over 8 to 12 inches of the board’s surface while its rear heel hooks the end of the stock to drive it forward. That keeps the workpiece from lifting off the cast-iron table—which is the exact vertical motion that starts kickback.
Related Articles
Keep troubleshooting with these hand-picked guides from FixlyGuide:
- The Hidden Culprit Behind Your Fuzzy Table Saw Cuts (It's Not Just the Blade!) — Fuzzy table saw cuts and tearout are frustrating, but often the problem isn't just your blade; hidden factors like feed rate, blade height,…
- Miter Joints Keep Opening Up? 6 Reasons and the Proven Fix — Stop miter joints from gaping open. Learn how to calibrate your saw, stabilize cuts, use shooting boards, and clamp corners correctly for i…
- Paint Wrinkling on Your Walls? 6 Causes and the Exact Fix — Stop peeling and scraping wet paint. Learn why paint wrinkles, how to sand down the ridges, and the exact steps to recoat for a smooth, fla…
- That Falling Cabinet Door? It's the 15-Minute Hinge Adjustment You're Missing — Don't let a sagging cabinet door drive you nuts—most issues stem from a simple hinge adjustment that you can fix in minutes with just a scr…
- Framing Nail Gun Sinking Nails Too Deep? 6 Causes of Overdriven Nails (And the Right Depth) — Frustrated by your nail gun driving nails too deep and damaging your wood? Learn the six common causes, from air pressure to worn-out parts…
- How to Safely Replace a Light Switch: 12 Steps to a Safe DIY Install — Step-by-step guide to safely replacing a standard single-pole light switch, from testing for zero voltage to wiring terminal screws and avo…
Should you do this yourself?
Answer five quick questions before you start. Safety outranks savings every time.
Your experience with work like this
How high do you have to work?
Does the job involve any of these?
Will it need a permit?
Specialty tools
Free and instant. Educational guidance only — not a quote, inspection, or professional diagnosis.
What should this project cost?
Enter your project details for a realistic cost range before you call anyone.
Cost depends heavily on which system turns out to be the source.
- Regional adjustment
- National average
- Labor share (typical)
- ~$1,620
- Quotes to collect
- 3 written estimates
Educational estimate based on national averages — not a binding quote. Always confirm with written local estimates.
Before you start
Check the difficulty, permits, and safety risk — then decide whether to call a pro.
- Estimate this projectGet a cost range for your scope and ZIP before you call anyone.Open
- Get local estimatesSend one request and compare written estimates from vetted pros.Open
Free, no signup required. Estimates are educational guidance, not a quote or an inspection.
Get the print-ready PDF of this guide
A clean, ad-free, printable version you can keep on your phone or pin to the workshop wall. Free with a FixlyGuide account.
- Print-optimized layout
- Tools, materials & every step included
- Saved to your account
Recommended for DIYers & woodworkers
Sponsored
The Top 20 Tools for Workshops of Any Budget
No stationary machines or power tools required — plus 3 fundamental tools that can't be bought at any price.
Get the free guide
Ted's Woodworking — The #1 Woodworking Resource
Detailed instructions, dimensioned drawings, materials & cutting lists, and 3D schematics for every skill level.
See the plansSponsored: links above are affiliate links. FixlyGuide may earn a commission on qualifying purchases — at no extra cost to you.
Frequently asked questions
Can kickback happen if I have a riving knife installed?+
Yes, though a riving knife dramatically reduces the risk. Kickback can still happen if your rip fence toes inward toward the blade, if you cut twisted lumber that rides over the knife, or if you trap an offcut between the blade and fence. The knife keeps the kerf open, but improper feeding technique can still cause trouble.
What is the difference between a riving knife and a splitter?+
A riving knife is mounted to the blade's trunnion assembly, so it rises, falls, and tilts along with the blade, maintaining a safe 1/8-inch gap. A splitter is bolted to a fixed bracket on the table frame or throat plate, so it cannot follow the blade up or down and must be removed for shallow non-through cuts.
What should I do if a board pinches the blade mid-cut?+
Never force it forward and never yank it backward. Keep your push stick steady with downward pressure against the fence, then lean down and slap the emergency shutoff switch with your hip or knee. Hold everything dead-still until the blade stops completely before wedging the cut open.
Why do European woodworkers rarely experience kickback?+
European regulations mandate short rip fences that stop just past the arbor of the blade, leaving wide-open clearance on the outfeed side. Because the fence doesn't extend across the whole table, severed stock cannot get wedged between the fence and rising rear teeth.
Is an anti-kickback pawl system necessary if I have a riving knife?+
Anti-kickback pawls provide physical teeth that dig into stock if it slides backward, but they are optional if you have a properly aligned riving knife. Many woodworkers skip pawls because they mar soft lumber surfaces and catch on thin cuts, whereas the riving knife provides clean, constant protection.
Can I rip a 2x4 on a table saw without kickback?+
Yes, but only if the board has a true, flat reference edge. Construction-grade 2x4s carry immense internal moisture and drying tension that frequently causes the kerf to pinch shut behind the blade. Joint the reference edge first or run the board on a straight-line sled.
Does blade sharpness affect table saw kickback?+
Dull teeth cannot shear wood fibers cleanly; they plow through stock, generating extreme friction and heat. This friction forces you to push significantly harder against the workpiece. Heavy feed pressure dramatically increases the likelihood of the board twisting or lifting into the blade's rear teeth.
Why can't I use my miter gauge and rip fence together?+
Trapping wood between the miter gauge face and the rip fence creates a pinch zone. Once the cut is made, the cutoff piece has zero clearance; the slightest vibration kicks it sideways into the rear blade teeth, launching it straight into your torso. Always use a floating stop block clamped ahead of the blade.
What push stick design provides the best kickback protection?+
An L-shaped push shoe with a long sole (8 to 12 inches) and a rear heel is the gold standard. It applies downward force along the length of the board to stop it from lifting while driving it forward. Single-point pencil sticks offer zero control over vertical board movement.
Discussion
Loading comments…