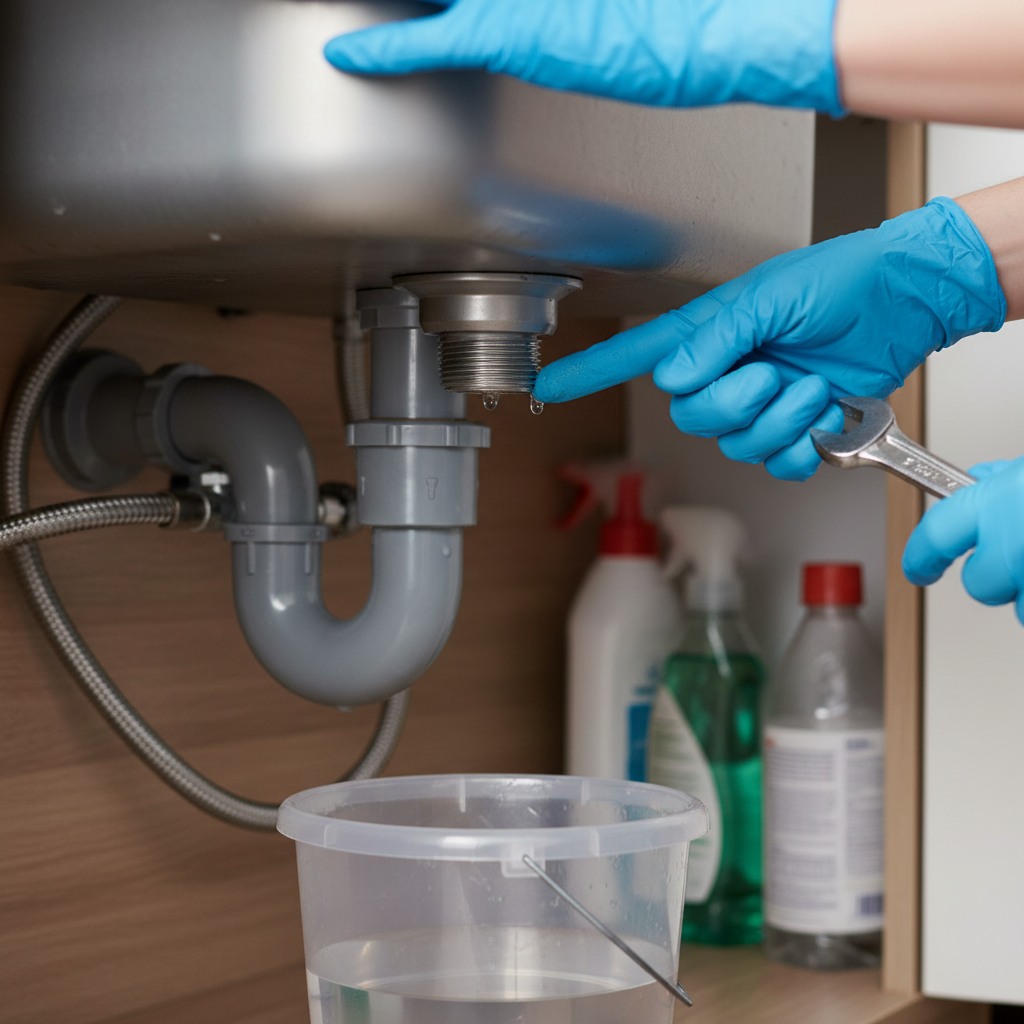
- Locate the Leak's Origin – Detective work is key
- Clear everything out from under the sink first. You need space to work and a dry floor under there so you can actually see where the water’s coming from. I’ll throw down an old towel or a couple layers of newspaper and call it a day.
- Plug the sink and fill it with about 4-6 inches of water. Wait a few minutes, then check only the top connection point (the sink flange). If it starts dripping right away, you found the leak.
- Still nothing? Run the dishwasher through a cycle and watch the dishwasher inlet port on the disposal. That’s a common leak point, and it usually shows itself pretty quick.
Plumbing · Leak
| Project category | Plumbing |
|---|---|
| Problem type | Leak |
| Trade required | Plumbing |
| Urgency | Emergency — act now |
| Safety risk | High safety risk |
| DIY suitability | DIY for experienced homeowners |
| Cost category | Low cost |
| Typical timeline | Shut water off now; repair usually same or next day |
| Contractor type | Licensed plumber |
Repair option
Isolate at the shutoff, replace the failed component, and dry the cavity fully.
Replacement option
Repipe the run or the branch when corrosion is widespread.
Common causes
- Failed supply line or shutoff valve
- Worn washers, cartridges, or P-trap connections
- Pinhole corrosion in older copper
Relevant tools:emergency checklistdiy or hire a pro
Published September 20, 2026Last updated September 20, 2026
Tools & materials you'll need
Affiliate linksAs an Amazon Associate FixlyGuide earns from qualifying purchases — at no extra cost to you. Prices and availability are accurate as of publication and subject to change.
Quick Answer
If you’ve got a drip under your sink and it’s coming from the garbage disposal, you’re usually dealing with one of a few usual suspects: a loose sink flange, a bad dishwasher connection, a cracked disposal housing, or a leaky drain line. Most of the time, you can handle it yourself with basic tools and a little patience. Don’t shrug it off. Small drips turn into swollen cabinets, mold, and a whole mess you didn’t ask for.
The Problem
I’ve been in plenty of kitchens where the homeowner’s looking at a damp cabinet and saying, “I can’t figure out where this water’s coming from.” Nine times out of ten, it’s the disposal. Sneaky little bugger, too, because sometimes it only leaks when the disposal’s running, sometimes when the sink’s full, and sometimes only when the dishwasher drains. That’s what makes it such a pain to chase down, but it’s a repair you don’t want to sit on. Water in the cabinet means warped wood, damaged drywall, and a mold problem brewing in the shadows. No thanks.
How It Works
Alright, let’s talk about how that thing under your sink works without turning your cabinet into a swamp. A garbage disposal is basically a motor-driven grinder. Food waste drops through the sink opening, past the rubber splash guard, and into the grinding chamber. Inside, a spinning plate (impeller plate) with two swiveling impellers — some folks call them “lugs” — throws food against a fixed grinding ring. That ring’s got sharp edges, and it breaks the waste down into tiny bits. Water from the faucet carries those particles out through the drain.
There are a few spots where leaks love to show up. First, you’ve got the sink flange, which is the metal ring sitting in the sink drain opening and tying the disposal to the sink. It gets sealed with plumber’s putty from the top and a fiber gasket and mounting ring assembly from below. Then there’s the discharge tube (or drain elbow), the curved pipe that sends ground-up waste and water from the disposal’s side outlet into the main drain line. That connection uses a metal flange and a rubber gasket. If you’ve got a dishwasher, there’s also a dishwasher inlet port on the side of the disposal housing, usually a little barb fitting where the hose hooks up. That one depends on a clamp and a hose that isn’t brittle or split.
The motor and grinding chamber sit inside a metal or plastic housing. When everything’s right, those connections stay watertight and the housing stays intact. But time, vibration, corrosion, and dried-out seals can all chip away at that. Before long, you’re on your knees with a flashlight wondering why there’s a puddle where there shouldn’t be one.
Step-by-Step Fix
Before you do anything, CUT THE POWER to the disposal at your electrical panel. I mean it. I’ve seen too many people trust the wall switch like it’s some kind of magic force field. It isn’t. Unplugging it isn’t enough, either. Somebody can flip that switch without thinking. Shut the breaker OFF. Then grab a flashlight and some paper towels, and let’s sort it out.
-
Locate the Leak's Origin – Detective work is key
- Clear everything out from under the sink first. You need space to work and a dry floor under there so you can actually see where the water’s coming from. I’ll throw down an old towel or a couple layers of newspaper and call it a day.
- Plug the sink and fill it with about 4-6 inches of water. Wait a few minutes, then check only the top connection point (the sink flange). If it starts dripping right away, you found the leak.
- If it stays dry, pull the stopper, let the sink drain, then turn on the disposal for just a short test — remember to turn the power back on just for this, then shut it off again right after. Watch the discharge pipe and the bottom of the housing. If it only leaks when grinding, you may be looking at a housing crack or a loose drain connection from vibration.
- Still nothing? Run the dishwasher through a cycle and watch the dishwasher inlet port on the disposal. That’s a common leak point, and it usually shows itself pretty quick.
-
Tighten the Sink Flange – Often the easiest fix
- This is the metal ring where the disposal meets the sink. Sometimes the mounting screws or the main mounting ring just work loose over time.
- Tools: Disposal wrench or large adjustable pliers.
- Look under the disposal. You’ll see a large metal mounting ring with three screws that hold it to the sink flange. Tighten those screws evenly, a little at a time, crisscrossing just like you’d tighten lug nuts on a truck wheel. Don’t reef on it and crack the sink.
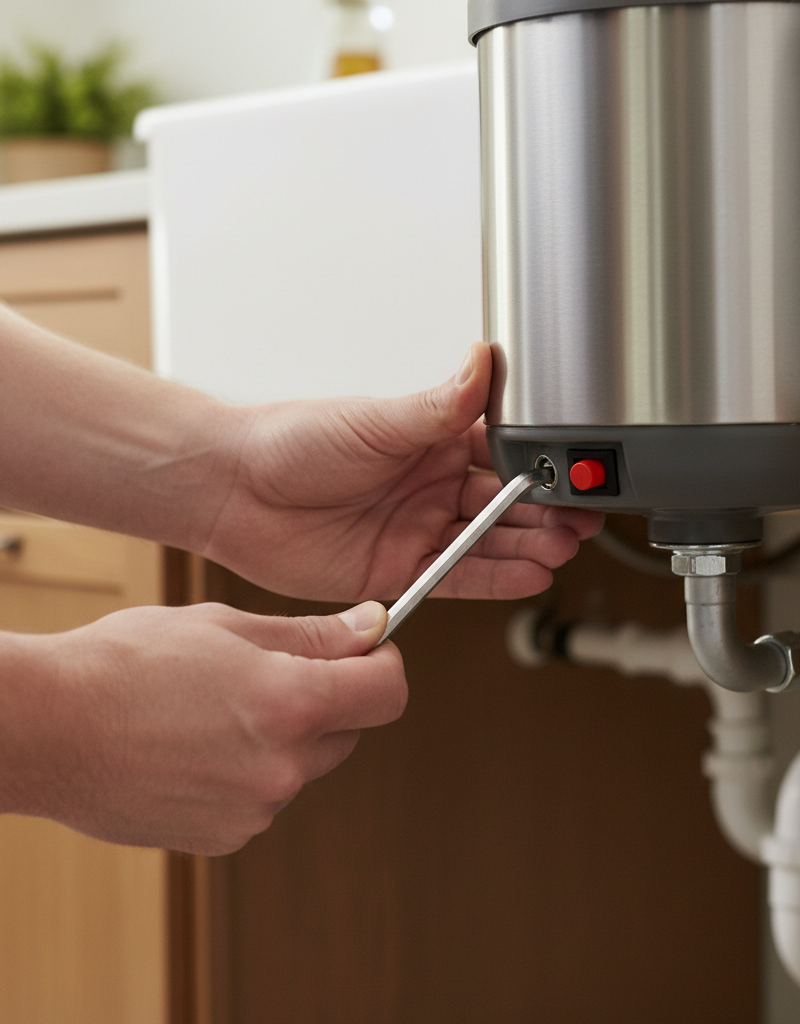
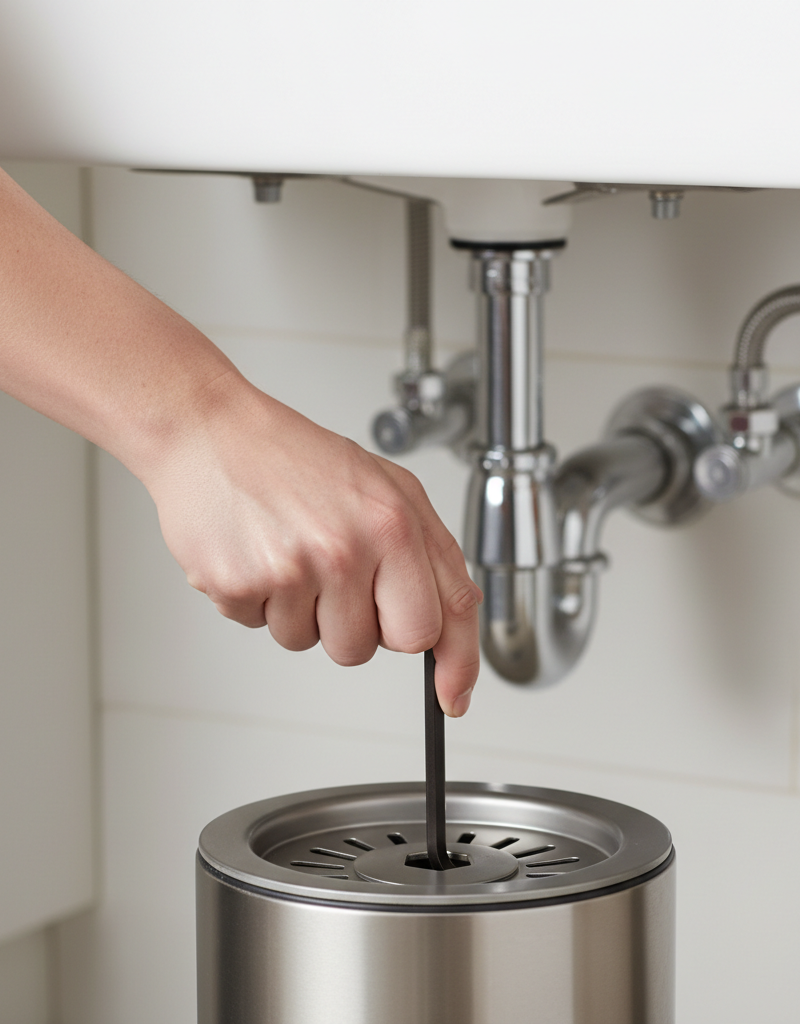
- There’s also usually a bigger “lock nut” ring you can snug with a disposal wrench. Sometimes a flathead screwdriver and a hammer will move it, carefully, tapped clockwise. Give it a snug turn, then test it again.
-
Replace the Sink Flange Plumber's Putty – When tightening isn't enough
- If the sink flange still leaks after tightening, the plumber’s putty seal from above the sink may have dried out or given up.
- Tools: Screwdriver, utility knife, new plumber's putty, rags.
- You’ll need to remove the disposal for this. Disconnect the drain line (discharge tube), then the dishwasher hose if you’ve got one. After that, loosen the three mounting screws and the lock nut ring, then twist the disposal counter-clockwise off the sink flange.
- From the top of the sink, push out the old flange. Scrape off every bit of old putty from the flange and the sink opening. Clean it up good.
- Roll a 1/2-inch thick rope of fresh plumber’s putty and lay it around the underside rim of the sink flange. Press the flange down into the sink opening. From below, put the fiber gasket, backup ring, and mounting ring back together, tighten the screws and lock nut, then reinstall the disposal.
-
Secure or Replace the Discharge Tube Seal – Another common drip point
- This is the elbow-shaped pipe coming out of the side of the disposal.
- Tools: Screwdriver, flashlight, new rubber gasket (if needed).
- Start by tightening the screws on the metal flange that holds the discharge tube to the disposal. Just snug — don’t muscle it like you’re setting steel beams.
- If that doesn’t do it, loosen the screws, pull the discharge tube away, and inspect the rubber gasket inside. If it’s cracked, flattened, or warped, replace it. You can usually grab one at any hardware store for a couple of bucks. Put it back together with the new gasket.
-
Check the Dishwasher Inlet Connection – Often overlooked
- If the leak only shows up when the dishwasher runs, this is where I’d look first.
- Tools: Screwdriver (for hose clamp), flashlight, new hose clamp (if needed).
- The dishwasher drain hose hooks to a small barbed fitting on the side of the disposal. There’s usually a spring clip or screw clamp holding it on.
- See if the clamp’s loose. If it is, tighten it. If the hose looks cracked or chewed up right at the connection, you may need to trim a little off the end or replace the hose. Sometimes the barb itself has a hairline crack — and then, well, that disposal’s probably headed out the door.
-
Inspect for Cracks in the Housing – The bad news scenario
- If you’ve checked every connection and the leak’s coming from the main body of the disposal, you’ve probably got a cracked housing.
- Tools: Flashlight.
- That usually comes from internal corrosion or an impact. There’s no practical DIY fix for a cracked disposal housing. That thing’s toast, and it’s replacement time. Epoxy or sealant might buy you a little time, but it’s a band-aid, not a repair — and it’ll fail sooner or later.
Common Causes
- Loose Connections: Daily vibration can loosen mounting bolts, drain pipe fittings, or the dishwasher hose clamp. It’s basic wear and tear, plain and simple.
- Worn Seals/Gaskets: Rubber gaskets and plumber’s putty dry out, crack, or lose their shape over time, so they stop sealing the way they should. The sink flange putty is a big one.
- Corrosion: Water, food bits, and harsh chemicals — which you really shouldn’t be dumping in there anyway — can eat away at metal parts, especially the discharge pipe connection or the housing itself.
- Cracked Housing: This is the one nobody wants. Internal corrosion, dropping something heavy into the disposal, or a factory defect can crack the body and leave you with a leak you can’t patch for long.
- Improper Installation: A new disposal that leaks right away usually means something was missed during install — not enough plumber’s putty, a bad gasket seat, a loose lock nut, that sort of thing.
- Dishwasher Hose Damage: The dishwasher drain hose or its connection can turn brittle, crack, or corrode, especially on older or bargain-grade hoses.
Common Mistakes
- Ignoring the Leak: A little drip now becomes rot, mold, and money later. Don’t let it ride. Water damage can run into the hundreds or thousands fast.
- Using the Wrong Sealant: Don’t smear caulk around a plumbing joint and hope for the best. Caulk isn’t made for those connections and won’t hold up. You need plumber’s putty or the right rubber gasket.
- Overtightening: “If snug is good, really tight is better,” right? Nope. Overtightening screws, especially on the sink flange, can crack the sink or the disposal housing. Snug is the goal. Broken porcelain is not.
- Not Cutting Power: I’ve said it already, but it’s worth saying again. Electricity and water don’t mix, and disposals have sharp parts. Kill the power at the breaker before your hands go anywhere near it.
- Assuming the Worst Immediately: Don’t run out and buy a new disposal before you check the connections. A lot of these leaks are cheap fixes.
- Pouring Chemicals Down: Drano and other harsh cleaners are rough on disposals and pipes. They can chew up seals and internal parts, and yes, they can actually cause leaks over time. Use hot water, ice, and maybe baking soda and vinegar for odors.
Cost & Time Breakdown
Sometimes you get lucky and it’s just a few screws. Free, or close to it. Other times, the whole unit’s on its last legs. Here’s a rough breakdown:
| Task | DIY Cost | Pro Cost | Time |
|---|---|---|---|
| Tighten Loose Connections | $0 | $75–$150 (trip charge) | 10–20 minutes |
| Replace Sink Flange Putty | $5–$15 (putty) | $150–$300 | 1–2 hours |
| Replace Discharge Gasket | $2–$5 (gasket) | $150–$300 | 30–60 minutes |
| Replace Dishwasher Hose/Clamp | $5–$25 (parts) | $150–$350 | 30–60 minutes |
| New Disposal Installation | $100–$400 (unit) | $300–$800 | 1–3 hours |
Tips & Prevention
- Regular Checks: Every six months or so, take a look under the sink. Watch for moisture, rust, or corrosion. Catching a small drip early saves you a pile of hassle later.
- Proper Use: Only run proper food waste through the disposal — no bones, fruit pits, fibrous veggies like celery stalks, or grease. Run cold water before, during, and after grinding for at least 30 seconds so everything flushes through.
- Avoid Harsh Chemicals: Like I said, drain cleaners are a hard no. They can wreck the seals and pipes. If you’ve got a clog, try a plunger or call a pro.
- Annual Tightening: While you’re under there doing those checks, give the sink flange screws and the discharge pipe connection a gentle snug-up. Don’t go overboard, just make sure vibration hasn’t loosened anything completely.
- Consider Quality: If you’re replacing a disposal, spending a little more on a better model with stainless steel components can pay off in the long run. Brands like InSinkErator Evolution series usually hold up well. I put an Evolution Excel in my own home in Gainesville about eight years ago, and that thing’s been a tank, never a single drip.
- Don't Overload: Stuffing too much food waste into the disposal at once puts extra stress on the motor and internal parts, and that can lead to wear, tear, and eventually leaks.
When to Call a Professional
Look, some jobs are just too big or too risky to tackle yourself, and that’s fine. If you’ve gone through every troubleshooting step and still can’t find the leak, or if you’ve nailed it down to a crack in the main housing, it’s time to bring in a licensed plumber. They’ve got the tools and the know-how to chase down those weird leaks that only show up under certain conditions, and they can swap out a disposal fast and safely. Don’t fool around with electrical connections or plumbing past your comfort level — a bad install can snowball into electrical hazards or major water damage, and your insurance may not smile on a DIY mistake. When you’re unsure, a pro can save you a headache and maybe a disaster.
Related Articles
Keep troubleshooting with these hand-picked guides from FixlyGuide:
- The Secret Culprit Behind Your Leaky Refrigerator (It’s Not Always the Water Line) — Discover the most common, often overlooked, reasons your refrigerator is leaking water and how to fix them with simple DIY steps.
- The 30-Second Fix for a Humming Garbage Disposal (Plumbers Don't Want You to Know) — Before you call a plumber, try these simple steps to unjam a humming garbage disposal in under a minute and save yourself a service call.
- The Secret Hairball Fix Plumbers Don't Want You to Know — Tired of standing in ankle-deep water? Most shower clogs are a gnarly mix of hair and soap scum, and you can clear them yourself without ha…
- The One Trick Plumbers Use When Your Garbage Disposal Hums But Won't Spin — When your garbage disposal hums but the blades aren't spinning, it's usually a simple jam that you can fix in minutes with common household…
- The Nasty Truth: Your Stinky Garbage Disposal Isn't Just Food Scraps — A persistent odor from your garbage disposal often points to a deeper, more stubborn problem than just old food, impacting your kitchen's f…
- Why Your Dishwasher Leaves Dishes Soaking Wet (And It's Not Your Rinse Aid) — Discover the real reasons your dishwasher isn't drying dishes and how to fix them, from blocked vents to faulty heating elements. Don't let…
Should you do this yourself?
Answer five quick questions before you start. Safety outranks savings every time.
Your experience with work like this
How high do you have to work?
Does the job involve any of these?
Will it need a permit?
Specialty tools
Free and instant. Educational guidance only — not a quote, inspection, or professional diagnosis.
What should this project cost?
Enter your project details for a realistic cost range before you call anyone.
Common repairs run $150–$650; repipes and water-heater replacements reach $1,500–$4,500.
- Regional adjustment
- National average
- Labor share (typical)
- ~$754
- Quotes to collect
- 3 written estimates
Educational estimate based on national averages — not a binding quote. Always confirm with written local estimates.
Fixly Project Decision Box
- DIY difficulty
- Moderate
- Estimated time
- 30 minutes – half a day
- Cost level
- Moderate
Main tools / materials
- Adjustable wrench
- Plunger or drain auger
- Bucket and towels
- Thread tape
When to stop and call a pro
- Water you cannot shut off at the fixture or main
- Sewage backing up into more than one fixture
- Water near electrical panels or outlets
- Gas water heater work beyond relighting a pilot
Need professional help?
Get a Licensed PlumberBefore you start
Check the difficulty, permits, and safety risk — then decide whether to call a pro.
- Estimate this projectGet a cost range for your scope and ZIP before you call anyone.Open
- Get local estimatesSend one request and compare written estimates from vetted pros.Open
Free, no signup required. Estimates are educational guidance, not a quote or an inspection.
Get the print-ready PDF of this guide
A clean, ad-free, printable version you can keep on your phone or pin to the workshop wall. Free with a FixlyGuide account.
- Print-optimized layout
- Tools, materials & every step included
- Saved to your account
Frequently asked questions
Why is my garbage disposal leaking from the top?+
A leak from the top of your garbage disposal usually indicates an issue with the sink flange seal. The plumber's putty or gasket around the flange may have dried out, cracked, or simply come loose over time. Retightening the mounting screws or replacing the plumber's putty are common fixes.
Can I use silicone sealant to stop a garbage disposal leak?+
While silicone might seem like a quick fix, it's generally not recommended for sealing garbage disposal connections. Plumber's putty is designed for the sink flange, and proper rubber gaskets are used for drain connections. Silicone can degrade, make future repairs harder, and may not withstand the vibrations and water pressure effectively.
How do I know if my garbage disposal housing is cracked?+
If you've checked and tightened all the connection points (sink flange, discharge pipe, dishwasher inlet) and the leak still appears to be coming from the main body or bottom of the disposal unit itself, it's highly likely the housing is cracked. This usually means the unit needs to be replaced, as cracks in the housing are not typically repairable.
Why is my garbage disposal leaking when the dishwasher runs?+
If your disposal only leaks when the dishwasher is running, the problem is almost certainly with the dishwasher drain hose connection to the disposal. Check the hose clamp for tightness and inspect the hose itself for any cracks or deterioration right where it connects to the disposal's inlet port.
Is a leaking garbage disposal dangerous?+
Yes, a leaking garbage disposal can be dangerous. The primary risks are water damage to your cabinets and flooring, which can lead to mold growth. More critically, water leaks near electrical components pose a shock hazard. Always disconnect power before inspecting or working on a disposal.
How long do garbage disposals typically last before leaking?+
The lifespan of a garbage disposal can vary widely depending on usage and quality, but most units last between 8 to 15 years. Regular leaks often start appearing as seals wear out or internal corrosion sets in towards the end of its service life.
Can I repair a small crack in my garbage disposal with epoxy?+
While it might be tempting, attempting to repair a crack in the garbage disposal housing with epoxy or other sealants is not a reliable long-term solution. The vibrations and constant water exposure will likely cause the patch to fail, leading to recurring leaks. Replacement is the safest and most effective option for a cracked housing.
What should I do immediately after discovering a garbage disposal leak?+
First, immediately turn off the power to the garbage disposal at the electrical breaker to prevent any electrical hazards. Then, clear out the cabinet under the sink, place a bucket or towels to catch the dripping water, and begin systematically identifying the source of the leak.

Discussion
Loading comments…