- Grease and Oil: This is the 1 culprit. Pouring cooking grease down the drain, even with hot water, lets it cool and harden in the pipes, where it grabs food scraps and holds on tight. Don’t do it. Scrape it into the trash instead.
- Too Little Water: Running the disposal without enough cold water means the food doesn’t flush away properly. It just hangs around in the pipes and starts building up.
- Foreign Objects: Silverware, bottle caps, plastic wrappers, small toys — yeah, people do manage to feed all kinds of nonsense into these things. If they get past the grinding chamber, they can jam the drain line hard.
- Overloading the Disposal: Dumping too much food in at once overwhelms the unit and usually leaves you with half-ground waste and a clog waiting to happen.
Plumbing · Clog
| Project category | Plumbing |
|---|---|
| Problem type | Clog |
| Trade required | Plumbing |
| Urgency | Soon — within weeks |
| Safety risk | Low safety risk |
| DIY suitability | DIY friendly |
| Cost category | Low cost |
| Typical timeline | Same-day DIY attempt; pro visit within a day or two |
| Contractor type | Licensed plumber |
Repair option
Plunger, hand auger, or trap cleanout before chemicals.
Replacement option
Line replacement when clogs return in the same spot repeatedly.
Common causes
- Hair and soap buildup in the trap
- Grease cooling in the branch line
- Flushed wipes or foreign objects
Relevant tools:diy difficultydiy or hire a pro
Published September 26, 2026Last updated September 26, 2026
Tools & materials you'll need
Affiliate linksAs an Amazon Associate FixlyGuide earns from qualifying purchases — at no extra cost to you. Prices and availability are accurate as of publication and subject to change.
Quick Answer
When your garbage disposal starts doing the slow-drain dance or, worse, sends water right back up into the sink, don’t lose your mind. Most of the time, it’s a partial clog, usually in the disposal itself or down in the P-trap. You can usually knock it out with a plunger, a screwdriver, and a bucket, and skip that pricey service call. The real trick is knowing where to look and keeping your hands where they belong.
The Problem
You know the routine: you finish dinner, scrape the plates, and flip on the disposal. Instead of that nice gurgle and the water disappearing, it just sits there. Or it creeps back up the other side of a double sink. Annoying as all get-out, right? A slow drain or full backup means one thing — something’s blocking the path.
Could be food scraps mashed into sludge. Could be grease that’s cooled off and turned to wax. Could even be a fork, cap, or some other junk that never should’ve gone down there in the first place. Whatever it is, that water isn’t moving until you clear the blockage. And if you leave it sitting, you’re asking for stink, bacteria, and a mess you don’t want to deal with later.
How It Works
Alright, let’s crack it open and see how this thing’s supposed to run. Your garbage disposal isn’t actually chewing food with blades. It uses impellers — little metal lugs mounted to a spinning plate. When food drops in, those lugs fling it against a fixed grind ring. That ring’s got sharp edges that tear the scraps down into tiny bits, usually around 1/8 to 1/16 inch in size.
Those particles get washed out with water through the drainpipe. That pipe drops into a P-trap, which is that curved section under the sink holding a little water to keep sewer gas from coming back up. After that, it ties into the home’s main drain line. A clog can happen in a few spots: in the disposal chamber if the food isn’t broken down enough, in the elbow pipe leaving the disposal, or — most common in my experience — right in the P-trap where grease and grit build up and harden over time. Sometimes the trouble’s farther downstream in the branch line if the kitchen’s been feeding it too much grease or starch for too long.
I pulled a disposal in Frisco last month that had exactly this kind of backup. Owner swore it was “just slow.” Took me ten minutes to find a paste of rice and bacon grease jammed in the trap like wet mortar. That’s usually how it goes.
Step-by-Step Fix
Before you touch anything, get your area set up. I’ve seen plenty of folks jump in without a bucket or towels nearby, and that turns a simple fix into a cabinet cleanup. Not fun. Not cheap.
-
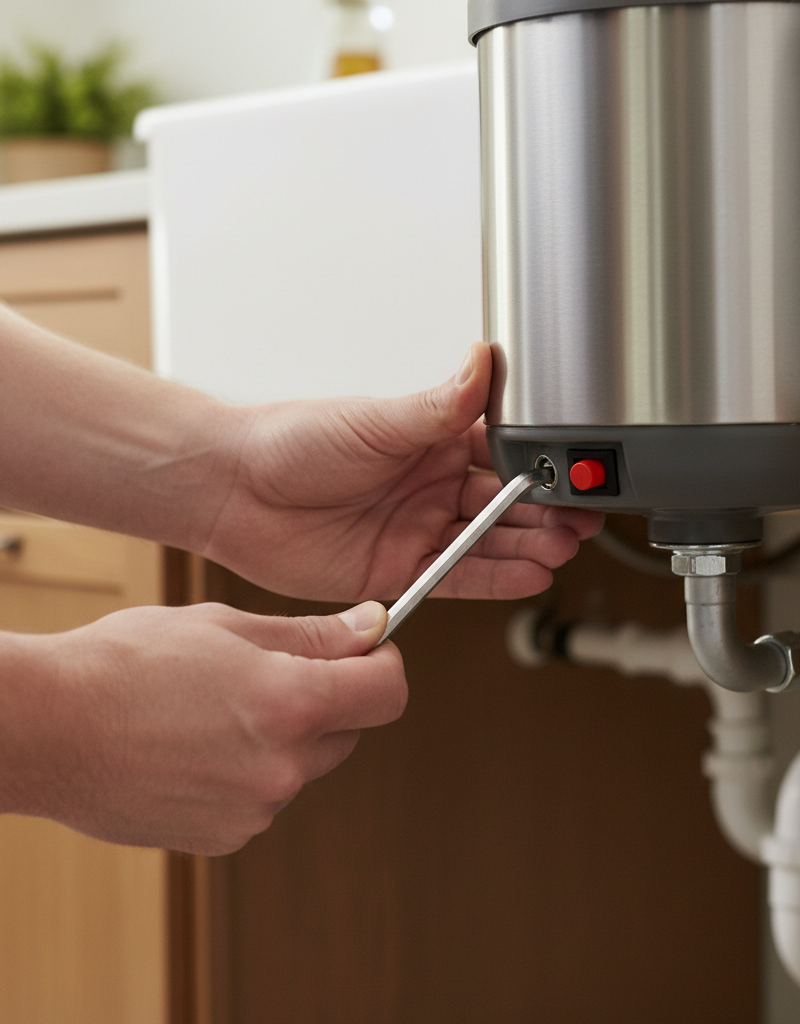
Safety First: Kill the Power — Unplug the unit or flip the breaker. Don’t even think about putting your hands near the disposal until you know it can’t start. Check the electrical panel; it might be labeled “Kitchen” or “Disposal.” Shut it off, then test the wall switch to make sure the unit stays dead.
-
Clear the Immediate Area — Remove any standing water and visible debris. If the sink’s backed up, bail out as much water as you can with a cup and bucket. Then shine a flashlight down into the drain opening. See big chunks or some random object? Use tongs or pliers and pull it out carefully. Never go in with your bare hand. No dice.
-
The Plunger Attack — Use a sturdy cup-style plunger. If you’ve got a double sink, seal the other side with a stopper or a wet rag. Add about 2-3 inches of water to the clogged basin — enough to cover the plunger cup. Set the plunger tight over the drain and give it about 10-15 hard plunges. On the last one, pull up sharp. That push-pull action can knock loose a lot of common clogs. If it still won’t drain, do it again.
-
Check the Drain Elbow — Inspect the discharge pipe from the disposal. That’s the pipe coming out of the side of the unit, usually a 1 1/2-inch PVC or metal elbow. Use a flashlight and look as far in as you can. A bigger chunk can hang up right there after it leaves the grinding chamber. If you spot a blockage, move on.
-
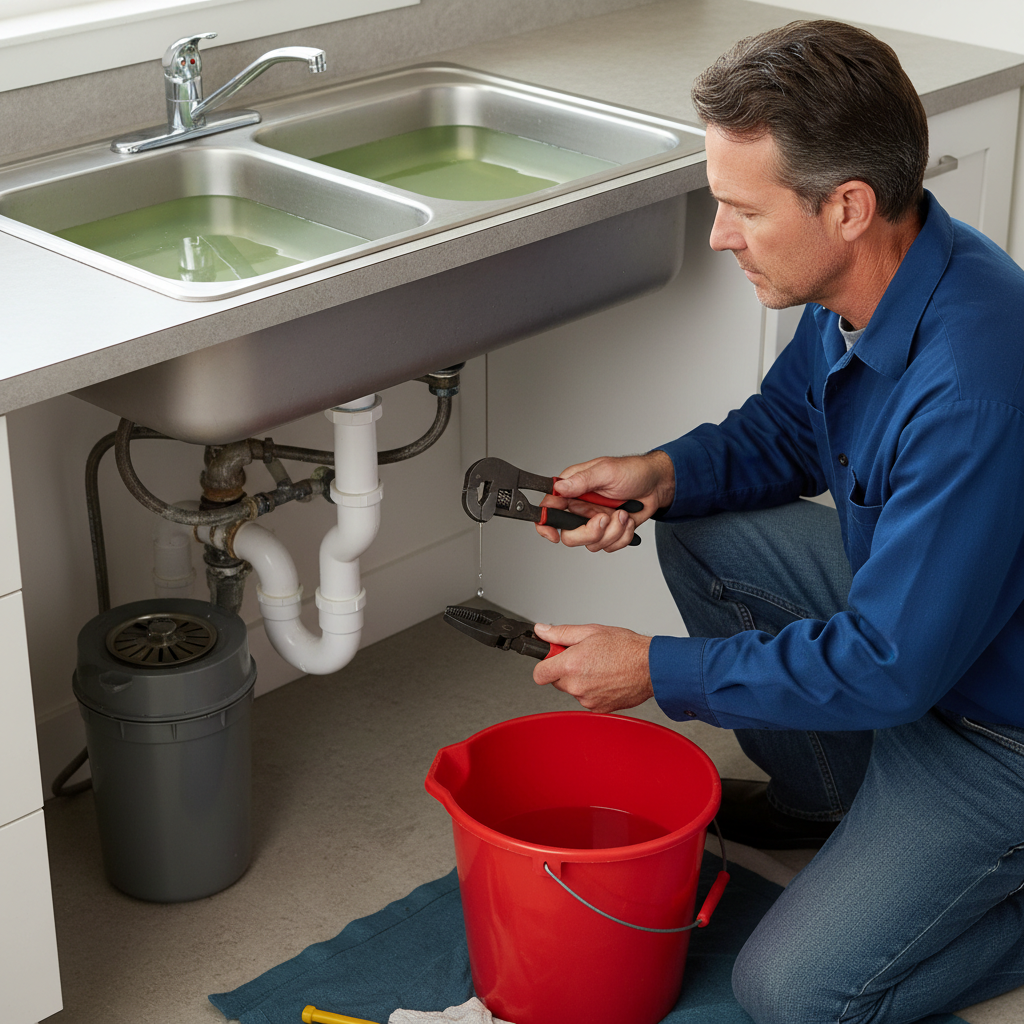
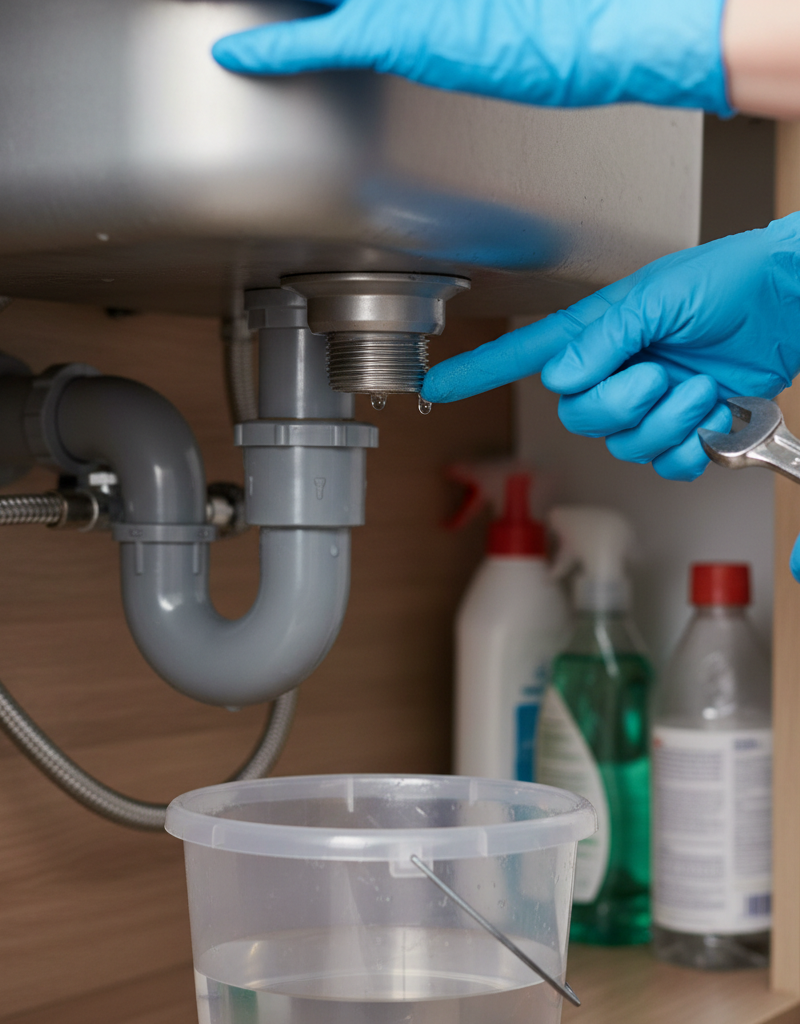
Disassemble the P-Trap — Get ready for some mess. Put a big bucket right under the P-trap. That’s the U-shaped pipe under the sink. You’ll probably need channel-lock pliers or a basin wrench to loosen the slip nuts on both sides. For PVC P-traps, you can often loosen these by hand. Pull the trap apart slowly and let the water and gunk drop into the bucket. Clean out the sludge with a wire brush or a coat hanger. That’s where the stubborn stuff likes to sit. Check the tailpiece from the sink and the pipe going into the wall while you’re at it.
-
Clean the Disposal Drain Line — Use a small drain brush or coat hanger. Once the trap’s off, you can reach the disposal discharge opening and the drain line heading into the wall. Work a flexible brush or straightened coat hanger gently in both directions to clear out any grime. Don’t force it. You’re trying to clear the pipe, not spear it.
-
Reassemble and Test — Put everything back together, hand-tight then snug. Reinstall the P-trap and get the slip nuts tight enough to seal, but don’t overdo it — especially on PVC, or you’ll crack ’em. Turn the water on slow and check every joint for leaks. If it stays dry, turn on the disposal and run cold water for about a minute. If it drains clean, you’re in good shape.
-
The Baking Soda & Vinegar Flush (Preventative) — A natural way to clear minor residue. If the drain’s still sluggish, or you just want to give it a good rinse, pour 1/2 cup of baking soda down the drain, then 1 cup of white vinegar. Let it sit for about 15-20 minutes — you’ll hear the fizzing. That mix helps loosen grease and grime. After that, flush with hot tap water for a few minutes. Important: Don't use commercial chemical drain cleaners in your garbage disposal; they can damage the rubber and plastic components.
Common Causes
- Grease and Oil: This is the #1 culprit. Pouring cooking grease down the drain, even with hot water, lets it cool and harden in the pipes, where it grabs food scraps and holds on tight. Don’t do it. Scrape it into the trash instead.
- Starchy and Fibrous Foods: Pasta, rice, potato peels, banana peels, celery strings, corn husks, and even coffee grounds — these don’t break down well. They swell with water and turn into a thick paste that clogs pipes. I once pulled a solid plug of potato peels out of a P-trap that looked like a concrete pipe. Took me 15 minutes with a chisel. From a family in Palo Alto, no less, who swore they were careful!
- Too Little Water: Running the disposal without enough cold water means the food doesn’t flush away properly. It just hangs around in the pipes and starts building up.
- Foreign Objects: Silverware, bottle caps, plastic wrappers, small toys — yeah, people do manage to feed all kinds of nonsense into these things. If they get past the grinding chamber, they can jam the drain line hard.
- Overloading the Disposal: Dumping too much food in at once overwhelms the unit and usually leaves you with half-ground waste and a clog waiting to happen.
Common Mistakes
- Using Chemical Drain Cleaners: Those harsh chemicals can eat at the rubber seals and plastic parts in your disposal and piping, which leads to leaks and repairs nobody wants. Stick with mechanical clearing or safer methods.
- Pouring Hot Water Down After Grease: Folks think hot water fixes grease, but it usually just sends it farther down the line where it cools off and turns into a worse blockage.
- Ignoring the Other Sink Drain: On a double sink, if you don’t seal the other side before plunging, the pressure escapes and the plunger doesn’t do much. You need that system sealed up to get real suction.
- Not Shutting Off the Power: This isn’t just sloppy — it’s dangerous. If the disposal kicks on while your hands are near it, you can get hurt bad. Unplug it or flip the breaker every time.
- Over-tightening PVC Fittings: Plastic nuts and pipes can crack if you crank down too hard with pliers. Tighten by hand until snug, then give it just a quarter turn more.
Cost & Time Breakdown
| Task | DIY Cost | Pro Cost | Time |
|---|---|---|---|
| Simple Plunging | $0–$20 | $100–$250 | 5–15 minutes |
| P-Trap Cleaning | $0–$30 | $150–$350 | 30–60 minutes |
| Full Drain Snake (DIY) | $20–$50 | $200–$450 | 1–2 hours |
| Disposal Replacement | $100–$300 | $300–$700 | 1.5–3 hours |
| Main Line Hydro-jetting | Not DIY | $350–$800+ | 1–3 hours |
Tips & Prevention
- Use Cold Water: Always run cold water before, during, and for about 15 seconds after using your disposal. Cold water helps keep grease and food bits solid enough to grind and flush out. Hot water can melt grease and let it coat the pipes.
- Small Batches: Feed waste into the disposal little by little, not all at once. That keeps the unit from getting overloaded and helps it grind the way it should.
- Avoid Problem Foods: Keep fibrous, starchy, and greasy stuff out of there. That means potato peels, celery, coffee grounds, eggshells (they don’t sharpen blades, that’s an old wives’ tale, they just make sand-like sludge), and any kind of cooking oil or grease.
- Regular Cleaning: Grind a tray of ice cubes — they scrape the grind ring — and a few citrus peels — for a decent smell — once a week or every couple of weeks. Keeps the unit fresher. I tell clients it’s like giving the disposal a spa day.
- Full Flush: After grinding, let the cold water run another 15-20 seconds so all the particles get pushed through the drain lines and P-trap. A lot of homeowners skip this part, then wonder why it smells later.
- Check the Splash Guard: That rubber splash guard in the sink opening can get gunked up or cracked over time and slow things down. Clean it now and then, and replace it if it’s damaged. They’re usually under ten bucks.
When to Call a Professional
Look, I’m all for DIY, but sometimes you’ve gotta call in a plumber. If you’ve plunged it, cleaned the P-trap, checked the discharge pipe, and the sink’s still backing up — especially if both sides of a double sink are filling up, or the dishwasher’s involved — you probably have a deeper clog in the main drain line. That’s not a coat-hanger job. You’ll need a pro with a snake or hydro-jetting gear to clear it without wrecking the pipes.
And if wastewater starts coming up in other fixtures, like a shower or toilet, when you run the disposal, that’s a big red flag for a main sewer line blockage. That’s a real emergency, not a “wait and see” problem. Don’t mess around with that stuff. It can turn into water damage and health hazards fast.
Related Articles
Keep troubleshooting with these hand-picked guides from FixlyGuide:
- The $5 Secret to Fixing a Leaky Single-Handle Faucet — A persistent drip from your single-handle faucet is often caused by a worn-out cartridge or O-rings, a problem usually solvable with a few…
- Why Your Garbage Disposal Just Died (And the One Thing You Should Check First) — Don't panic if your garbage disposal went silent. Often, it's a simple, overlooked electrical issue you can fix in minutes without a plumbe…
- The One Trick Plumbers Use When Your Garbage Disposal Hums But Won't Spin — When your garbage disposal hums but the blades aren't spinning, it's usually a simple jam that you can fix in minutes with common household…
- The 30-Second Fix for a Humming Garbage Disposal (Plumbers Don't Want You to Know) — Before you call a plumber, try these simple steps to unjam a humming garbage disposal in under a minute and save yourself a service call.
- The Drip You Can't Ignore: Why Your Garbage Disposal Leaks (And How to Stop It) — Don't let a leaky garbage disposal ruin your cabinets and create a mold problem; discover the real reasons behind the drips and how to fix…
- The Grimy Mystery: Why Your Garbage Disposal Stinks (Even After You Clean It) — If your garbage disposal still stinks after you've run all the usual home remedies, it's not you – it's likely a hidden build-up causing th…
What should this project cost?
Enter your project details for a realistic cost range before you call anyone.
Common repairs run $150–$650; repipes and water-heater replacements reach $1,500–$4,500.
- Regional adjustment
- National average
- Labor share (typical)
- ~$754
- Quotes to collect
- 3 written estimates
Educational estimate based on national averages — not a binding quote. Always confirm with written local estimates.
Fixly Project Decision Box
- DIY difficulty
- Moderate
- Estimated time
- 30 minutes – half a day
- Cost level
- Moderate
Main tools / materials
- Adjustable wrench
- Plunger or drain auger
- Bucket and towels
- Thread tape
When to stop and call a pro
- Water you cannot shut off at the fixture or main
- Sewage backing up into more than one fixture
- Water near electrical panels or outlets
- Gas water heater work beyond relighting a pilot
Need professional help?
Get a Licensed PlumberGet the print-ready PDF of this guide
A clean, ad-free, printable version you can keep on your phone or pin to the workshop wall. Free with a FixlyGuide account.
- Print-optimized layout
- Tools, materials & every step included
- Saved to your account
Frequently asked questions
Why is my garbage disposal draining slowly?+
A slow drain usually means there's a partial clog. This could be due to compacted food waste in the disposal itself, solidified grease in the P-trap, or starchy items swelling up in the drain line, restricting water flow.
Can I use chemical drain cleaner in my garbage disposal?+
Absolutely not. Chemical drain cleaners can severely damage the rubber seals, plastic components, and even the metal parts of your garbage disposal and drainpipes, leading to leaks or complete unit failure. Stick to mechanical methods or natural solutions like baking soda and vinegar.
What foods should I avoid putting in my garbage disposal?+
Steer clear of fibrous foods like celery, banana peels, and corn husks; starchy items such as pasta, rice, and potato peels (they swell); and anything greasy like cooking oil or fat. Eggshells and coffee grounds are also bad as they create fine sludge that clogs pipes.
My double sink is backing up, not just the disposal side. What does that mean?+
If water is backing up into both sides of your double sink, or even into other fixtures, it usually indicates a deeper clog further down in your main drain line, past the P-trap. This often requires professional intervention with a drain snake or hydro-jetting equipment.
How often should I clean my garbage disposal?+
For optimal performance and to prevent odors and minor clogs, it's a good practice to clean your garbage disposal weekly or bi-weekly. Grinding ice cubes and citrus peels is a great way to do this naturally.
What's the difference between a slow drain and a humming disposal?+
A slow drain means water isn't moving through the unit and pipes properly due to a blockage. A humming disposal that won't spin indicates an electrical issue or a jam in the grinding chamber itself, preventing the impellers from rotating.
Is it safe to put my hand down the garbage disposal to clear a clog?+
No, never put your hand down the garbage disposal. Even with the power off, there's a risk of the unit accidentally activating or your hand getting cut on the sharp grind ring. Always use tongs, pliers, or other long tools to retrieve objects.
Why do you recommend cold water for the garbage disposal?+
Cold water helps solidify grease and food particles, making them easier for the impellers to grind into small, manageable pieces that can be flushed away. Hot water can melt grease, allowing it to coat pipes and lead to future clogs.
How can I tell if the clog is in the P-trap or further down the drain?+
If cleaning out the P-trap (the U-shaped pipe directly under the sink) clears the clog, then it was located there. If the problem persists after cleaning the P-trap, the clog is likely further down the main drain line, potentially requiring a professional drain snake.

Discussion
Loading comments…