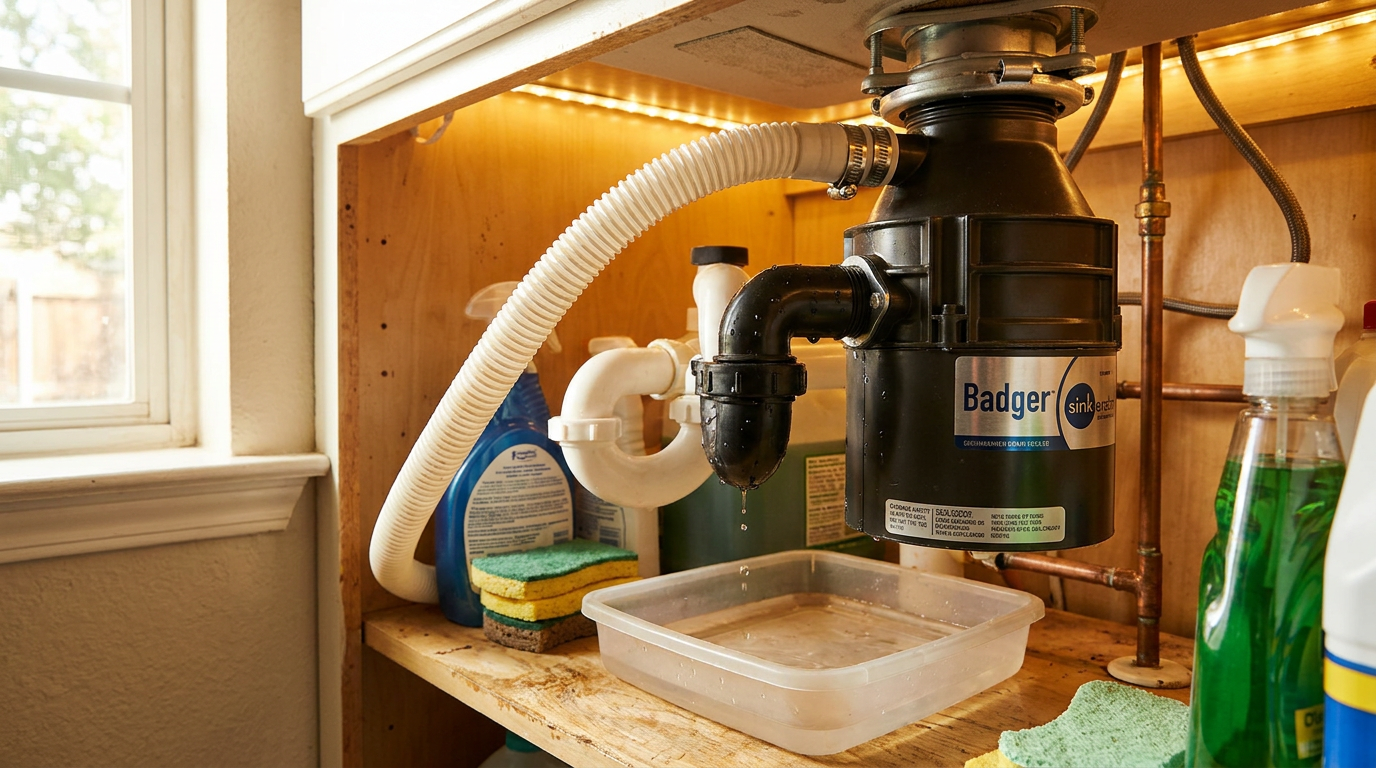
- Clear Sludge from the Disposal Barb — Grab a flashlight and look inside the disposal’s inlet barb. Over the years, solidified animal fat, detergent scum, and fibrous food debris build a greasy plug right where the hose diameter necks down.
- Poke a bottle brush, narrow wire coat hanger, or straight screwdriver all the way through the port into the grinding chamber, scraping the walls clean.
- Wipe out the greasy deposits with a damp rag until the 7/8-inch internal passage is fully open.
Plumbing · Clog
| Project category | Plumbing |
|---|---|
| Problem type | Clog |
| Trade required | Plumbing |
| Urgency | Soon — within weeks |
| Safety risk | Low safety risk |
| DIY suitability | DIY friendly |
| Cost category | Low cost |
| Typical timeline | Same-day DIY attempt; pro visit within a day or two |
| Contractor type | Licensed plumber |
Repair option
Plunger, hand auger, or trap cleanout before chemicals.
Replacement option
Line replacement when clogs return in the same spot repeatedly.
Common causes
- Hair and soap buildup in the trap
- Grease cooling in the branch line
- Flushed wipes or foreign objects
Relevant tools:diy difficultydiy or hire a pro
Published October 22, 2026Last updated October 22, 2026
Tools & materials you'll need
Affiliate linksAs an Amazon Associate FixlyGuide earns from qualifying purchases — at no extra cost to you. Prices and availability are accurate as of publication and subject to change.
Quick Answer
If water or foul-smelling gray sludge shoots up into your kitchen sink every time the dishwasher drains, nine times out of ten you’re looking at a blockage in the dishwasher drain hose, a clogged disposal inlet nipple, or a missing high loop. Crack open that 7/8-inch barbed disposal inlet with a screwdriver and zip-tie the flexible drain line up tight against the underside of your countertop, and you’ll fix over 90% of these backflows in under 45 minutes.
The Problem
You run the dishwasher, walk off, and 20 minutes later you’re staring at dirty, greasy water sitting in the kitchen sink—or bubbling up through the garbage disposal drain. Sometimes it’ll even spit across the counter through an air gap cylinder next to the faucet. Not fun.
Dishwashers don’t drain straight to your home’s main soil stack. They dump through a flexible corrugated line into the upper grinding chamber of the garbage disposal. So when that path gets narrowed by grease, when the knockout plug inside a newly installed disposal never got punched out, or when the drain hose sags down into a low spot under the sink, the waste water takes the easy route. And the easy route is right back into the sink basin instead of down the 1-1/2-inch P-trap. Leave it alone and that nasty dishwater’ll wreck clean dishes, leave a slimy film in the pipes, and eventually start leaking out of the cabinet base and onto the subfloor.
How It Works
This setup only takes a couple minutes to understand. Your dishwasher uses a small drain pump, usually on 120 volts, to push wastewater through a 5/8-inch or 7/8-inch flexible hose. That hose comes out of the dishwasher chassis, passes through a hole in the partition wall under the sink, and hooks into a molded barbed plastic inlet nipple near the top of the garbage disposal casing.
The disposal chamber sits above the motorized shredder plate and impellers. Inside that chamber, there’s a factory-molded plastic knockout plug made for homes without dishwashers. If that plug got removed the right way during install, the dishwasher water shoots into the grinding chamber, drops through the stationary shredder ring, and exits out the side discharge tube into the P-trap.
Gravity and backpressure do the rest. If the discharge hose droops below the level of the disposal inlet, water from the sink drain can siphon back into the dishwasher. On the flip side, when the dishwasher pump kicks on with about 5 to 8 PSI of force, any restriction at the disposal’s barbed port or along the drain line pushes the pumped water up through the disposal’s rubber sink baffle and floods your sink bowl. Plumbing codes call for either an atmospheric air gap or a secured high loop so those two water streams don’t cross-contaminate. Simple idea. Big mess if it’s wrong.
Step-by-Step Fix
Here’s the exact order I use to find the blockage, get flow moving again, and keep dirty water from backing up into the sink.
-
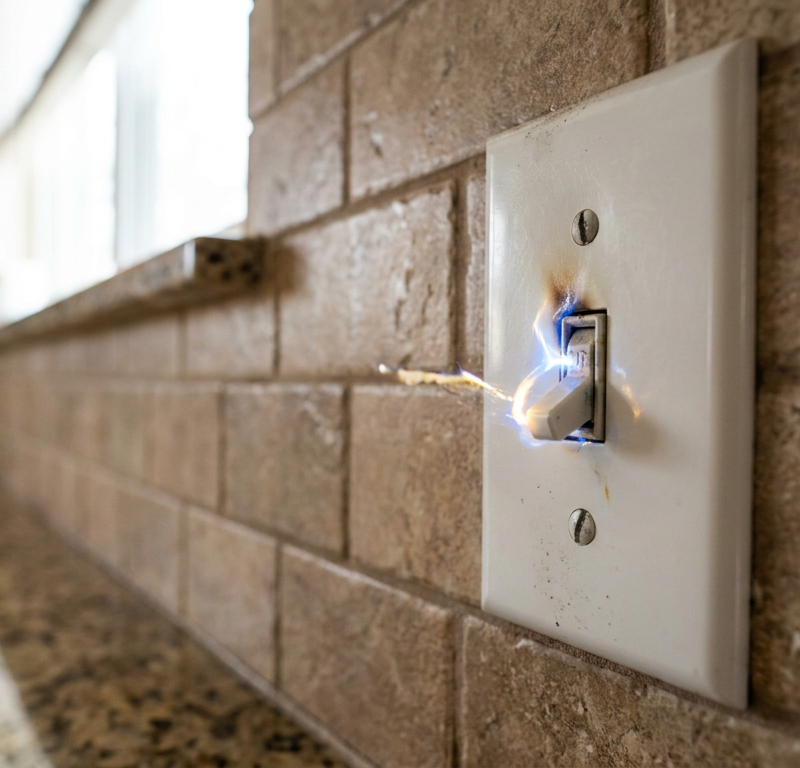
Cut the Power to Both Appliances — Unplug the garbage disposal from its electrical receptacle inside the sink cabinet or flip the dedicated 15-amp or 20-amp breaker at your main service panel. Hit the wall switch and make sure the disposal doesn’t turn on. Cancel and power off the dishwasher cycle so the internal pump doesn’t kick on while your hands are in the lines.
- Tools: Non-contact voltage tester or simple wall switch check.
- Safety: Never stick fingers, tools, or hoses into plumbing tied to live disposal circuits.
-
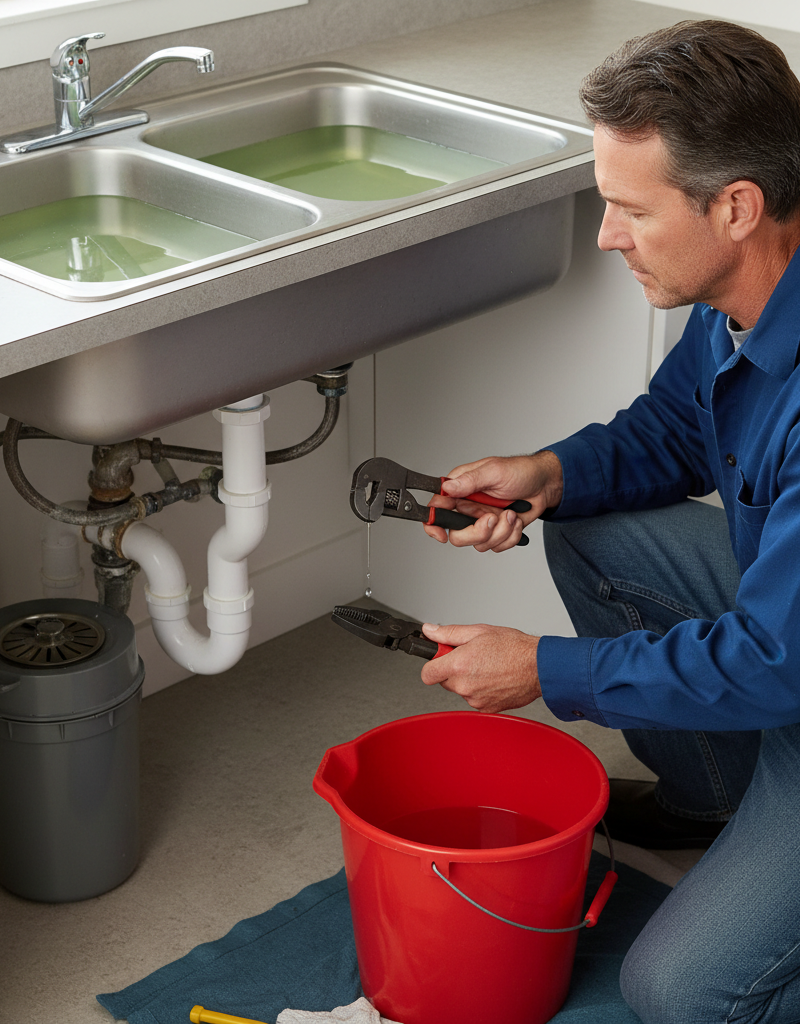
Clear the Under-Sink Workspace and Prep for Spills — Get all the cleaning supplies, plastic bins, and trash cans out from under the sink so you’ve got room to work. Lay down an old bath towel and set a shallow 1-gallon plastic container right under the garbage disposal and the dishwasher drain connection.
- Materials: Microfiber towel, shallow plastic bucket or oil pan.
-
Inspect the Dishwasher Drain Hose Routing — Look at how the flexible ribbed hose runs from the dishwasher into the cabinet. It needs to rise to the highest point possible—tucked tight underneath the countertop or sink rim—before it turns down toward the disposal inlet.
- If the hose drops to the cabinet floor and then climbs back up to the disposal, you’ve got a sagging line that invites backflow.
- If you’ve got an air gap (small chrome or brushed-nickel cylinder mounted on the back of the sink deck), check whether water is spurting out of its air holes during the cycle.
-
Clamp and Detach the Drain Line at the Disposal — Use a flathead screwdriver, 5/16-inch nut driver, or tongue-and-groove pliers to loosen the stainless steel worm-drive hose clamp holding the rubber boot to the disposal’s upper barbed inlet. Gently wiggle and twist the hose off the plastic nipple, aiming it straight into your catch bucket to catch roughly 1 to 2 cups of trapped, stagnant water.
- If the rubber cuff is baked on or brittle, warm it gently with a hairdryer on low for 30 seconds to soften it instead of prying hard and cracking the disposal housing.
-
Verify the Knockout Plug is Removed — Stick your finger or the blunt handle of a wooden spoon into the disposal’s barbed inlet tube. If the garbage disposal was installed recently and you feel a solid plastic barrier blocking the opening, the knockout plug never got driven out.
- If the plug is intact: Set the flat tip of a standard screwdriver against the plug face inside the inlet, and strike it firmly with a hammer until the circular plastic disc snaps free. Reach into the top of the disposal through the sink opening (with power still confirmed dead!) and pull the loose plastic disc out of the grinding plate. Don’t leave the plug in the chamber—it’ll jam the impellers.
-
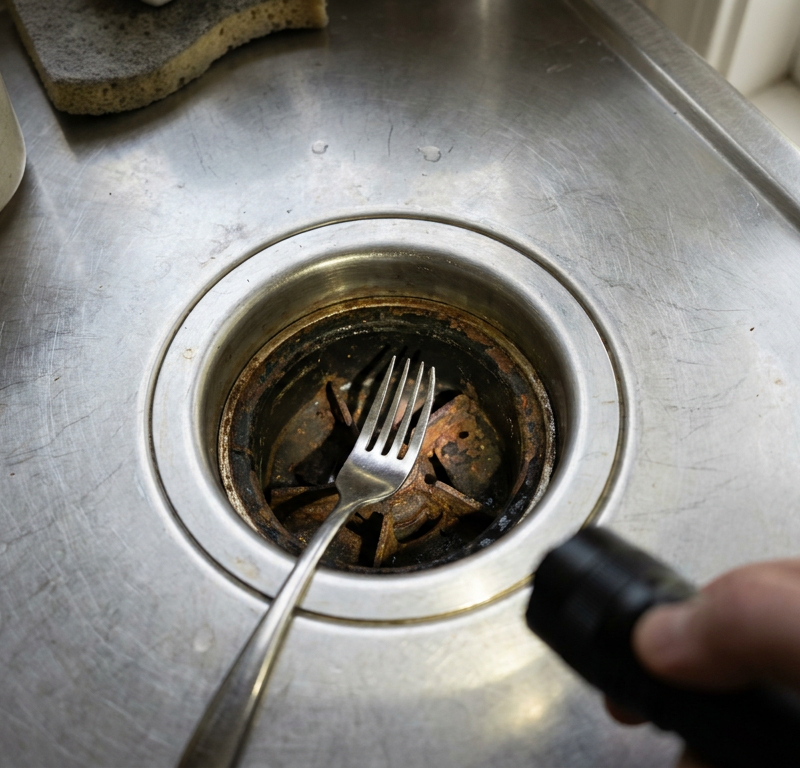
Clear Sludge from the Disposal Barb — Grab a flashlight and look inside the disposal’s inlet barb. Over the years, solidified animal fat, detergent scum, and fibrous food debris build a greasy plug right where the hose diameter necks down.
- Poke a bottle brush, narrow wire coat hanger, or straight screwdriver all the way through the port into the grinding chamber, scraping the walls clean.
- Wipe out the greasy deposits with a damp rag until the 7/8-inch internal passage is fully open.
-
Inspect and Clear the Dishwasher Drain Hose — Check the detached hose end for packed sediment, calcium chunks (common in hard water areas like North Texas), or gelatinous soap build-up. Squeeze the hose along its length; it ought to feel flexible, not rock-hard with grease.
- Aim the free end into your bucket, plug the dishwasher back in for 5 seconds, and run the "Cancel/Drain" cycle to see whether water shoots out with solid pump pressure.
- If water only dribbles out, the clog is deeper in the hose or inside the dishwasher’s internal sump filter.
-
Clean the Sink Air Gap (If Installed) — If your plumbing has a deck-mounted air gap, pry off the decorative metal or plastic cover by pulling straight up. Unscrew or unclip the inner plastic cap to expose the dual chambers.
- Check for coffee grounds, bone fragments, or watermelon seeds jammed in the downward discharge leg.
- Push a flexible bottle brush or a length of 1/4-inch flexible tubing through the larger 7/8-inch outlet line heading toward the disposal.
- Use a wet-dry shop vac over the top of the open air gap body to suck stubborn sludge up and out of the line.
-
Install or Re-secure the High Loop — If your setup doesn’t have an air gap, building codes (such as IRC P3107.1) require a high loop. Lift the highest point of the dishwasher drain hose until it touches the underside of the countertop deck—well above the disposal’s inlet port and the sink’s flood level rim.
- Secure it to the cabinet wall or underside of the counter framing with a galvanized pipe strap, a heavy-duty zip tie, or a plastic cable clamp and a 1/2-inch wood screw.
- Keep the hose on a smooth, continuous downward slope from that peak to the disposal inlet without any extra dips or kinks.
-
Reattach and Clamp the Drain Hose — Slide the rubber hose cuff fully over the disposal inlet barb until it seats against the disposal body. Place the worm-drive clamp about 1/4 inch back from the end of the hose cuff and tighten it securely with a 5/16-inch nut driver.
- Torque it until the rubber compresses noticeably under the metal band. Don’t overtighten, or you’ll cut into soft rubber or crack thin plastic barbs.
-
Run a Full Test Cycle and Check for Leaks — Turn the power back on. Run cold water through your kitchen faucet for 60 seconds, turn on the disposal to verify normal drainage, and then shut both off. Run a drain cycle on your dishwasher while watching the under-sink connections with a flashlight.
- Verify zero drops leak from the clamp interface.
- Confirm no water pushes back up through the sink drain or air gap cap.
Common Causes
- The Forgotten Knockout Plug: The number one reason a brand-new garbage disposal backs up into the sink on the very first dishwasher cycle. Plumbers and homeowners both miss this one plenty of times.
- Missing or Drooping High Loop: If the drain hose lies flat on the bottom of the sink cabinet, wastewater coming down from the kitchen sink just runs sideways into the low spot in the hose. Then, when the dishwasher kicks on, that standing column of water has nowhere to go but up.
- Grease and Detergent Build-Up: Modern dishwasher detergents have thick binders, and powdered detergents can cake up when they dissolve in lukewarm water. Mix that with bacon grease and cooking oils rinsed off plates, and you get a waxy plug right at the 5/8-to-7/8-inch inlet reduction.
- Air Gap Obstruction: If your local plumbing code requires an above-counter air gap, that plastic diverter can clog easy with food scraps, and then the drain water gushes onto the kitchen counter instead of heading into the disposal.
- Partially Clogged Kitchen Sink P-Trap or Branch Line: If the main sink drain line downstream from the disposal is half-choked with scale or grease, the dishwasher’s pumped volume (around 2 to 3 gallons per minute) can overwhelm the pipe and back up into the lowest sink basin.
Common Mistakes
- Using Liquid Chemical Drain Cleaner in the Dishwasher Line: Don’t pour caustic drain openers (like sodium hydroxide or sulfuric acid) down an air gap or into a dishwasher drain hose. It’ll wreck pump seals, eat through thin rubber connectors, and can splash corrosive chemicals right back in your face if the pump surges.
- Tightening Hose Clamps with Pliers Instead of a Nut Driver: Slip-joint pliers chew up the teeth on worm-drive clamps and slip off, which gouges the soft rubber hose. A 5/16-inch nut driver or magnetic socket bit gives you clean, controlled clamping torque without beating up the parts.
- Forgetting to Fish the Knockout Plug Out of the Chamber: When homeowners do remember to punch the knockout plug out, they often leave the circular plastic disc sitting on the disposal plate. First time you flip the switch, that disc jams between the swivel impellers and the stationary shredder ring, and the unit just hums like mad and trips its red reset button.
- Kinking the Ribbed Corrugated Line: Forcing the dishwasher hose around tight copper supply pipes or drain tees can pinch the flexible hose flat. A partly creased corrugated line creates a huge flow restriction that acts a lot like a complete sewer stoppage.
- Leaving the Dishwasher Filter Clogged: Fixing the under-sink lines without cleaning the internal cylindrical micro-filter at the bottom of the dishwasher basin leaves food debris circulating right back into the fresh line within 48 hours.
Cost & Time Breakdown
| Task | DIY Cost | Pro Cost | Time |
|---|---|---|---|
| Knockout plug removal & debris clear | $0 | $120–$180 | 15–30 mins |
| High loop installation (strap + clamp) | $5–$12 | $125–$200 | 20–30 mins |
| Dishwasher drain hose replacement | $18–$35 | $175–$250 | 45–60 mins |
| Air gap cleaning or unit replacement | $8–$22 | $140–$210 | 20–35 mins |
| Clearing clogged disposal P-trap branch | $0–$25 | $180–$275 | 30–60 mins |
Tips & Prevention
- Run Your Garbage Disposal Before Starting the Dishwasher: Make it a hard habit to run your kitchen faucet on cold and turn on the disposal for 10 seconds right before you hit "Start" on the dishwasher. That clears out any food scraps or standing water in the disposal grinding chamber and P-trap.
- Clean the Dishwasher Sump Filter Monthly: Twist out the fine-mesh screen assembly at the floor of the dishwasher, wash it under hot tap water with a nylon scrub brush and mild dish soap, and reinstall it. That keeps seeds, glass, and fibrous skins from ever reaching the pump or drain hose.
- Switch to Liquid or Pod Detergents: Powdered detergents are notorious for clumping in cooler water cycles (under 120°F), which leaves chalky sediment coating the inside ridges of corrugated drain hoses.
- Perform a Monthly Hot Water & Vinegar Flush: Once a month, fill a large bowl with 1 gallon of boiling water mixed with 1 cup of white distilled vinegar and dump it straight down the disposal while running the motor. That thermal shock melts grease along the rim of the inlet nipple before it calcifies into a blockage. I pulled a water heater in Frisco last month that had exactly this kind of greasy buildup around the drain line—it was nasty, and it was avoidable.
When to Call a Professional
If you clear the inlet barb, verify the knockout plug is out, build a clean high loop, and dirty water still surges up into the sink—or if water starts backing up into nearby floor drains or adjacent bathroom tubs—the problem isn’t the disposal. You’ve got a main kitchen branch blockage deep in the wall or a clogged 2-inch vent stack that needs a motorized drain auger to clear safely.
If you see water pooling under the dishwasher chassis, spot blackened char marks on the under-sink electrical outlet, or hear the disposal motor groaning and tripping the breaker over and over even with an empty grinding chamber, step back. That stuff involves electrical hazards and motor seal failure, and it needs a licensed plumber or appliance repair specialist.
Related Articles
Keep troubleshooting with these hand-picked guides from FixlyGuide:
- Kitchen Faucet Leaking Under the Sink When Sprayer Runs? 5 Causes and the Step-by-Step Fix — Fix that hidden water leak under your kitchen sink. Step-by-step diagnostic and repair instructions for leaking pull-out hoses, bad O-rings…
- The Nasty “Secret” Hiding in Your AC: 30-Minute Clear for a Clogged Drain Line — A clogged AC drain line can lead to water leaks, mold growth, and inefficient cooling, but it’s a fix most homeowners can tackle in under a…
- The Slow Drain Mystery: Why Your Garbage Disposal Backs Up (and the One Simple Tool That Saves the Day) — If your garbage disposal is draining slowly or backing up into your sink, it's likely a stubborn clog that you can tackle with a few basic…
- Kitchen Faucet Low Pressure? 10 Steps to Restore Weak Flow — Kitchen pull-out faucet suddenly lost water pressure? Learn how to clear clogged aerator screens, flush internal check valves, and fix unde…
- The 3 Hidden Reasons Your Bathroom Sink Stinks (And the 20-Minute Fix) — Uncover the surprising causes behind a foul-smelling bathroom sink drain and learn a simple, effective fix in just 20 minutes.
- Dishwasher Not Draining? 6 Reasons for Standing Water (and How to Fix It) — Seeing a puddle of dirty water in your dishwasher after a cycle is a common, fixable problem—here's how to diagnose and clear the clog, fro…
Should you do this yourself?
Answer five quick questions before you start. Safety outranks savings every time.
Your experience with work like this
How high do you have to work?
Does the job involve any of these?
Will it need a permit?
Specialty tools
Free and instant. Educational guidance only — not a quote, inspection, or professional diagnosis.
What should this project cost?
Enter your project details for a realistic cost range before you call anyone.
Common repairs run $150–$650; repipes and water-heater replacements reach $1,500–$4,500.
- Regional adjustment
- National average
- Labor share (typical)
- ~$754
- Quotes to collect
- 3 written estimates
Educational estimate based on national averages — not a binding quote. Always confirm with written local estimates.
Fixly Project Decision Box
- DIY difficulty
- Moderate
- Estimated time
- 30 minutes – half a day
- Cost level
- Moderate
Main tools / materials
- Adjustable wrench
- Plunger or drain auger
- Bucket and towels
- Thread tape
When to stop and call a pro
- Water you cannot shut off at the fixture or main
- Sewage backing up into more than one fixture
- Water near electrical panels or outlets
- Gas water heater work beyond relighting a pilot
Need professional help?
Get a Licensed PlumberGet the print-ready PDF of this guide
A clean, ad-free, printable version you can keep on your phone or pin to the workshop wall. Free with a FixlyGuide account.
- Print-optimized layout
- Tools, materials & every step included
- Saved to your account
Frequently asked questions
Can a new garbage disposal cause the dishwasher to back up into the sink?+
Yes, especially on newly installed disposals. Every new garbage disposal comes with a molded plastic knockout plug inside the barbed dishwasher inlet. If you or your installer forgot to punch this plug out with a screwdriver and hammer before connecting the drain hose, the pumped water has nowhere to go and will either blast back into your sink basin or leak out from under the appliance.
What is the difference between a high loop and an air gap?+
An air gap is a physical cylindrical fixture mounted above the sink deck that provides an open-air barrier to prevent cross-contamination. A high loop achieves a similar siphon-break effect inside the cabinet by looping the drain line up to the underside of the countertop. While some municipal codes require a true deck air gap, modern high loops work reliably in many jurisdictions where air gaps are not mandatory.
Can I use chemical drain cleaner to clear a dishwasher drain backup?+
No, never pour commercial chemical drain cleaners through your dishwasher or down its drain hose. These aggressive caustic solutions can destroy the plastic impeller of the dishwasher pump, melt thin rubber transition boots, and produce toxic fumes when reacting with hot dish residue. Mechanical clearing with a brush or shop vac is far safer and more effective.
Why is water coming out of the little chrome cylinder on my sink?+
If water shoots out from the small decorative cylinder on top of your sink, the air gap is functioning as a safety valve. It indicates the discharge leg heading down from the air gap into the disposal barb is clogged with grease or food debris. Removing the chrome cap and clearing out the internal plastic chamber with a bottle brush will resolve the issue.
What size is the dishwasher drain connection on a garbage disposal?+
Most residential garbage disposals use a standard barbed connection designed for a 7/8-inch inside-diameter (ID) rubber boot. The dishwasher hose usually leaves the appliance at 5/8-inch ID and flares to 7/8-inch at the cabinet end to mate cleanly with the disposal barb.
Why does my dishwasher fill with dirty water even when I haven't run it?+
This problem is almost always caused by a missing high loop or a failed check valve. When you run water in your sink or wash pots, gravity allows that wastewater to roll backwards down an unlooped drain hose into the dishwasher sump basin. Fastening the drain hose up high under the countertop rim stops this siphon immediately.
Why does water only back up into the sink when the disposal is turned off?+
If the disposal grinding plate or the drain arm beneath it is packed with dense food matter, wastewater from the dishwasher cannot fall down through the shredder ring. It fills the grinding chamber rapidly and forces its way upward through the rubber sink baffle into your sink basin. Running the disposal clears this bottleneck.
How do I know if the clog is in the hose or in the disposal inlet?+
First, check whether your kitchen faucet has hot water flowing at or above 120°F. If the water is hot, inspect the dishwasher drain filter at the bottom of the tub; a thick layer of fat or mineral deposits prevents full pump-out. Next, pull the hose off the disposal inlet and run a wire or brush through the barbed port, which frequently cakes with food debris.
Discussion
Loading comments…