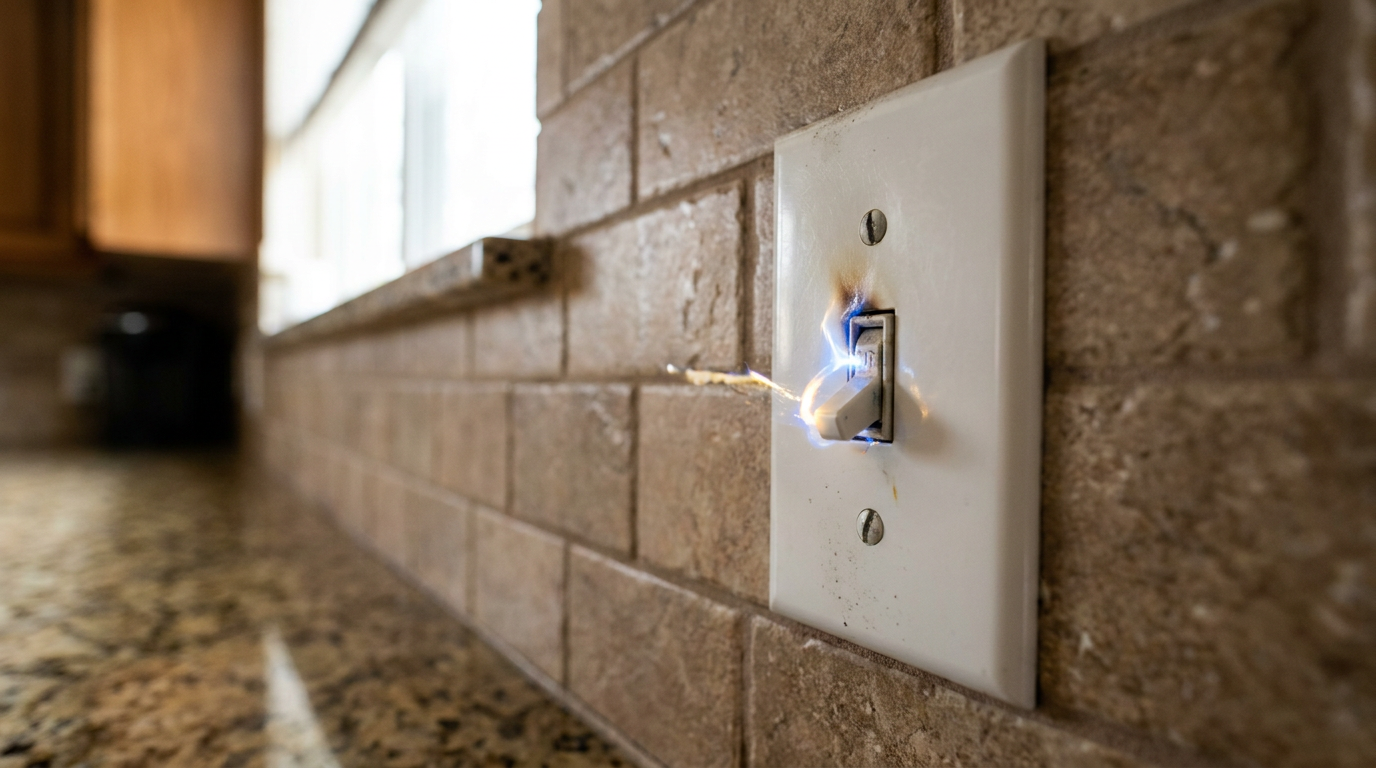
- Unscrew the Switch from the Box.
- Tools: Phillips or flathead screwdriver.
- You’ll see two longer screws, one up top and one down low, holding the switch in the electrical box. Back those out. Now the switch should loosen up.
Plumbing · Leak
| Project category | Plumbing |
|---|---|
| Problem type | Leak |
| Trade required | Plumbing |
| Urgency | Emergency — act now |
| Safety risk | High safety risk |
| DIY suitability | DIY for experienced homeowners |
| Cost category | Low cost |
| Typical timeline | Shut water off now; repair usually same or next day |
| Contractor type | Licensed plumber |
Repair option
Isolate at the shutoff, replace the failed component, and dry the cavity fully.
Replacement option
Repipe the run or the branch when corrosion is widespread.
Common causes
- Failed supply line or shutoff valve
- Worn washers, cartridges, or P-trap connections
- Pinhole corrosion in older copper
Relevant tools:emergency checklistdiy or hire a pro
Published October 14, 2026Last updated October 14, 2026
Tools & materials you'll need
Affiliate links- AmazonSingle-pole wall switch15-amp or 20-amp
As an Amazon Associate FixlyGuide earns from qualifying purchases — at no extra cost to you. Prices and availability are accurate as of publication and subject to change.
Quick Answer
When a garbage disposal starts up by itself, that’ll get your attention fast. It’s not just weird — it’s a real electrical hazard. Nine times out of ten, I’m looking at a bad wall switch. The guts inside wear out, and the switch starts making and breaking contact whenever it feels like it. Less often, I’ve seen a stuck relay inside the disposal motor, a damaged wire between the switch and the unit, or some odd radio frequency (RF) interference from another device messing with the control circuit. First, immediately turn off the breaker that powers your garbage disposal to eliminate the safety risk.
The Problem
You’re in the other room and all of a sudden you hear that ugly grinding roar from under the sink. You walk into the kitchen and, sure enough, the disposal’s running. You flip the switch off, and it stops. Then it happens again later — maybe hours, maybe days. That kind of phantom start is enough to make anybody uneasy. It means something in that kitchen circuit isn’t behaving right, and that’s a fire hazard if you let it ride. I’ve seen disposals cook themselves too when they run too long with no water or scraps in there. That thing’s toast. You can’t, and shouldn’t, ignore it.
How It Works
A garbage disposal isn’t complicated. It’s a tough little electric motor hooked to a grinding chamber. When you hit the wall switch, you’re closing a standard 120-volt household circuit. Power comes from the main panel, through the breaker, into the switch, and then down to the disposal under the sink. Inside the unit, that electricity powers an induction motor, which spins impellers — some folks call them lugs — on a flywheel. Those throw food waste against a stationary grind ring until it’s chopped up. It’s built for short, hard bursts. Not all-day duty.
For the whole setup to stay safe, that wall switch has to act like a reliable gatekeeper. OFF means the circuit’s open. No power should be getting through. ON means the circuit closes cleanly and stays closed. If the disposal starts on its own, that gate is failing somewhere. Electricity is sneaking through a bad switch, a damaged wire, or a component inside the disposal itself. The trick is figuring out where that unwanted path is forming.
Step-by-Step Fix
This is the straightest path to diagnosing and replacing the most common failure: a bad wall switch. SAFETY FIRST: Before you begin any work, go to your home's main electrical panel and turn off the circuit breaker that controls the garbage disposal. The disposal and switch must be completely de-energized.
-
Confirm the Power is Off. After you flip the breaker, go back to the kitchen and try the wall switch again. The disposal should be dead silent. If it still hums or runs, you grabbed the wrong breaker. Head back to the panel and find the right one.
-
Remove the Switch Plate.
- Tools: Flathead or Phillips screwdriver.
- Take out the two little screws holding the faceplate to the wall. Pull the plate off gently. If someone painted over it, you may need to score the edges with a utility knife first.
-
Unscrew the Switch from the Box.
- Tools: Phillips or flathead screwdriver.
- You’ll see two longer screws, one up top and one down low, holding the switch in the electrical box. Back those out. Now the switch should loosen up.
-
Pull the Switch Out and Inspect the Wiring.
- Safety: The wires should not be live, but always treat them with caution.
- Ease the switch out of the wall box. Usually you’ll see two or three wires on it. Most of the time it’s two black wires — those are your hot wires — plus a green or bare copper ground. The black wires are what make the switch do its job. Look for anything ugly: melted insulation, black marks, loose wire ends, all that good stuff.
-
Test the Switch with a Multimeter (Optional but Recommended).
- Tools: Multimeter.
- Set the meter to continuity. Usually there’s a little sound icon for that. Touch one probe to each of the two screw terminals where the black wires were connected. With the switch OFF, the meter should stay quiet and show no continuity. Flip the switch ON, and it should beep, which means the circuit is complete. If it beeps while the switch is OFF, no dice — the switch is bad and closing when it shouldn’t.
-
Disconnect the Old Switch.
- Tools: Screwdriver.
- Loosen the side screws and remove the wires. If the wires are stabbed into the back of the switch — people call that a backstab connection — you may need to use a small screwdriver in the release slot beside the wire to pop it free.
-
Connect the New Switch.
- Tools: New single-pole wall switch, wire strippers (if needed).
- Grab the new switch. It doesn’t matter which black wire lands on which brass screw terminal. Loop each black wire clockwise around a brass terminal screw and tighten it down snug. Hook the green or bare copper ground wire to the green screw on the new switch. A new switch usually runs around $2-$5.
-
Reinstall the Switch and Plate. Gently tuck the wires back into the box. Screw the new switch back in with the mounting screws. Then put the wall plate back on. Don’t crank the plate screws too hard, or you’ll crack the plastic.
-
Restore Power and Test. Go back to the panel and turn the breaker back ON. Then head to the kitchen and test the new switch. It should turn the disposal on and off cleanly. Keep an eye on it for the next few days to make sure the phantom-start problem stays gone.
Common Causes
- Faulty Wall Switch (Most Common): The contacts inside the switch wear down after a lot of use. They get pitted, weak, or just plain sloppy, and electricity can arc across even when the switch is supposed to be off. That’s how the disposal ends up starting by itself.
- Stuck Disposal Relay: Some disposal models, especially ones with auto-reverse features, have an internal relay. If that relay sticks in the on position because of a surge or a mechanical failure, the unit can run nonstop or fire up at random even with the wall switch off.
- Damaged Wiring: A wire between the switch and the disposal may have damaged insulation. If bare copper touches another wire or a metal box, you can get a short that bypasses the switch and feeds the disposal directly. I pulled a water heater in Frisco last month that had exactly this kind of chewed-up wire behind the panel — same headache, different appliance. Older homes and recent remodels are the usual suspects.
- Radio Frequency Interference (RFI): This one’s rare, but it happens. A strong RF signal from a nearby device — a ham radio, baby monitor, even a bad garage door opener — can sometimes induce current in the disposal wiring and trick the control circuit into kicking on. You’re more likely to see that with smart or electronically controlled disposals than with basic ones.
Common Mistakes
- Forgetting the Breaker: Biggest mistake by far. People start messing with the switch or wiring without killing the power at the breaker first. That’s a dangerous move and can end in a nasty shock.
- Using the Wrong Switch: Match a standard single-pole switch with another single-pole switch. Don’t grab a three-way or a dimmer by mistake — they’re wired differently and won’t do the job right.
- Leaving Loose Connections: Tighten those screws. A loose wire can arc, and that means heat, fire risk, and the same problem you were trying to fix in the first place.
- Ignoring a Still-Present Problem: If you swap the switch and the disposal still turns on by itself, you’ve got a deeper issue — probably wiring or the unit itself. Don’t just shrug and live with it. That’s when you call an electrician.
Cost & Time Breakdown
Here’s a look at what to expect for this repair.
| Task | DIY Cost | Pro Cost | Time |
|---|---|---|---|
| Replace Wall Switch | $2–$10 | $125–$200 | 15-30 min |
| Inspect Wiring | $0 | (included) | 10 min |
| Replace Disposal | $100–$300 | $350–$600 | 1-2 hours |
| Diagnose/Fix Short | $0 (if easy) | $200–$400+ | 1-3 hours+ |
Tips & Prevention
- Install a High-Quality Switch: When you replace the switch, spend a few extra bucks on a commercial-grade or heavy-duty one. They’re built tougher inside and usually rated for more on/off cycles — often 20 amps instead of 15 amps.
- Check for Moisture: Look under the sink for any leaks. Water dripping onto the disposal
Related Articles
Keep troubleshooting with these hand-picked guides from FixlyGuide:
- The Drip You Can't Ignore: Why Your Garbage Disposal Leaks (And How to Stop It) — Don't let a leaky garbage disposal ruin your cabinets and create a mold problem; discover the real reasons behind the drips and how to fix…
- The Nasty Truth: Your Stinky Garbage Disposal Isn't Just Food Scraps — A persistent odor from your garbage disposal often points to a deeper, more stubborn problem than just old food, impacting your kitchen's f…
- Why Your Garbage Disposal Just Died (And the One Thing You Should Check First) — Don't panic if your garbage disposal went silent. Often, it's a simple, overlooked electrical issue you can fix in minutes without a plumbe…
- The Slow Drain Mystery: Why Your Garbage Disposal Backs Up (and the One Simple Tool That Saves the Day) — If your garbage disposal is draining slowly or backing up into your sink, it's likely a stubborn clog that you can tackle with a few basic…
- Garbage Disposal Making a Grinding Noise? 5 Causes of That Racket (and the Fix) — A metal-on-metal grinding sound from your garbage disposal usually means a foreign object is stuck. Here's how to safely find it and what t…
- Why Does Only One Room Have Flickering Lights? The Real Culprit Isn't Always the Bulb — Flickering lights in a single room often point to a localized issue, ranging from a loose bulb to a faulty switch or wiring problem.
What should this project cost?
Enter your project details for a realistic cost range before you call anyone.
Common repairs run $150–$650; repipes and water-heater replacements reach $1,500–$4,500.
- Regional adjustment
- National average
- Labor share (typical)
- ~$754
- Quotes to collect
- 3 written estimates
Educational estimate based on national averages — not a binding quote. Always confirm with written local estimates.
Fixly Project Decision Box
- DIY difficulty
- Professional Recommended
- Estimated time
- Diagnosis 1–2 hours
- Cost level
- Moderate
Main tools / materials
- Non-contact voltage tester
- Outlet tester
- Flashlight
When to stop and call a pro
- Burning smell, scorch marks, or a warm outlet or switch plate
- A breaker that trips again right after being reset
- Any work inside the service panel
- Aluminum wiring or cloth-insulated wiring
Need professional help?
Talk to a Licensed ElectricianGet the print-ready PDF of this guide
A clean, ad-free, printable version you can keep on your phone or pin to the workshop wall. Free with a FixlyGuide account.
- Print-optimized layout
- Tools, materials & every step included
- Saved to your account
Frequently asked questions
Is it dangerous if my garbage disposal turns on by itself?+
Yes, it is extremely dangerous. It indicates a serious electrical fault that poses a risk of electric shock and fire. It can also cause severe injury if it starts unexpectedly while someone has their hands in the sink. Immediately turn off the power at the circuit breaker.
Why would a garbage disposal start on its own?+
The most common reason is a failing wall switch where the internal contacts are worn and making an intermittent connection. It can also be caused by a stuck relay inside the disposal, a short circuit in the wiring, or (rarely) radio frequency interference.
Can a power surge cause my garbage disposal to act up?+
Yes, a power surge can damage the internal components of a garbage disposal, particularly the control relay if it has one. This damage could cause the relay to stick in the "on" position, leading to the unit running unexpectedly.
How much does it cost to replace a garbage disposal switch?+
If you do it yourself, the only cost is the new switch, which is typically $2-$10. If you hire an electrician, the cost will likely be between $125 and $200 to cover their service call fee and labor.
Is replacing a wall switch a difficult DIY project?+
For a homeowner comfortable with basic electrical work, it's a relatively easy task. The critical part is ensuring the power is completely off at the breaker. If you have any hesitation about working with electricity, it is always best to hire a licensed electrician.
My disposal is activated by an air switch (button on the countertop). Could that be the problem?+
Yes, absolutely. An air switch system can also fail. The button, the air tube, or the control box under the sink could be the source of the problem. A cracked air tube or faulty control box could cause the disposal to self-activate.
What's the difference between a 15-amp and 20-amp switch?+
A 20-amp switch is built with heavier-duty components designed to handle a higher electrical load. While a 15-amp switch is usually sufficient for a disposal, using a 20-amp rated switch provides a greater margin of safety and durability, making it a wise upgrade.
I replaced the switch and the garbage disposal still turns on by itself. What now?+
If a new switch doesn't solve the problem, the fault lies elsewhere. The issue is likely a short in the house wiring or a failed component inside the garbage disposal unit itself. At this point, you should call a licensed electrician to diagnose the more complex and potentially dangerous problem.

Discussion
Loading comments…