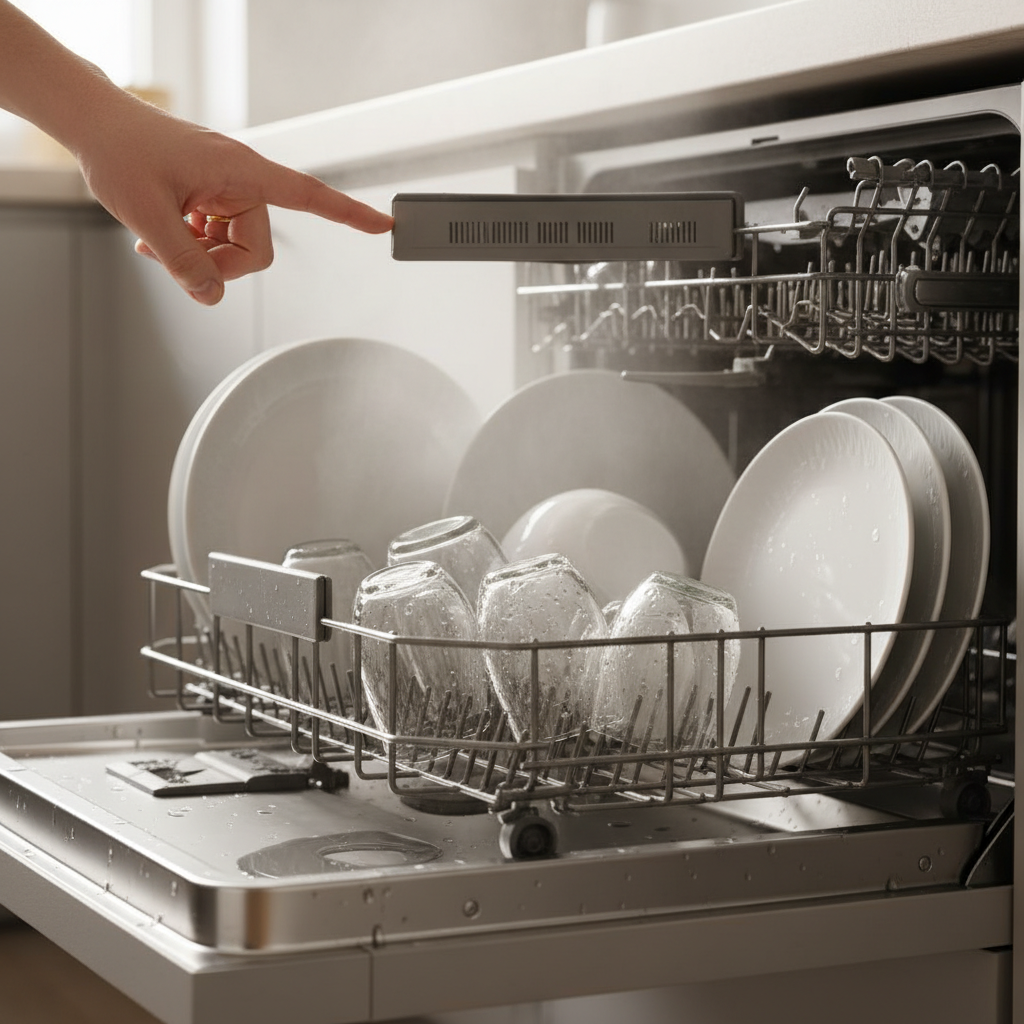
- Faulty Heating Element: This is the big one for heat-dry models. If it’s burned out, there’s no heat, and no dry dishes.
- Clogged Vent: A blocked vent keeps humid air trapped inside instead of letting it escape.
- Improper Loading: Too many dishes or the wrong placement stops water from draining and hot air from moving.
- No Rinse Aid or Dispenser Malfunction: Rinse aid helps break water surface tension so it can sheet off.
- Drainage Issues: Leftover water in the tub means dishes are sitting in moisture after a “dry” cycle.
HVAC · High energy usage
| Project category | HVAC |
|---|---|
| Problem type | High energy usage |
| Trade required | HVAC |
| Urgency | Planned project |
| Safety risk | Low safety risk |
| DIY suitability | DIY for experienced homeowners |
| Cost category | High cost |
| Typical timeline | Assessment within weeks; replacement planned off-season |
| Contractor type | Licensed HVAC technician |
Repair option
Duct sealing, insulation, and a tune-up before touching the equipment.
Replacement option
High-efficiency replacement sized by a load calculation, not a rule of thumb.
Common causes
- Aging, low-efficiency equipment
- Leaking ducts losing conditioned air
- Insufficient attic insulation
- Oversized system short-cycling
Relevant tools:project cost estimatorrepair or replace
Published August 29, 2026Last updated August 29, 2026
Tools & materials you'll need
Affiliate linksAs an Amazon Associate FixlyGuide earns from qualifying purchases — at no extra cost to you. Prices and availability are accurate as of publication and subject to change.
Quick Answer
Nobody likes cracking open the dishwasher after a cycle and finding a little puddle party inside. If your dishes are coming out soaking wet, it’s usually one of a few things: a blocked vent, a heating element that’s gone on vacation, or sometimes — believe it or not — the way you’ve stacked the plates. I’ve seen homeowners about lose their minds over this, but nine times out of ten, it’s a pretty straightforward fix you can handle yourself without calling in the cavalry. We’ll go through checking the vent, testing the element, and tightening up your loading game.
The Problem
You run a full wash cycle, hear that familiar clunk as the door pops open (or maybe it doesn’t), and there they are: your supposedly clean dishes, glistening with water droplets. Annoying? You bet. You pay good money for a machine to do a job, and drying is part of that job. This isn’t just a small nuisance, either; wet dishes can leave water spots, mildew smells in the dishwasher itself, and mean more towel work for you at the end of the night. I hear it all the time from folks who figure their rinse aid isn’t strong enough or the machine’s just “getting old.” Usually, that’s not the whole story.
How It Works
Let’s talk about how these machines are supposed to dry dishes in the first place. Most modern dishwashers use one of two main methods: heat drying or condensation drying. Some use both.
Heat Drying: This is the old-school workhorse. Your dishwasher has a heating element, usually a U-shaped rod at the bottom, kind of like what you’d find in an electric oven, just smaller. After the final rinse, that element kicks on and heats the air inside the tub to around 140-160°F (60-70°C). That hot air evaporates the water off your dishes. A lot of models also have a vent, usually on the door or near the top of the tub, that opens to let the moist hot air out and pull in cooler, drier air from the kitchen. It’s basically a tiny convection setup built for plates.
Condensation Drying: You’ll see this more on energy-efficient models and a lot of European brands. Instead of blasting hot air with a heater, these machines use the leftover heat from the final hot rinse. The inside of the tub — especially if it’s stainless steel — holds onto that heat. When the cycle ends, the tub walls are hotter than the dishes. Steam hits those cooler dishes, turns back into water droplets, and runs down the tub walls to drain away. There’s often a fan helping move air around, and some models have a small vent that opens too. Plastic stuff usually stays wetter with this method because it doesn’t hold heat well, which is why your plastic containers are always the ones causing grief.
Both systems depend on good airflow and, just as important, proper drainage. If steam can’t escape or water can’t drain, you’re going to have wet dishes. Plain and simple. If you know which system your machine uses, troubleshooting gets a whole lot easier. Check your owner’s manual — it usually spells it out.
Step-by-Step Fix
Alright, let’s roll up our sleeves. Before you start poking around, remember the golden rule: safety first! Always disconnect power to the dishwasher before doing any work inside it. That means flipping the breaker in your electrical panel. Don’t skip this step — I’ve seen guys take nasty shocks because they got casual with it.
-
Check Power & Cycle Settings — The Obvious First Stop
- Before you touch anything else, make sure your dishwasher’s getting power and you’ve actually selected a drying option. Sounds silly, right? Still, I’ve rolled up to jobs where the homeowner just forgot to turn on “Heated Dry” or “Extended Dry.” Check the control panel for the right settings. Some eco cycles intentionally cut heat or skip drying to save energy. And if your dishwasher is tied to a switch under the sink, make sure that’s on too. I showed up to a place in Brighton once and the homeowner’s kid had flipped the garbage disposal switch, which also controlled the dishwasher. Easy fix. Felt a little dumb making the trip, but there you go.
-
Inspect the Vent Assembly — Clearing the Air
- A lot of heat-drying dishwashers have a vent, usually on the top edge of the door or the front of the tub. Those vents get packed with food bits, detergent buildup, or the occasional rogue piece of plastic from a container. Look for a small grille or flap. Clean it out with a small brush or a toothpick. Some vents have a fan behind them — make sure it spins freely. If it’s jammed solid, that fan may need replacing, and yeah, that usually means pulling the dishwasher out a bit to get at the vent assembly. A quick look here can save you a pile of hassle.
-
Test the Heating Element — Is It Getting Hot in Here?
- Safety first: Make sure the power is OFF at the breaker! The heating element is usually at the bottom of the tub. Check it for breaks, burn marks, or corrosion. If it looks okay, grab a multimeter and test for continuity. Set it to the ohms (Ω) setting. Disconnect the wires leading to the heating element — usually 2-3 wires. Put one probe on each terminal of the element. You should see a reading between 10-30 ohms. If you get an “OL” (open circuit) or infinite reading, the element’s toast and needs replacing. That’s a common failure point, especially in older machines. I pulled one out in Frisco last month that looked fine from the top, but it tested dead as a doornail.
-
Examine the Rinse Aid Dispenser — Lubricating the Slide
- Rinse aid isn’t just about spot-free dishes; it helps water sheet off surfaces, which makes drying work better. Make sure the dispenser’s full. Also check if it’s clogged or not dispensing right. Sometimes old, gummy rinse aid blocks the tiny opening. Clean it out with a small brush and hot water. Make sure the cap’s screwed on tight too — if air gets in, it can mess with the dispensing. I tell folks not to cheap out on rinse aid either; it makes a real difference.
-
Check the Drain Hose & Air Gap — Don’t Let Water Linger
- A partial clog in your drain hose or air gap (if you’ve got one) can leave a little dirty water sitting at the bottom of the tub, and that moisture just hangs around. Check the air gap on your sink — that little cylindrical cap — for blockages. For the drain hose, you might need to pull the dishwasher out a bit to get to it. Look for kinks or clogs. Sometimes the high loop under the sink is what keeps backflow from happening, so make sure it’s still where it should be. If water isn’t draining all the way, you’re not getting dry dishes. No dice.
-
Review Dish Loading Practices — The Stack Attack
- Believe it or not, how you load the dishwasher has a huge effect on drying. Don’t cram it full. Water needs a path off the dishes, and hot air needs room to move. Make sure cups and bowls are upside down, and don’t nest items together. Plastic stuff goes on the top rack, away from the heating element if you’ve got one, since it can melt. Tilt items a little so water runs off. Overlapping dishes make little pockets where water gets trapped. I’ve seen kitchens where people just jam everything in there and call it a day. Take an extra minute to load it right — it pays off.
-
Inspect the Thermostat or Thermistor — Is It Reading Right?
- Some dishwashers use a thermostat or thermistor to keep tabs on the internal temperature. If that part’s bad, the machine might not realize it needs to turn on the heating element or stretch out the drying cycle. Testing these usually takes a multimeter and checking resistance changes based on temperature, which can get a little more involved. Your dishwasher’s service manual — usually online with the model number — will give you the exact resistance values to look for.
-
Consider a New Drying Method (for condensation models) — When Heat Isn’t an Option
- If you’ve got a condensation drying model and the dishes are still coming out wet, you might need to change up the routine a bit. Crack the dishwasher door open about 3-4 inches right after the cycle finishes. That lets steam out and pulls cooler air in, which speeds up evaporation. Some machines even have an “auto-open” feature for this. And for plastic items? You may just have to towel them off. That’s life.
Common Causes
- Faulty Heating Element: This is the big one for heat-dry models. If it’s burned out, there’s no heat, and no dry dishes.
- Clogged Vent: A blocked vent keeps humid air trapped inside instead of letting it escape.
- Improper Loading: Too many dishes or the wrong placement stops water from draining and hot air from moving.
- No Rinse Aid or Dispenser Malfunction: Rinse aid helps break water surface tension so it can sheet off.
- Drainage Issues: Leftover water in the tub means dishes are sitting in moisture after a “dry” cycle.
- Faulty Thermostat/Thermistor: If the machine can’t read the temperature right, it won’t know when to engage or extend drying.
- Selected Cycle Settings: Some “eco” or “light wash” cycles intentionally cut back or skip heated drying.
Common Mistakes
- Ignoring Rinse Aid: Folks think it’s optional, but it really helps with drying. Don’t skip it, and keep the dispenser full and clean.
- Overcrowding the Racks: You’re not playing Tetris here. Leave space between items so water can drain and air can move. I’ve seen families cram three days’ worth of dishes into one load, then wonder why nothing gets dry or clean.
- Blocking the Vent: Know where the vent is on your machine and don’t stick tall items or cutting boards in front of it. It’s gotta breathe.
- Using Too Much Detergent or the wrong kind: Too much suds can leave a film or mess with rinsing, which hurts drying. Use the recommended amount of decent detergent.
- Not Checking the Drain Loop/Air Gap: A small kink or a missing high loop under the sink can cause drainage problems that show up as wet dishes. Easy to miss, but it matters.
- Assuming a Malfunction Without Checking Settings: Always double-check the cycle settings first. It’s the simplest fix and saves you a bunch of unnecessary troubleshooting.
Cost & Time Breakdown
Here’s a rough idea of what you’re looking at if you need to fix your dishwasher’s drying problem:
| Task | DIY Cost | Pro Cost | Time |
|---|---|---|---|
| Check/Refill Rinse Aid | $5–$15 | Included in service | 5 minutes |
| Clean Vent Assembly | $0 | Included in service | 10–20 minutes |
| Test/Replace Heating Element | $20–$100 | $150–$350 | 30–60 minutes |
| Clear Drain Hose/Air Gap | $0–$5 (for tools) | $100–$250 | 20–45 minutes |
| Replace Thermostat/Thermistor | $20–$70 | $150–$300 | 45–90 minutes |
| Full Diagnostic & Repair | N/A | $150–$400+ | 1–3 hours |
Tips & Prevention
- Regular Rinse Aid Use: Keep that dispenser full. It’s cheap insurance against wet spots and helps drying a whole lot. Aim to refill it once a month, depending on how much you run the machine.
- Load Smart, Not Hard: Give yourself an extra 30 seconds to load the dishwasher right. Don’t crowd it, keep airflow moving, and angle dishes so water can drain off. Little habit, big payoff.
- Clean Filters Regularly: It’s not directly a drying issue, but a clean filter keeps water moving the way it should, which helps the rinse and can affect drying too. Pull it out and rinse it under the tap once a week or so.
- Check Drain Hose for Kinks: Once a year, or whenever you’re doing a deep clean under the sink, take a peek behind the dishwasher or under there and make sure the drain hose isn’t pinched or compressed.
- Run Hot Water Before Starting: Before you hit “start,” run the kitchen sink hot water until it’s good and hot. That way the dishwasher starts with hot water, which helps with cleaning and especially with condensation drying.
- Consider Cycle Options: If the dishes are still wet, try a “sanitizing” or “heavy duty” cycle; those usually run hotter and dry longer. Just don’t forget they’ll use more energy.
When to Call a Professional
Look, some jobs are just for the pros, and there’s no shame in knowing where the line is. If you’ve checked the easy stuff — power, settings, rinse aid, loading, vent, and even tested the heating element — and the dishwasher still won’t dry, it might be time to call a licensed appliance repair tech. Especially if you’re dealing with more advanced electrical diagnostics, a control board problem, or the issue keeps coming and going like a bad hair day. Don’t fool around with electrical parts you’re not comfortable with, and if you suspect a leak, cut the power and water right away and get a pro on the line. Better safe than sorry with a major appliance like this.
Related Articles
Keep troubleshooting with these hand-picked guides from FixlyGuide:
- The 30-Minute Trick When Your Dishwasher Won't Drain (Plumbers Keep Secret) — Discover the real reasons your dishwasher isn't draining and how to fix it in under an hour, without calling a plumber.
- Chalky dishes? It’s not always hard water. — If you're seeing a chalky white film on your glassware, the cause is likely hard water minerals, but using the wrong detergent or a malfunc…
- My Toaster Only Toasts One Side: The Hidden Thermostat Flaw — If your toaster only toasts one side, the cause is often an imbalanced internal thermostat or misaligned heating element, a specific flaw y…
- The Silent Fire Hazard Lurking In Your Laundry Room — Don't let a clogged dryer vent become a silent fire starter. Learn why this common oversight is so dangerous, the clear warning signs to lo…
- Your 'Clean' Dishes Are Still Dirty? The Culprit Is Hiding — Frustrated by gritty, food-flecked dishes after a full wash cycle? The problem isn't your detergent. Your dishwasher is making dishes dirti…
- That Corner Crack Is Back? It's Not the Drywall's Fault — Discover the real reasons that annoying drywall crack in the corner keeps returning. It's often a sign of deeper issues than just bad mud o…
What should this project cost?
Enter your project details for a realistic cost range before you call anyone.
Cost depends heavily on which system turns out to be the source.
- Regional adjustment
- National average
- Labor share (typical)
- ~$1,620
- Quotes to collect
- 3 written estimates
Educational estimate based on national averages — not a binding quote. Always confirm with written local estimates.
Fixly Project Decision Box
- DIY difficulty
- Advanced
- Estimated time
- Homeowner checks 20–30 minutes
- Cost level
- Moderate
Main tools / materials
- Clean air filter
- Garden hose for condenser coils
- Shop vac for the condensate line
When to stop and call a pro
- Burning smell, smoke, or a tripping breaker
- Refrigerant lines iced over or hissing
- Any work inside the sealed refrigerant circuit (EPA-licensed only)
- Gas smell near a furnace — leave and call the utility
Need professional help?
Find an HVAC Pro Near YouGet the print-ready PDF of this guide
A clean, ad-free, printable version you can keep on your phone or pin to the workshop wall. Free with a FixlyGuide account.
- Print-optimized layout
- Tools, materials & every step included
- Saved to your account
Frequently asked questions
Why are my plastic dishes always wet after a dishwasher cycle?+
Plastic items retain heat poorly compared to glass or ceramic. In condensation drying dishwashers, this means water doesn't evaporate as effectively, often leaving them wet. Try opening the door slightly after the cycle or hand-drying these items.
Can I use less rinse aid to save money?+
While you can, it's not recommended if you want truly dry dishes. Rinse aid significantly helps water sheet off surfaces, preventing spots and aiding in the drying process. Using less might save a few pennies but could lead to wetter dishes and more work for you.
My dishwasher used to dry fine, now it doesn't. What changed?+
Often, a change in drying performance points to a failing heating element, a clogged vent, or even a recent change in how you load the dishes. Review your settings and consider if anything else in your kitchen routine has changed recently.
Is it bad to just let my dishes air dry if the dishwasher isn't working?+
It's not 'bad' in terms of hygiene, but it defeats the purpose of having a dishwasher. You'll likely end up with water spots, and it can contribute to a musty smell in the dishwasher over time if moisture lingers too long. Plus, it's just plain inconvenient.
How do I know if my heating element is broken?+
Visually inspect it for breaks or burns. The most reliable way is to test for continuity with a multimeter. If it shows an 'open circuit' (infinite resistance), it's definitely faulty and needs replacement.
Will a dishwasher cleaner help with drying issues?+
A dishwasher cleaner primarily removes grease and limescale buildup from the internal components. While a very dirty machine might have reduced efficiency, a cleaner won't directly fix a faulty heating element or clogged vent, which are the main culprits for poor drying.
My dishwasher has a 'fan dry' option, but dishes are still wet. What gives?+
Even with a fan, if the internal air is too humid (e.g., from a recent hot rinse), the fan can only do so much. Ensure the vent isn't blocked and that the final rinse water is hot enough. Sometimes, the fan itself might be faulty or obstructed.
Is it safe to run a dishwasher with a broken heating element?+
Yes, it's generally safe. The machine will still wash dishes, but they simply won't dry. The primary risk would be if the element had a short circuit, but typically a broken element just won't heat up. You'll just have to hand-dry everything.
Should I open the dishwasher door after a cycle for better drying?+
Yes, especially with condensation drying models. Opening the door a few inches right after the cycle finishes allows steam to escape and cooler, drier air to enter, significantly improving drying performance, particularly for plastics.

Discussion
Loading comments…