- Check Power Connections — Ensure the robot is receiving power.
- Verify the power supply unit (transformer) is securely plugged into a working, GFCI-protected electrical outlet.
- Check that the floating power cable is firmly connected to both the power supply and the robotic cleaner's input port.
- If the power supply has an indicator light, ensure it's on. If not, try a different outlet.
- Safety Note: Always ensure your hands are dry when handling electrical plugs and outlets. For any persistent electrical issues, consult a licensed electrician.
Published May 22, 2026Last updated August 17, 2026
Tools & materials you'll need
Affiliate linksAs an Amazon Associate FixlyGuide earns from qualifying purchases — at no extra cost to you. Prices and availability are accurate as of publication and subject to change.
Quick Answer
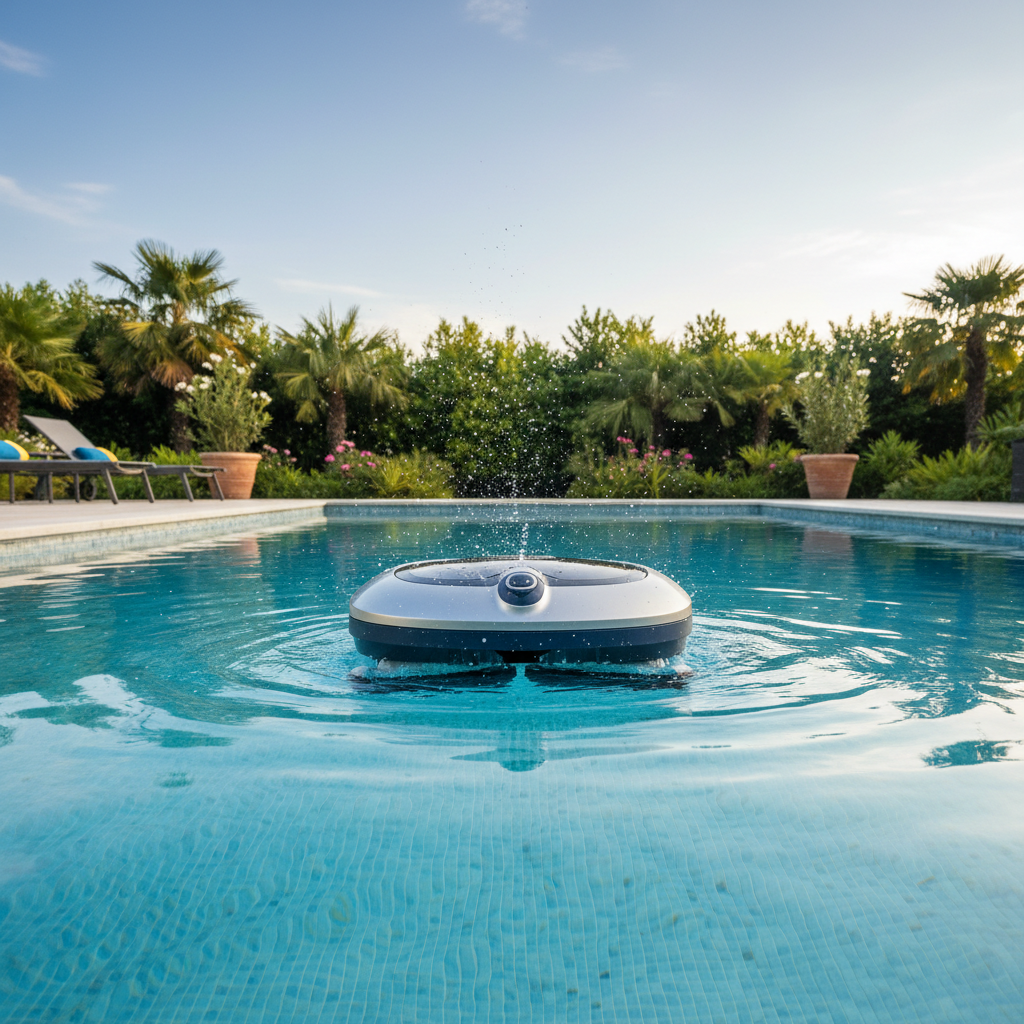
Robotic pool cleaners are autonomous devices designed to thoroughly clean your swimming pool's floor, walls, and waterline. They operate independently of your pool's main filtration system, moving randomly or on a programmed path, scrubbing surfaces, and vacuuming debris into an onboard filter. This not only saves you significant time and effort but also reduces the strain on your pool's primary pump and filter, potentially leading to energy savings and improved water quality.
The Problem
For many pool owners, the dream of a refreshing dip often comes with the reality of tedious, time-consuming maintenance. Manual scrubbing, vacuuming, and skimming are physically demanding and can easily consume several hours of your week, especially in larger or frequently used pools. Neglecting this maintenance leads to cloudy water, algae growth, staining, and an accumulation of leaves, dirt, and other debris that not only look uninviting but can also clog your pool's filtration system, reduce sanitizer effectiveness, and even damage surfaces. The constant battle against debris and grime can turn your backyard oasis into a chore, diminishing the enjoyment of pool ownership.
How It Works
Robotic pool cleaners are essentially self-contained cleaning machines. At their core, they use a combination of powerful electric motors, intelligent navigation systems, and advanced filtration. When placed in the pool, an internal pump motor creates suction, drawing water (and debris) through the cleaner's brushes or rollers and then into a high-capacity filter basket or cartridge. This filtered water is then expelled back into the pool.
Most cleaners are powered by a low-voltage transformer that plugs into a standard GFCI outlet, with a long, floating power cord connected to the robot. Some advanced models are battery-powered. Their movement is controlled by internal drive motors, which rotate tracks or wheels, allowing the robot to navigate the pool floor and climb walls. Many feature onboard microprocessors that employ algorithms to map the pool's contours, ensuring comprehensive coverage and efficient cleaning paths, rather than random wandering. Gyroscopes and accelerometers help them maintain orientation and detect walls. The brushes, typically made of PVC or a combination of materials, agitate and scrub the pool surfaces, dislodging stubborn dirt and algae before it's vacuumed up. This independent operation means they don't rely on your pool's existing pump and filter, reducing wear and tear on your main system and often improving the overall clarity of the water by adding an extra layer of filtration. Some models even collect data on pool size and shape over several cleaning cycles to optimize routes.
Step-by-Step Fix
While robotic pool cleaners are largely autonomous, occasional troubleshooting or simple maintenance can keep them running optimally. This section covers common minor issues and their solutions.
-
Check Power Connections — Ensure the robot is receiving power.
- Verify the power supply unit (transformer) is securely plugged into a working, GFCI-protected electrical outlet.
- Check that the floating power cable is firmly connected to both the power supply and the robotic cleaner's input port.
- If the power supply has an indicator light, ensure it's on. If not, try a different outlet.
- Safety Note: Always ensure your hands are dry when handling electrical plugs and outlets. For any persistent electrical issues, consult a licensed electrician.
-
Inspect and Clean the Filter Basket/Cartridge — A clogged filter reduces suction and cleaning effectiveness.
- Remove the robot from the pool and disconnect the power.
- Open the cleaner's lid or access panel (refer to your specific model's manual).
- Carefully remove the filter basket or cartridges.
- Rinse them thoroughly with a garden hose until all debris is removed. For fine silt, you might need to use a gentle scrub brush.
- Allow filters to air dry completely before reinserting them to prevent mold or mildew growth if storing the cleaner.
- If filters are damaged or heavily stained, consider replacement.
-
Clear Impellers and Brushes — Obstructions can hinder movement and suction.
- With the power disconnected, flip the robot over or access the bottom panel.
- Visually inspect the intake ports, impeller area (often under a protective grate), and brushes for entangled hair, leaves, twigs, or other debris.
- Carefully remove any obstructions. Tweezers or needle-nose pliers can be helpful for stubborn items.
- Ensure the brushes can rotate freely. If they are worn, they may need replacement.
-
Straighten the Floating Cable — A tangled cable can limit coverage and stress connections.
- After each use, coil the floating cable neatly. Avoid kinks or tight wraps.
- If the cable appears twisted or tangled during operation, it can reduce the robot's range or cause it to get stuck.
- Lay the cable out straight in the sun for an hour or two; the warmth can help it relax and unwind.
- Some advanced cables have swivel mechanisms to prevent tangling; ensure these are clean and moving freely.
-
Check for Suction Leaks/Loose Parts — Diminished suction can indicate bigger issues.
- While inspecting the filter area, check for any visible cracks in the cleaner's housing or where the filter seals.
- Ensure the filter basket is seated correctly and the lid or access panel is securely closed, creating a tight seal.
- Loose screws on the housing or intake ports can sometimes allow water to bypass the filter, reducing effective suction.
-
Verify Water Chemistry — Imbalanced water can prematurely degrade cleaner components.
- Test your pool water regularly (pH, alkalinity, chlorine, TDS).
- High levels of calcium or phosphates can lead to scaling on the cleaner's internal components over time.
- Extremely acidic or alkaline water can degrade plastic and rubber parts.
- Cleaners work best in balanced water, reducing the likelihood of mineral buildup within the unit.
-
Reset the Robot — A simple power cycle can resolve software glitches.
- Disconnect the robot from its power supply.
- Wait for at least 30 seconds to allow internal capacitors to discharge.
- Reconnect the power supply and place the robot back in the pool. This can often clear minor programming errors or temporary hang-ups.
-
Run a Self-Test Cycle (If Available) — Some advanced models have diagnostic modes.
- Consult your owner's manual for instructions on activating any diagnostic or self-test functions.
- These cycles can help identify specific component failures or sensor issues.
- Note down any error codes displayed, as these are crucial when contacting customer support.
Common Causes
- Clogged Filters: The most frequent cause of reduced cleaning performance. Filters fill up with dirt, leaves, and algae, restricting water flow and suction.
- Tangled Power Cords: Prevents the robot from reaching all areas of the pool, leading to incomplete cleaning patterns and potential damage to the cord or connection.
- Obstructed Impeller/Brushes: Hair, small stones, or even twigs can get caught, stopping the impeller from spinning or preventing brushes from scrubbing effectively.
- Worn Brushes or Tracks/Wheels: Over time, these components wear down, reducing their ability to grip surfaces, climb walls, or scrub efficiently.
- Imbalanced Pool Chemistry: Hard water can cause mineral buildup (scaling) on internal components, while harsh chemicals can degrade plastics and rubber seals.
- Power Supply Issues: A faulty transformer, a tripped GFCI outlet, or a damaged power cord can prevent the robot from turning on or operating consistently.
- Software Glitches: Like any electronic device, the robot's internal programming can occasionally encounter minor errors, leading to erratic behavior or non-operation.
Common Mistakes
- Not Cleaning Filters Regularly: Many homeowners wait too long, allowing filters to become completely clogged, drastically reducing efficiency and stressing the motor. Clean filters after every use or every few uses depending on pool debris.
- Storing the Robot in the Sun: UV rays and extreme heat will significantly shorten the life of plastic components and the power cord. Always store the cleaner in a cool, shaded area.
- Leaving the Cleaner in the Pool Continuously: While robust, leaving the robot submerged 24/7 exposes it to constant chemicals, UV, and wear, leading to premature degradation. Remove it when not in use.
- Ignoring a Tangled Cord: A consistently tangled cord puts strain on the motor connections and can damage the cable itself, leading to costly repairs. Always uncoil properly and store neatly.
- Running the Robot in a Green or Extremely Dirty Pool: Robotic cleaners are for maintenance, not initial cleanup. Extremely dirty pools will overwhelm the filter and can damage the motor. Shock the pool and remove large debris first.
- Using Aggressive Cleaners on the Robot: Harsh chemicals can damage the robot's sensitive plastic and rubber components. Use only plain water and a soft cloth for cleaning the exterior.
Cost & Time Breakdown
| Task | DIY cost | Pro cost | Time |
|---|---|---|---|
| Routine filter cleaning | $0 | N/A | 5–10 minutes |
| Clearing minor obstructions | $0 | N/A | 10–20 minutes |
| Replacing worn brushes/tracks | $30–$80 | N/A | 20–40 minutes |
| Replacing power cable | $100–$250 | N/A | 30–60 minutes |
| Repairing motor/pump (DIY) | $150–$400+ | $200–$600+ (pro repair) | 1–3 hours (DIY) |
| Annual maintenance check | $0 (DIY) | $75–$150 (pro tune-up) | 30 mins (DIY) |
Tips & Prevention
- Regular Filter Maintenance: Make it a habit to rinse the filter basket or cartridges thoroughly after every 1-2 uses. This is the single most important maintenance step.
- Proper Cable Management: Always uncoil the floating cable fully before placing the robot in the pool. After use, gently wipe it clean and coil it loosely for storage to prevent kinks and tangles.
- Store in the Shade: When not in use, remove the robot from the pool and store it in a cool, dry, shaded location, ideally in a caddy or on a stand designed for it. This protects it from UV damage and harsh pool chemicals.
- Pre-Clean Large Debris: Before deploying your robotic cleaner, skim large leaves, twigs, and other heavy debris from the pool surface. This prevents overworking and clogging your robot.
- Check Water Chemistry: Keep your pool water balanced. Proper pH and alkalinity prevent scale buildup and corrosion, prolonging the life of your robot's components.
- Inspect for Wear: Periodically check the brushes, tracks or wheels, and seals for signs of wear and tear. Replacing these items proactively can prevent more significant damage down the line. Most manufacturers offer replacement kits.
- Run on a Schedule: Program your robot to run regularly (e.g., 2-3 times a week) to prevent heavy buildup of dirt and algae. Consistent cleaning is easier on the robot than infrequent, intensive sessions.
When to Call a Professional
While many minor issues with robotic pool cleaners are DIY-friendly, some problems warrant professional intervention. You should call a licensed pool professional or an authorized robotic cleaner service center if your robot is experiencing persistent electrical problems, such as not turning on at all despite checking power connections, or if it emits smoke or burning smells. If the main drive motor or pump motor is making unusual grinding noises, or if the robot moves erratically, stops mid-cycle, or refuses to climb walls after you've performed all basic troubleshooting steps, it likely indicates an internal component failure that requires specialized tools and expertise to diagnose and repair. Damage to the power cord near the robot's entry point, which could expose internal wiring, is also best handled by a professional for safety reasons. Additionally, if your specific model has advanced diagnostic capabilities that point to a core system failure, a service technician will have the necessary software and components to address it correctly and safely. Attempting to repair complex internal electronics can void warranties, lead to further damage, or even pose electrical hazards.
Related Articles
Keep troubleshooting with these hand-picked guides from FixlyGuide:
- The Secret Power Tool Hiding in Your Garage for a Speedier Clean — Unlock the hidden potential of your cordless drill to tackle stubborn household grime, soap scum, and dirt with specialized cleaning attach…
- The Secret to Endless Hot Showers? It's Not Your Water Heater's Age — Inconsistent hot water or no hot water at all often points to a single, often overlooked culprit: the thermostat. Understanding its role is…
- The Single Cedar Board Secret to Attracting Bluebirds to Your Yard — Discover how to construct an ideal bluebird nesting box using just one cedar board, providing a safe and inviting habitat for these cherish…
- The Single Cedar Board Secret to Attracting Bluebirds This Spring — Discover how a single cedar board can be transformed into a welcoming home for bluebirds, enriching your yard with their vibrant presence a…
- The Single Board Secret to Attracting Bluebirds: A Quick DIY House — Discover how to construct an ideal bluebird house using just one cedar board, providing a safe and inviting home for these cherished backya…
- The Secret Culprit Behind Your Dishwasher's Standing Water (It's Not Always a Clog) — Discover why your dishwasher isn't draining completely and follow our step-by-step guide to identify and fix common issues, often without a…
What should this project cost?
Enter your project details for a realistic cost range before you call anyone.
Cost depends heavily on which system turns out to be the source.
- Regional adjustment
- National average
- Labor share (typical)
- ~$1,620
- Quotes to collect
- 3 written estimates
Educational estimate based on national averages — not a binding quote. Always confirm with written local estimates.
Get the print-ready PDF of this guide
A clean, ad-free, printable version you can keep on your phone or pin to the workshop wall. Free with a FixlyGuide account.
- Print-optimized layout
- Tools, materials & every step included
- Saved to your account
This article was independently written by FixlyGuide based on the source topic.
Frequently asked questions
How often should I run my robotic pool cleaner?+
For most residential pools, running your robotic cleaner 2-3 times per week is sufficient to maintain a clean pool. If your pool sees heavy use, experiences high debris fallout, or during peak swimming season, you might increase this to daily use.
Do robotic pool cleaners help with algae?+
Yes, robotic pool cleaners with active brushes can scrub and remove algae from pool surfaces. While they won't single-handedly eliminate a severe algae bloom (which requires chemical treatment), regular use helps prevent algae from taking hold and assists in circulating chemicals.
Can robotic pool cleaners get stuck?+
Occasionally, yes. They can get stuck on large obstacles like toys, main drains with raised covers, or uneven pool surfaces. Ensuring the pool is clear of large debris and that the power cord isn't tangled can help prevent this. Some advanced models have anti-entanglement features.
How long do robotic pool cleaners last?+
With proper maintenance and care, a good quality robotic pool cleaner can last anywhere from 3 to 7 years. Factors like frequency of use, quality of components, and adherence to maintenance schedules significantly impact its lifespan.


Discussion
Loading comments…