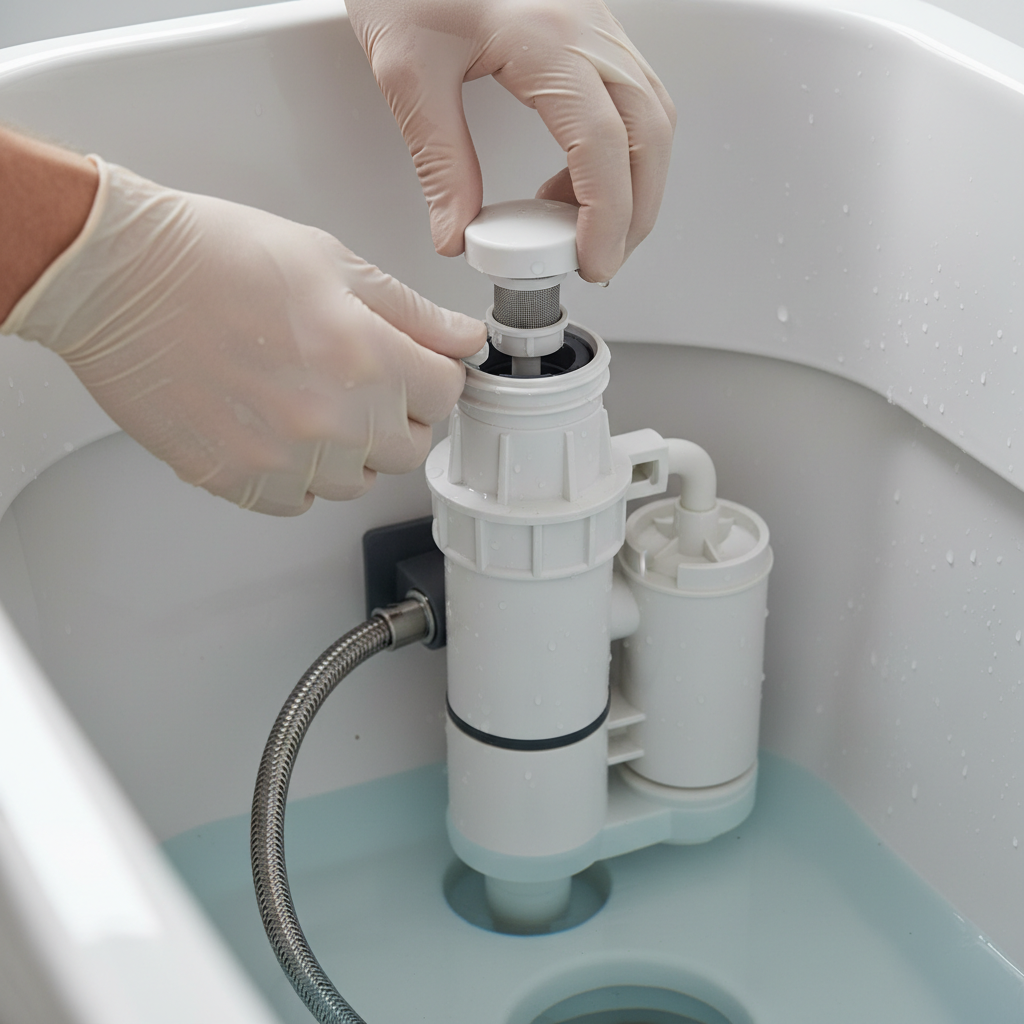
- Shut Off the Water Supply — Locate and close the isolation valve.
- Beneath your toilet tank, usually on the left side, you'll find a small chrome or plastic handle attached to a pipe coming out of the wall or floor. This is the toilet's water supply stopcock.
- Turn this handle clockwise until it's snug. Don't overtighten, but make sure the water flow to the toilet has stopped completely.
- Safety Note: Ensure the water is fully off before proceeding. You can verify this by flushing the toilet – no new water should enter the tank.
Plumbing · Leak
| Project category | Plumbing |
|---|---|
| Problem type | Leak |
| Trade required | Plumbing |
| Urgency | Emergency — act now |
| Safety risk | High safety risk |
| DIY suitability | DIY for experienced homeowners |
| Cost category | Low cost |
| Typical timeline | Shut water off now; repair usually same or next day |
| Contractor type | Licensed plumber |
Repair option
Isolate at the shutoff, replace the failed component, and dry the cavity fully.
Replacement option
Repipe the run or the branch when corrosion is widespread.
Common causes
- Failed supply line or shutoff valve
- Worn washers, cartridges, or P-trap connections
- Pinhole corrosion in older copper
Relevant tools:emergency checklistdiy or hire a pro
Published July 9, 2026Last updated August 17, 2026
Tools & materials you'll need
Affiliate linksAs an Amazon Associate FixlyGuide earns from qualifying purchases — at no extra cost to you. Prices and availability are accurate as of publication and subject to change.
Quick Answer
A slow-filling toilet tank usually points to an issue with the fill valve or the water supply line. Most often, the culprit is a clogged fill valve filter or a partially closed water supply stopcock. You can typically diagnose and fix this yourself in under 15 minutes by shutting off the water, flushing the toilet to empty the tank, and then inspecting/cleaning the fill valve. Ensure your supply valve is fully open.
The Problem
You've flushed the toilet, and now you're waiting... and waiting... for the tank to refill. Instead of a quick, steady stream, you hear a trickle, or the refill takes an unusually long time. This isn't just an inconvenience; a slow-filling toilet can increase water consumption if it doesn't fully refill before the next flush, or worse, lead to a 'ghost flush' where the toilet attempts to flush with insufficient water. The primary problem is restricted water flow into the tank, preventing the fill valve from operating efficiently and delaying the toilet's readiness for the next use. If ignored, the continuous slow filling can also put extra strain on the fill valve components, potentially leading to premature wear and failure.
How It Works
Understanding how your toilet tank refills helps in diagnosing the issue. When you flush, the water in the tank empties into the bowl, and the float (either a cup-style or a ball-on-arm) drops. This drop is the signal for the fill valve, a cylindrical mechanism typically located on the left side of the tank, to open. The fill valve has several key components: a float that regulates the water level, a diaphragm or seal that controls water flow, and a small filter screen at its base where the water supply line connects. As the tank refills, water flows from the supply line, through the fill valve's filter, past the diaphragm, and into the tank. A small tube, the refill tube, directs some water into the toilet's overflow pipe, refilling the bowl trap to maintain the water seal. As the water level rises, the float lifts, gradually closing the fill valve's diaphragm until the water flow stops completely when the desired water level is reached. Any obstruction in this pathway—from the main shutoff valve to the fill valve's internal components—can impede water flow and cause a slow refill.
Step-by-Step Fix
Before you begin, gather your tools. Always work calmly and carefully. If at any point you feel unsure or encounter something unexpected, it's always best to call a professional.
-
Shut Off the Water Supply — Locate and close the isolation valve.
- Beneath your toilet tank, usually on the left side, you'll find a small chrome or plastic handle attached to a pipe coming out of the wall or floor. This is the toilet's water supply stopcock.
- Turn this handle clockwise until it's snug. Don't overtighten, but make sure the water flow to the toilet has stopped completely.
- Safety Note: Ensure the water is fully off before proceeding. You can verify this by flushing the toilet – no new water should enter the tank.
-
Flush the Toilet to Empty the Tank — Remove water for better access.
- Once the water supply is off, flush the toilet. Hold the handle down to allow as much water as possible to drain from the tank into the bowl. This will give you clear access to the fill valve and prevent spills.
-
Inspect the Water Supply Line and Stopcock — Check for obvious kinks or partial closures.
- Examine the flexible water supply line that connects the stopcock to the bottom of the fill valve. Look for any visible kinks or bends that could restrict water flow.
- Fully open the stopcock by turning it counter-clockwise and then close it fully clockwise. Repeat this a few times to dislodge any mineral buildup that might be preventing it from fully opening.
- If this doesn't work: If the line looks fine and cycling the stopcock doesn't improve flow, the issue is likely within the fill valve itself.
-
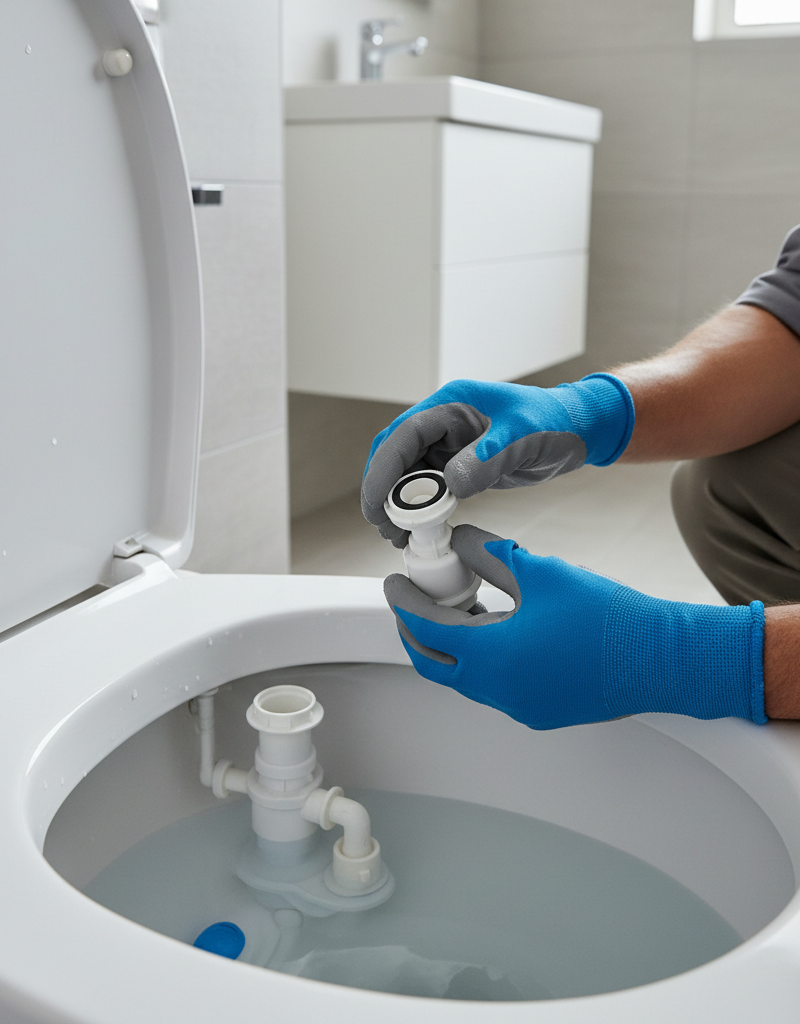
Remove the Fill Valve Cap (If Applicable) — Access the internal diaphragm.
- Many modern fill valves have a twist-off or clip-on cap. Gently twist the top cap of the fill valve counter-clockwise or unclip the locking tab, then pull it straight up to remove it.
- Be careful not to lose any small rubber O-rings or seals.
-
Clean or Replace the Fill Valve Diaphragm/Seal — Address clogs or damaged parts.
- Inside the fill valve, underneath the cap, you'll find a rubber diaphragm or a small gasket. Carefully remove it.
- Inspect it for any grit, debris, tears, or signs of wear. Often, a tiny piece of sediment is caught here.
- Rinse the diaphragm thoroughly under running water to remove any obstructions. If it's damaged or brittle, you may need a replacement. These are inexpensive and widely available at hardware stores.
- Pro Tip: Take the old diaphragm with you to the store to ensure you get an exact match.
-
Check and Clean the Fill Valve Filter Screen — The most common source of blockages.
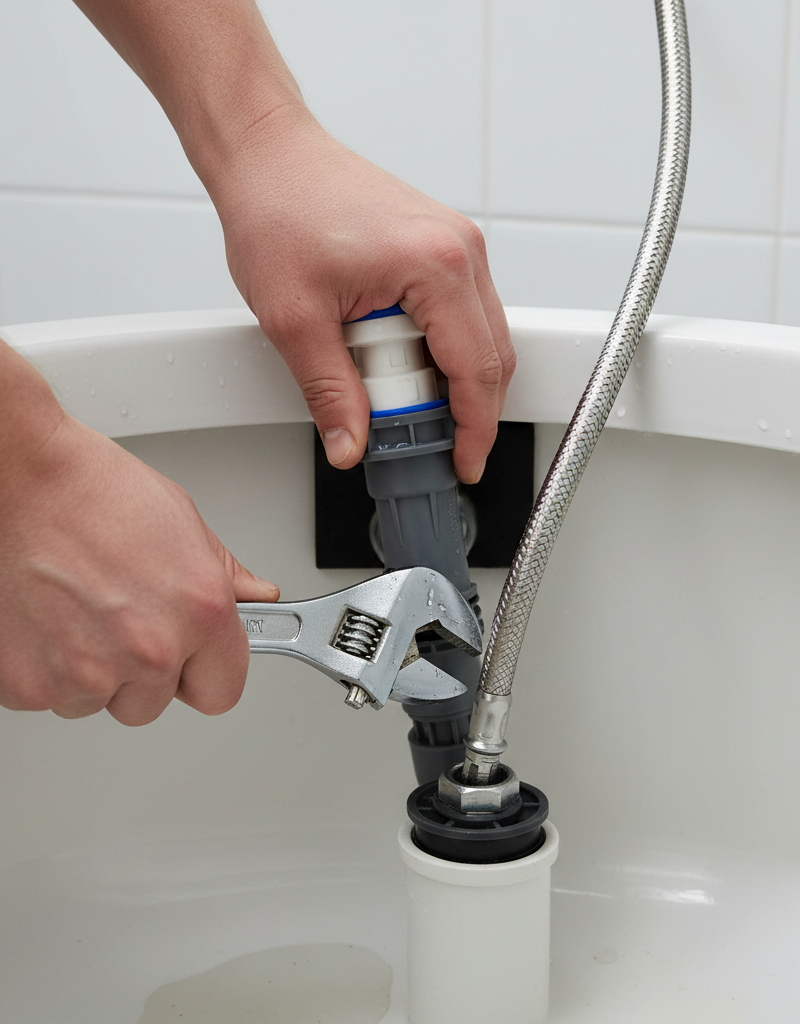
- This is often the primary culprit. At the very base of the fill valve, where the supply line connects, there's usually a small filter screen. You might need to disconnect the supply line from the valve to access it.
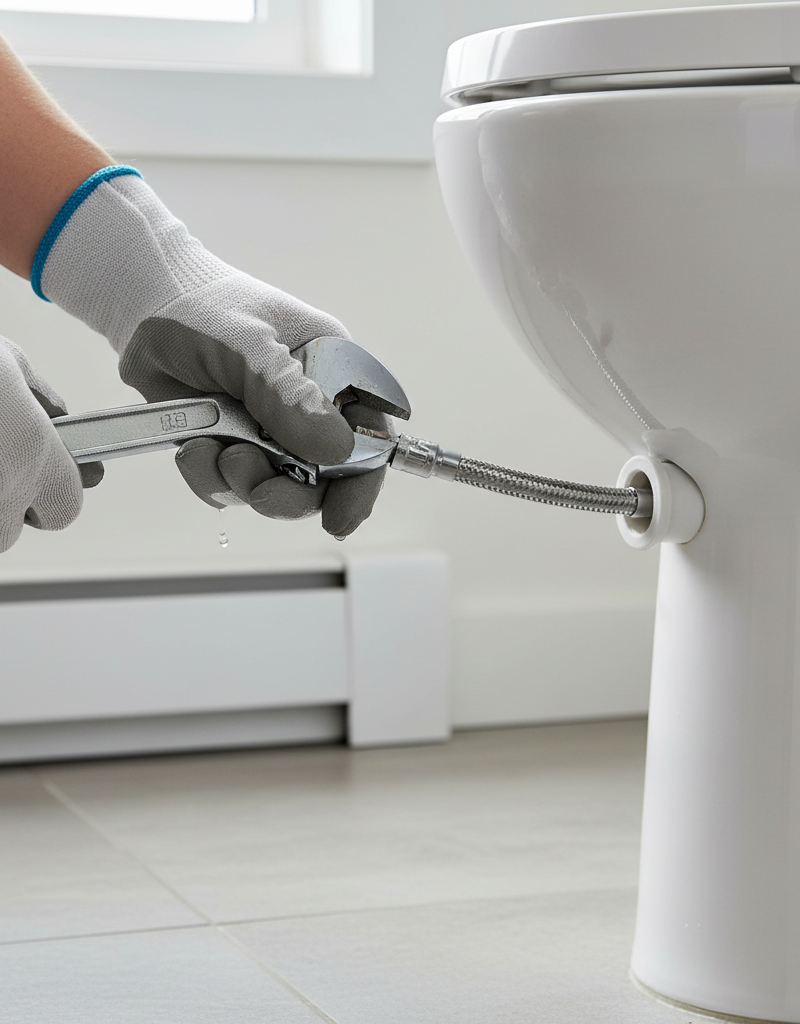
- Unscrew the nut connecting the supply line to the fill valve (counter-clockwise). Once disconnected, you should be able to see a small mesh screen inside the fill valve's inlet.
- Use needle-nose pliers or tweezers to carefully pull out the screen. Rinse it thoroughly under a faucet to remove any accumulated rust, mineral deposits, or sediment. A small brush (like a toothbrush) can help.
- Safety Note: Be gentle with the plastic components to avoid cracking them.
-
Reassemble the Fill Valve — Reverse the steps, ensuring proper seating.
- Insert the cleaned filter screen back into the base of the fill valve. Ensure it's seated correctly.
- Reconnect the water supply line to the fill valve, hand-tightening the nut first, then giving it a quarter to half turn with a wrench. Don't overtighten.
- Replace the diaphragm/seal into its groove, ensuring it sits flat and correctly. Replace the fill valve cap, twisting it clockwise until it locks into place or clipping it securely.
-
Restore Water Supply and Test — Check for leaks and proper function.
- Slowly turn the water supply stopcock counter-clockwise to open it fully. Listen for the sound of water entering the tank.
- Watch the tank carefully as it refills. Check for any leaks at the supply line connection or around the fill valve cap.
- Once the tank is full, flush the toilet several times to confirm that the tank is now refilling at a normal pace and that there are no new leaks.
- If the problem persists: The fill valve itself might be faulty and require full replacement, or the issue could be with your home's water pressure.
Common Causes
- Clogged Fill Valve Filter Screen: This is by far the most frequent cause. Sediment, mineral deposits, or rust from your home's water supply can accumulate in the small mesh filter at the base of the fill valve, restricting water flow. This is especially common in older homes or areas with hard water.
- Partially Closed Water Supply Stopcock: The small valve beneath the toilet might not be fully open, inadvertently restricting the flow of water into the tank. This can happen if it was accidentally bumped or if mineral buildup prevents it from opening completely.
- Damaged or Worn Fill Valve Diaphragm/Seal: The rubber diaphragm or seal inside the fill valve, which controls the water flow, can become stiff, torn, or accumulate debris, preventing it from opening fully or sealing properly.
- Low Water Pressure: While less common for a single toilet, general low water pressure in your home can affect refill speed. This could be due to issues with the main water supply, a failing pressure regulator, or a significant leak elsewhere.
- Kinked or Obstructed Supply Line: The flexible hose connecting the stopcock to the fill valve can sometimes become kinked or develop an internal obstruction, limiting water flow.
- Faulty Fill Valve: Over time, the entire fill valve mechanism can wear out, leading to internal component failures that reduce its efficiency and cause slow filling. This is more likely with older, cheaper, or frequently repaired valves.
Common Mistakes
- Overtightening Connections: When reconnecting the water supply line, over-tightening plastic or brass nuts can strip threads or crack components, leading to leaks. Hand-tighten first, then use a wrench for a quarter to half turn.
- Ignoring the Supply Stopcock: Many DIYers jump straight to the fill valve without confirming the water supply valve beneath the toilet is fully open. Always check this first, as it's the easiest fix.
- Not Fully Draining the Tank: Attempting to work on the fill valve with water still in the tank can lead to spills and makes the job messier and more difficult.
- Forcing Fill Valve Components: If the fill valve cap or internal parts are stuck, forcing them can break delicate plastic components, necessitating a full valve replacement rather than a simple repair.
- Using the Wrong Replacement Parts: If a diaphragm or seal needs replacing, using a generic part that doesn't exactly match your fill valve model can cause leaks or continued slow filling. Always bring the old part to ensure a proper match.
- Forgetting the Refill Tube: The small rubber tube that connects the fill valve to the overflow pipe ensures the bowl refills. Forgetting to reattach this or reattaching it incorrectly will cause the toilet bowl to have inadequate water for flushing and trap sealing.
Cost & Time Breakdown
| Task | DIY cost | Pro cost | Time |
|---|---|---|---|
| Clean fill valve filter | $0 | $75–$150 | 15–30 minutes |
| Replace fill valve diaphragm | $5–$15 | $85–$175 | 20–40 minutes |
| Replace entire fill valve | $15–$30 | $150–$250 | 30–60 minutes |
| Adjust stopcock | $0 | $75–$100 | 5–10 minutes |
| Diagnose low home water pressure | $0 (DIY) | $100–$200 | 30–60 minutes |
Tips & Prevention
- Regular Stopcock Cycling: Periodically (yearly or every two years) fully open and close your toilet's water supply stopcock to prevent mineral buildup and ensure it can function properly when needed.
- Flush Annually: If you live in an area with hard water, consider flushing your water heater annually to reduce sediment in your pipes, which can clog toilet fill valve filters.
- Consider a Water Softener: For persistent issues with mineral buildup in faucets and toilets, a whole-home water softener can significantly extend the life of your plumbing fixtures.
- Listen for Changes: Pay attention to how your toilet sounds when it refills. A sudden change from a robust fill to a slow trickle is an early warning sign.
- Inspect Supply Lines: During your routine bathroom cleaning, take a quick glance at the flexible water supply line for any kinks, bulges, leaks, or signs of wear.
- Choose Quality Fill Valves: When replacing a fill valve, invest in a reputable brand. Quality valves tend to have more robust filters and last longer.
When to Call a Professional
While a slow-filling toilet is often a straightforward DIY fix, there are specific situations where calling a licensed plumber is the wisest course of action. If you've cleaned the fill valve filter, ensured the stopcock is fully open, and even replaced the entire fill valve but the problem persists, it could indicate a deeper issue with your home's water pressure. A plumber can accurately diagnose whether the low pressure is specific to the toilet, the bathroom, or your entire home, potentially stemming from a faulty pressure regulating valve or issues with the main water supply line. Additionally, if you notice widespread low water pressure across multiple fixtures, significant plumbing noise (like hammering), or suspect a hidden leak, a professional has the expertise and tools to investigate without causing further damage. Never hesitate to call a pro if you're uncomfortable disconnecting water lines, dealing with persistent leaks, or if the DIY steps haven't resolved the issue. It could save you time, money, and potential water damage in the long run.
Related Articles
Keep troubleshooting with these hand-picked guides from FixlyGuide:
- The 4 Hidden Reasons Your Toilet Tank Fills Slowly (And How to Fix Them in 30 Minutes) — A slow-filling toilet tank is a common, annoying problem that usually points to issues with the fill valve or water supply and can often be…
- The 4 Hidden Reasons Your Toilet Tank Fills Slowly (And How to Fix Them in Under an Hour) — A toilet tank that fills slowly is a common, annoying plumbing problem, often caused by easily fixable issues within the fill valve or wate…
- The Secret Culprit Behind Your Slow Toilet Fill (It's Not Clogs!) — A slow-filling toilet tank is usually caused by issues with the fill valve, not clogs, affecting both water pressure and flush efficiency.…
- The 3 Hidden Reasons Your Toilet Tank Fills Slowly (And How to Fix Each) — Discover the common culprits behind a slow-filling toilet tank, from crucial valve issues to subtle obstructions, and learn how to restore…
- Is a Tiny Clog Halving Your Toilet's Flush Power? The Hidden Fill Valve Secret — A slow-filling toilet tank is a common, frustrating issue often caused by a restricted fill valve, easily fixed with basic tools.
- The 5-Minute Trick to Fix a Door That Won't Latch (No New Hardware Needed) — Discover the simple, often overlooked reason your door isn't latching and how to fix it in minutes with basic tools, no new hardware requir…
Should you do this yourself?
Answer five quick questions before you start. Safety outranks savings every time.
Your experience with work like this
How high do you have to work?
Does the job involve any of these?
Will it need a permit?
Specialty tools
Free and instant. Educational guidance only — not a quote, inspection, or professional diagnosis.
What should this project cost?
Enter your project details for a realistic cost range before you call anyone.
Common repairs run $150–$650; repipes and water-heater replacements reach $1,500–$4,500.
- Regional adjustment
- National average
- Labor share (typical)
- ~$754
- Quotes to collect
- 3 written estimates
Educational estimate based on national averages — not a binding quote. Always confirm with written local estimates.
Fixly Project Decision Box
- DIY difficulty
- Moderate
- Estimated time
- 30 minutes – half a day
- Cost level
- Moderate
Main tools / materials
- Adjustable wrench
- Plunger or drain auger
- Bucket and towels
- Thread tape
When to stop and call a pro
- Water you cannot shut off at the fixture or main
- Sewage backing up into more than one fixture
- Water near electrical panels or outlets
- Gas water heater work beyond relighting a pilot
Need professional help?
Get a Licensed PlumberGet the print-ready PDF of this guide
A clean, ad-free, printable version you can keep on your phone or pin to the workshop wall. Free with a FixlyGuide account.
- Print-optimized layout
- Tools, materials & every step included
- Saved to your account
Frequently asked questions
Why is my toilet tank filling so slowly?+
The most common reasons for a slow-filling toilet tank are a clogged filter screen inside the fill valve, a partially closed water supply shutoff valve located beneath the toilet, or a worn-out fill valve diaphragm or seal.
Can I fix a slow-filling toilet myself?+
Yes, in most cases, a slow-filling toilet is a straightforward DIY repair. You can usually resolve the issue by cleaning the fill valve's filter screen, ensuring the water supply stopcock is fully open, or replacing the fill valve's internal diaphragm.
How do I clean the toilet fill valve filter?+
To clean the fill valve filter, first turn off the water supply to the toilet and flush it to empty the tank. Disconnect the flexible supply line from the base of the fill valve. Carefully pull out the small mesh screen located inside the fill valve's inlet, rinse it thoroughly to remove debris, and then reassemble.
When should I call a plumber for a slow-filling toilet?+
You should call a plumber if you've tried cleaning the fill valve and ensuring the stopcock is open, but the problem persists. This could indicate a wider issue like low home water pressure, a faulty pressure regulating valve, or a deeper plumbing obstruction that requires professional diagnosis and repair.
How long should a toilet tank take to fill?+
Typically, a toilet tank should take between 30 seconds to 1 minute to refill completely after a flush. If it takes significantly longer than this, it indicates a problem with the water flow or fill valve.
Discussion
Loading comments…