
Tools & materials you'll need
Affiliate linksAs an Amazon Associate FixlyGuide earns from qualifying purchases — at no extra cost to you. Prices and availability are accurate as of publication and subject to change.
Quick Answer
A toilet tank that refills slowly typically indicates a problem with the fill valve assembly or the water supply line. Common culprits include a partially closed shut-off valve, a clogged fill valve filter screen, a worn-out fill valve diaphragm seal, or an issue with the float mechanism. Most of these issues are inexpensive to fix and can be resolved in under an hour with basic tools.
The Problem
You flush the toilet, and while the bowl empties quickly, you stand there waiting… and waiting… for the tank to refill. This slow refill cycle doesn't just waste your time; it can lead to multiple flushes being needed to clear the bowl, an increased water bill from repeat flushing, and a general inconvenience in a busy household. Ignoring a slow fill can even strain your plumbing system over time, as components are forced to work harder or longer than designed. The good news is that this common plumbing nuisance rarely signals a major disaster and is usually a straightforward DIY repair.
How It Works
To understand why your toilet tank might be filling slowly, it helps to know how the fill process works. When you flush, the flush valve opens, allowing water from the tank to rush into the bowl, creating a siphon effect that clears waste. As the tank empties, the water level drops, lowering the float (either a cup-style float riding on the fill tube or an older ball float attached to a rod). This lowered float activates the fill valve.
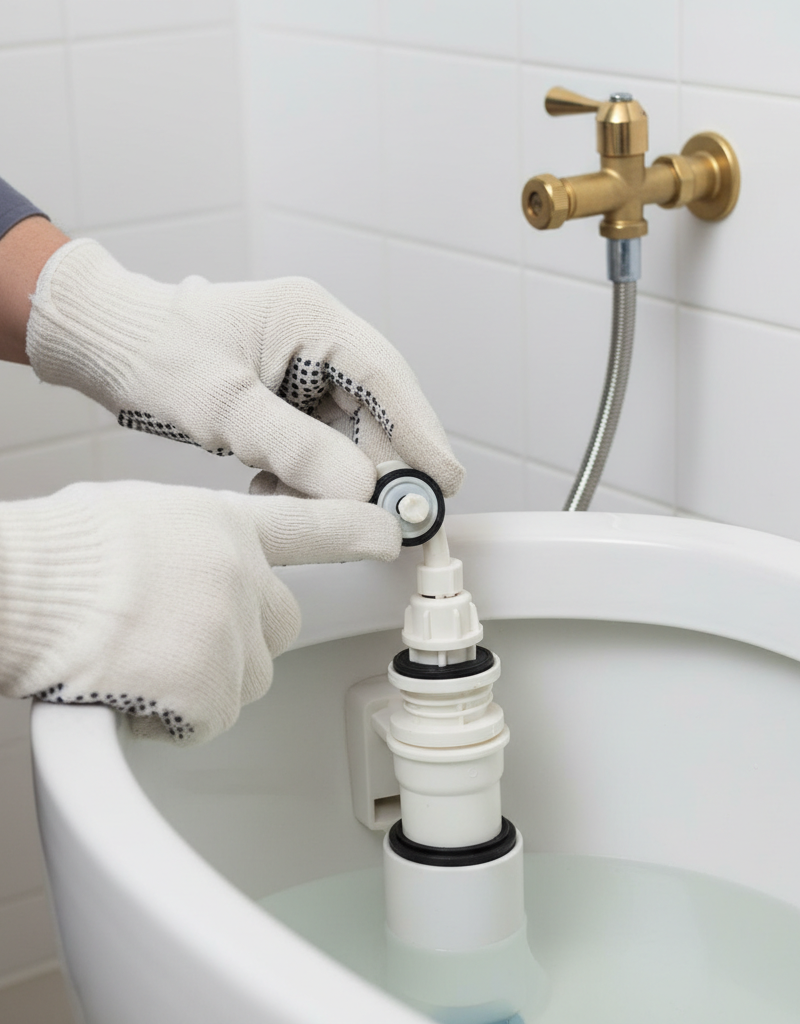
The fill valve is the heart of your toilet's refilling system. It’s typically a plastic tower-like mechanism located on the left side of your tank. Inside, there's a diaphragm or piston that closes against water pressure when the float rises to a certain height, signaling the tank is full. When the float drops, it opens this diaphragm, allowing fresh water from your home’s main supply line to flow into the tank. Before the water enters the main body of the fill valve, it passes through a small filter screen located at the base of the valve, where it connects to the supply line. This screen catches sediment and debris from the water supply, preventing it from clogging the sensitive internal mechanisms of the fill valve. Part of this incoming water also diverts through a small refill tube into the overflow pipe, which refills the toilet bowl trap after each flush. Any blockage or restriction in this delicate system—from the initial water supply to the fill valve’s internal components—will result in a sluggish refill.
Step-by-Step Fix
Safety Note: Always turn off the water supply to the toilet and flush it to empty the tank before working on any internal components. Wear gloves to keep your hands clean.
1. Check the Shut-Off Valve — Ensure full water flow
- Locate the small valve on the wall or floor near the base of your toilet, where the supply line connects. This is your toilet's shut-off valve.
- Turn the handle clockwise fully to close the valve, then counter-clockwise fully to open it completely. Sometimes, these valves get partially closed accidentally.
- Flush the toilet to test the refill speed. If the problem persists, move to the next step.
2. Inspect the Supply Line — Look for kinks or damage
- Examine the flexible water supply line that runs from the shut-off valve to the bottom of the toilet tank. It's usually braided stainless steel or reinforced flexible PVC.
- Check for any obvious kinks, twists, or bends that could restrict water flow.
- Feel along the line for any hard spots or signs of internal collapse, which can happen with older, cheaper plastic lines. If kinked or damaged, replacement is necessary.
- If this doesn't work: If the line looks fine, the issue is likely internal to the toilet.
3. Clean the Fill Valve Filter Screen — Remove sediment blockage
- Turn off the water supply to the toilet at the shut-off valve.
- Flush the toilet to empty the tank. Hold the handle down to remove as much water as possible.
- Unscrew the water supply line from the bottom of the fill valve using an adjustable wrench. Be prepared for a small amount of residual water.
- Look inside the threaded inlet at the bottom of the fill valve. You should see a small mesh screen or filter. This screen is designed to catch sediment.
- Carefully pull out the filter screen. You might need needle-nose pliers or a small screwdriver to gently pry it out.
- Rinse the screen thoroughly under running water to remove any accumulated rust, sand, or debris. Use an old toothbrush or a pick to clear stubborn clogs.
- Reinsert the clean filter screen, reconnect the supply line, and turn the water back on. Test the flush.
- If this doesn't work: If the screen was clean or cleaning it didn't help, the issue might be the fill valve itself.
4. Adjust the Fill Valve Float — Ensure proper float movement
- Open the toilet tank lid.
- Observe the fill valve and float mechanism. Most modern toilets use a cylinder or cup-style float that slides up and down on the fill valve shaft.
- Manually lift the float to its highest position. Does it stick or rub against anything? Ensure it moves freely without obstruction.
- Check the float adjustment clip. Make sure the float cup is set to the correct waterline, usually indicated by a mark inside the tank. If it's set too low, it might be prematurely shutting off the water or never opening fully.
- Adjust the float to allow maximum water into the tank (without overflowing the tank's overflow tube) and ensure it doesn't bind.
- If this doesn't work: The fill valve diaphragm might be the problem.
5. Replace the Fill Valve Diaphragm Assembly — Restore internal sealing and flow
- Turn off the water supply and empty the tank as in Step 3.
- Determine the type and brand of your fill valve. Many modern fill valves (like Fluidmaster 400A) have replaceable diaphragm assemblies.
- Typically, you'll need to twist the top cap of the fill valve counter-clockwise by about an eighth of a turn and lift it off. Take note of how it sits.
- Underneath, you'll see a rubber diaphragm or a small piston. Carefully remove it, being mindful of its orientation.
- Compare your old diaphragm to a new one (available at any hardware store). Ensure it's an exact match.
- Install the new diaphragm or piston assembly in the same orientation as the old one. Press it down firmly.
- Replace the top cap, twisting it clockwise until it locks into place.
- Turn the water supply back on and test.
- If this doesn't work: Replacing the entire fill valve is the next logical step.
Common Causes
- Partially Closed Shut-Off Valve: The simplest and often overlooked cause. The valve may have been bumped or turned down over time.
- Clogged Fill Valve Filter Screen: Sediment, rust, or mineral deposits from your water supply accumulate on the small mesh screen at the base of the fill valve, restricting flow.
- Worn or Damaged Fill Valve Diaphragm/Piston: Over time, the rubber diaphragm or plastic piston inside the fill valve can stiffen, warp, or accumulate mineral buildup, preventing it from opening fully or sealing properly.
- Kinked or Restricted Supply Line: The flexible hose connecting the wall valve to the toilet tank can become kinked, twisted, or internally collapsed, impeding water flow.
- Slightly Malfunctioning Float Mechanism: While less common for slow fill (more common for constant running), a float that binds or is incorrectly adjusted can sometimes prevent the fill valve from opening sufficiently.
Common Mistakes
- Ignoring the Shut-Off Valve: Many homeowners jump straight to internal components without checking if the most basic water supply is fully open. Always check this first!
- Not Completely Emptying the Tank: Failing to shut off the water and flush the toilet thoroughly before working on the fill valve can lead to a messy surprise or make it harder to access components.
- Over-Tightening Plastic Connections: The fill valve and supply line nuts are often plastic. Over-tightening can easily crack them, leading to leaks and requiring full replacement.
- Using the Wrong Replacement Parts: Fill valve diaphragms and even entire fill valves are not universal. Always ensure you purchase the correct part for your specific toilet model or, at least, a universal kit known to be compatible with most designs (like Fluidmaster).
- Forcing Stuck Components: If a part doesn't easily come apart, forcing it can break plastic tabs or strips threads. Refer to your fill valve's manual or look up a video for its specific disassembly method.
- Forgetting to Inspect the Supply Line: Sometimes the issue isn't inside the toilet at all, but a simple kink in the flexible supply line. Don't overlook this quick check.
Cost & Time Breakdown
| Task | DIY Cost | Pro Cost | Time |
|---|---|---|---|
| Check/Adjust Shut-Off Valve | $0 | $0 | 5 min |
| Clean Fill Valve Filter Screen | $0 | $75–$150 | 15–30 min |
| Replace Fill Valve Diaphragm/Piston | $5–$15 | $75–$175 | 30–45 min |
| Replace Flexible Supply Line | $10–$30 | $75–$175 | 30–60 min |
| Replace Entire Fill Valve | $15–$30 | $150–$250 | 45–90 min |
Tips & Prevention
- Annual Fill Valve Check: Once a year, open your toilet tank and visually inspect the fill valve and float for any signs of wear, mineral buildup, or sticking. Give the float a gentle push to ensure it moves freely.
- Water Quality: If you have hard water, consider a whole-house water softener to reduce mineral buildup in all your plumbing fixtures, including toilet fill valves.
- Flush the Shut-Off Valve: Periodically (e.g., every few years), gently turn your toilet shut-off valve fully off and then fully on. This helps prevent it from seizing up due to scale buildup.
- Quality Replacement Parts: When replacing a fill valve or diaphragm, opt for reputable brands. Higher-quality components tend to last longer and perform better.
- Don't Use Tank Cleaners with Harsh Chemicals: Drop-in toilet bowl cleaners that sit in the tank can corrode rubber seals and plastic components of the fill valve, leading to premature failure and slow filling.
- Regular Cleaning: A quick clean of the visible parts of the fill valve (above the waterline) during your regular bathroom cleaning can help prevent early mineral buildup.
When to Call a Professional
While many slow-filling toilet issues are DIY-friendly, certain situations warrant professional help. If you've tried troubleshooting and replacing the fill valve with no success, there might be a more complex issue with your home's water pressure or supply lines, which a licensed plumber can diagnose accurately. Additionally, if you notice water leaking from the base of the toilet or from the supply line connections that you can't stop, or if you're uncomfortable working with plumbing components, don't hesitate to call a professional. Plumbers have specialized tools and expertise to quickly identify and fix issues without causing further damage, especially if the problem might extend beyond the toilet itself to your main water supply system.
Related Articles
Keep troubleshooting with these hand-picked guides from FixlyGuide:
- The 4 Hidden Reasons Your Toilet Tank Fills Slowly (And How to Fix Them in 30 Minutes) — A slow-filling toilet tank is a common, annoying problem that usually points to issues with the fill valve or water supply and can often be…
- The 4 Hidden Reasons Your Toilet Tank Fills Slowly (And How to Fix Them in Under an Hour) — A toilet tank that fills slowly is a common, annoying plumbing problem, often caused by easily fixable issues within the fill valve or wate…
- The 3 Hidden Reasons Your Toilet Tank Fills Slowly (And How to Fix Each) — Discover the common culprits behind a slow-filling toilet tank, from crucial valve issues to subtle obstructions, and learn how to restore…
- The Secret Culprit Behind Your Slow Toilet Fill (It's Not Clogs!) — A slow-filling toilet tank is usually caused by issues with the fill valve, not clogs, affecting both water pressure and flush efficiency.…
- The $5 Flapper Trick Plumbers Hope You Don't Know About Your Running Toilet — Discover the secret $5 flapper trick that often fixes a running toilet, saving you money on parts and plumber call-outs.
- The #1 Mistake Homeowners Make When Their Ice Maker Stops (And the Easy Fix) — Is your refrigerator ice maker on strike? Often, a simple oversight or minor clog is the culprit, easily fixable with basic tools.
Frequently asked questions
How do I know if my toilet fill valve is bad?+
Signs of a bad toilet fill valve include a tank that fills very slowly, a toilet that runs constantly (ghost flushing), the tank not filling at all, or a whistling noise during the fill cycle.
Can low water pressure cause a toilet to fill slowly?+
Yes, significantly low household water pressure can cause all water fixtures, including toilets, to fill slowly. However, it's less common for a toilet to be the only fixture affected if the problem is general home water pressure.
How often should I replace my toilet fill valve?+
A toilet fill valve typically lasts between 5 to 10 years, though this can vary based on water quality and usage. If you experience persistent slow filling, constant running, or other issues, it might be time for a replacement.
Is it easy to replace a toilet fill valve?+
Replacing a toilet fill valve is considered a moderate DIY task. It requires basic tools and the ability to work with plumbing connections. Many universal fill valve kits come with clear instructions.


Discussion
Loading comments…