Tools & materials you'll need
Affiliate linksAs an Amazon Associate FixlyGuide earns from qualifying purchases — at no extra cost to you. Prices and availability are accurate as of publication and subject to change.
Quick Answer
A running toilet is one of the most common and annoying plumbing issues, not to mention a significant waste of water and money. Often, the culprit is a faulty flapper valve or an issue with the flapper chain, preventing a proper seal between the tank and the bowl. This article will guide you through diagnosing and fixing the most frequent causes, many of which can be resolved in minutes with minimal tools.
The Problem
You hear it: that constant, maddening hiss, gurgle, or trickle coming from your toilet tank. It's a running toilet, and it's effectively turning your money into wasted water, potentially adding hundreds of dollars to your annual water bill. This isn't just an annoyance; it can also strain your septic system or municipal wastewater treatment, and in extreme cases, contribute to premature wear on your toilet components. Most homeowners assume a complex plumbing issue, but often, the fix is incredibly simple and can be done without calling a professional.
How It Works
To understand how to fix a running toilet, it helps to know how a toilet fundamentally operates. When you flush, you activate a lever (the flush handle) which pulls a chain connected to a rubber or plastic "flapper" valve at the bottom of the toilet tank. This flapper lifts, allowing the water stored in the tank to rush into the toilet bowl, creating the siphoning action that empties the bowl's contents. As the water level in the tank drops, the flapper falls back into its sealed position, covering the drain hole. Simultaneously, a float (usually attached to the fill valve) detects the dropping water level. Once the flapper is sealed, the fill valve opens, allowing fresh water to refill the tank. The float rises with the water level, and once it reaches a predetermined point (the fill line), it signals the fill valve to shut off, stopping the water flow. A small refill tube also diverts some water directly into the toilet bowl during the refill cycle to ensure the bowl is always full of water. A running toilet occurs when any part of this delicate balance fails, most often because the flapper isn't seating correctly or the fill valve isn't shutting off entirely.
Step-by-Step Fix
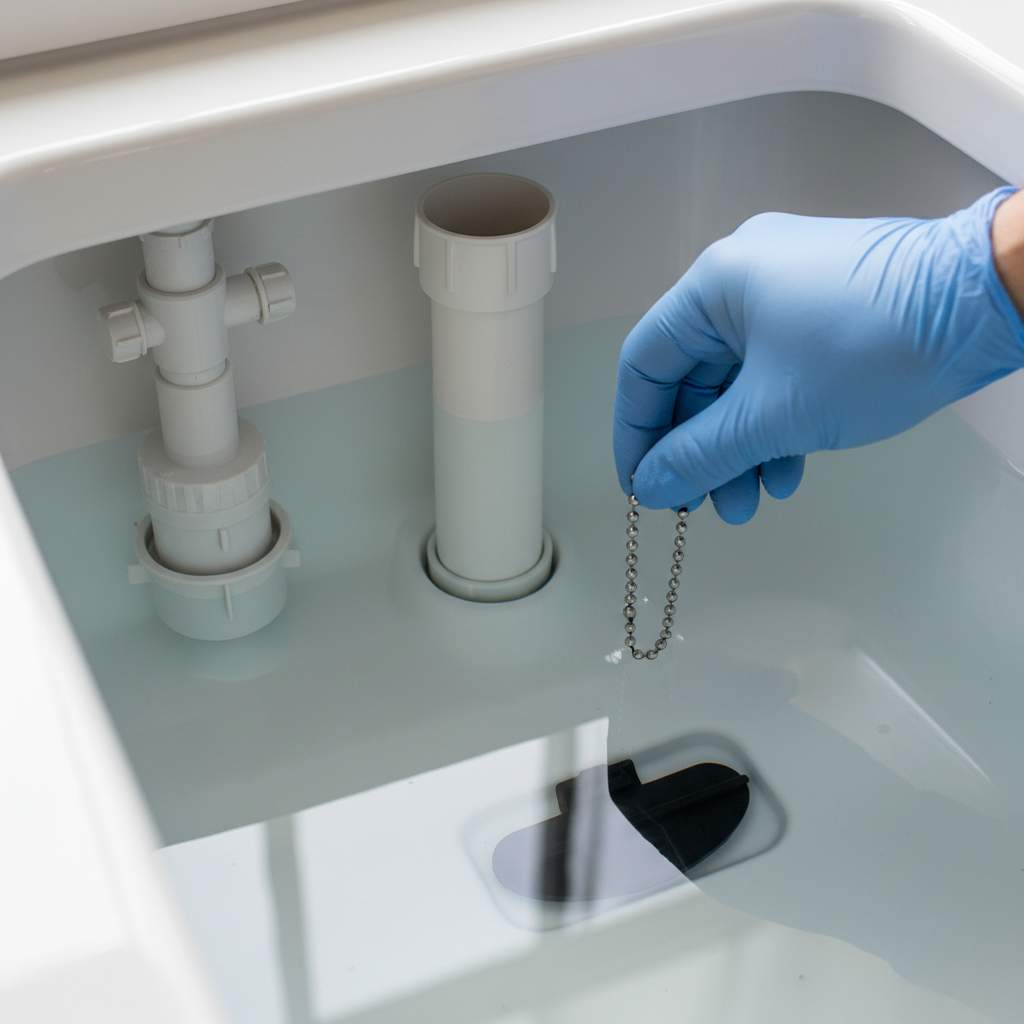
1. Check the Flapper Chain — The most common and easiest fix.
- Diagnosis: Open the toilet tank lid. Observe the flapper (the rubber stopper at the bottom of the tank). Is the chain too tight, preventing the flapper from fully closing? Is it tangled? Is there too much slack, allowing it to get caught under the flapper? The chain should have just a little slack when the flapper is closed (about 1/2 inch to 1 inch). If the chain is too long, it can get caught under the flapper, preventing a seal.
- Action: If the chain is too tight, adjust the clip on the flush lever to give it more slack. If it's too long, shorten it by clipping it to a higher link. Ensure the chain hangs freely without tangling or interfering with any other components. Sometimes, the chain just needs a little wiggle to free itself from under the flapper. Listen for the running to stop. This often solves 80% of running toilet issues.
2. Inspect the Flapper for Obstructions — Debris can prevent a seal.
- Diagnosis: With the tank lid off, carefully lift the flapper and visually inspect the rubber seal and the drain opening at the bottom of the tank. Are there any mineral deposits, rust flakes, or other debris preventing the flapper from seating flush? Even a tiny piece of grit can create a leak.
- Action: Using a gloved hand or a scrub brush, carefully clean the rim of the drain opening and the underside of the flapper. Flush the toilet a few times to see if the debris is cleared. For stubborn mineral buildup, you can gently scrub with a mild abrasive pad (like a Scotch-Brite pad) or use a vinegar-soaked cloth for an hour before scrubbing.
3. Test the Flapper Seal — Confirm the flapper is the culprit.
- Diagnosis: If the running continues, despite chain adjustments and cleaning, perform a dye test. Add a few drops of dark food coloring (or a toilet dye tablet) to the tank water. Do NOT flush. Wait 15-30 minutes. If you see colored water appear in the toilet bowl, your flapper is definitely leaking and needs replacement.
- Action: If the dye test confirms a leak, proceed to step 4 for flapper replacement.
4. Replace the Flapper — Wear and tear is inevitable.
- Safety First: Turn off the water supply to the toilet by twisting the shut-off valve behind the toilet clockwise until it's snug. Flush the toilet to drain most of the water from the tank.
- Removal: Disconnect the flapper chain from the flush lever arm. Detach the flapper from its "ears" or hinge pins at the base of the overflow tube. Some flappers simply slide off, others clip on. Note how the old one was installed.
- Installation: Take the old flapper to a hardware store to ensure you get an exact match. Critical: Flappers come in various sizes (2-inch or 3-inch being most common) and types (universal vs. specific brands). Install the new flapper by reversing the removal steps. Connect the chain, ensuring proper slack (1/2 to 1 inch). Turn the water supply back on and check for leaks and proper operation.
5. Adjust the Fill Valve Float — Ensuring proper water level.
- Diagnosis: If the flapper isn't leaking (dye test negative), but water is still running, the fill valve might not be shutting off completely. Look at the water level in the tank. Is it rising above the fill line or spilling into the overflow tube (the central standpipe)? This indicates the fill valve isn't stopping the water flow at the correct height.
- Action: Most fill valves have an adjustable float mechanism. For older ballcock-style floats, you can carefully bend the metal arm to lower the float. For newer cylinder-style fill valves, there's usually a clip or screw that allows you to slide the float cup up or down. Lower the float slightly so the water level stops about 1 inch below the top of the overflow tube. Flush and observe. Adjust as needed until the water shuts off cleanly.
6. Inspect the Fill Valve Refill Tube — Small tube, big impact.
- Diagnosis: Check the small flexible tube connecting the fill valve to the overflow tube. This tube must be positioned so it directs water down into the overflow tube, but it should not be inserted too far down into the tube. If it's inserted too far, it can create a siphoning effect that continuously drains water, or it can be a symptom of an overfilling tank.
- Action: Ensure the refill tube is securely attached to the fill valve and gently clipped to the top of the overflow tube, positioned to direct water into the tube without being submerged. Trim it if it's too long.
7. Replace the Fill Valve — When all else fails.
- Diagnosis: If adjusting the float doesn't stop the running, and you've ruled out flapper issues, the fill valve itself might be faulty or worn out. You might hear a constant, faint hiss from the fill valve even when the tank is full, or the valve might drip internally.
- Safety First: Turn off the water supply and flush the toilet. Use a sponge to remove any remaining water from the tank.
- Removal: Disconnect the water supply line from the bottom of the fill valve. Use an adjustable wrench to loosen the large nut on the underside of the tank that secures the fill valve. Carefully lift the old fill valve out of the tank.
- Installation: Place a new fill valve into the tank, ensuring the shank gasket is properly seated. Secure it with the new nut from below, hand-tighten, then give it a quarter-turn with a wrench. Connect the water supply line. Reattach the refill tube to the overflow tube. Turn on the water supply slowly and check for leaks. Adjust the float as necessary.
Common Causes
- Worn or Damaged Flapper: The most frequent offender. Over time, the rubber degrades, becoming stiff, cracked, or allowing mineral buildup to prevent a tight seal. This leaks water from the tank into the bowl.
- Improperly Adjusted Flapper Chain: If the chain is too tight, it holds the flapper slightly open. Too much slack, and it can get caught underneath, preventing a seal. Both lead to a running toilet.
- High Water Level / Malfunctioning Fill Valve Float: If the float is set too high or has become waterlogged, it won't signal the fill valve to shut off, causing water to continuously flow into the overflow tube.
- Faulty Fill Valve: The internal components of the fill valve (diaphragm or seals) can wear out, preventing it from completely closing off the water supply to the tank.
- Sediment or Debris: Mineral deposits, rust flakes, or other small bits of debris can get lodged under the flapper or within the fill valve, hindering its ability to seal or shut off.
- Long Refill Tube: If the refill tube is inserted too far into the overflow tube, it can create a siphoning effect, continuously draining water from the tank into the bowl.
Common Mistakes
- Ignoring the problem: Many homeowners let a running toilet go, dismissing it as a minor issue. It costs money, wastes water, and can lead to larger problems if tank components degrade further.
- Assuming a complex issue: Most running toilets are fixed by a simple flapper adjustment or replacement, not a full rebuild. Start with the easiest, most common culprits.
- Not turning off the water: Always, always turn off the water supply to the toilet before performing any maintenance or replacement, especially when replacing components like the flapper or fill valve.
- Buying the wrong parts: Flappers and fill valves come in various sizes and styles. Take your old part to the store or take clear photos to ensure you buy the correct replacement, especially for flappers (2-inch vs. 3-inch).
- Over-tightening connections: When replacing the fill valve or water supply line, over-tightening plastic nuts or supply lines can crack them, leading to leaks. Hand-tighten, then a quarter turn with a wrench.
- Not checking the overflow tube: Assuming the fill valve is bad without checking if water is just flowing into the overflow tube, which often points to a flapper or float adjustment issue.
Cost & Time Breakdown
| Task | DIY Cost | Pro Cost | Time |
|---|---|---|---|
| Adjust Flapper Chain | $0 | $75–$150 | 1–2 minutes |
| Clean Flapper/Drain | $0 | $75–$150 | 5–10 minutes |
| Replace Flapper | $8–$20 | $100–$200 | 15–30 minutes |
| Adjust Fill Valve Float | $0 | $75–$150 | 5–10 minutes |
| Replace Fill Valve | $15–$30 | $150–$300 | 30–60 minutes |
Tips & Prevention
- Regular Inspections: Periodically (e.g., every 6-12 months) remove your tank lid and visually inspect the flapper, chain, and water level. Look for signs of wear or mineral buildup.
- Dye Test Annually: Perform a dye test annually to catch silent leaks that you might not hear. Early detection saves water and money.
- Clean Flapper/Seat: Gently clean the flapper and drain seat with a non-abrasive brush or cloth during your inspections to remove mineral buildup.
- Check Chain Slack: Ensure the flapper chain has just the right amount of slack (about 1/2 to 1 inch) to allow a full seal without getting caught.
- Avoid Harsh Cleaners: Don't use in-tank chemical drop-in cleaners. They can corrode rubber parts like flappers and seals, leading to premature failure.
- Consider a Quality Fill Valve: If you live in an area with hard water, investing in a slightly higher-quality fill valve when replacing can offer better longevity and sealing.
When to Call a Professional
While most running toilet issues are DIY-friendly, there are specific situations where calling a licensed plumber is the wisest choice. If you've followed all the steps above, replaced both the flapper and the fill valve, and the toilet continues to run, there might be a more complex issue with the toilet's internal siphoning jet or a faulty flush valve seat that requires specialized tools or knowledge to repair. Additionally, if you notice any water leaking from the base of the toilet, around the tank bolts, or from the main water supply line connection that you can't easily fix, it's time to call a pro to prevent potential water damage. Anytime you feel uncomfortable, unsure, or if water is actively spraying or flooding, shut off the main water supply to your house and contact a professional immediately. Don't risk water damage or a bigger plumbing headache.
Related Articles
Keep troubleshooting with these hand-picked guides from FixlyGuide:
- The 30-Second Toilet Fix Plumbers Don't Want You to Know — A running toilet can waste hundreds of gallons of water per day, but often the fix is incredibly simple and takes under a minute.
- The $2 Trick to Stop a Running Toilet (Plumbers Don't Want You to Know) — Discover the simple, two-dollar fix that can stop your running toilet in minutes, saving water and preventing costly repairs.
- The $5 Flapper Trick Plumbers Hope You Don't Know About Your Running Toilet — Discover the secret $5 flapper trick that often fixes a running toilet, saving you money on parts and plumber call-outs.
- The $5 Secret to Silencing a Running Toilet (Plumbers Hope You Don't Know) — A running toilet is usually caused by a simple issue with the flapper or its chain, leading to constant water waste and higher utility bill…
- The 3 Hidden Reasons Your Toilet Tank Fills Slowly (And How to Fix Each) — Discover the common culprits behind a slow-filling toilet tank, from crucial valve issues to subtle obstructions, and learn how to restore…
- The 5-Minute Trick When Your Range Hood Fan Suddenly Dies (It's Not Always the Motor) — Before you panic about a broken motor, learn the quick diagnostic steps to revive a dead range hood fan and restore proper kitchen ventilat…
Frequently asked questions
Why is my toilet constantly running?+
The most common reason a toilet runs is a faulty flapper that isn't sealing properly, allowing water to continuously leak from the tank into the bowl. Other causes include a fill valve float set too high or a worn-out fill valve.
How do I know if my flapper is bad?+
You can perform a dye test: add a few drops of food coloring to the toilet tank. Wait 15-30 minutes without flushing. If colored water appears in the bowl, your flapper is leaking and needs replacement.
Can a running toilet waste a lot of water?+
Yes, even a slow leak can waste hundreds of gallons of water per day, leading to significant increases in your water bill over time. It's one of the biggest silent water wasters in a home.
How do I adjust the water level in my toilet tank?+
Most toilets have an adjustable float on the fill valve. For older ballcock floats, gently bend the float arm down. For newer cylindrical floats, there's usually a clip or screw to slide the float cup down, aiming for the water to stop about 1 inch below the overflow tube.


Discussion
Loading comments…