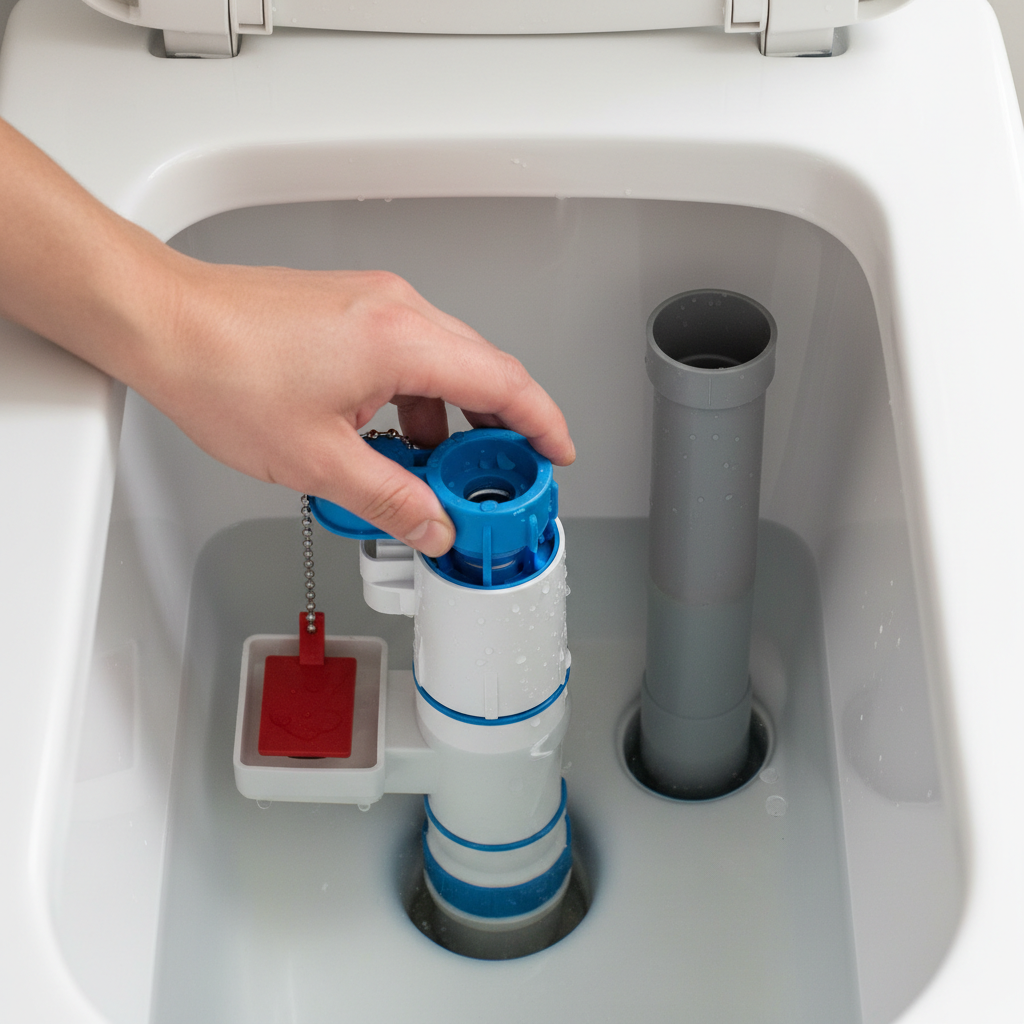
- Worn or Damaged Flapper: The most frequent offender. Over time, the rubber can degrade, warp, or accumulate mineral deposits, preventing a complete seal.
- Improper Float Height: If the float is set too high, the tank overfills, and water continuously spills into the overflow tube.
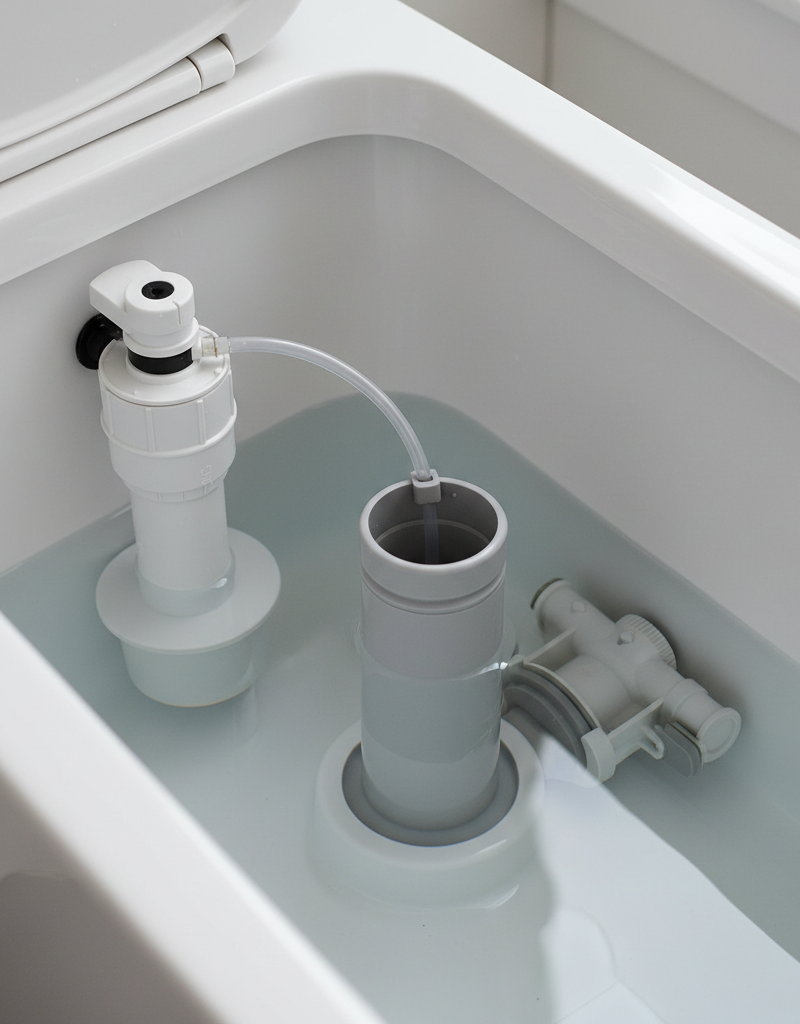
- Refill Tube Issues: The small tube that directs water into the overflow pipe can be inserted too far, kinked, or disconnected, causing a siphoning effect or improper bowl refill.
- Flapper Chain Maladjustment: A chain that's too short keeps the flapper slightly open; one that's too long can get caught under it.
- Faulty Fill Valve: The entire fill valve mechanism can wear out, failing to shut off the water supply even when the float signals the tank is full.
Plumbing · Leak
| Project category | Plumbing |
|---|---|
| Problem type | Leak |
| Trade required | Plumbing |
| Urgency | Emergency — act now |
| Safety risk | High safety risk |
| DIY suitability | DIY for experienced homeowners |
| Cost category | Low cost |
| Typical timeline | Shut water off now; repair usually same or next day |
| Contractor type | Licensed plumber |
Repair option
Isolate at the shutoff, replace the failed component, and dry the cavity fully.
Replacement option
Repipe the run or the branch when corrosion is widespread.
Common causes
- Failed supply line or shutoff valve
- Worn washers, cartridges, or P-trap connections
- Pinhole corrosion in older copper
Relevant tools:emergency checklistdiy or hire a pro
Published May 6, 2026Last updated August 18, 2026
Tools & materials you'll need
Affiliate linksAs an Amazon Associate FixlyGuide earns from qualifying purchases — at no extra cost to you. Prices and availability are accurate as of publication and subject to change.
Quick Answer
Most running toilets stem from one of three common issues: a faulty flapper, an improperly set float arm, or a refill tube that's misplaced. Often, adjusting the float or reseating the flapper takes seconds. If those don't work, replacing the flapper or the entire fill valve are straightforward DIY tasks that can be completed in under an hour with basic tools and inexpensive parts.
The Problem
You hear that phantom flush, that gentle hiss, or the constant trickle of water into your toilet bowl – your toilet is running. This isn't just an annoying sound; it's a significant water waster. A continuously running toilet can silently hike up your water bill by hundreds of dollars a year, potentially wasting thousands of gallons of water monthly. Beyond the financial drain, it indicates a component within your toilet tank isn't functioning as intended, leading to inefficient flushing and premature wear on other parts. Left unaddressed, it can strain your septic system or municipal wastewater treatment, and in rare cases, could contribute to overflow if the fill valve malfunctions severely.
How It Works
Understanding how your toilet works is key to fixing it. When you flush, a chain lifts the flapper valve at the bottom of the tank, allowing water to rush from the tank into the toilet bowl, creating the siphoning action that clears the waste. As the water level in the tank drops, the flapper falls back into place, sealing the tank's drain hole. Simultaneously, the float mechanism (either a ballcock float on a rod or a cup-style float around the fill valve) drops with the water level. This drop activates the fill valve, which then starts refilling the tank with fresh water from your home's supply line. As the water level rises, the float rises with it. Once the water reaches the predetermined fill line, the float triggers the fill valve to shut off the water supply, stopping the refill cycle. A small refill tube also diverts a portion of this incoming water into the overflow tube, which then flows into the bowl, refilling the trap and maintaining the water level in the bowl. If any part of this system – the flapper, the float, or the fill valve – malfunctions, water will continue to flow into the tank or directly into the overflow tube and then into the bowl, creating the tell-tale sound of a running toilet.
Step-by-Step Fix
Always turn off the toilet's water supply valve before performing any work inside the tank to prevent accidental flooding. This valve is typically located on the wall behind or beneath the toilet.
1. Check the Flapper Seal – The most common culprit
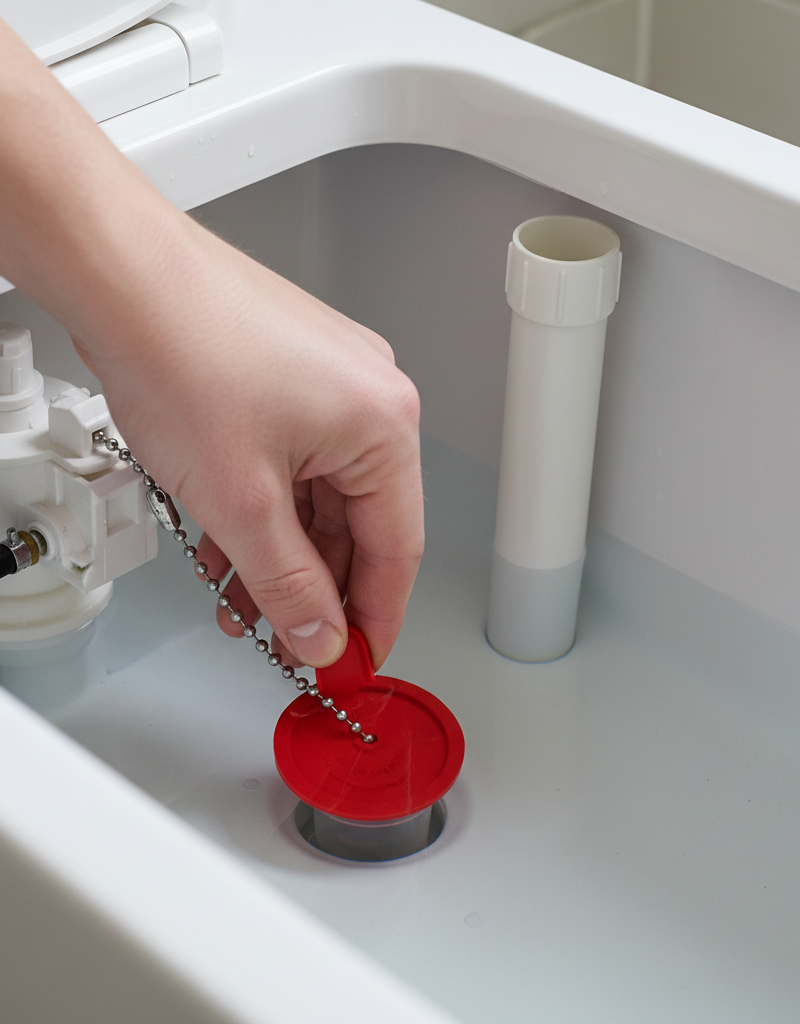
- Diagnosis: The flapper is the rubber or plastic seal at the bottom of the tank. Over time, it can warp, degrade, or get knocked out of alignment, preventing a watertight seal. Sometimes, mineral deposits or grime can build up on its edge. This is the first thing to check because it's often the easiest fix.
- Action: Open the tank lid. Gently push down on the flapper with your hand. Does the running stop? If so, the flapper isn't sealing properly. Lift the chain slightly and then let it drop, ensuring the flapper seats squarely over the drain hole. Inspect the flapper for any visible damage, cracks, or mineral buildup. Clean any gunk off the flapper and the drain hole rim. If it's damaged, it needs replacement.
- If this doesn't work: Proceed to checking the float arm.
2. Adjust the Float Arm – Preventing overfilling
- Diagnosis: The float arm (or cup) tells the fill valve when to stop filling the tank. If it's set too high, the water level will rise above the overflow tube, causing water to continuously spill down the tube and into the bowl. If it's set too low, flushing efficiency can be reduced.
- Action (Ballcock style): For older toilets with a large ball float attached to a metal rod, gently bend the rod downwards slightly to lower the water level. The water level should be about 1 inch below the top of the overflow tube. Be careful not to bend it too far, or it won't fill enough.
- Action (Cup-style): For newer toilets with a cup-shaped float around the fill valve, there's usually an adjustment screw or a clip on the vertical rod. Press the clip or turn the screw to slide the float cup down the rod, lowering the water level.
- After adjustment: Turn the water back on for a moment, let the tank fill, and see if the running stops at the new level. Re-adjust if necessary.
3. Inspect the Flapper Chain Length – Too tight or too loose?
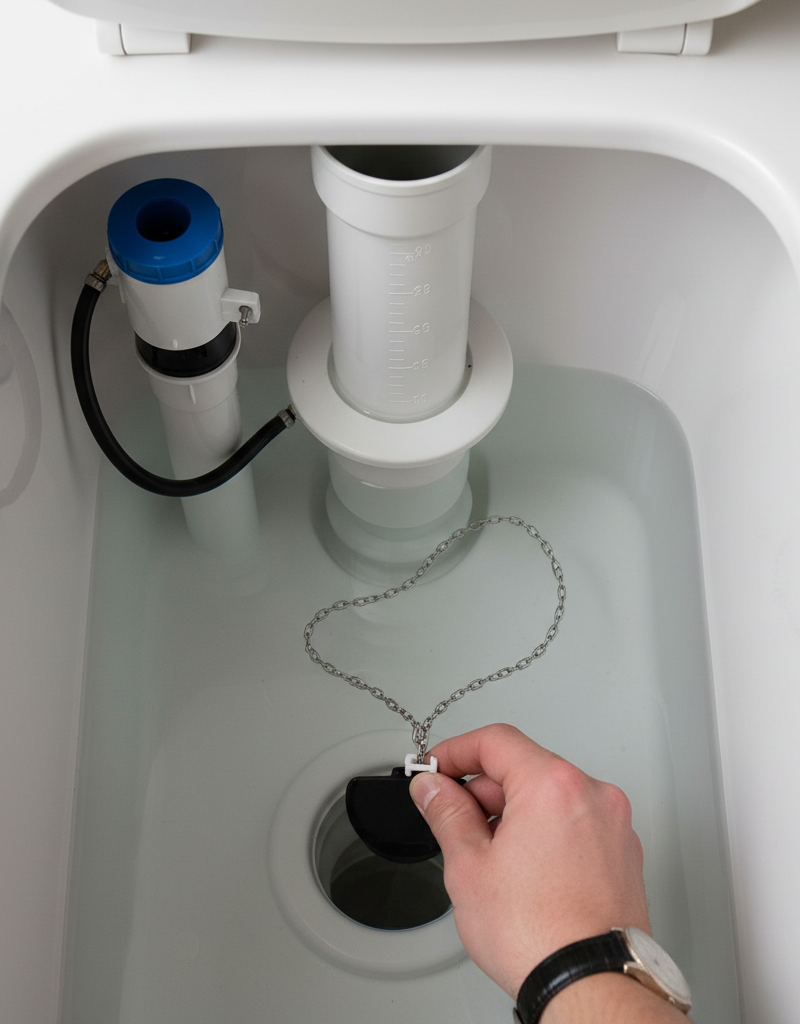
- Diagnosis: If the chain connecting the flush lever to the flapper is too short or too taut, it can prevent the flapper from fully seating, creating a small leak. If it's too long, it can get caught under the flapper.
- Action: Ensure there's about 1/2 inch to 1 inch of slack in the chain when the flapper is fully closed. Adjust the chain's hook to a different link if needed to achieve the correct tension. The flapper should close completely without any tension from the chain, but not have so much slack that it gets caught.
4. Check the Refill Tube Position – Is water siphoning incorrectly?
- Diagnosis: The small refill tube connected to the fill valve should only point into the overflow tube, delivering water to refill the bowl's trap. If it's inserted too far down into the overflow tube or is completely disconnected, it can cause various issues, including continuous running or a failure to refill the bowl properly.
- Action: Ensure the refill tube is correctly positioned into the top of the overflow tube without being submerged more than about an inch. Trim the tube with scissors if it's too long. Make sure it's not kinked or blocked and that it's securely attached to the fill valve's outlet.
5. Dye Test for Invisible Leaks – The silent culprit
- Diagnosis: Sometimes, the leak is so small you can't hear it, but water is still continually seeping from the tank into the bowl through a faulty flapper or flush valve seal. This is where a dye test comes in handy.
- Action: Remove the tank lid. Add a few drops of dark food coloring (blue or green works best) into the toilet tank water, but do not flush. Wait for at least 15-20 minutes. If you see colored water appear in the toilet bowl without flushing, you have a leak, most likely from the flapper. The flapper or flush valve seal needs to be replaced.
- Safety Note: Use only food-grade coloring. Do not use chemical dyes that could damage components or stain porcelain.
6. Replace the Flapper – When all else fails for the flapper
- *Tools: New universal flapper, scissors (optional).
- Action: Turn off the water supply and flush the toilet to empty the tank. Disconnect the old flapper from the chain and the two ears (or float tube) at the base of the overflow tube. Attach the new flapper in the same way, connect the chain, and adjust its length. Ensure it creates a tight seal. Note that some flappers are specific to toilet models, so try to match the old one or buy a 'universal' type.
7. Replace the Fill Valve – For stubborn running issues
- *Tools: New universal fill valve kit, adjustable wrench, sponge, old towels/bucket.
- Action: If fixing the flapper, float, or refill tube hasn't worked, the fill valve itself might be faulty. Turn off the water supply and flush the toilet to empty the tank. Disconnect the water supply line from the bottom of the fill valve. Use an adjustable wrench to loosen the large nut holding the fill valve in place under the tank. Unscrew the nut, remove the old fill valve, and clean the hole. Install the new fill valve, ensuring the rubber washer is correctly seated, and tighten the nut hand-tight, then an additional quarter turn with the wrench. Connect the water supply line, ensuring it's not cross-threaded. Position the refill tube into the overflow pipe and turn the water back on slowly. Adjust the float on the new fill valve as necessary.
- Pro Tip: Take a photo of the old fill valve assembly before removal for an easier reassembly reference.
Common Causes
- Worn or Damaged Flapper: The most frequent offender. Over time, the rubber can degrade, warp, or accumulate mineral deposits, preventing a complete seal.
- Improper Float Height: If the float is set too high, the tank overfills, and water continuously spills into the overflow tube.
- Refill Tube Issues: The small tube that directs water into the overflow pipe can be inserted too far, kinked, or disconnected, causing a siphoning effect or improper bowl refill.
- Flapper Chain Maladjustment: A chain that's too short keeps the flapper slightly open; one that's too long can get caught under it.
- Faulty Fill Valve: The entire fill valve mechanism can wear out, failing to shut off the water supply even when the float signals the tank is full.
- Sediment or Debris: Small particles can get lodged under the flapper or within the fill valve mechanism, preventing proper sealing or shut-off.
Common Mistakes
- Ignoring the problem: Many homeowners tolerate a running toilet, unaware of how much water (and money) it wastes. Address it immediately.
- Over-tightening fittings: When replacing the fill valve or the supply line, over-tightening plastic or brass fittings can crack them, leading to leaks. Hand-tighten, then a quarter turn with a wrench.
- Using the wrong flapper: Not all flappers are universal. While many are, some toilets require specific flapper types for optimum sealing. Take your old flapper to the store or note your toilet's make and model.
- Forgetting to turn off the water: Always turn off the external water supply valve to the toilet before working inside the tank. Forgetting can lead to a quick flood.
- Cutting the refill tube too short: The refill tube needs to reach into the overflow pipe by about an inch. If it's too short, it won't properly refill the bowl's trap, potentially leading to sewer gas odors.
- Adjusting the float without checking the flapper first: While the float can be a cause, the flapper is far more often the culprit. Always start with the easiest and most common issues.
Cost & Time Breakdown
| Task | DIY Cost | Pro Cost | Time |
|---|---|---|---|
| Flapper adjustment | $0 | $75–$150 (trip charge) | 30 seconds |
| Flapper replacement | $6–$20 | $100–$200 | 10–15 minutes |
| Float adjustment | $0 | $75–$150 (trip charge) | 1–2 minutes |
| Fill valve replacement | $15–$30 | $150–$300 | 30–60 minutes |
| Leak detection (dye test) | $0–$5 (food coloring) | N/A | 20 minutes |
Tips & Prevention
- Regular Dye Tests: Perform a dye test every six months to catch silent leaks before they add up on your water bill. It's quick, easy, and requires no tools.
- Inspect Flapper Annually: Lift the tank lid once a year and visually inspect your flapper for signs of wear, warping, or mineral buildup. Clean it with a soft brush if needed.
- Avoid Harsh Chemical Cleaners: Do not use abrasive or harsh chemical toilet bowl cleaners that can degrade rubber components like the flapper over time.
- Proper Water Level: Ensure your tank's water level is always about an inch below the top of the overflow tube to prevent continuous overflow.
- Listen for Sounds: Pay attention to any unusual sounds from your toilet, especially hissing, trickling, or random flushing, which are early indicators of trouble.
- Consider Upgrades: If your toilet is very old and frequently has issues, consider upgrading to a newer, more water-efficient model. Newer toilets often have improved internal mechanisms that are more reliable.
When to Call a Professional
While most running toilet issues are DIY-friendly, there are specific situations where calling a licensed plumber is the smarter, safer, and ultimately more cost-effective choice. If you've tried all the common troubleshooting steps—adjusting the flapper, checking the float, and replacing both the flapper and fill valve—and the toilet continues to run, there might be a more complex underlying issue. This could include problems with the flush valve seal (which is part of the toilet's porcelain and not easily replaceable), cracked toilet tank, or issues with the water supply line connection that require specialized tools or expertise. Additionally, if you encounter persistent leaks from the tank base onto the floor, beyond a simple fill valve replacement, or if you're uncomfortable working with plumbing components and feel you might cause more damage, it's time to call a professional. Plumbers can quickly diagnose intricate problems, have access to OEM-specific parts, and ensure the repair is done correctly and warrantied, preventing future headaches and potential water damage.
Related Articles
Keep troubleshooting with these hand-picked guides from FixlyGuide:
- The $2 Trick to Stop a Running Toilet (Plumbers Don't Want You to Know) — Discover the simple, two-dollar fix that can stop your running toilet in minutes, saving water and preventing costly repairs.
- The $5 Secret to Silencing a Running Toilet (Plumbers Hope You Don't Know) — A running toilet is usually caused by a simple issue with the flapper or its chain, leading to constant water waste and higher utility bill…
- The 3 Hidden Reasons Your Toilet Tank Fills Slowly (And How to Fix Each) — Discover the common culprits behind a slow-filling toilet tank, from crucial valve issues to subtle obstructions, and learn how to restore…
- The Secret Culprit Behind Your Leaky Refrigerator (It’s Not Always a Hose) — Discover the hidden causes of your refrigerator leaking water and how to fix them with our comprehensive troubleshooting guide.
- The 30-Second Toilet Fix Plumbers Don't Want You to Know — Stop that phantom-flushing toilet with this quick guide to diagnosing and fixing the most common silent water leaks.
- The 4 Hidden Reasons Your Entire Home Has Low Water Pressure (And the Easy Fixes) — Low water pressure throughout your entire home can be a frustrating and often misunderstood problem, with several common culprits. Learn to…
Should you do this yourself?
Answer five quick questions before you start. Safety outranks savings every time.
Your experience with work like this
How high do you have to work?
Does the job involve any of these?
Will it need a permit?
Specialty tools
Free and instant. Educational guidance only — not a quote, inspection, or professional diagnosis.
What should this project cost?
Enter your project details for a realistic cost range before you call anyone.
Common repairs run $150–$650; repipes and water-heater replacements reach $1,500–$4,500.
- Regional adjustment
- National average
- Labor share (typical)
- ~$754
- Quotes to collect
- 3 written estimates
Educational estimate based on national averages — not a binding quote. Always confirm with written local estimates.
Fixly Project Decision Box
- DIY difficulty
- Moderate
- Estimated time
- 30 minutes – half a day
- Cost level
- Moderate
Main tools / materials
- Adjustable wrench
- Plunger or drain auger
- Bucket and towels
- Thread tape
When to stop and call a pro
- Water you cannot shut off at the fixture or main
- Sewage backing up into more than one fixture
- Water near electrical panels or outlets
- Gas water heater work beyond relighting a pilot
Need professional help?
Get a Licensed PlumberFrequently asked questions
Why does my toilet keep running after I flush?+
The most common reasons are a faulty flapper that isn't sealing properly, a float arm that's set too high causing overfilling, or a refill tube that's misplaced.
How do I know if my flapper is bad?+
Perform a dye test: add food coloring to the tank water and wait 15-20 minutes without flushing. If colored water appears in the bowl, your flapper is leaking and needs replacement.
How much water does a running toilet waste?+
A continuously running toilet can waste hundreds to thousands of gallons of water per month, potentially adding $50 to $200 or more annually to your water bill depending on water rates and leak severity.
Can I replace the toilet flapper myself?+
Yes, replacing a toilet flapper is an easy DIY task that typically takes 10-15 minutes with no special tools. Most hardware stores sell universal flappers.
Discussion
Loading comments…