Tools & materials you'll need
Affiliate linksAs an Amazon Associate FixlyGuide earns from qualifying purchases — at no extra cost to you. Prices and availability are accurate as of publication and subject to change.
Quick Answer
A slow-filling toilet tank frequently points to one of three culprits: a partially closed water supply valve, a blocked toilet fill valve, or a buildup of mineral deposits in the flexible supply line or the fill valve itself. Most homeowners can diagnose and resolve these issues in under an hour with just a few basic tools, restoring their toilet to proper function and eliminating long wait times between flushes.
The Problem
You’ve flushed your toilet, but instead of the usual swift refill, you hear a trickle, and the tank takes an eternity to replenish. This isn’t just an annoyance; it signals inefficiency and can be a precursor to other toilet problems, like phantom flushing or an incomplete flush. A slow-filling tank wastes water, causes inconvenience, and can indicate underlying issues in your plumbing system. While it might seem like a major problem, the causes are often simple and easily remedied without needing a professional plumber.
The typical refill time for a toilet tank should be around 30 to 60 seconds. If your toilet is taking several minutes—or even longer—to refill, it’s a clear sign that something is impeding the water flow into the tank. Ignoring this can lead to further frustration and potentially impact the overall performance and lifespan of your toilet’s internal components.
How It Works
Understanding how your toilet tank fills is key to diagnosing a slow refill. When you flush, the water in the tank empties into the bowl, creating the siphoning action that clears waste. As the water level in the tank drops, a float mechanism (either a float cup around the fill valve shaft or an older-style ball float arm) also drops. This drop in the float opens the fill valve, which is connected directly to your home's main water supply via a flexible supply line and a shut-off valve.
Water then flows from the house supply, through the shut-off valve and supply line, up into the fill valve, and into the tank. A small tube, called the refill tube, also directs some water into the toilet bowl during this process to ensure the bowl is properly refilled. As the tank fills, the float rises with the water level. Once the water reaches the predetermined fill line (usually marked inside the tank or on the fill valve itself), the float mechanism pushes against a lever or cam inside the fill valve, shutting off the water flow. This system is designed to be relatively quick and efficient, relying on unimpeded water pressure and clear pathways for water to travel. Any obstruction or malfunction in this chain—from the shut-off valve to the fill valve assembly—can lead to a noticeably slow refill.
Step-by-Step Fix
1. Check the Shut-Off Valve — Ensure the water supply is fully open and unrestricted.
Locate the small oval or round handle on the wall or floor near the base of your toilet, where the flexible supply line connects. This is your toilet's shut-off valve. Sometimes, these valves get bumped or partially closed during cleaning or other activities. To ensure it's fully open, turn the handle counter-clockwise as far as it will go without excessive force. If it feels stiff, you can gently try to turn it fully open. A partially closed valve is a very common and easy-to-fix cause of slow filling. Test the flush after adjusting.
2. Inspect the Flexible Supply Line — Look for kinks, damage, or blockages in the main water conduit.
Examine the flexible braided hose connecting the shut-off valve to the bottom of the toilet tank. Feel along its entire length for any tight bends or kinks that might restrict water flow. If you find a kink, gently straighten it out. Also, visually inspect the line for any signs of damage, swelling, or corrosion, which could indicate a blockage or a leak. If the line appears damaged or suspect, it's best to replace it. A common internal blockage can occur if tiny bits of sediment from the water main flake off and get lodged, especially in older, rigid supply lines. If replacing, ensure you have the correct length and thread size (typically 3/8-inch or 1/2-inch compression).
3. Test Water Pressure at the Fill Valve — Rule out low overall house water pressure or a clogged valve inlet.
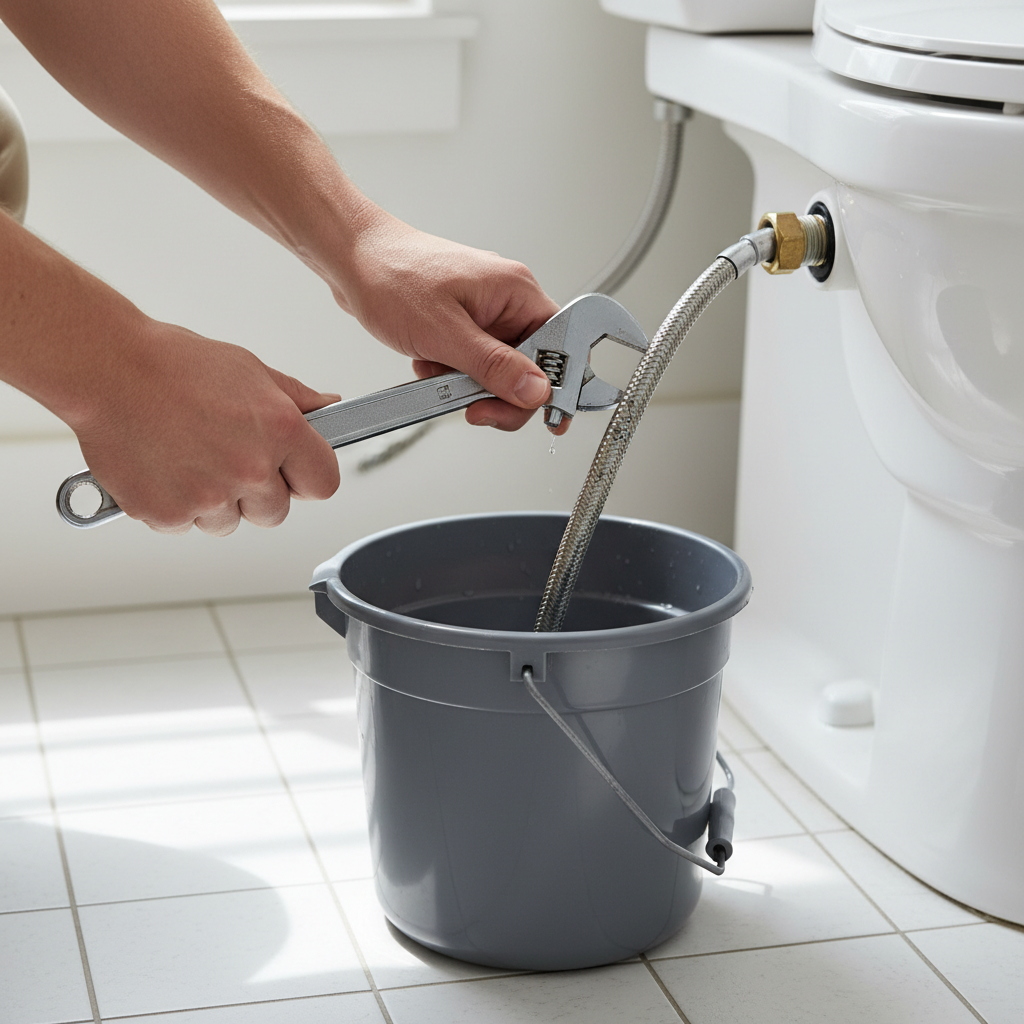
Safety Note: Be prepared for water to spray. Place an empty bucket under the toilet tank. Turn off the water supply at the shut-off valve. Hold a bucket directly under the fill valve's threaded shaft where the supply line connects. Carefully disconnect the flexible supply line from the bottom of the fill valve (a crescent wrench or channel locks may be needed to loosen the nut). Aim the supply line into the bucket. Slowly turn the shut-off valve fully open for a few seconds to observe the water flow. A strong, steady stream indicates good supply pressure. If the flow is weak, the issue might be broader house pressure or a clogged shut-off valve itself, not just the toilet fill valve. If the stream is strong, the problem is likely within the fill valve. Turn off the water and reattach the supply line, ensuring a tight, leak-free connection.
4. Clear Debris from the Fill Valve Inlet — Remove any sediment directly at the valve's entry point.
After turning off the water supply and disconnecting the supply line (as in step 3), inspect the small conical rubber washer and the screen filter (if present) inside the base of the fill valve where the supply line connects. Use a small screwdriver or needle-nose pliers to carefully pry out any visible debris, sediment, or mineral buildup from this inlet screen. Rinse it thoroughly under a sink faucet. Reinsert the screen and washer, reconnect the supply line, and turn the water back on. This is a common location for small particles to get stuck.
5. Clean or Replace the Fill Valve Cap Assembly — Address issues with the valve's main operating mechanism.
Safety Note: Always turn off the water supply to the toilet before working on internal components. Lift the toilet tank lid. Shut off the water supply at the base of the toilet. Flush the toilet to empty most of the water from the tank. You'll see the fill valve as the tall plastic or brass mechanism on the left side of the tank (when facing the toilet). Depending on your fill valve model (e.g., Fluidmaster 400A is common), you'll need to remove its cap. For many models, you do this by gently twisting the cap counter-clockwise about a quarter turn and lifting it straight up. Be careful not to lose the rubber gasket or diaphragm underneath. Inspect the cap and its underlying rubber diaphragm for any mineral buildup, tears, or warping. Clean any mineral deposits with a stiff brush and white vinegar. If the diaphragm is damaged, it will need to be replaced. Many hardware stores sell replacement kits for common fill valves at a low cost. If the entire cap appears worn or damaged, a new fill valve cap assembly might be required, which typically costs less than $10.
6. Flush the Fill Valve Body — Clear internal sediment from the valve's main column.
With the fill valve cap removed (from step 5), place an empty cup or small bucket over the exposed top of the fill valve shaft. Slowly and briefly turn the water supply back on at the shut-off valve. Water should shoot up from the fill valve into the cup, flushing out any loose sediment or debris from inside the valve body. Be ready to turn the water off quickly after a few seconds to avoid overflowing the cup or making a mess. Repeat this a couple of times until the water runs clear. This clears any internal blockages that might be impeding flow. Turn off the water, reattach the cap, and turn the water supply back on to test.
7. Adjust the Fill Valve Float Height — Ensure the float isn't inadvertently shutting off flow too early.
While not directly causing a 'slow' fill, an incorrectly adjusted float can cause the tank to not fill to its optimal level, making it seem like a slow fill if you expect more water. Ensure the water level in the tank reaches the water fill line, usually marked on the inside of the tank or on the fill valve itself, about 1 inch below the top of the overflow tube. If the water level is too low, you may need to adjust the float. Most modern fill valves have a simple clip or screw adjustment. Raise the float cup slightly for more water, or lower it for less. On older ball-float types, gently bend the brass rod connecting the ball to the fill valve. After adjustment, flush and observe the new fill level.
8. Consider a Full Fill Valve Replacement — If all other steps fail, the valve itself is likely faulty.
If you've systematically worked through all the above troubleshooting steps and your toilet tank still fills slowly, the fill valve itself is likely at the end of its lifespan or irreparably clogged internally. Replacing the entire fill valve assembly is a relatively straightforward DIY project. Kits are widely available, typically costing $15–$30. This involves shutting off the water, draining the tank, disconnecting the supply line and old fill valve nut, removing the old valve, installing the new one, reconnecting, and adjusting. Follow the instructions provided with your new fill valve explicitly.
Common Causes
- Partially Closed Shut-Off Valve: The most common and easiest fix. The small valve supplying water to the toilet can be inadvertently turned, restricting flow.
- Clogged Flexible Supply Line: Mineral deposits, rust, or debris can accumulate inside the flexible hose connecting the shut-off valve to the toilet tank, narrowing the pathway for water.
- Blocked Fill Valve Inlet Screen: A small screen at the base of the fill valve is designed to catch sediment. Over time, this screen can become completely clogged with mineral deposits or debris.
- Faulty Fill Valve Diaphragm/Gasket: The rubber diaphragm or gasket inside the fill valve cap, which regulates water flow, can become stiff, torn, or covered in mineral buildup, preventing it from opening fully.
- Low Household Water Pressure: While less common for a single toilet, general low water pressure in your home can affect refill rates. This is usually evident in other fixtures as well.
- Aging or Deteriorated Fill Valve: Like any mechanical part, fill valves wear out. Internal components can stiffen, corrode, or break, leading to sluggish operation even without obvious blockages.
Common Mistakes
- Forgetting to Turn Off the Water: Always shut off the water supply at the toilet's shut-off valve AND flush the toilet to empty the tank before attempting any internal repairs. Failing to do so will result in a messy flood.
- Over-tightening Connections: When reconnecting the supply line or the fill valve nut, over-tightening can strip threads, crack plastic components, or damage washers, leading to leaks. Hand-tighten, then use a wrench for only a quarter to half turn more until snug.
- Ignoring the Supply Line: Many DIYers focus solely on the fill valve, overlooking the simple possibility of a kinked or clogged supply line, which is often a quicker and easier fix.
- Using Harsh Chemicals: Avoid pouring harsh chemical cleaners into the toilet tank. These can damage rubber and plastic components of the fill valve and flush valve, causing more problems than they solve. White vinegar is a safer and effective descaling agent.
- Replacing Without Proper Diagnosis: Don't immediately buy a new fill valve without first checking the shut-off valve and supply line. A simple adjustment or cleaning could save you time and money.
- Not Checking the Refill Tube: While less directly related to slow filling, ensure the small refill tube from the fill valve is properly inserted into the overflow tube. If it's dislodged, the bowl won't refill, leading to an incomplete flush and potential sewer gas issues, which can be confused with a
Related Articles
Keep troubleshooting with these hand-picked guides from FixlyGuide:
- The 4 Hidden Reasons Your Toilet Tank Fills Slowly (And How to Fix Them in 30 Minutes) — A slow-filling toilet tank is a common, annoying problem that usually points to issues with the fill valve or water supply and can often be…
- The Secret Culprit Behind Your Slow Toilet Tank (And the $7 Fix) — A slow-filling toilet tank is a common, annoying problem, usually caused by a simple issue within the fill valve that homeowners can fix th…
- The Secret Culprit Behind Your Slow Toilet Fill (It's Not Clogs!) — A slow-filling toilet tank is usually caused by issues with the fill valve, not clogs, affecting both water pressure and flush efficiency.…
- The 4 Hidden Reasons Your Toilet Tank Fills Slowly (And How to Fix Them in Under an Hour) — A toilet tank that fills slowly is a common, annoying plumbing problem, often caused by easily fixable issues within the fill valve or wate…
- The 3 Hidden Reasons Your Toilet Tank Fills Slowly (And How to Fix Each) — Discover the common culprits behind a slow-filling toilet tank, from crucial valve issues to subtle obstructions, and learn how to restore…
- Is One Drip Emitter Starving? The Secret Culprit (It's Not Clogging) — A single drip emitter refusing to hydrate your plants can be frustrating, but the fix is often simpler than you think and rarely a clog.
Frequently asked questions
How long should a toilet tank take to fill?+
A healthy toilet tank should typically refill in about 30 to 60 seconds after a complete flush. If it takes several minutes, there's likely an issue restricting water flow.
Can low water pressure cause a slow-filling toilet?+
Yes, low water pressure in your home can definitely cause a slow-filling toilet. However, it's more likely to be an issue within the toilet's own shut-off valve, supply line, or fill valve if other fixtures in your home have normal water pressure.
Is it worth fixing a slow-filling toilet, or should I replace it?+
Most slow-filling toilet issues are simple DIY fixes, like opening a valve, clearing a clog, or replacing an inexpensive fill valve. It's almost always worth attempting a repair before considering a full toilet replacement, which is a much larger and more costly project.
How often should I clean my toilet fill valve?+
There's no strict schedule, but if you live in an area with hard water or notice a slow fill, inspecting and cleaning your fill valve every 1-2 years, or as needed, can prevent problems. This is especially true for the small inlet screen.
What's the difference between a slow-filling toilet and a leaking toilet?+
A slow-filling toilet takes a long time to refill after a flush. A leaking toilet, often called a 'running toilet,' continuously or intermittently tries to refill because water is escaping from the tank into the bowl, even when it hasn't been flushed. While both can be related to the fill valve, they are distinct issues. A slow fill is about restricted incoming water, while a leak is about outgoing water.
Can I use lubricants on my fill valve?+
It's best to avoid petroleum-based lubricants on toilet parts, as they can degrade rubber and plastic components. If something is sticking, gently clean it with water and a mild non-abrasive cleaner (like white vinegar for mineral deposits). Often, simply cleaning the parts resolves stiffness.


Discussion
Loading comments…