
Tools & materials you'll need
Affiliate linksAs an Amazon Associate FixlyGuide earns from qualifying purchases — at no extra cost to you. Prices and availability are accurate as of publication and subject to change.
Quick Answer
A washing machine leaking from the bottom is a common household issue that can stem from several sources, ranging from simple fixes like loose hose connections to more involved repairs such as a failing water inlet valve or a compromised tub seal. Most leaks originate from either the water supply system or the drain system. Identifying the exact source usually involves a bit of detective work, but many of these problems can be resolved by a homeowner with basic tools and a little patience.
The Problem
You've just finished a load of laundry, only to discover a puddle of water beneath your washing machine. This isn't just annoying; it can damage your flooring, create slip hazards, and even lead to mold or mildew growth if left unaddressed. A leak from the bottom of your washer indicates a breach in either the water intake, the drain system, or the internal tub assembly. While the sight of water can be alarming, pinpointing the leak's origin is the first crucial step towards a successful repair. Ignoring the problem will only exacerbate it, potentially leading to more costly repairs or even premature appliance replacement.
How It Works
To understand why your washing machine might be leaking, it helps to grasp the basic water flow. Water enters the machine through inlet hoses, controlled by a water inlet valve, and is directed into the wash tub. The tub itself is typically a two-part system: an inner perforated tub that holds the clothes and spins, and an outer, stationary tub that contains the wash water. During the wash and rinse cycles, this water is agitated with detergent. Once the cycle completes, a drain pump activates, forcing the water through a drain hose and out of the machine into your home's drain system. Agitation and spinning are powered by a motor, often connected via a drive belt or direct drive. Various seals and gaskets, such as the tub seal at the bottom of the inner tub where the agitator shaft passes through, and the door seal on front-load machines, keep water contained. If any component in this delicate system — from the hoses and valves to the pump and seals — fails or becomes compromised, water will find a way out, often appearing as a leak from the machine's base.
Step-by-Step Fix
Here's how to systematically diagnose and fix common washer leaks from the bottom.
-
Safety First! Unplug Your Washer – Always disconnect the machine from power before performing any inspection or repair. Failure to do so can result in serious electrical shock.
- Tools: None (just your hands)
- Safety: Unplug the power cord from the wall outlet.
-
Inspect Inlet Hoses and Connections – Water supply hoses are a frequent source of leaks. Check both the hot and cold water hoses where they connect to the back of the washer and to the wall spigots.
- Check for visible drips, cracks, or bulges in the hoses.
- Tighten any loose connections by hand or with a wrench.
- If this doesn't work: Hoses can degrade over time; consider replacing them if they show signs of wear, even if no visible leak is present yet. Use new rubber washers if reinstalling old hoses.
-
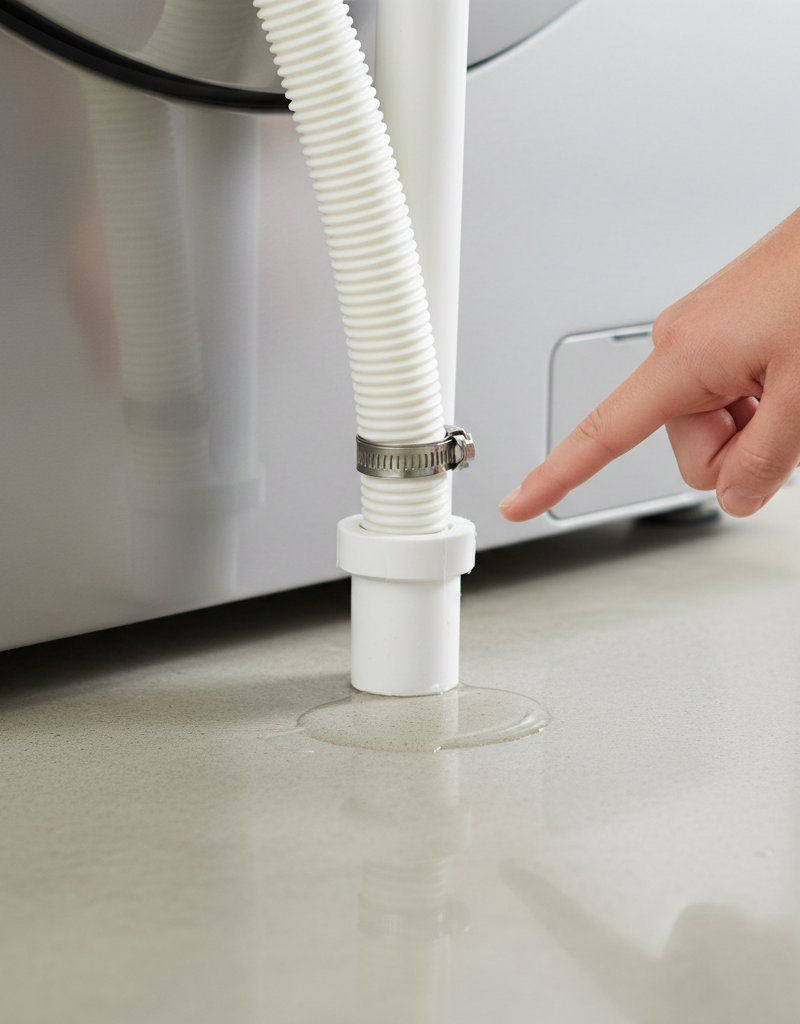
Examine the Drain Hose – The drain hose carries wastewater out of the machine. It can leak if it's cracked, loose, or improperly installed in the standpipe.
- Pull the washer away from the wall to access the drain hose at the back.
- Look for cracks, holes, or kinks along the entire length of the hose.
- Ensure the hose is securely seated in the drain standpipe or laundry tub, and that it's not pushed in too far, which can cause siphoning issues.
- If this doesn't work: If the hose is damaged, replace it. Ensure any clamps are tight.
-
Check the Drain Pump Filter (Front-Load Washers) – Many front-load washers have a drain pump filter designed to catch lint and small items before they reach the pump. A clogged or improperly secured filter cap can cause leaks.
- Locate the access panel, usually at the bottom front of the washer. You may need a screwdriver to open it.
- Place a shallow pan or towels beneath the filter cover to catch residual water.
- Slowly unscrew the filter cap, allowing water to drain.
- Clean any lint, coins, or debris from the filter. Inspect the rubber gasket on the cap for cracks or damage.
- Securely screw the filter cap back on, ensuring it's tight but not overtightened.
- Safety: Expect a small amount of water to drain out when opening the filter.
-
Inspect the Water Inlet Valve – This valve, usually located at the back of the washer where the supply hoses connect, controls water flow into the tub. A crack in its housing or a faulty solenoid can cause a slow drip.
- With the power still unplugged, visually inspect the valve body for any signs of cracking or water stains.
- If you suspect an internal issue, this is often a part best replaced by a professional, though a DIYer can attempt it with careful planning and research.
- Pro Tip: If the leak only occurs during the fill cycle, this valve is a strong suspect.
-
Examine the Tub-to-Pump Hose – This hose connects the bottom of the outer tub to the drain pump. It can loosen, crack, or become punctured.
- You'll need to tip the washer back or lay it down (carefully!) to access the underside. Have an assistant help you.
- Visually inspect the hose and its clamps for damage or looseness.
- Tighten any loose clamps. Replace the hose if it's cracked or broken.
- Tools: Adjustable wrench, pliers, shallow pan, assistant.
-
Check the Tub Seal (Top-Load Washers) – For top-load washers, the tub seal is located where the agitator shaft passes through the bottom of the outer tub. A failing seal can cause water to leak down the shaft.
- This is a more involved repair, often requiring partial disassembly of the washing machine tub components.
- Symptoms include water leaking directly under the center of the washer, especially during agitation or spin cycles.
- When to call a pro: If you're not comfortable with substantial disassembly, call a professional for this repair, as it can be complex.
-
Inspect the Door Boot Seal (Front-Load Washers) – On front-load washers, the large rubber gasket (boot seal) around the door opening can tear or become damaged, leading to leaks.
- Carefully inspect the entire circumference of the seal for tears, punctures, or mold buildup that prevents a good seal.
- Clean the seal thoroughly with a mild detergent and check again.
- If this doesn't work: A torn door boot almost always requires replacement, which can be done by a DIYer with patience and the right tools.
Common Causes
- Loose or Damaged Inlet/Drain Hoses: The most frequent culprits. Hoses can degrade, connections can loosen from vibration, or clamps can fail.
- Clogged Drain Pump Filter: In front-loaders, a blocked filter prevents proper draining and can cause water to back up and escape.
- Cracked Drain Pump Housing: The pump itself, especially if made of plastic, can crack due to impacts or age, leading to leaks.
- Faulty Water Inlet Valve: A crack in the valve body or a malfunctioning solenoid can cause a steady drip or a sudden leak.
- Worn Out Tub Seal (Top-Load): The seal around the agitator shaft can degrade over years of use, allowing water to pass through.
- Damaged Door Boot Seal (Front-Load): Tears or holes in the rubber gasket around the door opening will allow water to escape during cycles.
- Excessive Suds: Too much detergent can create an enormous amount of suds, which can force water out of vent holes or seals not designed for such pressure.
Common Mistakes
- Ignoring the Leak: Small leaks can quickly become big problems, causing water damage, mold, and further appliance deterioration. Address it immediately.
- Overtightening Hose Connections: While you need a snug fit, overtightening can strip threads or damage rubber washers, actually creating new leaks.
- Not Unplugging the Washer First: Always disconnect power. Water and electricity are a dangerous combination. This is a critical safety step.
- Using the Wrong Detergent or Too Much Detergent: Especially with high-efficiency (HE) washers, using non-HE detergent or too much detergent can lead to excessive sudsing and leaks.
- Not Checking All Potential Sources: A leak might appear in one spot but originate elsewhere. Go through a systematic diagnostic process instead of assuming the first wet spot is the source.
- Forgetting to Look Underneath: Many leaks, especially from the pump or tub-to-pump hose, are only visible when the machine is tilted or laid down.
Cost & Time Breakdown
| Task | DIY Cost | Pro Cost | Time |
|---|---|---|---|
| Inspect Hoses | $0–$30 | $75–$150 | 15–30 min |
| Clean Drain Pump Filter | $0 | $75–$150 | 15–30 min |
| Replace Inlet Hoses | $15–$40 | $100–$200 | 30–60 min |
| Replace Drain Hose | $20–$50 | $100–$250 | 30–60 min |
| Replace Water Inlet Valve | $40–$100 | $150–$300 | 1–2 hours |
| Replace Tub Seal/Boot Seal | $50–$200 | $200–$500+ | 2–4+ hours |
Tips & Prevention
- Regular Hose Inspection: Annually check your water inlet hoses for cracks, bulges, and tight connections. Replace rubber hoses every 3-5 years, or upgrade to braided stainless steel hoses for better durability.
- Clean Drain Pump Filter (Front-Loaders): Make it a habit to clean the drain pump filter every 3-6 months to prevent clogs and potential leaks.
- Use Proper Detergent: Always use HE detergent in HE washers and follow dosage instructions. Over-sudsing can strain seals and lead to leaks.
- Don't Overload: Overloading your washing machine can throw it off balance, leading to excessive vibration that can loosen connections and stress components.
- Keep Washer Level: Ensure your washing machine is level to prevent unnecessary stress on its internal components and reduce vibration.
- Immediate Action: If you notice any signs of a leak, address it immediately to prevent further damage to your home and appliance.
When to Call a Professional
While many washing machine leaks can be handled by a determined DIYer, there are specific situations where calling an appliance repair professional is the safest and most efficient choice. If, after checking the easily accessible components like hoses and the drain pump filter, you still can't locate the source of the leak, or if the leak appears to be coming from deep within the machine's internal components (e.g., a crack in the outer tub, a persistent issue with the water inlet valve after basic inspection, or a failing motor), it's time to call in an expert. Repairs involving significant disassembly, such as replacing a tub seal or drum bearing, can be complex and require specialized tools and knowledge. Attempting these advanced repairs without sufficient experience can lead to further damage, void your warranty, or expose you to electrical hazards. Additionally, if the leak is substantial and causing active water damage to your home, or if you suspect an electrical short due to water intrusion, immediately unplug the machine (if safe to do so) and contact a professional. They have the diagnostic tools and expertise to quickly identify the issue and perform the repair safely and effectively.
Related Articles
Keep troubleshooting with these hand-picked guides from FixlyGuide:
- The Secret Culprit Behind Your Leaking Washing Machine (and the $15 Fix) — Discover the often-overlooked cause of washing machine leaks from the bottom and how a simple, affordable fix can save you from costly repa…
- The Secret Culprit Behind Your Leaky Washer (It's Not Always the Hose!) — Discover why your washing machine might be leaking from the bottom and learn the essential steps to diagnose and fix common culprits.
- The Secret Culprit Behind Your Leaky Washer (It's Not Always the Hose!) — Discover the often-overlooked parts causing your washing machine to leak from the bottom and follow our guide to fix it yourself.
- The Secret Culprit Behind Your Leaking Washer (It's Not Always the Hose) — A washing machine leaking water from the bottom can often be traced to common, easily fixable issues like loose hoses or a clogged drain pu…
- The Secret Culprit Behind Your Leaking Refrigerator (It’s Not Always a Big Fix) — Discover the most common and often overlooked reasons why your refrigerator is leaking water on the floor, and how to fix them yourself.
- The Hidden Culprit Behind Your AC Not Cooling (and How to Find It) — If your central AC isn't cooling your home, the issue often stems from a surprisingly simple problem that's easy to overlook. Learn how to…
Get the print-ready PDF of this guide
A clean, ad-free, printable version you can keep on your phone or pin to the workshop wall. Free with a FixlyGuide account.
- Print-optimized layout
- Tools, materials & every step included
- Saved to your account
Frequently asked questions
Why is my washing machine leaking only during the spin cycle?+
Leaks during the spin cycle often point to issues with the drain system. This could be a cracked drain hose, a loose connection at the drain pump, a damaged drain pump housing, or a problem with the tub-to-pump hose that only becomes apparent with the increased water pressure and vibration during spinning.
Can too much soap cause a washing machine to leak?+
Yes, using too much detergent, especially non-HE detergent in an HE machine, can create excessive suds. These suds can build up and force water out of the machine's overflow vents, seals, or even around the door, leading to leaks that appear to come from the bottom.
How do I find where the water is coming from under my washer?+
To pinpoint the leak's origin, first unplug the washer. Pull it away from the wall. Thoroughly inspect all water inlet and drain hoses for visible signs of damage or loose connections. For front-loaders, check the drain pump filter. You may need to carefully tilt the machine to inspect the underside for leaks from the drain pump or tub-to-pump hose. Running a short wash cycle with the back panel off (if safe and accessible) can sometimes help visualize the leak.
Is a washing machine leak an emergency?+
A small, slow drip might not be an immediate emergency, but any washing machine leak should be addressed promptly to prevent water damage, mold growth, and potential electrical hazards. A large, sudden leak that is rapidly pooling water should be considered an emergency, requiring immediate disconnection of power and water supply, and professional attention.


Discussion
Loading comments…