
Tools & materials you'll need
Affiliate links- AmazonReplacement fill hoses (braided stainless steel recommended)2
As an Amazon Associate FixlyGuide earns from qualifying purchases — at no extra cost to you. Prices and availability are accurate as of publication and subject to change.
Quick Answer
If your washing machine is leaking water from the bottom, the most likely culprits are a loose or damaged fill hose, a clogged drain pump filter, or a faulty drain pump. Often, these issues can be diagnosed and repaired with basic tools and a bit of troubleshooting, saving you the expense of a professional service call. Before attempting any repairs, always unplug the machine and turn off the water supply.
The Problem
Discovering a puddle of water beneath your washing machine can be a frustrating and potentially damaging experience. A leak from the bottom of the washer, particularly during the fill, wash, or drain cycles, points to several possible internal or external component failures. Ignoring the leak can lead to significant water damage to your flooring, subfloor, and even the structural integrity of your home, not to mention the risk of mold and mildew growth. Pinpointing the exact source of the leak is crucial for an effective and lasting repair, and often, the fix is much simpler than you might imagine.
How It Works
To understand why your washer might be leaking, it helps to know how water moves through the appliance. When you start a wash cycle, the washing machine's inlet valves open, allowing hot and cold water to flow through the fill hoses into the tub. Agitation occurs, and once the wash is complete, the dirty water is pumped out. The drain pump, typically located at the bottom front or side of the machine, forces the water through a drain hose and into your home's standpipe or utility sink. During the spin cycle, the inner tub spins at high speeds, extracting water through centrifugal force, which then collects in the outer tub and is subsequently drained. Seals, gaskets, and hoses are critical at every stage to contain this water. A leak from the bottom usually indicates a breach in this contained system, whether it's a loose connection, a cracked component, or a blockage causing an overflow.
Step-by-Step Fix
1. Safety First – Unplug and turn off water
- Before You Start – Always disconnect the washer's power cord from the electrical outlet and turn off both hot and cold water supply valves located behind the machine. This prevents electrical shock and further water damage. Have old towels or a shop vac ready for any standing water.
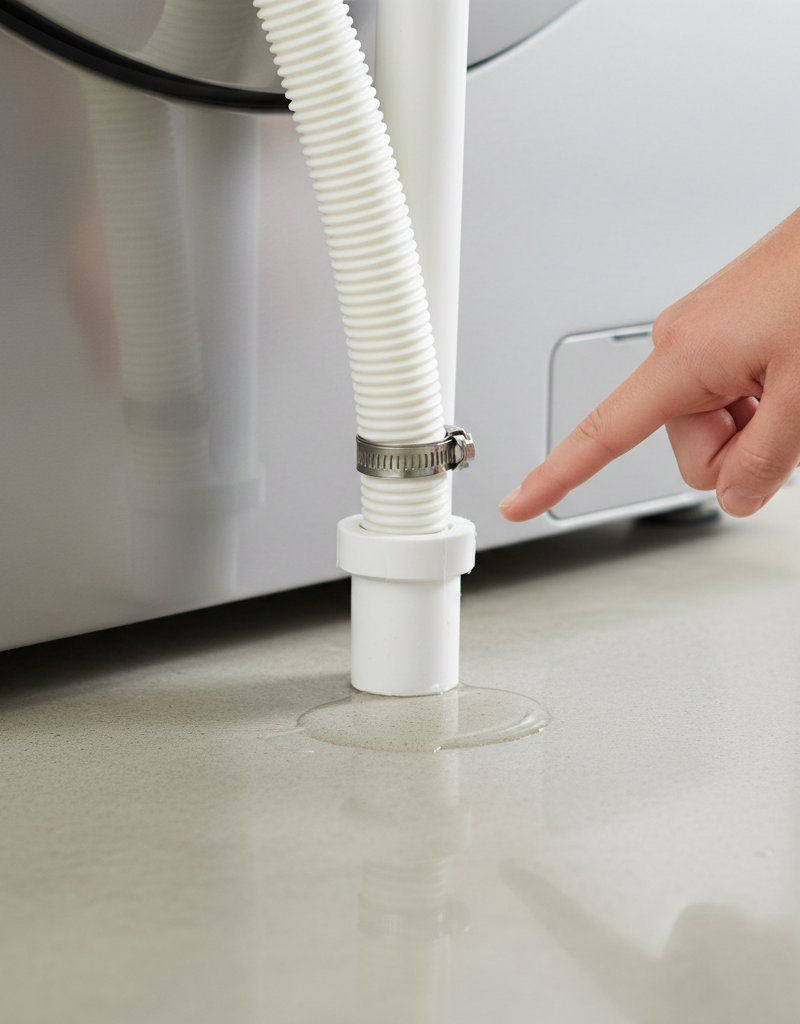
2. Inspect Fill Hoses – Check for loose connections or damage
- The Obvious Culprit – Gently pull the washer away from the wall to access the back. Visually inspect both hot and cold water supply hoses where they connect to the washer and the wall. Feel for moisture around the connections. Use an adjustable wrench to carefully tighten any loose fittings. Check the entire length of both hoses for cracks, bulges, or pinholes. If you find any damage, replace the hose immediately. Even a small crack can cause a significant leak.
3. Examine Drain Hose – Look for blockages or poor fit
- Drainage Issues – Check the drain hose, which typically runs from the back of the washer into a standpipe or utility sink. Ensure it's not kinked or clogged. Pull the hose out of the standpipe and inspect the tip for debris. If the hose isn't properly seated in the standpipe, water can splash out during draining. The drain hose should have an air gap and not be pushed too far down, which can create a siphon effect and cause overflows. Also check the connection point at the washer itself for tightness.
4. Clean Drain Pump Filter – Remove debris that causes overflows
- Hidden Blockage – Many front-loading washers and some top-loaders have a drain pump filter designed to catch lint, coins, and other small items before they reach the pump. This filter is usually located behind a small access panel at the bottom front of the machine. Place towels down, as residual water will likely spill out. Twist counter-clockwise to remove the cap and pull out the filter. Clean any lint, hair, or debris thoroughly. Reinsert and tighten securely. A clogged filter can prevent water from draining properly, causing the machine to overflow internally and leak from the bottom.
5. Inspect Dispenser Drawer & Hoses – Check for clogs or overflows
- Detergent Buildup – For front-load washers, pull out the detergent dispenser drawer. Clean any accumulated detergent residue or mold, which can block water flow and cause water to leak down the front and under the machine. Also, inspect the rubber hoses connected to the dispenser from the inside of the machine by removing the top panel (if accessible and simple). These hoses can sometimes become loose or cracked.
6. Check Internal Hoses & Clamps – A common failure point
- Under the Hood – Carefully tilt the washer back or onto its side (consult your owner’s manual for proper tilting instructions to avoid damage). Once you have access to the underside or interior, visually inspect all internal hoses – primarily those leading to and from the pump, and the large tub-to-pump hose. Look for visible cracks, punctures, or loose clamps. Use a screwdriver or nut driver to tighten any hose clamps that appear loose. If a hose is damaged, it will need to be replaced. This often requires purchasing a specific part for your washer model.
7. Examine the Drain Pump – Look for cracks or damage
- Heart of the Drainage – While the machine is tilted, examine the drain pump itself. It's usually a small motor with an impeller, connected to hoses. Check the pump housing for any visible cracks or signs of water weeping from its seams. If the pump housing is cracked or the pump is making unusual noises (a grinding or buzzing sound without draining water), it may be failing and will need replacement. Replacing a drain pump is a moderate DIY task, often involving disconnecting electrical connectors and hose clamps.
8. Look for a Leaky Tub Seal – A less common but serious issue
- Inner Tub Leak – For front-load washers, inspect the large rubber boot gasket (door seal) around the door opening. While often leaking from the front, a tear or poor seal could direct water downwards. For both top and front loaders, a leak from the main tub seal (between the inner and outer tubs) is a more serious repair, often requiring significant disassembly and is usually best left to a professional.
Common Causes
- Loose or Damaged Fill Hoses: The most frequent culprit. Vibrations can loosen connections over time, or hoses can degrade and crack, especially older rubber hoses.
- Clogged Drain Pump Filter: Lint, pet hair, coins, and other small items accumulate, blocking drainage and causing internal overflows.
- Kinked or Improperly Seated Drain Hose: Restricts water flow or allows water to splash out during discharge.
- Faulty Drain Pump: Worn seals, a cracked housing, or a failing motor can cause the pump to leak or fail to remove water, leading to a backup.
- Loose Internal Hose Clamps: Vibrations can cause clamps on internal hoses to loosen, leading to drips.
- Cracked Inner Tub or Outer Tub: While less common, physical damage to the tubs themselves can obviously result in leaks. This is often due to impact or extreme wear.
- Detergent Overuse/Wrong Detergent: Excessive suds can escape the tub, especially in high-efficiency (HE) machines, mimicking a leak.
Common Mistakes
- Ignoring the Leak: A small leak can quickly become a large one, causing significant floor damage and potential mold growth. Address it immediately.
- Not Unplugging the Washer: Never work on any appliance without disconnecting its power. This is a critical safety measure.
- Over-tightening Hose Connections: While you want a snug fit, over-tightening can strip threads or crack plastic fittings, creating a worse leak.
- Using the Wrong Detergent or Too Much: This is particularly true for HE machines. Using regular detergent or too much HE detergent creates excessive suds that can push past seals and mimic a leak.
- Forgetting the Drain Pump Filter: Many DIYers overlook this simple maintenance item, which is a very common cause of draining problems and leaks.
- Reassembling Components Incorrectly: Ensure all hoses, clamps, and access panels are reinstalled securely and properly aligned after inspection or repair. A misaligned drain pump filter cap, for example, will leak.
Cost & Time Breakdown
| Task | DIY Cost | Pro Cost | Time |
|---|---|---|---|
| Inspect Hoses | $0–$15 | $75–$150 (trip fee) | 10–20 minutes |
| Clean Drain Pump Filter | $0 | Included in service | 15–30 minutes |
| Replace Fill Hoses | $15–$50 | $120–$250 | 20–40 minutes |
| Replace Drain Pump | $50–$200 | $200–$400 | 1–2 hours |
| Tighten Internal Clamps | $0 | Included in service | 30–60 minutes |
| Diagnose Tub Seal (Pro) | N/A | $250–$600+ | 2–4 hours (pro) |
Tips & Prevention
- Regular Hose Inspection: Check your washing machine's fill and drain hoses every 6-12 months for cracks, bulges, and loose connections. Replace rubber hoses every 3-5 years, or upgrade to braided stainless steel hoses for better durability.
- Clean Drain Pump Filter Annually: Make cleaning the drain pump filter a part of your annual appliance maintenance routine. Refer to your owner’s manual for its location and cleaning instructions.
- Use Proper Detergent & Quantity: Always use high-efficiency (HE) detergent for HE washers and measure carefully. Over-sudsing can lead to internal overflows.
- Level the Machine: Ensure your washing machine is perfectly level. An unbalanced machine can vibrate excessively, potentially loosening hose connections over time.
- Don't Overload: Overloading the washer can strain mechanical components and seals, potentially leading to leaks.
- Leave Door Ajar (Front-Loaders): After use, leave the door of a front-load washer slightly ajar to allow the gasket to dry, preventing mold and prolonging its life.
When to Call a Professional
While many washer leaks are simple DIY fixes, there are times when calling a professional appliance repair technician is the smartest and safest course of action. If you've inspected all external hoses, cleaned the drain pump filter, and checked accessible internal connections without identifying the source of the leak, the problem may lie deeper within the machine. This could involve a faulty main tub seal, a cracked outer tub, or issues with the transmission or bearings, all of which require extensive disassembly and specialized tools. If you are uncomfortable tilting the machine, disconnecting electrical components, or if the leak persists after attempting the basic troubleshooting steps, a professional can accurately diagnose and repair the issue, preventing further damage and ensuring the washer operates safely. Additionally, if the leak is substantial and rapidly flooding your laundry area, shut off the water immediately and call a pro to prevent major water damage.
Related Articles
Keep troubleshooting with these hand-picked guides from FixlyGuide:
- Is your washer leaking? 3 culprits you can fix today. — A washing machine leaking water from the bottom typically indicates a loose hose connection, a clogged drain hose, or a failing water pump…
- The Secret Culprit Behind Your Dishwasher Not Draining (It's Not Always a Clog) — Your dishwasher not draining can stem from simple fixes to more complex issues, often involving the air gap, drain hose, or filter.
- Washing Machine Won't Spin or Drain? Easy Fixes for Common Problems — If your washing machine isn’t spinning or draining, it’s usually due to a clogged pump filter, a kinked drain hose, or an overloaded machin…
- The Secret Culprit Behind Your Kitchen Sprayer’s Drab Drizzle (It’s Not Clogging!) — Don't replace that kitchen sink sprayer head just yet! Low pressure often stems from a few hidden, easily fixable issues within your faucet…
- The Secret Culprit Behind Your Leaking Refrigerator (It’s Not Always a Big Fix) — Discover the most common and often overlooked reasons why your refrigerator is leaking water on the floor, and how to fix them yourself.
- How Often to Water Your Lawn in Summer: A Homeowner's Guide — Watering your lawn correctly in summer is crucial for its health and appearance, preventing common issues like browning and shallow root gr…
Frequently asked questions
Why is my washing machine leaking water from the bottom?+
The most common reasons a washing machine leaks from the bottom include loose or damaged fill hoses, a clogged drain pump filter, a faulty drain pump, or loose internal hose clamps. Less common causes are a damaged tub seal or a cracked tub.
Can I fix a washing machine leak myself?+
Many common washing machine leaks, particularly those from fill hoses or a clogged drain pump filter, can be fixed by a homeowner with basic tools and some troubleshooting. However, leaks involving major components like the main tub seal or a cracked outer tub may require professional intervention.
How do I find where my washer is leaking?+
To find the source of a washer leak, first unplug the machine and turn off the water. Then, systematically check fill hoses for tightness and damage, inspect the drain hose for clogs or poor seating, clean the drain pump filter, and look for internal hose issues by tilting the machine. Run a short cycle watching for drips.
How much does it cost to fix a leaking washing machine?+
The DIY cost to fix a leaking washing machine can be as low as $0 (if just tightening a hose) to $50–$200 for parts like new hoses or a drain pump. Hiring a professional usually costs between $120–$400, depending on the severity and type of repair needed.
How often should I replace washing machine hoses?+
It's generally recommended to inspect rubber washing machine fill hoses every 6 to 12 months and replace them every 3 to 5 years, even if they show no visible signs of damage. Upgrading to braided stainless steel hoses can offer greater durability and peace of mind.


Discussion
Loading comments…