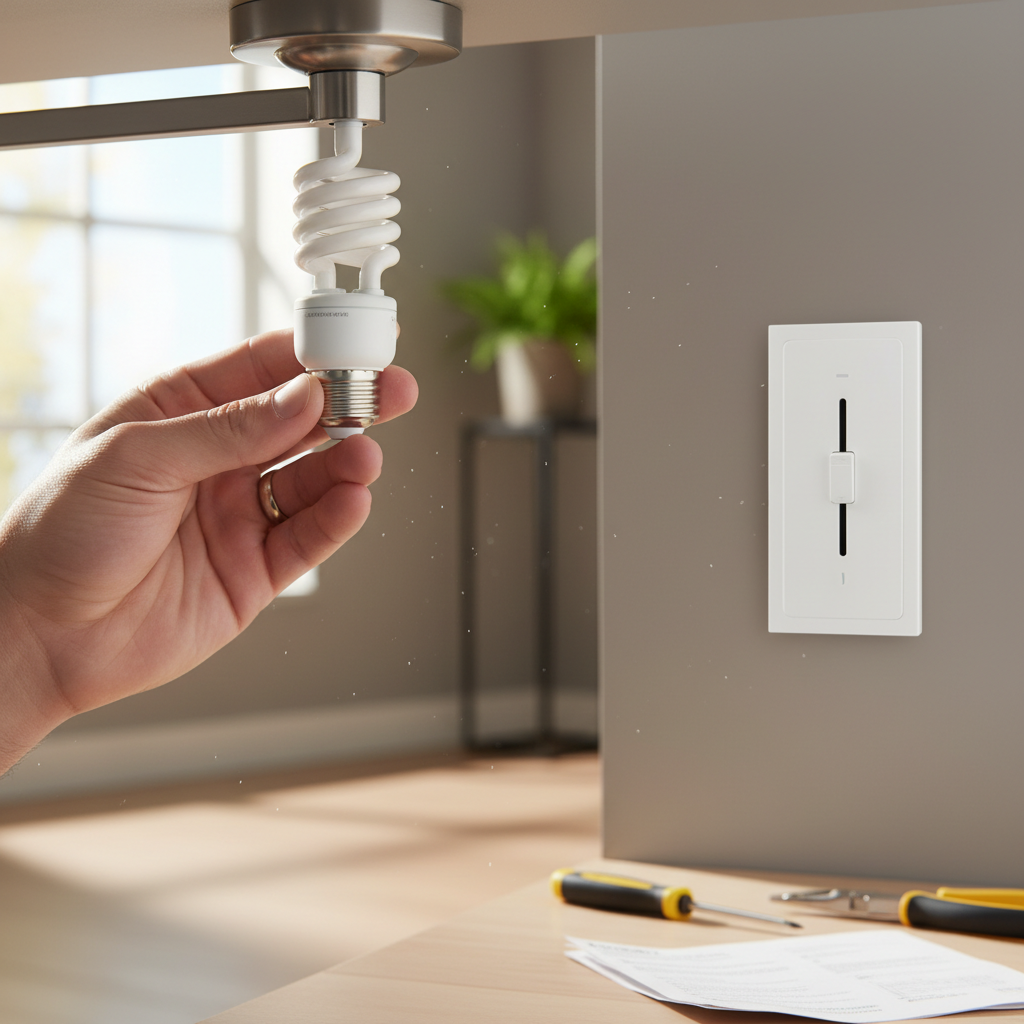
- Safety First: Turn off the power at the circuit breaker.
- Diagnosis: If the bulb intermittently flickers or goes out and comes back on when wiggled, or if you notice scorch marks around the bulb base or inside the socket.
- Solution 1: Tighten the Bulb. Gently but firmly screw the LED bulb into the socket until it's snug. Do not overtighten, as this can damage the socket.
- Tools: Screwdriver, cotton swabs, non-abrasive cleaner, fine-grit sandpaper or emery board, non-contact voltage tester.
General remodeling · Renovation planning
| Project category | General remodeling |
|---|---|
| Problem type | Renovation planning |
| Trade required | General contracting |
| Urgency | Planned project |
| Safety risk | Low safety risk |
| DIY suitability | Pro recommended |
| Cost category | Major investment |
| Typical timeline | Design and permitting often 2–4 months before work starts |
| Contractor type | General contractor |
Repair option
Phase the work and fix the building envelope first.
Replacement option
Full renovation with permits, design, and a general contractor.
Common causes
- Space no longer fits how the household lives
- Resale preparation
- Deferred maintenance stacking up
Relevant tools:project cost estimatorcompare quoteshome improvement material prices
Published July 18, 2026Last updated August 18, 2026
Tools & materials you'll need
Affiliate links- AmazonElectrical tapeFor re-securing wire connections if needed
- AmazonLED-compatible dimmer switchIf your current dimmer is incompatible
- AmazonNew LED bulbs (enclosed-fixture rated if applicable)For replacement
- AmazonCotton swabsFor cleaning socket contacts
- AmazonRubbing alcohol or non-abrasive cleanerFor cleaning socket contacts
As an Amazon Associate FixlyGuide earns from qualifying purchases — at no extra cost to you. Prices and availability are accurate as of publication and subject to change.
Quick Answer
LED bulbs, despite their touted longevity, can fail prematurely due to several often overlooked factors. The most common culprits include incompatible dimmer switches causing flickering and premature burnout, loose connections within the light fixture or socket leading to intermittent power and heat, and excessive heat buildup from enclosed fixtures or poor bulb design. Addressing these issues, such as replacing an old dimmer with an LED-compatible one, ensuring bulbs are screwed in snugly, or using 'enclosed fixture rated' LEDs, can significantly extend their lifespan.
The Problem
You’ve made the switch to LED lighting, expecting years of hassle-free illumination, only to find your new bulbs dying just as quickly, if not faster, than the old incandescents. It's frustrating, expensive, and completely defeats the purpose of investing in energy-efficient lighting. This isn't just bad luck; it's a clear signal that something in your home's electrical setup or the fixture itself isn't playing nice with your LED technology. Most homeowners mistakenly blame the bulb, swapping it out again and again, when the real issue lies deeper, often in a simple fix you can tackle yourself.
How It Works
Unlike incandescent bulbs that create light by heating a filament until it glows, LEDs (Light-Emitting Diodes) produce light through electroluminescence. When an electric current passes through a semiconductor material, it emits photons—light. This process is inherently far more efficient, generating much less heat than an incandescent. However, LEDs require a 'driver,' a small electronic circuit built into the bulb's base, to convert the alternating current (AC) from your home's wiring into the direct current (DC) the LED chips need at a specific voltage. This driver is also responsible for regulating the current to protect the delicate LED chips.
Heat is the biggest enemy of an LED bulb. While LEDs produce less heat than incandescents, their longevity is highly dependent on managing the heat they do generate. The heat produced by the LED chips and the driver circuit must be dissipated away from these components. This is typically achieved through a heat sink, often the metal or ceramic base of the bulb. If heat builds up, the semiconductor material degrades faster, and the driver components can fail, leading to flickering, dimming, or complete burnout. Dimmer switches add another layer of complexity. Older dimmer switches, designed for resistive incandescent loads, often chop the AC waveform in a way that is incompatible with an LED driver. This 'choppy' power can cause the driver to work harder, overheat, or simply not function correctly, leading to flickering, buzzing, and a dramatically shortened lifespan for your LED.
Step-by-Step Fix
1. Check Your Dimmer Switch — Confirm compatibility and upgrade if necessary.
Safety First: Always turn off the power to the light fixture at your circuit breaker before working on electrical components. Use a non-contact voltage tester to confirm the power is off.
Many premature LED failures are traced back to old dimmer switches designed for incandescent bulbs. These dimmers are not designed to handle the low-wattage, complex electrical load of an LED bulb. The result is often flickering, buzzing, or constant premature bulb failure. Look for dimmers labeled 'trailing edge' or 'ELV' (Electronic Low Voltage) for best compatibility with most LEDs. Leading-edge or MLV (Magnetic Low Voltage) dimmers are generally for incandescents or specific magnetic transformers.
- Diagnosis: If your LED bulbs only fail in dimmer-controlled circuits, or they flicker and hum when dimmed, this is a strong indicator.
- Solution: Replace the old dimmer with a new, LED-compatible dimmer switch. These are readily available at hardware stores and clearly marked as 'LED Dimmer' or 'Universal Dimmer.' Follow the wiring instructions carefully; typically, it involves connecting load, line, and ground wires. If you're unsure about wiring, consult a licensed electrician.
- Tools: Screwdriver set (Phillips and flathead), non-contact voltage tester, wire strippers, electrical tape.
2. Inspect Fixture Connections and Bulbs — Tighten loose connections and clean contacts.
Loose connections anywhere in the circuit can cause resistance, leading to heat buildup and intermittent power that stresses an LED driver. This includes the bulb itself not being screwed in tightly enough, or the contacts within the fixture being oxidized or bent.
- Safety First: Turn off the power at the circuit breaker.
- Diagnosis: If the bulb intermittently flickers or goes out and comes back on when wiggled, or if you notice scorch marks around the bulb base or inside the socket.
- Solution 1: Tighten the Bulb. Gently but firmly screw the LED bulb into the socket until it's snug. Do not overtighten, as this can damage the socket.
- Solution 2: Clean Contacts. Using a non-abrasive household cleaner and a cotton swab, clean the metal contact tab at the bottom of the socket and the threaded brass casing. For stubborn corrosion, use fine-grit sandpaper or an emery board, always with the power off. Gently bend the contact tab slightly upwards (again, power off!) to ensure better contact with the bulb's base.
- Solution 3: Inspect Wiring. If the problem persists after checking the bulb and socket, unscrew the fixture canopy from the ceiling or wall (with power off) and inspect the wire nuts. Ensure all wires are firmly twisted together and securely held by the wire nuts. Loose wire nuts are a common cause of intermittent power and heat.
- Tools: Screwdriver, cotton swabs, non-abrasive cleaner, fine-grit sandpaper or emery board, non-contact voltage tester.
3. Address Heat Buildup — Use appropriate bulbs for enclosed fixtures, improve ventilation.
LEDs are very sensitive to heat. While they produce less heat overall than incandescents, the heat they do generate must dissipate effectively. If a standard LED bulb is used in an enclosed fixture (like a flush-mount ceiling light or a fully enclosed globe pendant), the heat can get trapped, causing the internal driver and LED chips to overheat and fail prematurely.
- Diagnosis: If bulbs are failing frequently in specific enclosed fixtures, especially where the bulb feels very hot to the touch after a short period (again, power off before touching).
- Solution 1: Use 'Enclosed Fixture Rated' Bulbs. Many manufacturers now make LED bulbs specifically designed to handle higher operating temperatures in enclosed fixtures. These bulbs often have more robust heat sinks or internal thermal management. Check the bulb's packaging for a label indicating it is 'suitable for enclosed fixtures' or 'wet rated' (which often implies better heat management).
- Solution 2: Improve Ventilation. If using open fixtures, ensure there's adequate airflow around the bulb. For recessed can lights, ensure insulation isn't directly touching the fixture, which can trap heat. If a fixture has a very tight cover, consider a different style of fixture, or one that specifically states it can be used with standard LEDs.
- Solution 3: Check Ambient Temperature. In very hot environments (e.g., an unventilated attic or garage in summer), even well-designed LEDs can struggle. While less common, consider if the overall environment contributes to the problem.
- Tools: None beyond replacing the correct bulb type.
4. Verify Voltage Stability — Check for common household voltage issues.
While less common for isolated bulb failures, unstable or incorrect voltage can stress LED drivers. Extremely high or fluctuating voltage can shorten an LED's life.
- Safety First: Only experienced DIYers should work with live voltage. If you are unsure, call a professional electrician.
- Diagnosis: If multiple LED bulbs are failing across different fixtures on the same circuit (or even throughout the house), and you've ruled out dimmer and heat issues. Also, look for signs like other electronics acting erratically.
- Solution: Use a multimeter to test the voltage at the socket (with power on). A standard incandescent bulb can also be used as a quick test – if it burns brighter than usual or fails quickly, it might indicate over-voltage. Normal household voltage is around 120V. Readings consistently above 125V or below 110V can be problematic for some LEDs. If you suspect voltage issues, contact an electrician to check your home's main electrical service.
- Tools: Multimeter (for advanced users), non-contact voltage tester.
- Pro Tip: If your home is older, consider having an electrician inspect your wiring for potential issues like undersized wiring or corroded connections that could cause voltage drops or spikes.
5. Consider Bulb Quality — Sometimes, it's just a cheap bulb.
Not all LED bulbs are created equal. Inexpensive, no-name brands can cut corners on driver quality, heat sink design, and LED chip quality, all of which contribute to an early demise.
- Diagnosis: If you're consistently buying the cheapest bulbs available and they're all failing quickly.
- Solution: Invest in reputable brands known for quality and warranty. While they might cost a bit more upfront, the longer lifespan and better performance will pay off. Look for certifications like Energy Star, which often indicates better quality control and driver design. Read reviews, especially those mentioning longevity.
Common Causes
- Incompatible Dimmer Switches: The leading cause. Old dimmers designed for incandescent bulbs send an unsuitable electrical signal to LED drivers, causing stress, overheating, and premature failure.
- Heat Buildup in Enclosed Fixtures: Standard LED bulbs need to dissipate heat. When trapped in a fully enclosed fixture, internal temperatures soar, degrading components.
- Loose Connections: Poor contact at the bulb socket, within the fixture's wiring, or at junction boxes creates resistance, leading to localized heating and intermittent power.
- Voltage Fluctuations/Over-voltage: While less common, inconsistent or excessively high voltage from the grid or faulty home wiring can prematurely burn out LED drivers.
- Poor Quality Bulb Design: Cheaply made LED bulbs often skimp on critical components like efficient heat sinks or robust drivers, leading to inherent short lifespans.
- Vibration: In rare cases, constant vibration (e.g., near a garage door opener or a heavy machinery area) can physically stress the internal components of an LED bulb, though this is more common with filament bulbs.
Common Mistakes
- Ignoring the Dimmer: Many homeowners overlook the dimmer as the culprit, repeatedly replacing bulbs instead of the switch. Instead: Always consider the dimmer's age and type first if a circuit is dimmed.
- Using Standard LEDs in Enclosed Fixtures: Assuming all LEDs can go anywhere. Instead: Always check bulb packaging for 'suitable for enclosed fixtures' if placing in a sealed light.
- Overtightening Bulbs: Twisting bulbs in too tightly can damage the fragile metal contact tab in the socket or internal components of the bulb. Instead: Screw bulbs in until snug, but don't force them.
- Ignoring Intermittent Flickering: Viewing occasional flickering as a minor annoyance. Instead: Flickering is a sign of stress; address it promptly to prevent premature failure of the bulb and potential issues with the fixture.
- Buying the Cheapest Bulbs: Prioritizing upfront cost over long-term reliability. Instead: Invest in reputable brands with good warranties, even if they cost a few dollars more.
- Troubleshooting Live: Forgetting to turn off power at the breaker before inspecting or working on a fixture. Instead: Always prioritize safety; cut the power and verify with a voltage tester.
Cost & Time Breakdown
| Task | DIY Cost | Pro Cost | Time |
|---|---|---|---|
| Replace incompatible dimmer | $20–$50 | $75–$200 (parts + labor) | 15–30 minutes |
| Tighten connections/clean socket | $0 | $75–$150 (min. service call) | 5–10 minutes |
| Replace bulb with 'enclosed rated' | $8–$20 | $75–$100 (bulb + minimal labor) | 1–2 minutes |
| Inspect fixture wiring | $0 (if DIY) | $75–$150 (min. service call) | 15–30 minutes |
| Voltage check / circuit diagnosis | $0 (if DIY with multimeter) | $150–$300 (diagnostic fee) | 30–60 minutes |
Tips & Prevention
- Match Dimmers to LEDs: If you have dimmer switches, spend the extra money on LED-compatible dimmers. It will save you money on bulbs in the long run and prevent frustrating flickering.
- Read Bulb Packaging: Always check for 'suitable for enclosed fixtures,' 'wet rated,' or 'dimmable' labels. This ensures you're using the right bulb for the right application.
- Buy Quality Bulbs: Choose reputable brands over generic, unbranded alternatives. Look for Energy Star certification, which signifies a level of quality and adherence to performance standards.
- Regularly Check for Loose Connections: If you have persistent issues in a particular fixture, periodically check that the bulb is screwed in firmly and that the wire connections in the fixture are snug.
- Mind Ambient Temperature: While less common, consider the operating environment. In extremely hot areas like workshops or enclosed patios, ensure bulbs are rated for higher temperatures.
- Avoid Overloading Circuits: While rare with low-wattage LEDs, ensure you're not trying to power too many devices from a single circuit, which can lead to voltage fluctuations.
When to Call a Professional
If you've systematically worked through the troubleshooting steps – you've replaced the dimmer, ensured all connections are tight, used enclosed-fixture-rated bulbs, and purchased quality replacements – and your LED bulbs are still failing prematurely, it's time to call a licensed electrician. Consistent, widespread issues with LED bulb lifespan across multiple fixtures or circuits could indicate deeper, more complex electrical problems such as unstable voltage from your main service, faulty circuit breakers, or incorrect wiring within your walls. An electrician has the specialized diagnostic tools to safely test voltage stability, assess your home's wiring integrity, and identify subtle issues that could be stressing your LED lighting system and potentially other electronics. Do not attempt to diagnose or fix main electrical service issues yourself, as this can be extremely dangerous. Remember, safety always comes first when dealing with your home's electrical system.
Related Articles
Keep troubleshooting with these hand-picked guides from FixlyGuide:
- The #1 Hidden Culprit Behind Your Whole-House Low Water Pressure (It's Not Your City!) — Discover the most common, often overlooked cause of low water pressure throughout your entire home and how to fix it yourself.
- The 4 Hidden Reasons Your Entire Home Has Low Water Pressure (And the Easy Fixes) — Low water pressure throughout your entire home can be a frustrating and often misunderstood problem, with several common culprits. Learn to…
- The Secret Culprit Behind Your Whole-House Low Water Pressure (It's Not Always the City) — Whole-house low water pressure can be a frustrating and complex issue, ranging from simple fixes homeowners can do to signs that require a…
- The 4 Hidden Reasons Your Shower Runs Cold – And How to Fix It FAST — Learn the surprising causes behind a cold shower and discover simple, effective DIY fixes to restore hot water quickly.
- The #1 Hidden Culprit Behind Your Whole-House Low Water Pressure (It's Not Your City!) — Discover the most common, overlooked cause of low water pressure throughout your entire home and how to easily diagnose and fix it yourself.
- Why is Your Light Switch Hot? (The Hidden Danger Most Homeowners Miss) — A hot light switch isn't just uncomfortable; it's a critical warning sign of electrical issues that should never be ignored due to fire ris…
Should you do this yourself?
Answer five quick questions before you start. Safety outranks savings every time.
Your experience with work like this
How high do you have to work?
Does the job involve any of these?
Will it need a permit?
Specialty tools
Free and instant. Educational guidance only — not a quote, inspection, or professional diagnosis.
What should this project cost?
Enter your project details for a realistic cost range before you call anyone.
Cost depends heavily on which system turns out to be the source.
- Regional adjustment
- National average
- Labor share (typical)
- ~$1,620
- Quotes to collect
- 3 written estimates
Educational estimate based on national averages — not a binding quote. Always confirm with written local estimates.
Fixly Project Decision Box
- DIY difficulty
- Advanced
- Estimated time
- Homeowner checks 20–30 minutes
- Cost level
- Moderate
Main tools / materials
- Clean air filter
- Garden hose for condenser coils
- Shop vac for the condensate line
When to stop and call a pro
- Burning smell, smoke, or a tripping breaker
- Refrigerant lines iced over or hissing
- Any work inside the sealed refrigerant circuit (EPA-licensed only)
- Gas smell near a furnace — leave and call the utility
Need professional help?
Find an HVAC Pro Near YouBefore you start
Check the difficulty, permits, and safety risk — then decide whether to call a pro.
- Estimate this projectGet a cost range for your scope and ZIP before you call anyone.Open
- Get local estimatesSend one request and compare written estimates from vetted pros.Open
Free, no signup required. Estimates are educational guidance, not a quote or an inspection.
Recommended for DIYers & woodworkers
Sponsored
The Top 20 Tools for Workshops of Any Budget
No stationary machines or power tools required — plus 3 fundamental tools that can't be bought at any price.
Get the free guide
Ted's Woodworking — The #1 Woodworking Resource
Detailed instructions, dimensioned drawings, materials & cutting lists, and 3D schematics for every skill level.
See the plansSponsored: links above are affiliate links. FixlyGuide may earn a commission on qualifying purchases — at no extra cost to you.
Frequently asked questions
Why do my LED bulbs burn out so fast?+
LED bulbs burn out fast primarily due to incompatible dimmer switches, excessive heat trapped in enclosed fixtures, or loose electrical connections in the socket or fixture wiring. Poor quality bulbs with inadequate drivers or heat sinks can also fail prematurely.
Can a bad dimmer switch ruin LED bulbs?+
Yes, absolutely. Old dimmer switches designed for incandescent bulbs send an inconsistent electrical signal to LED drivers, causing them to work harder, overheat, and fail much faster than their rated lifespan.
What kind of LED bulb do I need for an enclosed fixture?+
For enclosed fixtures, you need LED bulbs specifically labeled as 'suitable for enclosed fixtures' or 'enclosed fixture rated.' These bulbs are designed with better heat dissipation to prevent premature failure from trapped heat.
How do I know if my dimmer is LED compatible?+
Check if your dimmer is labeled 'LED compatible,' 'universal,' 'trailing edge,' or 'ELV.' If it's an older dimmer with a simple rotary knob and no specific LED designation, it's likely not compatible and should be replaced.

Discussion
Loading comments…